![]()
GILL MAXIMET SENSOR BUOY MOUNT
INSTALLATION INSTRUCTIONS FOR CB-450 AND SMALLER BUOY MODELS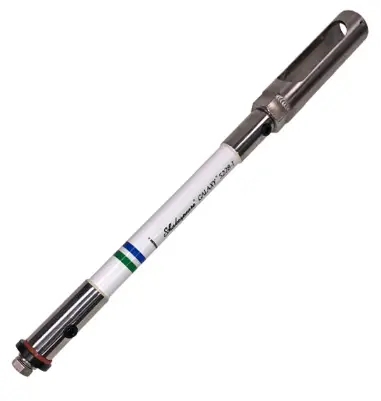
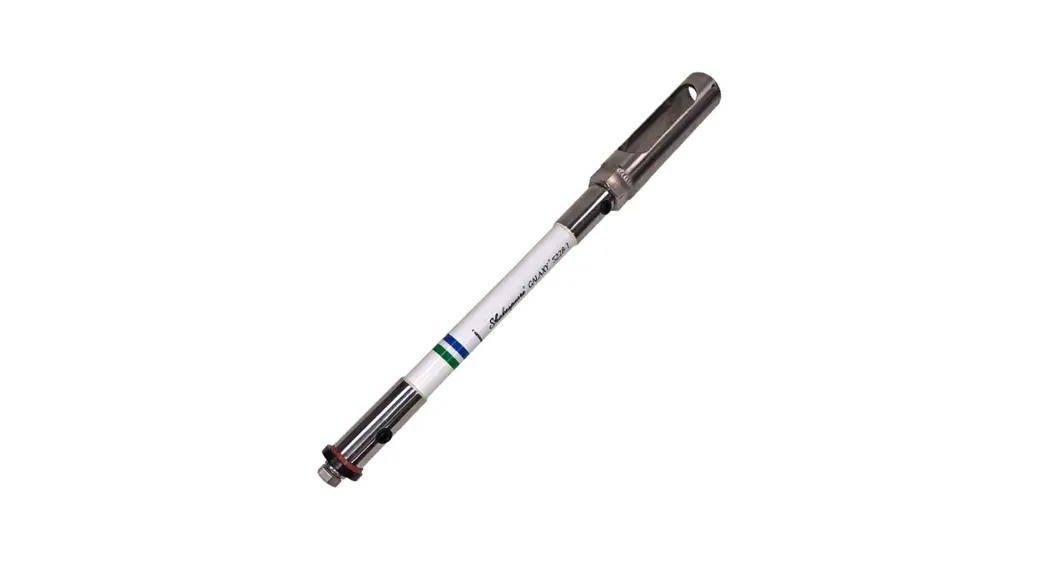
Figure 1: NexSens CB-MXM-M Weather Sensor Buoy Mount.
Overview
The NexSens CB-MXM-M Gill MaxiMet Weather Station Buoy Mount provides a means of securely installing a Gill MaxiMet weather station to a CB-Series data buoy. The
mounts are lightweight to reduce the impact of top-side weight on buoy stability.
What’s Included
CB-MXM-M Parts
- (1) Bottom mounting adapter for solar tower
- (1) 1-ft. Antenna extension mast
- (1) 1/2” Oversized flat washer
- (1) 214 Silicone O-ring
- (1) 1/2” Split lock washer
- (1) 1/2-13 x 1-1/2” Hex cap bolt
- (3) #10 Split lock washers
- (3) #10 Flat washers
- (3) 10-32 x 1/2” Pan head bolts
CB-MXM-M Installation on Buoy Solar Tower
- Use a 9/16” socket to remove the white top plate from the buoy’s solar tower.
 Figure 2: Solar tower top plate removal.
 - Use a 3/4” socket to remove the 1-1/2” bolt, lock washer, and oversized washer from the base of the mast mounting adapter.
a. Insert the 1-1/2” bolt, lockwasher, and oversized washer through a vacant mounting hole on the plate.
b. Thread the adapter onto the bolt on the opposite side of the plate and tighten using the 3/4” socket. Figure 3: Mast attachment to solar tower plate.
 - Route the MaxiMet cable through the mount opening, align the connector pins, and rotate clockwise until the connector snaps into place.
a. Note: Only the top most portion of the connector should spin. Do not rotate the connector from the middle or bottom. Figure 4: Connect the MaxiMet sensor cable.
 - Align the outside holes at the bottom of the sensor with the threaded inserts on the mount. a. Use the (3) included pan head bolts, a flat washer, a lock washer and a Philips screwdriver to connect the sensor.
 Figure 5: Secure the weather station to the mount.
 - Route the plug through the center hole on the plate and move the cable within the open groove extending from the center hole.
a. It is recommended to zip tie the cable to the mount and provide cable armor around the portion of the cable in contact with the open groove. Figure 6: Route the MaxiMet cable to the X2-CB logger.
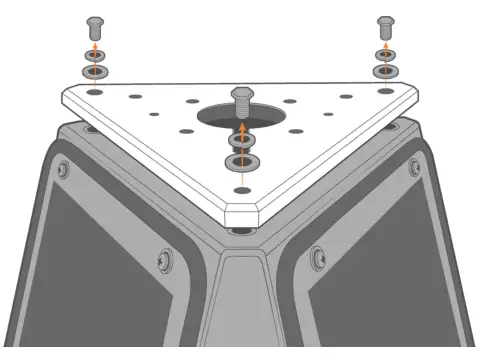 Figure 2: Solar tower top plate removal.
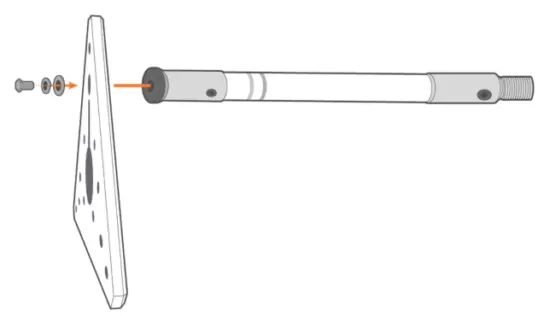 Figure 3: Mast attachment to solar tower plate.
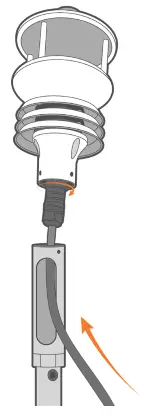 Figure 4: Connect the MaxiMet sensor cable.
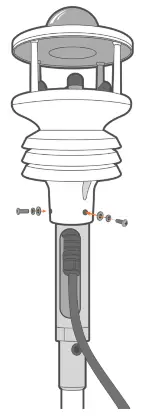 Figure 5: Secure the weather station to the mount.
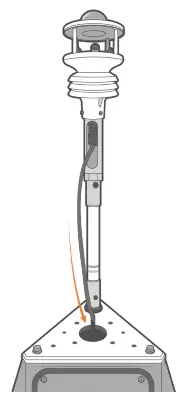 Figure 6: Route the MaxiMet cable to the X2-CB logger.
GILL MAXIMET SENSOR BUOY MOUNT
INSTALLATION INSTRUCTIONS FOR CB-650 AND LARGER BUOY MODELS
Figure 1: NexSens CB-MXM-M Weather Sensor Buoy Mount.
Overview
The NexSens CB-MXM-M Gill MaxiMet Weather Station Buoy Mount provides a means of securely installing a Gill MaxiMet weather station to a CB-Series data buoy. The
mounts are lightweight to reduce the impact of top-side weight on buoy stability.
What’s Included
CB-MXM-M Parts
- (1) Bottom mounting adapter for solar tower
- (1) 1-ft. Antenna extension mast
- (1) 1/2” Oversized flat washer
- (1) 214 Silicone O-ring
- (1) 1/2” Split lock washer
- (1) 1/2-13 x 1-1/2” Hex cap bolt
- (3) #10 Split lock washers
- (3) #10 Flat washers
- (3) 10-32 x 1/2” Pan head bolts
CB-MXM-M Installation on Buoy Solar Tower
- Thread the extension mast onto the pre-mounted base on the solar tower.
 Figure 2: Attach the extension mast onto the solar tower.
 - Route the MaxiMet cable through the mount opening, align the connector pins, and rotate clockwise until the connector snaps into place.
a. Note: Only the top most portion of the connector should spin. Do not rotate the connector from the middle or bottom. Figure 3: Connect the MaxiMet sensor cable.
 - Align the outside holes at the bottom of the sensor with the threaded inserts on the mount.
a. Use the (3) included pan head bolts, a flat washer, a lock washer and a Philips screwdriver to connect the sensor.
Figure 4: Secure the weather station to the mount. - Route the plug through the nearest hole on the solar tower.
a. It is recommended to zip tie the cable to the mount and provide cable armor around the portion of the cable in contact with the open hole.
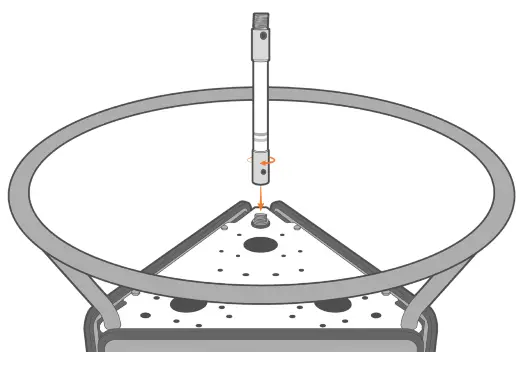 Figure 2: Attach the extension mast onto the solar tower.
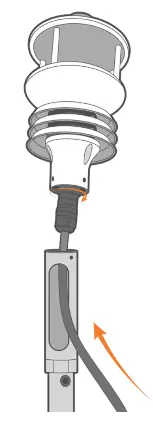 Figure 3: Connect the MaxiMet sensor cable.
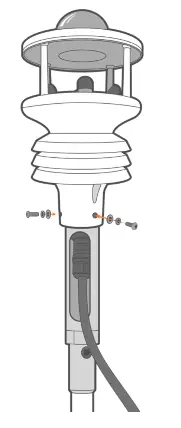
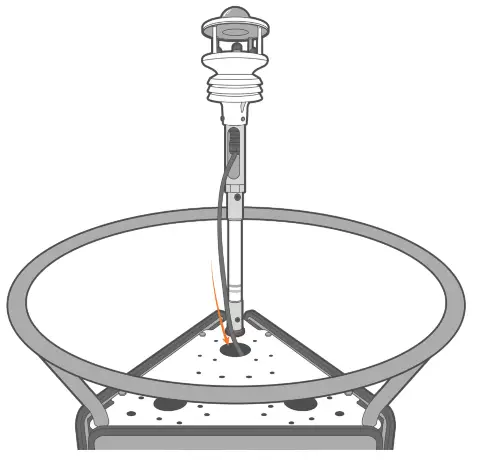
Figure 5: Route the MaxiMet cable to the X2-CB logger.
937-426-2703
www.nexsens.com
2091 Exchange Court
Fairborn, Ohio 45324


