COMMSCOPE BUDI-S-SEAL 4X10⁻¹ Can Seal Up to 4 Cables
General product information
- The BUDI-S-SEAL 4X10⁻¹ can seal up to 4 cables with cable diameter range 3-10 mm in the BUDI S box.
- The BUDI-S-SEAL 4X15-1 can seal up to 4 cables with cable diameter range 9-15 mm in the BUDI S box.
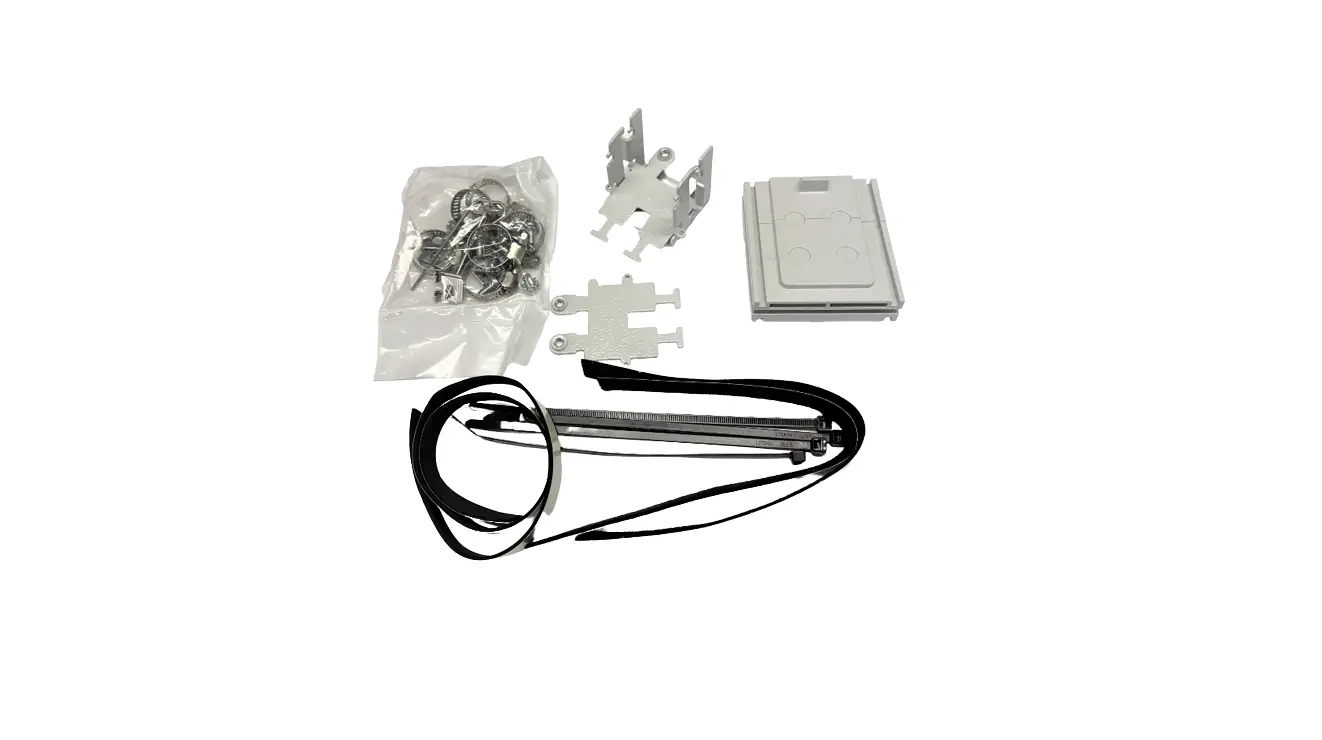
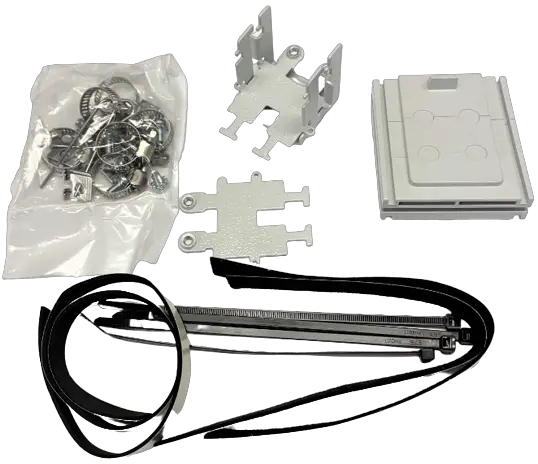
Kit contents
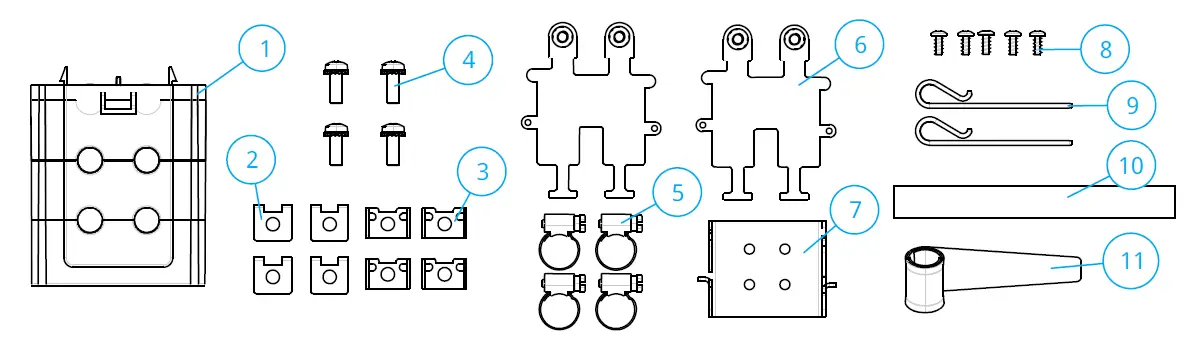
| N° | Description | Qty |
| 1 | CSEAL BUDI 4×10 | 1 |
| 2 | Strength member fixation cap (top plate) | 4 |
| 3 | Strength member fixation base plate | 4 |
| 4 | Bolt with washer | 4 |
| 5 | Hose clamp | 4 |
| 6 | Metal plates | 2 |
| 7 | Bottom Bracket | 1 |
| 8 | Ejot screws | 5 |
| 9 | Retaining clips | 2 |
| 10 | Felt tape | 1 |
| 11 | Foam | 1 |
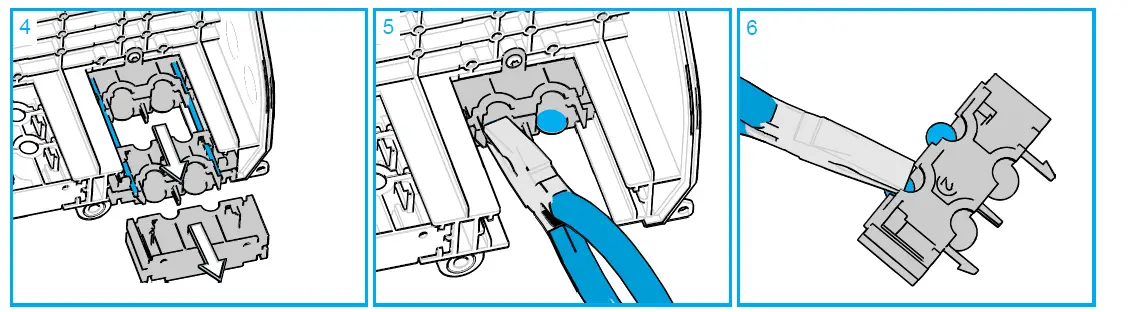
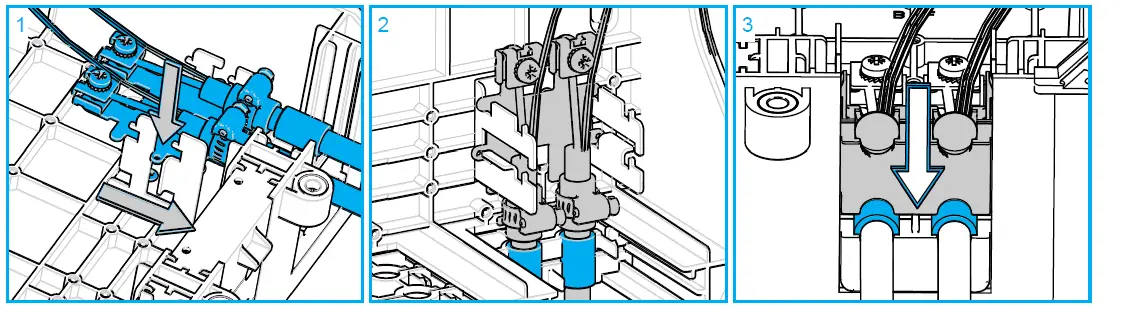
Prepare cable seal
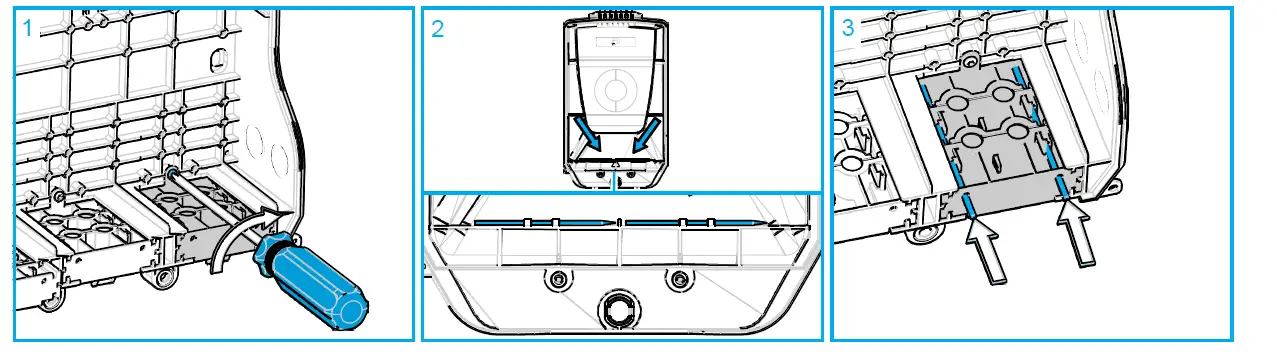
- Slide the seal in the opening and secure with one of the 5 bolts.
- Locate the release pins from inside the box cover. These pins are used to easily & quickly disassemble the seal ports to allow a wrap around cable installation.
- Insert each release pin in the plate guides and slide until they disengage both sets of latches.

- Once the latches are disengaged, pull the top and middle sections of the cable entry plate away from the box. Both the top and middle sections will slide out.
- Determine where the cable will enter and use a pair of pliers to remove the thin plastic knockout from the bottom entry part. Grip the knockout with the pliers and pull the handle down peeling the knock out away from the port.
- Remove the corresponding knock out in the second section of the cable entry plate. Once both sides are removed the port is fully open. Repeat next knock outs for the other cable(s) if needed.
Install bracket
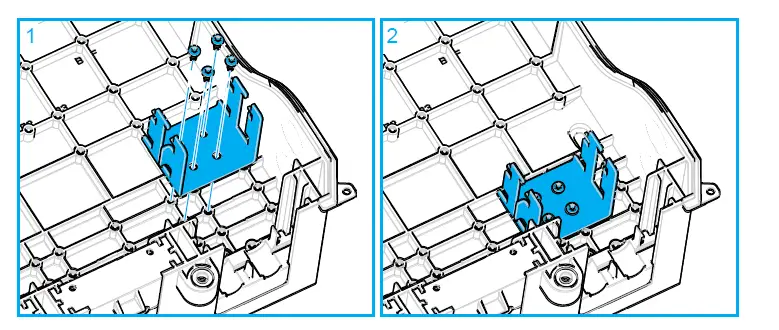
- Install the bottom bracket with the 4 screws as shown. Make sure the bracket is correctly oriented. Make sure to select the correct holes in the bottom cover.
- Bracket installed in correct orientation and in correct position
Prepare cable
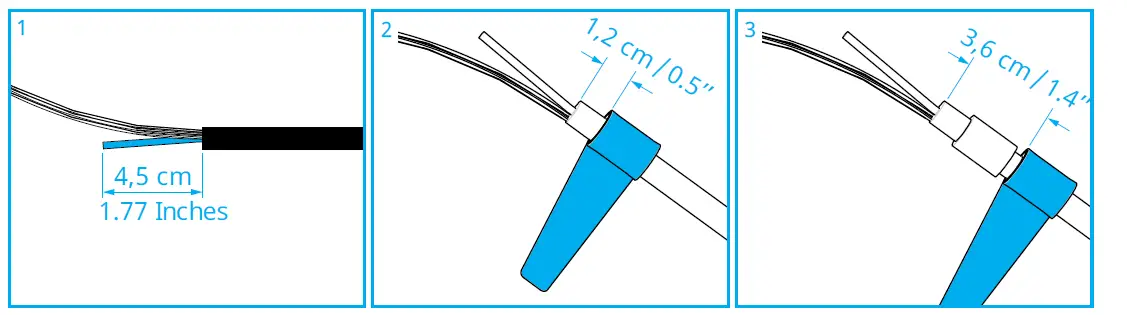
- Remove 1.5 m / 60 Inches from the jacket of the cable. Cut the strength member to a length of 4.5 cm / 1.77 Inches.
- Wrap a piece of felt tape at a distance of 1.2 cm / 0.5 Inches from the jacket end.
- Cut a piece of foam (length according to table below). Wrap it around the cable at a distance of 3.6 cm / 1.4 Inches from the jacket end. At this place the cable will touch the cable seal
Table 1: Foam length per cable diameter
| Sealblock 4x10mm | Sealblock 4x15mm | |||
| Cable diameter (mm) | Foam length (±5 mm) | Cable diameter (mm) | Foam length (±5 mm) | |
| 3 | 95 | 9 | 125 | |
| 4 | 90 | 10 | 115 | |
| 5 | 80 | 11 | 105 | |
| 6 | 75 | 12 | 95 | |
| 7 | 70 | 13 | 85 | |
| 8 | 60 | 14 | 70 | |
| 9 | 50 | 15 | 60 | |
| 10 | 40 | |||
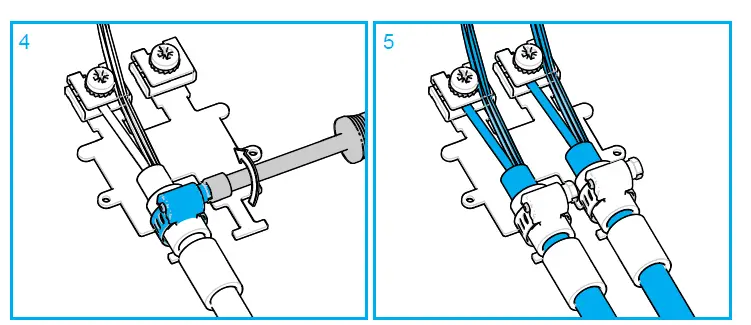
Install cable(s) on plate
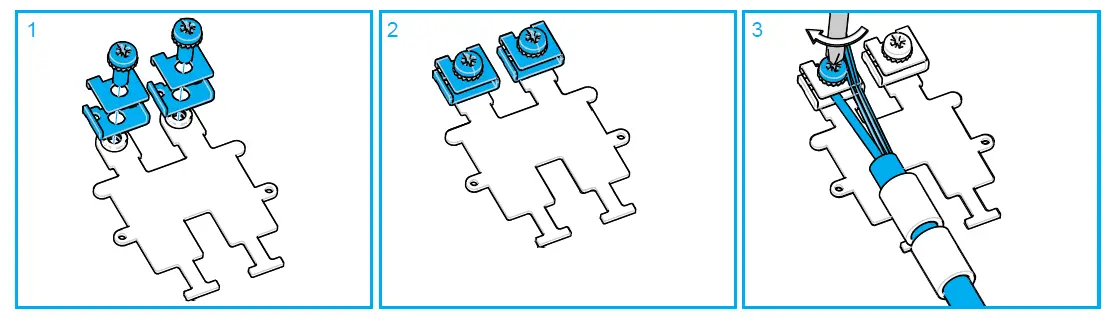
- Install the strength members with the screws to the plate. Make sure the studs on the plate are facing upwards.
- Plates secured but not tightened yet.
- Slide the strength member between the two plates and secure the screw.

- Install the hose clamp around the T-shape and the felt tape.
- Two cables fully installed on the plate
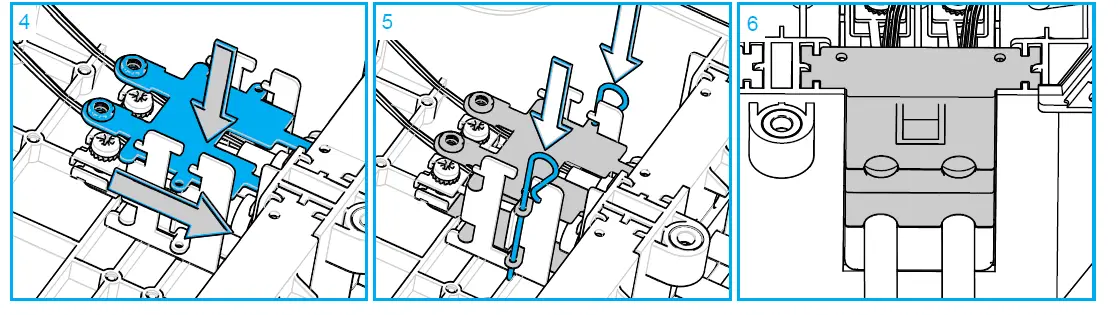
Install the plate into the box
- Slide the plate in the bottom bracket. First to the bottom then slightly to the seal area so the flange with the hole falls into the recess.
- Plate correctly installed. Note that the foam should be positioned in the seal area if cable(s) is(are) installed.
- Close the middle part of the seal. If no cable will be installed on the two top positions use the complete entry plate (section 2 and 3).

- Install the second plate (with or without cables) on top of the already installed plate.
- Secure the plates with the 2 retaining clips.
- Close the top part of the seal.
© 2022 CommScope, Inc. All Rights Reserved


