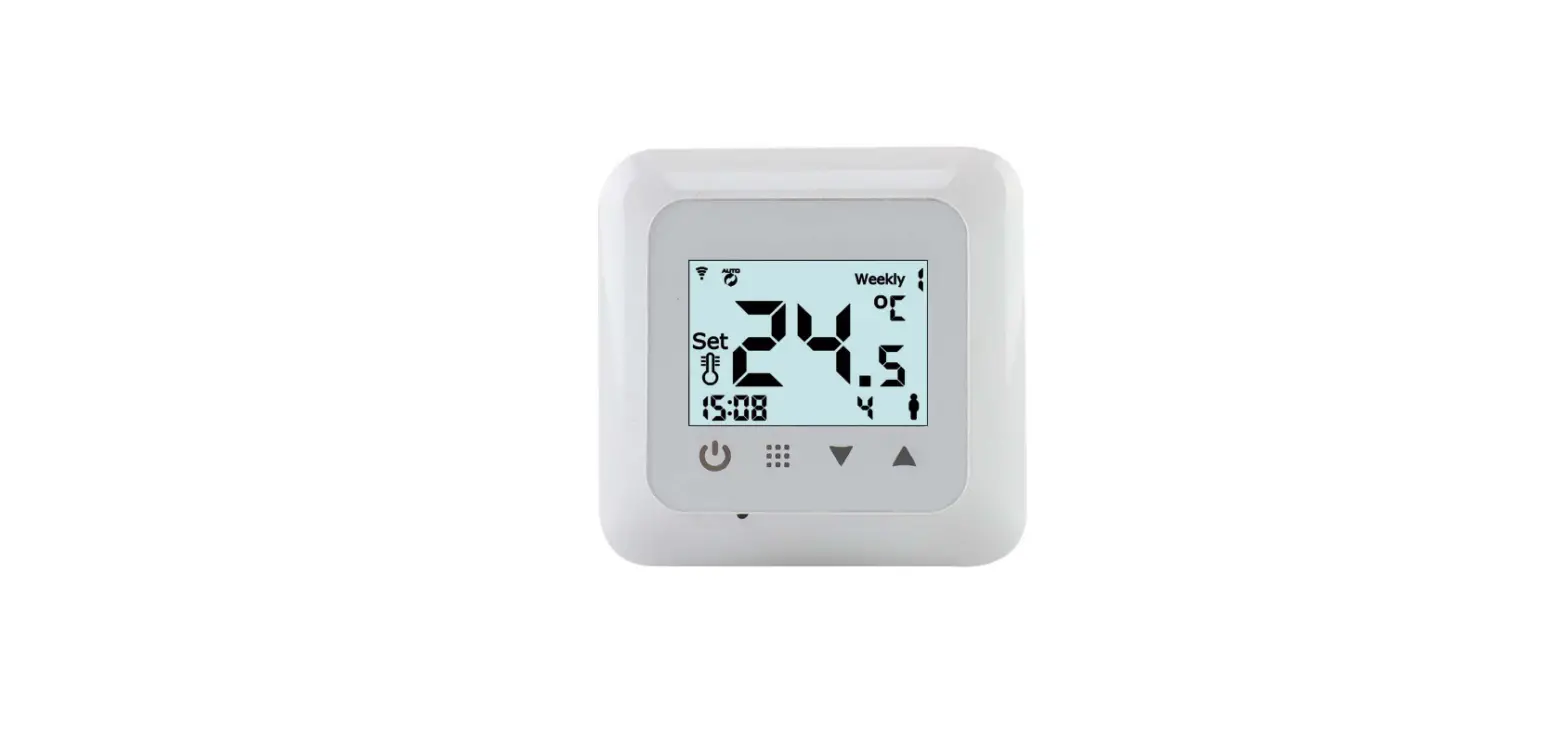
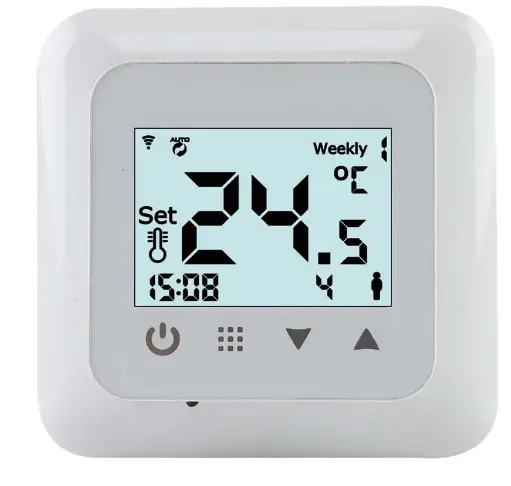
Klima SF300 Digital Thermostat
Read this manual carefully and keep it with other warranty documents. Connection must be carried out by a qualified installer in accordance with local regulations. Before installing or disassembling the thermostat, always switch off the electricity in the meter cupboard. This thermostat can be installed in a single flush- mounting box 50 mm deep, according to standard DIN formats
Technical details
- Power 90-240Vac 60/60Hz
- Max. Load 16A/250V
- Floor sensor type 10k NTC 1%
- Temp. range 5oC-35oC
- Accuracy 0.5oC
- Cover IP21
- Warranty 2 years
Wiring diagram
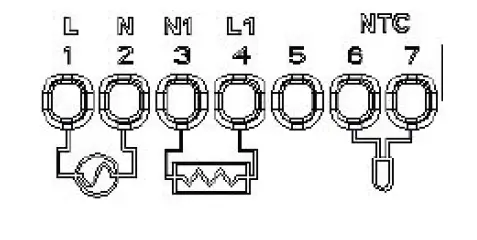
- 1 Power supply (Line)
- 2 Power supply (Neutral)
- 3 Heating cable wire 1*
- 4 Heating cable wire 2*
- 5 N/A
- 6-7 Floor sensor connection
Order Heating wire 1 and 2 does not apply.
EARTH: Connect the earth of the heating cable and the earth of the power supply outside the thermostat
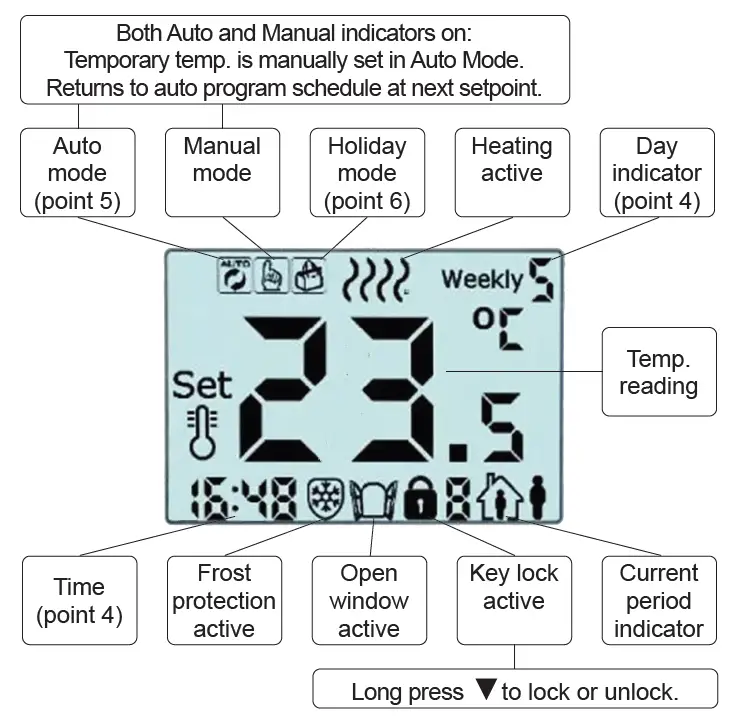
Display icon explainantion
Time setting
(Thermostat on) Long press o to enter options
- Press▲, choose 0101 and press o to enter
- Press▼or▲to set minutes
- Press
 to confirm and enter hour setting
 - Press▼or▲to set hours
- Press to confirm
- Press▼or▲to set week day (Monday = 1, Sunday = 7)
- Press to confirm
Choose mode
Press![]() to switch between Auto Mode or Manual mode.
to switch between Auto Mode or Manual mode.
Programming
(Auto Mode)
(Thermostat on) Long press![]() to enter options
to enter options
- press▲, choose 0202 and then to enter programming
- Press to choose hours, min. and temp. (with▼or▲and )
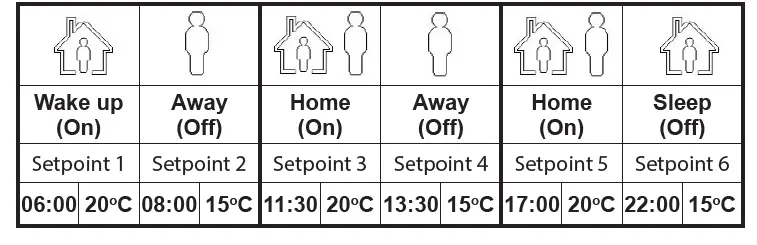
There are 3 periods (6 setpoints) per day. See standard scedule for reference:
Holiday Mode
(Thermostat on) Long press o to enter options
- Press▲, choose 0303 and press to enter
- Press▼or▲to set days
- Press to confirm and enter temperature setting
- Press▼or▲to set temperature
- Press to confirm
Sensor error
When an “E1” or “E2” code is shown the sensor is wrongly connected or broken. The thermostat will stop heating until the sensor is connected correctly or replaced.
Advanced settings
WARNING: Changing advanced settings may cause undesired results. Please consult your installer before entering this menu!
- Press the on/off button once, long press to enter Advanced menu A.
- Press to choose between A1 to AE. Press▼or▲to adjust
No. Item Parameters Default A1 Measured temp. calibration -9oC to +9oC 0.5oC A2 Differential 0.5oC to 2.5oC 1oC A3 Key lock 0: Half lock 1: Full lock
0 A4 Power with memory function 0: Power with memory function 1: Shutdown power after power off 2: Shutdown power after power on
0 A5 Backlight time 5 to 30 seconds 10 sec A6 Programmable 0: 5+2 (Week 1-5 and weekend 6-7) 1: 6+1 (Week 1-6 and sunday 7)
2: 7 (Week 1-7)
0 A7 Lowest temp. setting 1 – 10oC 5oC A8 Highest temp.setting 20-70oC 35oC A9 Low temp.protection 1: 1oC – 10oC Function off: > 10oC Display (—- )
5oC AA High temp.protection 1: 35oC-70oC 2: Function off: < 35oC Display (—- )
45oC AB High temp. protection differential 1-9 2 AC Running temp. of open window function 1: 10 – 20oC, 2: Function off: < 10oC Display (—- )
15oC AD Running time of open window function 10 – 20 min 10 AE Reset to factory settings Long press o until display goes blank –


