![]()
![]()
Room thermostat
User instructions
6LE004189B
tebis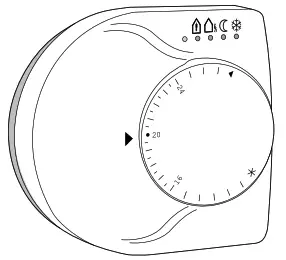

Usage
The thermostat TX320 KNX/EIB is used for controlling the temperature in individual rooms of functional and private buildings.
The thermostat should be used in dry rooms.
Configuration
- TX 100 V1.6.3 or higher: detailed description is included in the User’s Instructions supplied with the configurator.
- ETS: application software TL 320A, database, and description available from the manufacturer.
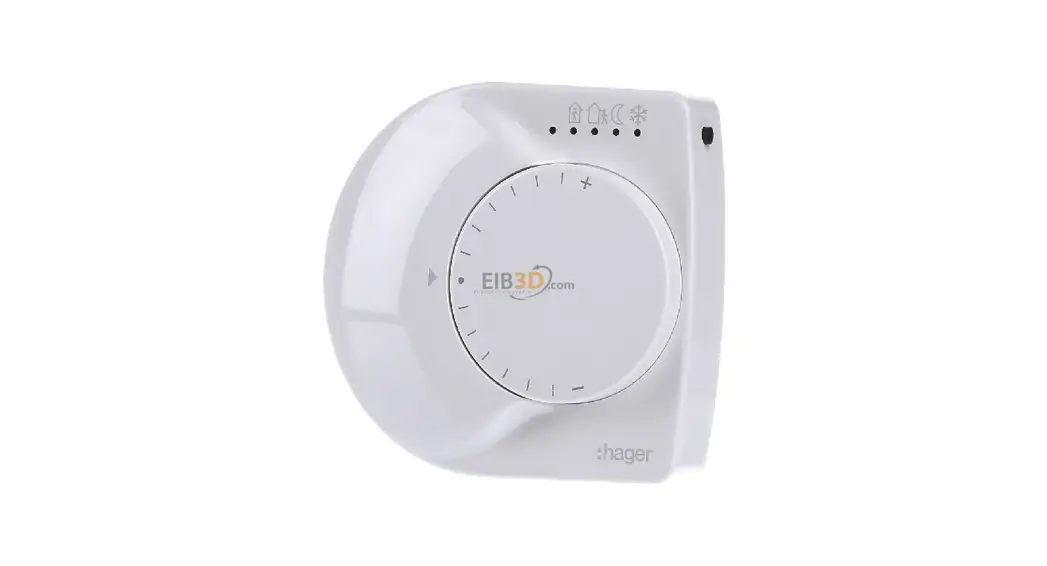
Description of thermostat
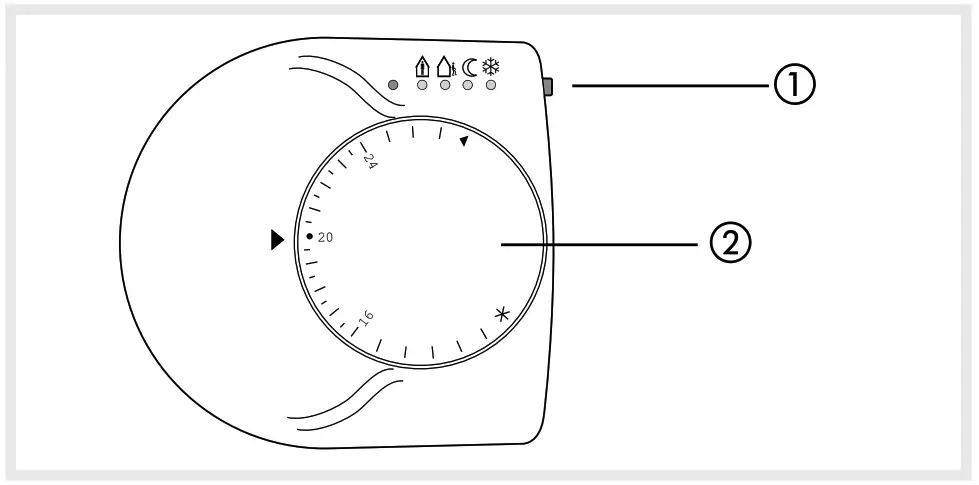
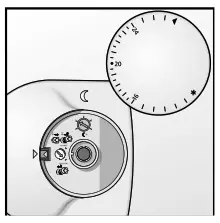
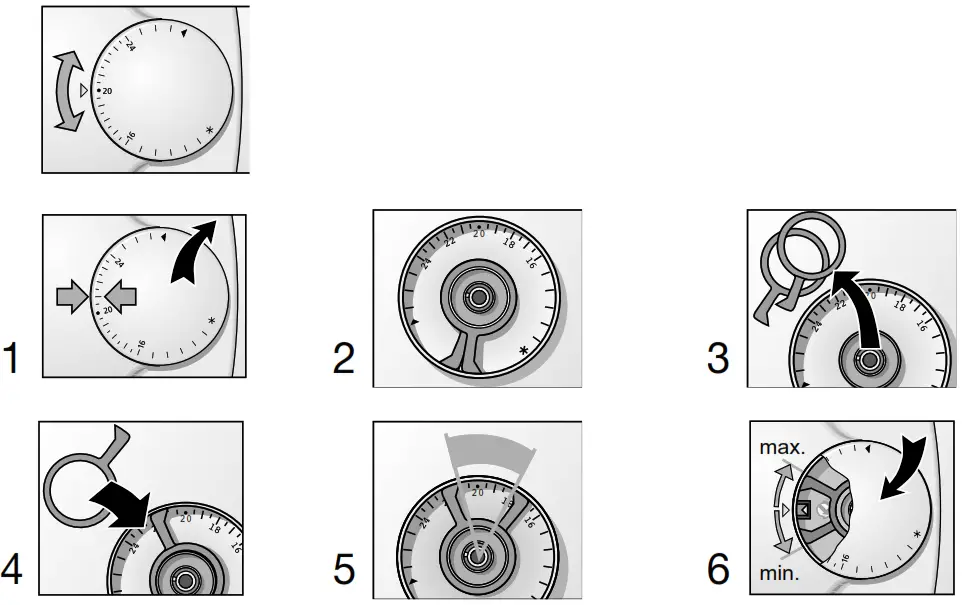
- Push button for operating modes or presence.
 comfort mode
 standby mode
 reduction mode (at night)
 frost protection
red/blue LED:
red = heating
blue = cooling
out = demanding temperature is reached. - Temperature selector.
Installation
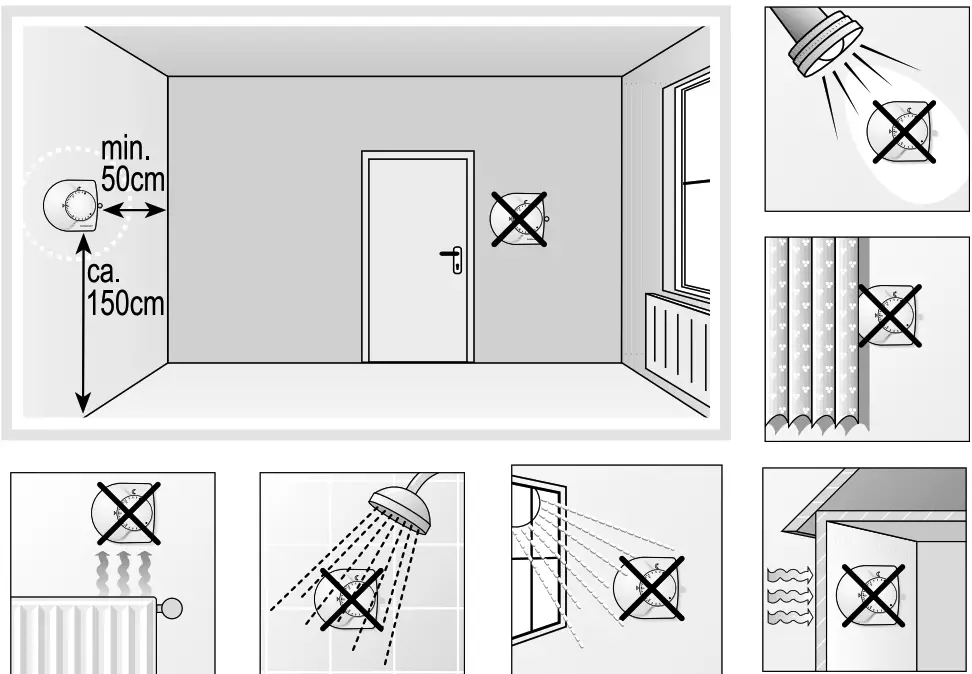
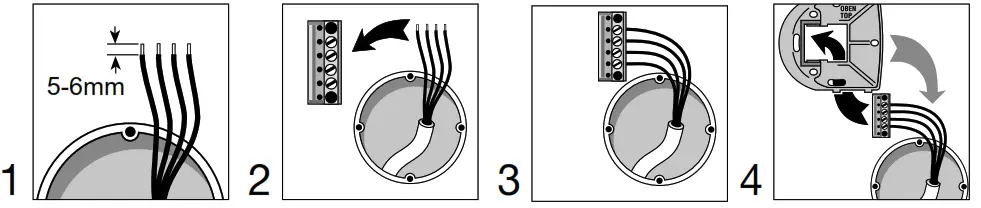
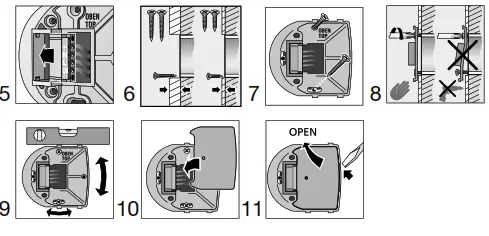
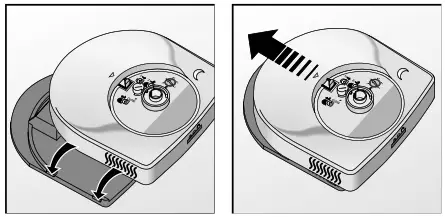
Installation of thermostat
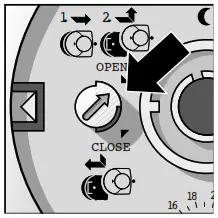
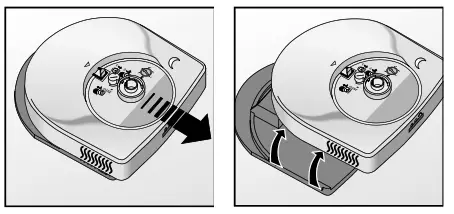
- Gently pull off the temperature selector.

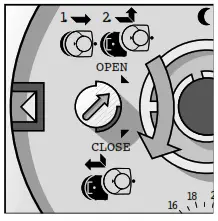
- Turn the latch with a small screwdriver to position “OPEN”.

- Carefully place the thermostat on the guiding rails and push to the left until the mounting base is covered.
Do not tilt the thermostat!
- Turm latches with a small screwdriver to position “CLOSE”.

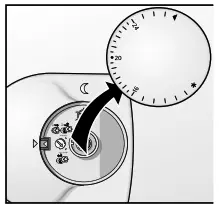
- Place temperature selector on the unit.

De-Installation
De-installation of thermostat
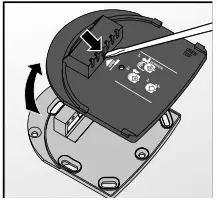
- Draw off, temperature selector.

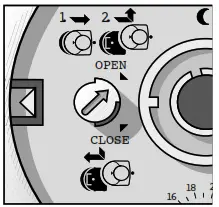
- Loosen latch to position “OPEN”.


De-installation of mounting base
- Press-in springs at the cover of the mounting base and lifts it off.

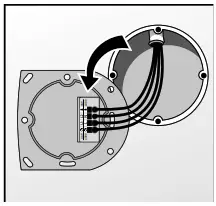
- Loosen screws and reverse base unit.

- Pull out the wire using an appropriate screwdriver to release the spring clamp!

Temperature
Temperature control knob in order to adjust the comfort setting between 10 and 28°C.
It is possible to limit this temperature range mechanically (e.g. 18 to 23°C), following the instructions below.
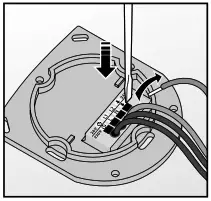
Connection of BUS and inputs
 The functionality of inputs :
Inputs (E1-E2) are used to interface contacts free of potential with the EIB/KNX bus, such as pushbuttons, switches, or conventional automatisms.
The input E3 allows a floor temperature probe to be connected. (reference EK 087).
The particular functions of each product depend on the configuration and the setup.- Connect the bus cable to the bus line (red + / black –). (Note the polarity!)
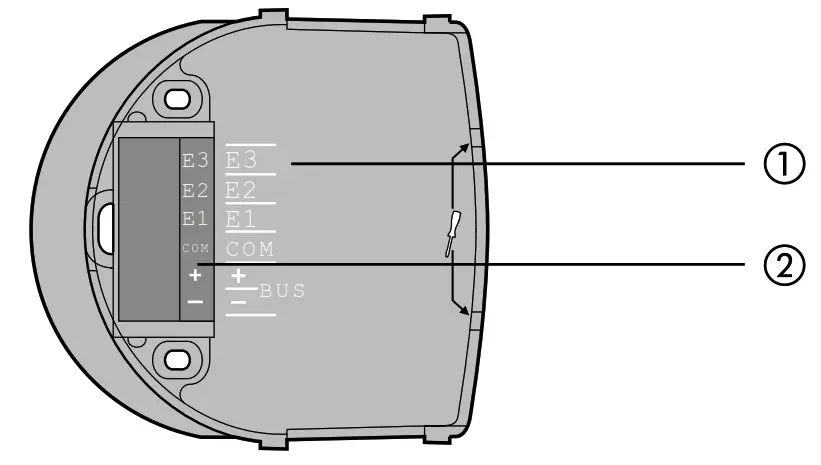 The functionality of inputs :
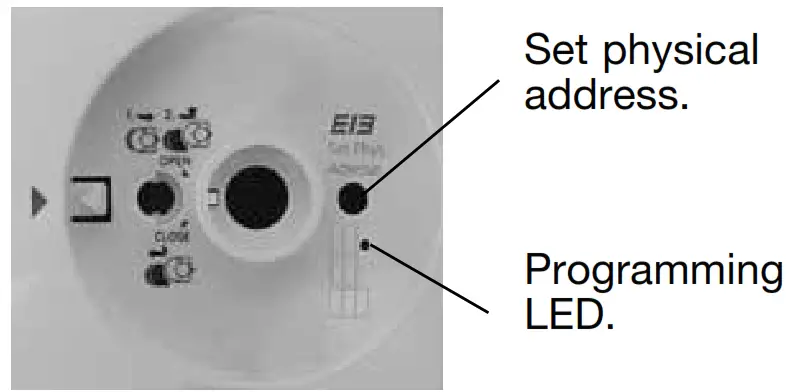
Entering the physical address
Technical characteristics
| Power supply: | bus KNX/EIB – 30Vs SELV |
| Power consumption: | < 10 mA |
| Operating temperature: | 0 °C —> +45 °C |
| Storage temperature: | -20 °C —> +60 °C |
| Protection type: | IP21 |
| Pollution category: | 2 |
| Rated impulse voltage: | 1500V |
| Overvoltage Category: | 3 |
| Insulation class: | III |
| Softwarestruktur: | Klasse A |
| Ecodesign class: | IV |
| Voltage and current declared for the needs of EMC emissions tests: | 30V – 10mA |
| Action type: | 2 |
| Communication media KNX : | TP1 |
| Configuration mode KNX : | Code |
Independent product for surface mounting or flush mounting box.
![]() – This device must be installed only by a qualified electrician.
– This device must be installed only by a qualified electrician.
– Conform to TBTS installation rules.
![]() Correct Disposal of This product
Correct Disposal of This product
(Waste Electrical & Electronic Equipment).
(Applicable in the European Union and other European countries with separate collection systems).
This marking shown on the product or its literature indicates that it should not be disposed of with other households waste at the end of its working life. To prevent possible harm to the environment or human health from uncontrolled waste disposal, please separate this from other types of waste and recycle it responsibly to promote the sustainable reuse of material resources.
Household users should contact either the retailer where they purchased this product, or their local government office, for details of where and how they can take this item for environmentally safe recycling.
Business users should contact their suppliers and check the terms and conditions of the purchase contract. This product should not be mixed with other commercial wastes of disposal.
 Usable throughout Europe å and in Switzerland


