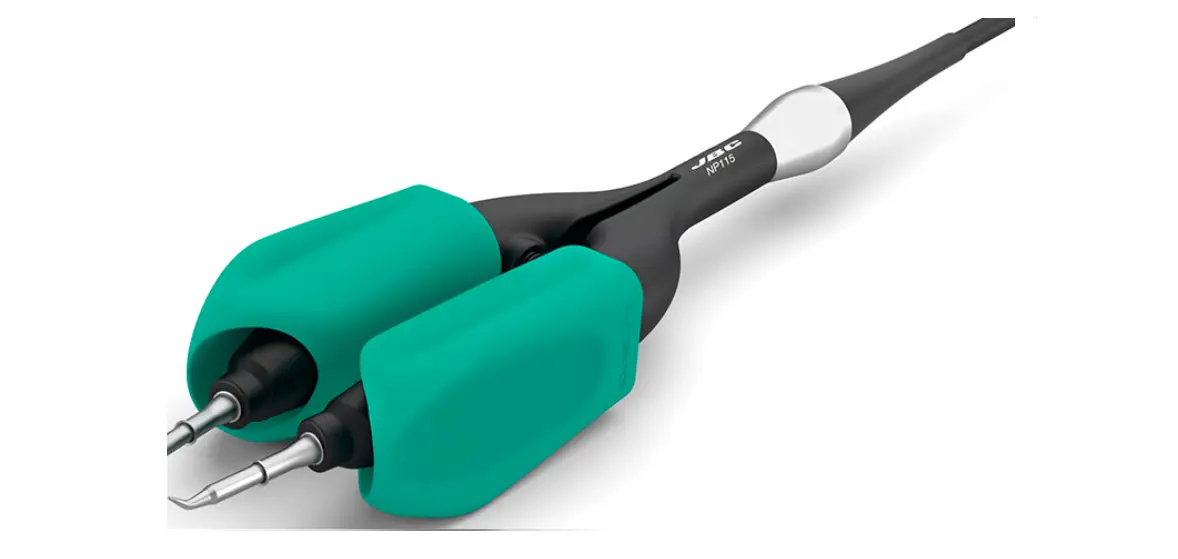
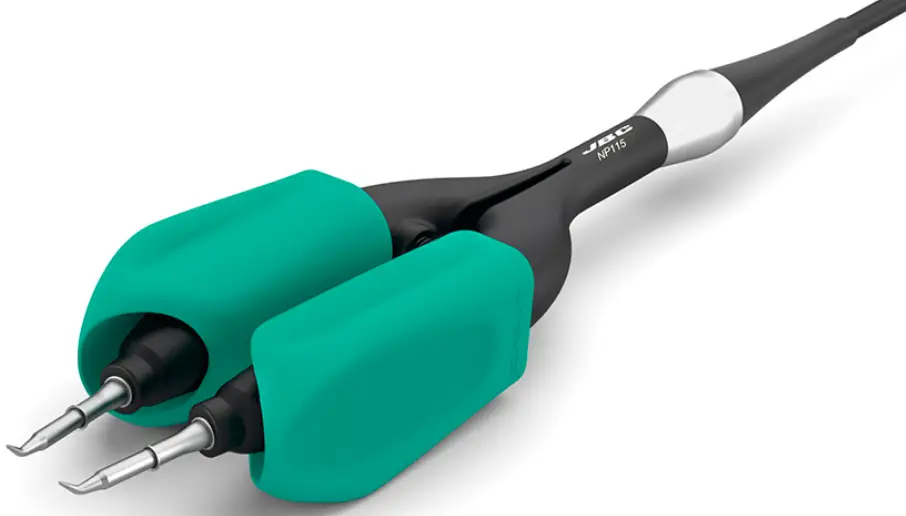
JBC NP115 Nano Tweezers
 This manual corresponds to the following reference: NP115-A
Packing List
The following items are included:
- Nano Tweezers ………………………………… 1 unit
Ref. NP115-A
- Manual ……………………………………………… 1 unit
Ref. 0029758
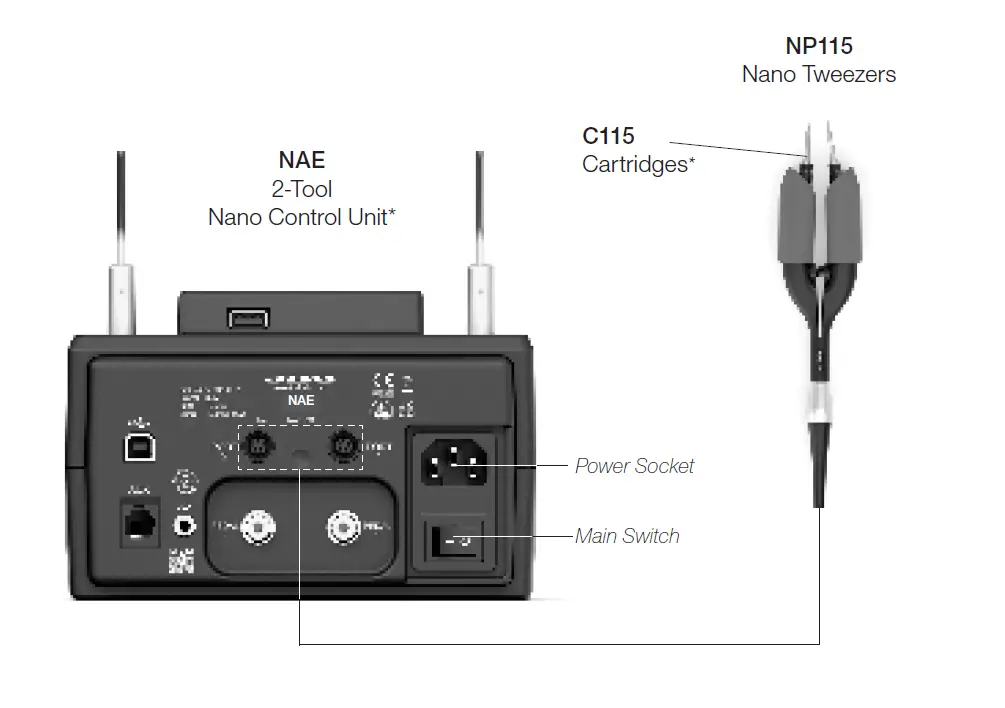
Connections
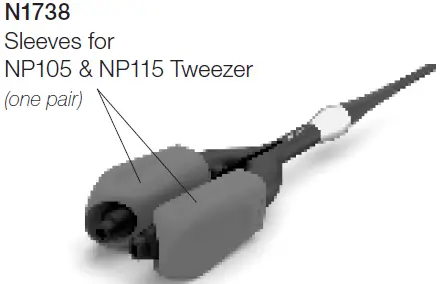
Changing Sleeves N1738
Change the sleeves by pulling the worn onto out and by pushing the new onto onto the tweezer arms.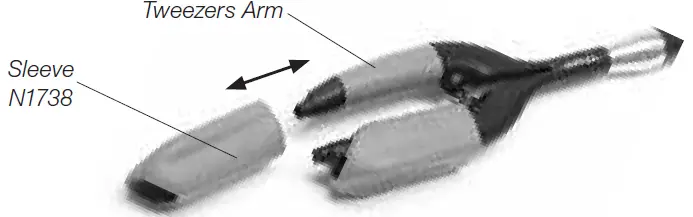
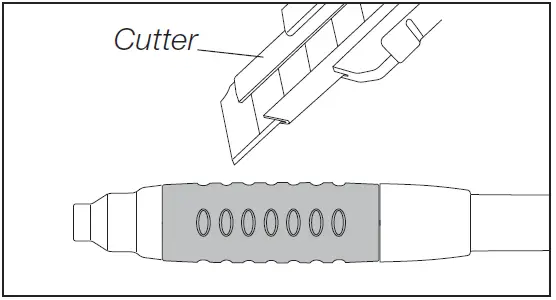
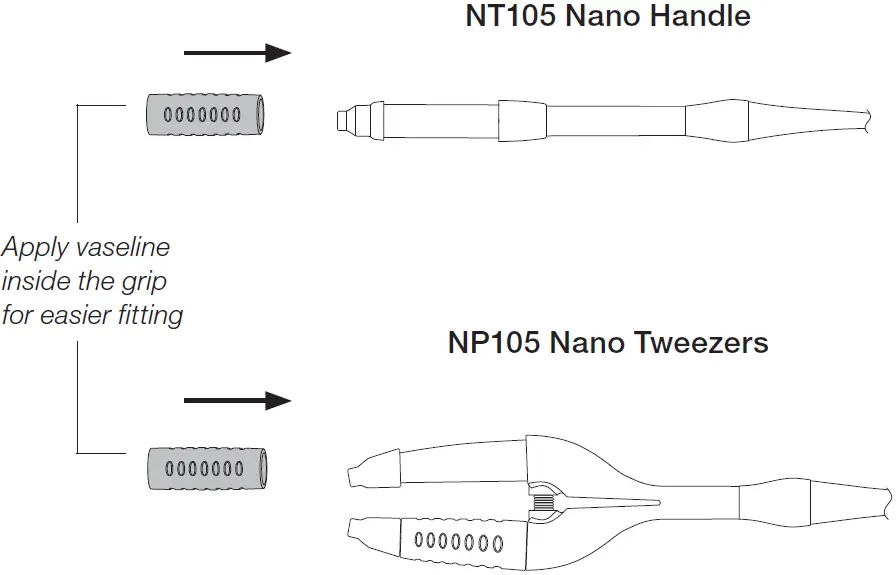
Changing Grips N6079
Removing Grips
- Make a length-ways cut. Be careful not to damage the handle.

- Remove the old grip.

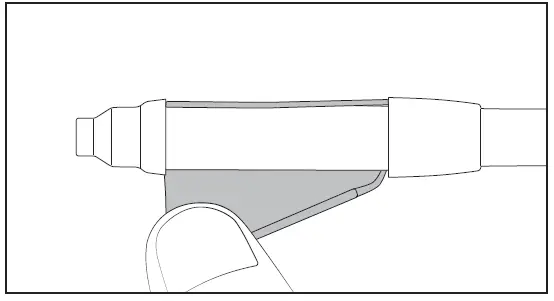
Assembling Grips
Changing Cartridges
Save time and change cartridges safely without having to switch the station off.
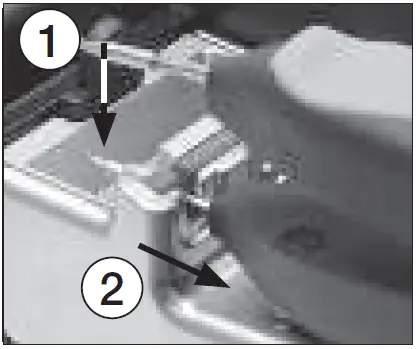
- Removing
Place the cartridge into the extractor slot (1) and pull the tweezers to remove the cartridge (2).
- Inserting
Push the tweezers onto the new cartridge until the reference ring*.
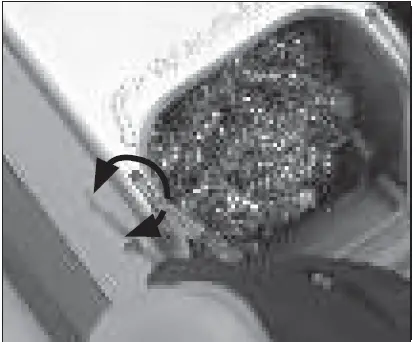
- Aligning
Use the holes to rotate the cartridges for a proper alignment.
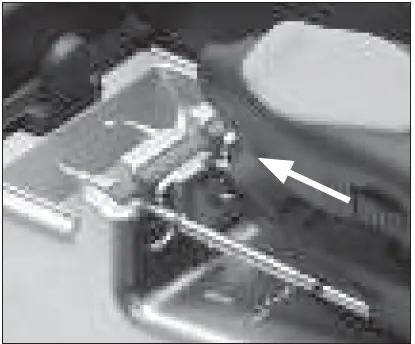
Important
For a correct connection, it is important to push the cartridge in until the reference ring rests against the tweezers.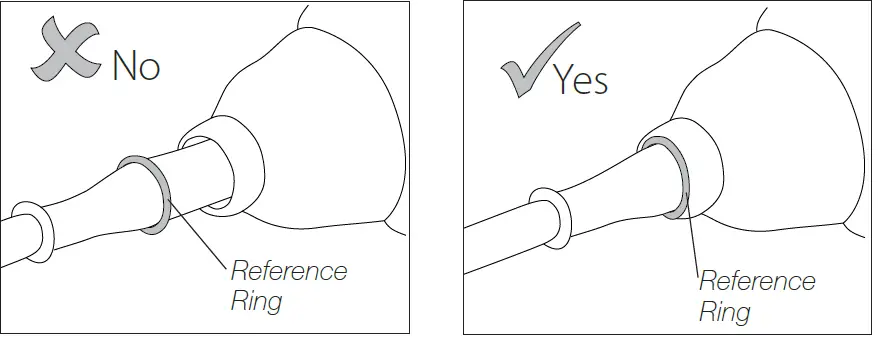
Compatible Cartridges
The Nano Tweezers NP115 and AN115 work with C115 cartridges. Find the model that best suits your soldering needs on www.jbctools.com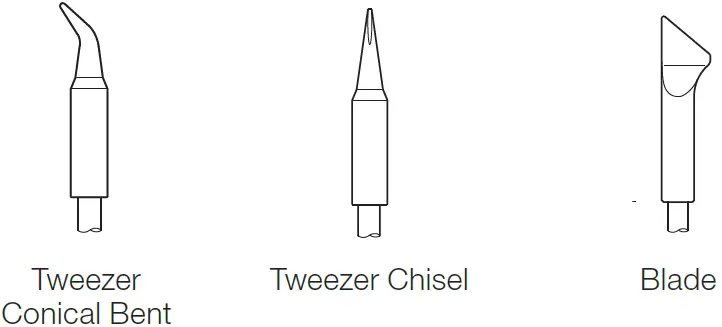 Example:
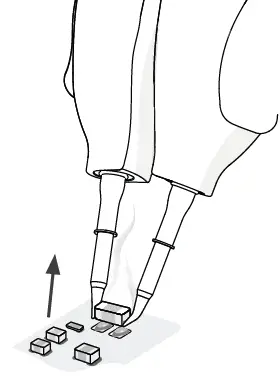
Chip Components Rework Process using Tweezers and Pedal
The Pedal is frequently used to rework components with tweezers.
NP115 JBCs nano tweezers is the most effective tool for disordering chip components but also it facilitates its rapid placement and soldering by using a pedal connected to JBC´s NAS station.
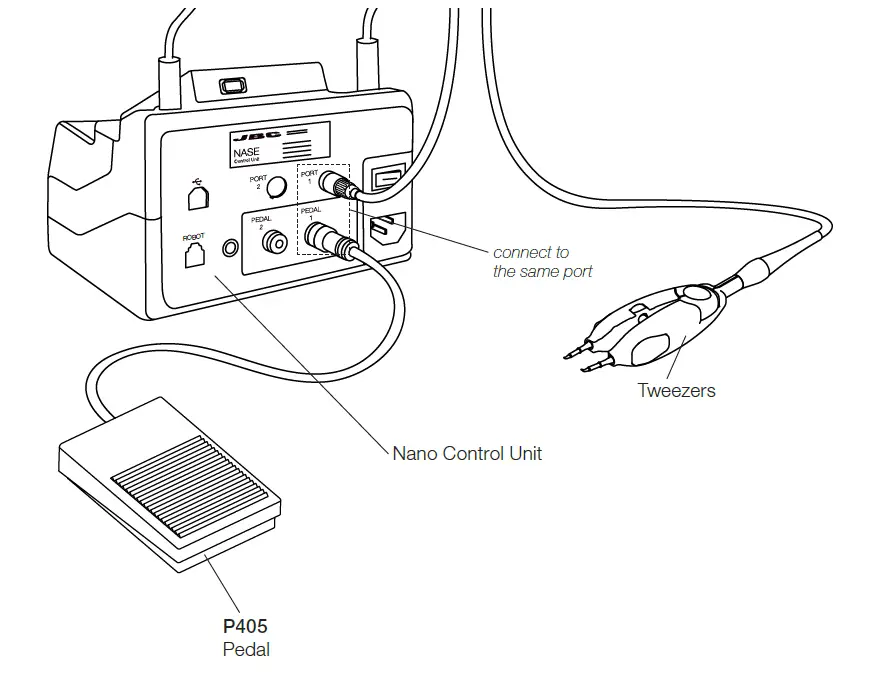
- Connections
Connect pedal P405 to the same port where NP115 tweezers are connected.
In the peripherals menu for the “Pedal Activation Mode” choose between “pressed” and “released”.
- DE soldering*
Lift the tweezers from the holder, press and hold the pedal to activate the tweezers and disorder the component.
Once the pedal is released the tweezers enters in hibernation mode and cools down.
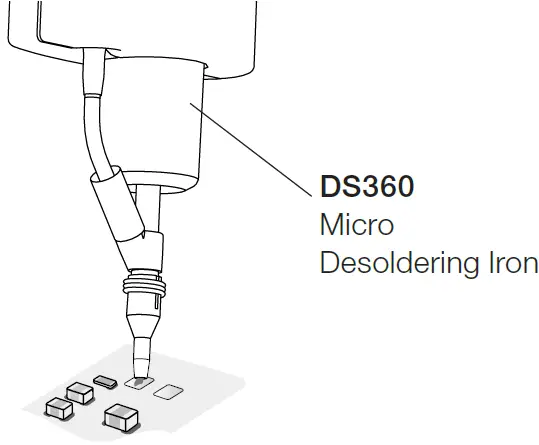
- Pad Cleaning
Clean the pads with JBC´s disordering tool DS360.
For this operation JBC´s disordering station DSS is needed.
- Solder Paste Dispensing
Apply the solder paste amount needed to solder the new chip component.
The use of JBC´s DPM solder paste dispenser is recommended.
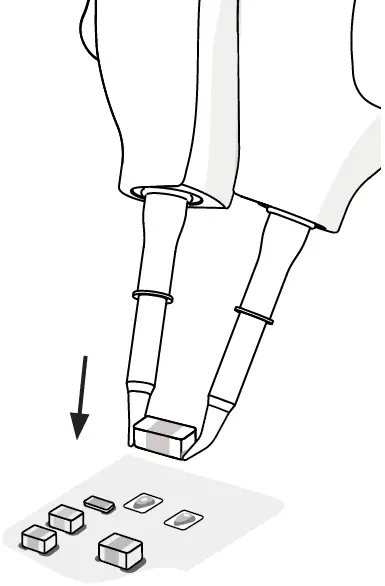
- Placing
Do not press the pedal.
Use the tweezers to position the component on the previously tinned pad.
Note:
The inactive tool prevents the component from heating up prematurely.

- Soldering
Once in position press and hold the pedal to activate the tweezers and perform the soldering.


Safety
It is imperative to follow safety guidelines to prevent electric shock, injury, fire or explosion.
- Do not use the units for any purpose other than soldering or rework. Incorrect use may cause fire.
- The power cord must be plugged into approved bases. Be sure that it is properly grounded before use. When unplugging it, hold the plug, not the wire.
- Do not work on electrically live parts.
- The tool should be placed in the stand when not in use in order to activate the sleep mode. The soldering tip or nozzle, the metal part of the tool and the stand may still be hot even when the station is turned off. Handle with care, including when adjusting the stand position.
- Do not leave the appliance unattended when it is on.
- Do not cover the ventilation grills. Heat can cause inflammable products to ignite.
- Avoid flux coming into contact with skin or eyes to prevent irritation.
- Be careful with the fumes produced when soldering.
- Keep your workplace clean and tidy. Wear appropriate protection glasses and gloves when working to avoid personal harm.
- Utmost care must be taken with liquid tin waste which can cause burns.
- This appliance can be used by children over the age of eight and also persons with reduced physical, sensory or mental capabilities or lack of experience provided that they have been given adequate supervision or instruction concerning use of the appliance and understand the hazards involved. Children must not play with the appliance.
- Maintenance must not be carried out by children unless supervised.
Specifications
- Max. Power Per Cartridge:
- Cable Length:
- Total Net Weight:
- Package Dimensions /Weight:(L x W x H)
Complies with CE standards ESD Safe
- 120 cm / 47.24 in
- 47 g / 0.104 lb
- 235 x 40 x 40 mm / 91 g
- 9.25 x 1.57 x 1.57 in / 0.201 lb
Warranty
JBC’s 2 year warranty covers this equipment against all manufacturing defects, including the replacement of defective parts and labour.
Warranty does not cover product wear or misuse.
In order for the warranty to be valid, equipment must be returned, postage paid, to the dealer where it was purchased.
Get 1 extra year JBC warranty by registering here: https://www.jbctools.com/productregistration/ within 30 days of purchase.
This product should not be thrown in the garbage.
In accordance with the European directive 2012/19/EU, electronic equipment at the end of its life must be collected and returned to an authorized recycling facility.


