Guangzhou Lightsource Electronics T01A-TYAZ Smart Lock User
Special Attention:
- Mechanical keys please keep outdoor, just in case keys lock in doors.
- Please replace for the battery when low wattage alarm.
- Reading this manual carefully before installation, and keep it for future reference.
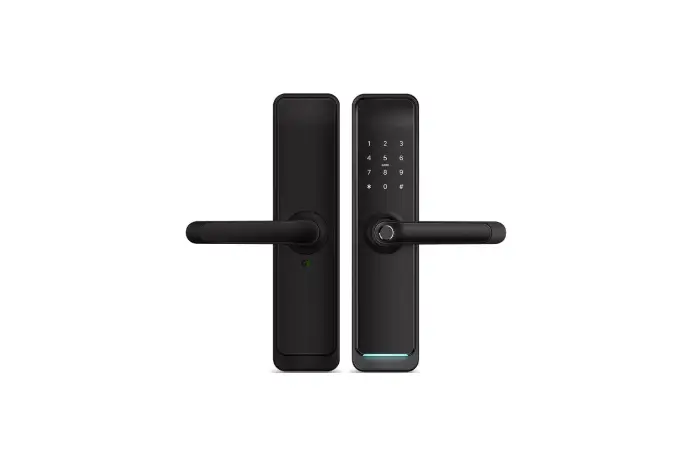
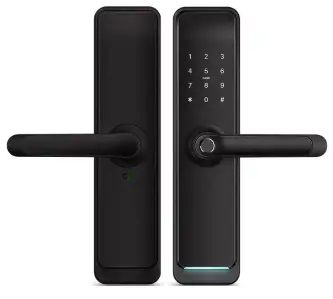
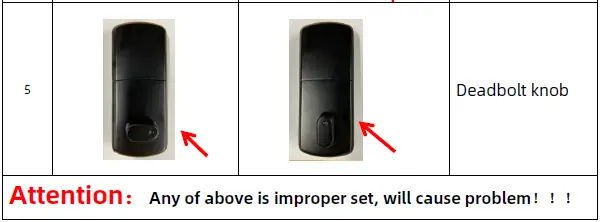
Introduction
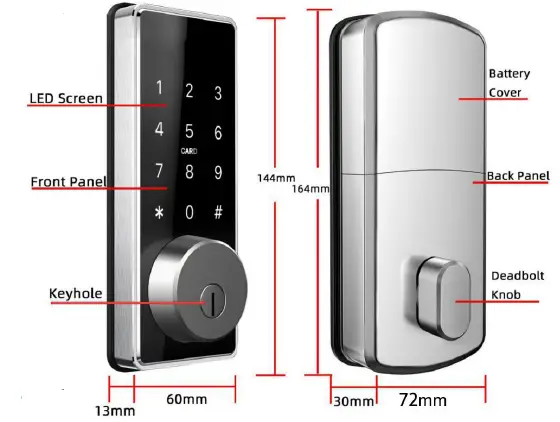
Lock structure
Packing List
Check the following drawing to check whether the package contains all the parts
| NO | Name | Qty | NO | Name | Qty | |
| 1 | Front Pane | 1 | 9 | Screw Stubs:M4*30mm | 3 | |
| 2 | Back Panel | 1 | 10 | Screw Stubs:M4*40mm | 3 | |
| 3 | Mortise | 1 | 11 | Mortise Screws:M4*10mm (For Wooden Door) | 4 | |
| 4 | Card | 3 | 12 | Mortise Screws:M5*10mm (For Aluminum Door) | 4 | |
| 5 | Mechanical Key | 2 | 13 | M4*10mm Screws For Fixing Back Panel | 4 | |
| 6 | Waterproof Rubber Plate | 2 | 14 | M4*30mm Screw | 3 | |
| 7 | User Manual | 1 | 15 | M4*50mm Screw | 3 | |
| 8 | Strike&Strike Box | 1+1 |
Specifications
| Suitable for Models | T01A-TYAZ | Doors Applicable | Aluminum door Wooden door |
| Materials | Handle:Zinc Alloy | Working Voltage | 6V/4x AA Batteries |
| Lock Weight | 2.0KG | Door Thickness to Fit | 35-50mm |
| Unlocking Way | Password Card Mechanical key |
Data Capacity | Password:10 temporary password Card:380 |
| Color | Silver Black | Working Temperature | -10℃-55℃ |
| Low Wattage Alarm |
Less than 4.8V | Working Humidity |
0-95% |
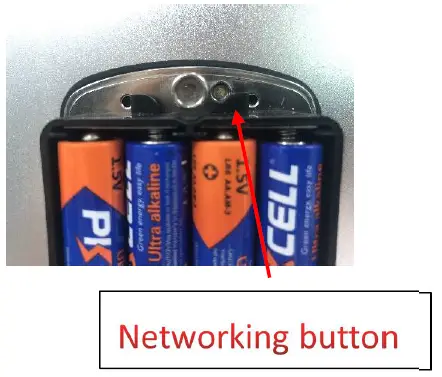
Networking mode
- Touch to wake the screen
- Long press the network configuration key for 5 seconds to enter the network configuration mode
Installation
Confirm opening direction

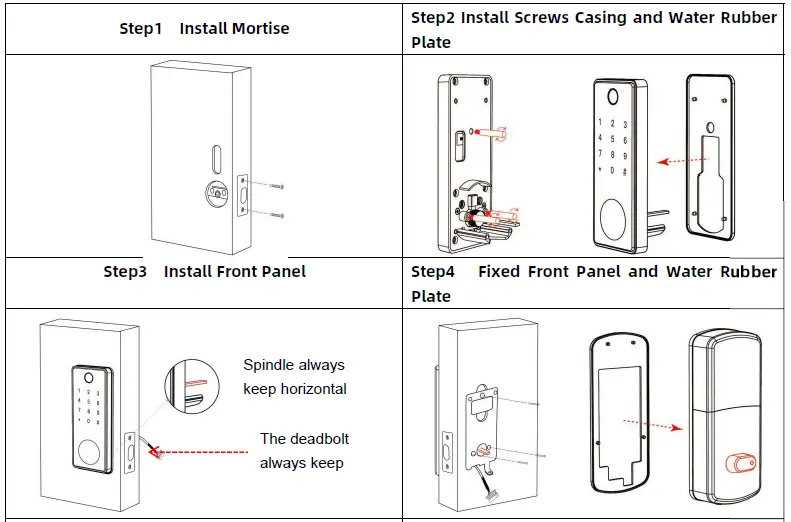
Installation Diagram
Step1 Install Mortise
Step2 Install Screws Casing and Water Rubber Plate
Step3 Install Front Panel
Step4 Fixed Front Panel and Water Rubber Plate
 Step5 Connecting Front and Back Panels
Step6 Fixed Back Panel
Step7 Install Batteries
Step8 Cover the battery box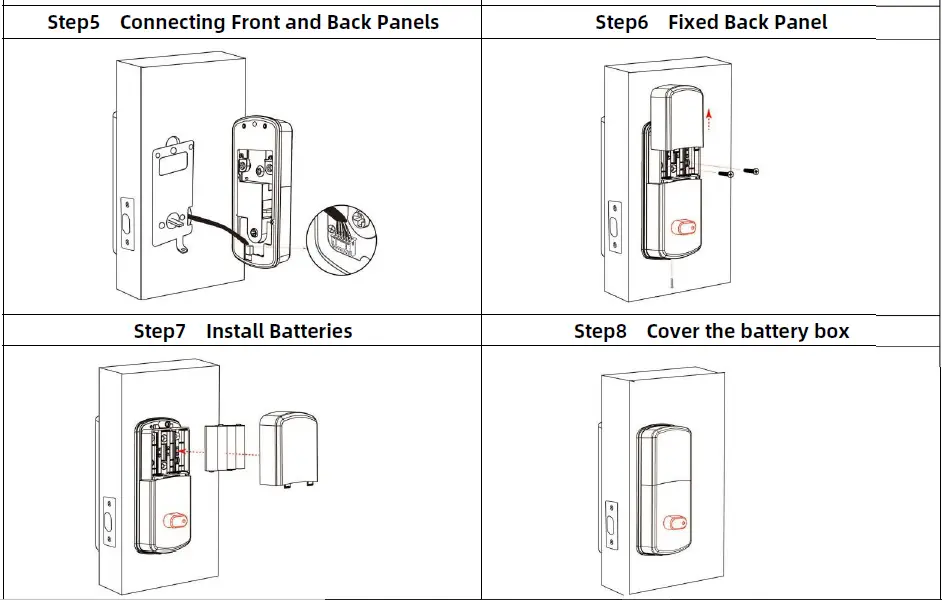
3.Operation
Download
The software (iOS version) can be downloaded from the app store, and the Android version can be downloaded from the application store of Google play or scan the QR code above to download
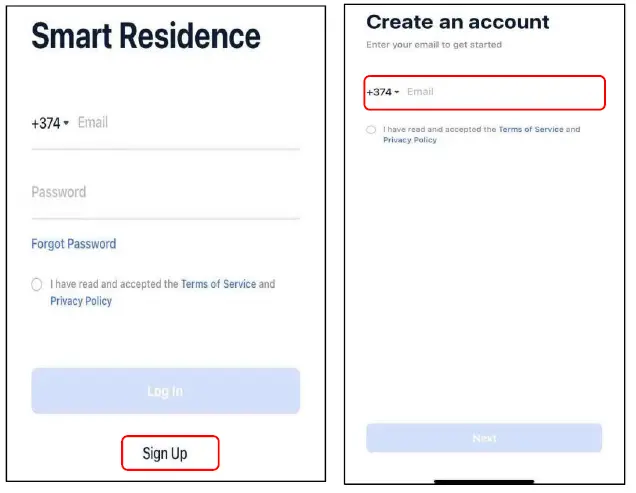
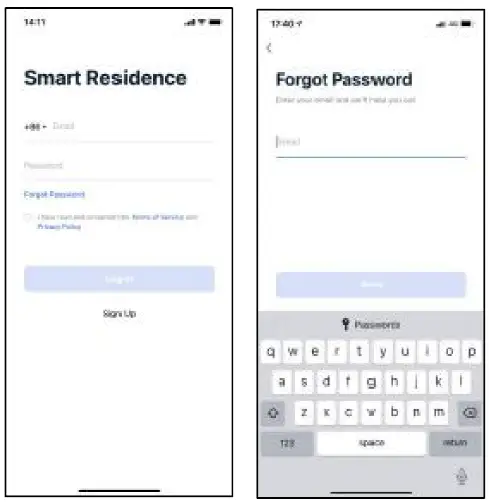
Registration
After entering the APP, click “Register” at the bottom to create an account. After the authentication of the account and the setting of the password, the account is registered, and then you can log in to the system.(You can register with your email or mobile number)
Account login
After the account is successfully registered, you can enter your account to log in
 Create sites and zones
After registering an account for the first time, you need to create a site first, and you can also create an area, so that you have a site with many areas, which is convenient for classification and management of devices later.
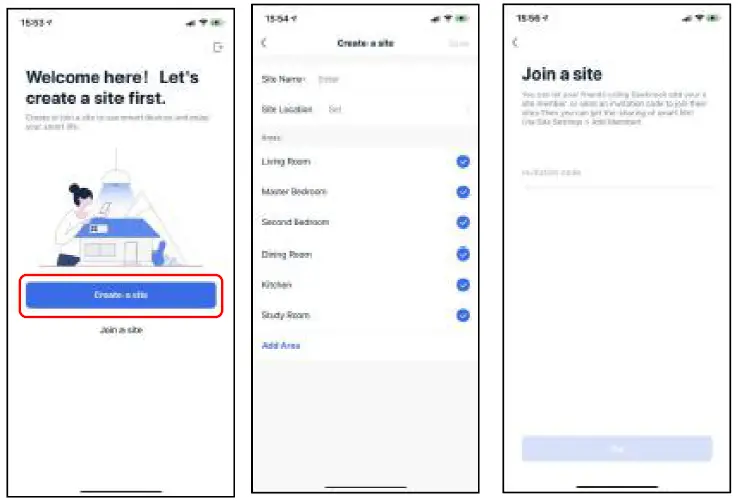
Join the site
In addition to creating your own site, you can also join other people’s sites. After creating the site with other accounts, you can invite site members to join. After the invitation is confirmed, the site and smart devices can be shared
Device
Add Device
Select the corresponding equipment category for distribution network installation, which can be manually selected or automatically scanned. After the device is added, you can access the panel to use the corresponding functions. It can also be displayed and operated in workbench widgets.
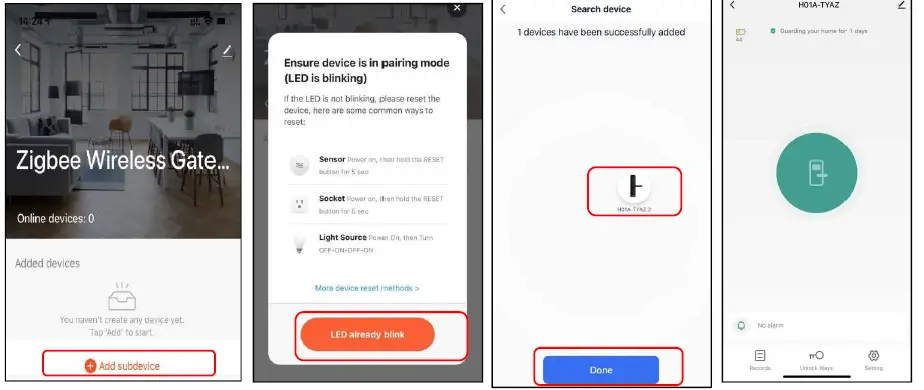
Add Gateway
- Tap Add Device on the Home page or + in the upper right corner of the page to go to the Add Device page.
- Click the Gateway,Choose add your zigbee gateway type,Added successfully

Add lock
- After the gateway is added successfully, enter the gateway page, click on “Add sub device”,then select more device type.find the door lock option
- Door Lock:Touch to wake the screen,Long press the network configuration key for 5 seconds, Door lock reminder : “ Under connecting, pls wait”to enter the network configuration mode
- Door lock reminder:“Network join Succeed”Added successfully
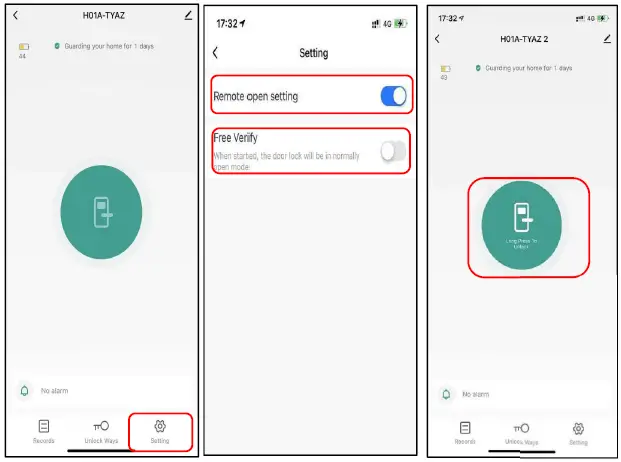
Setting
Remote Open
Need to open the remote unlock setting in the settings,You can directly press and hold the unlock button to unlock
Free Verify
When started,the door lock will be in normally open mode
UnLock Ways
Manage Password
Used for security verification on the door lock device side and cannot be unlocked
Emergency Password
If all other passwords have been forgotten,use this password to unlock the lock in an emergency
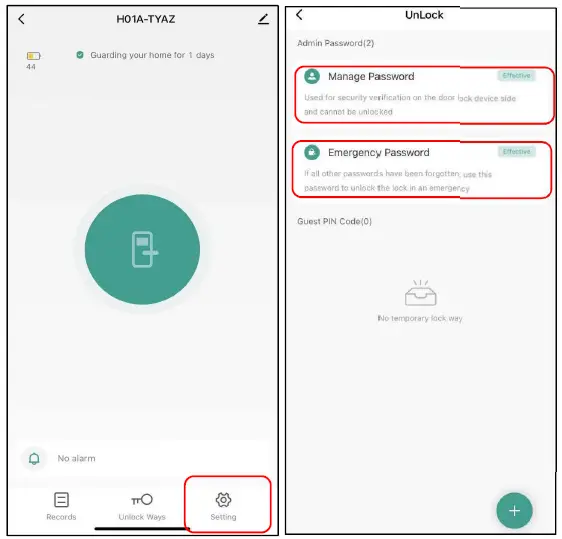
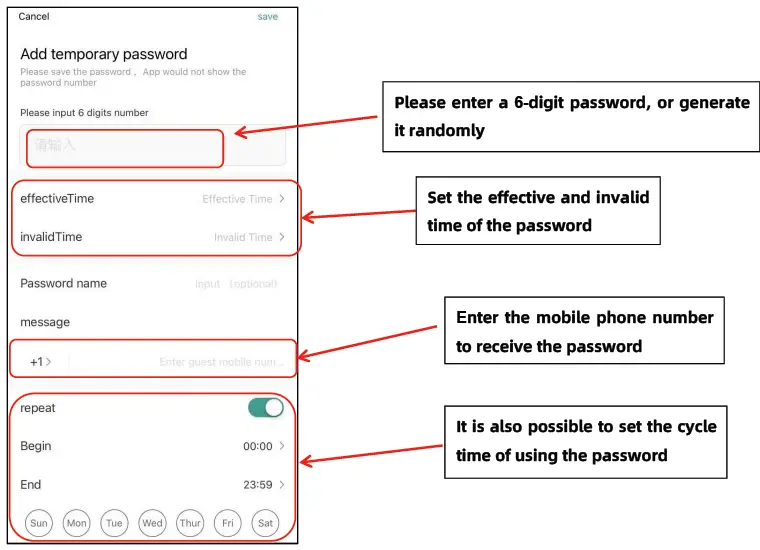
Add temporary password
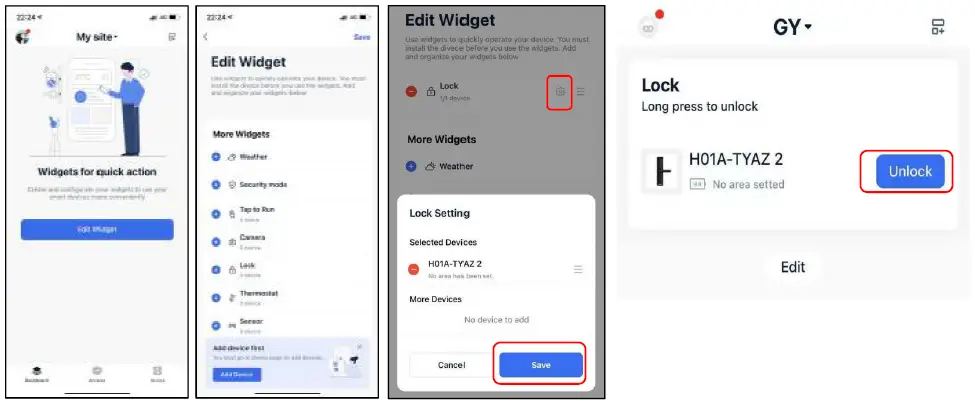
Dashboard
Edit widget
After entering the APP, you directly come to the workbench, where you can add and assemble the small components you need to build a custom application scenario. But before the widgets can play a role, you need to add the corresponding type of equipment. After the widget is successfully added, the specific devices and functions of the widget can be displayed in the workbench.
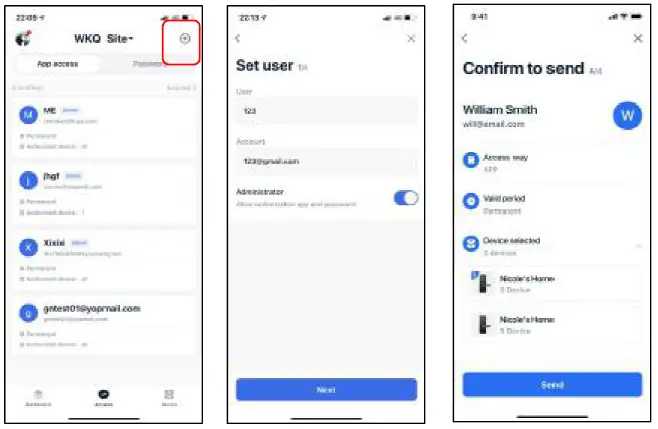
Access
APP access (passenger)
Add passers to this module, select the corresponding time range and pass equipment, and you can log in to the app to use the pass function.
 Password
Add a password, including a one-time password and a periodic password, for the user to use the password space in the corresponding time range 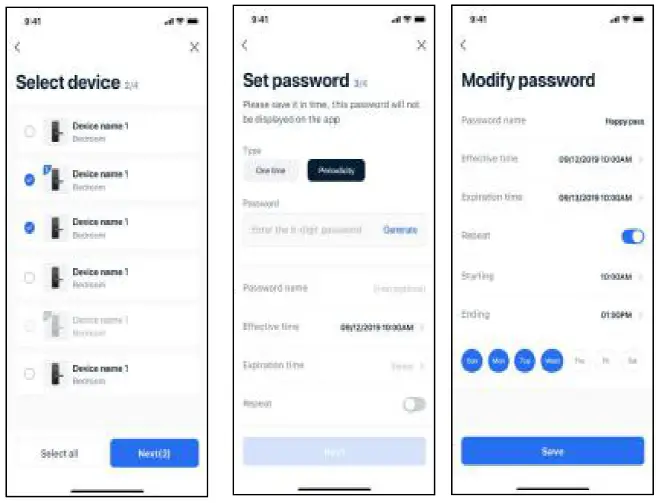
Guarantee
Customer Name:
Customer Calls :
Purchase Date :
Product Name :
Product Model :
Note:
- Please keep this card so that you can use it when you need warranty service.
- We provide you with a one-year warranty from the date of purchase.
- This warranty service is valid for customers in any country in the world.
This device complies with part 15 of the FCC Rules. Operation is subject to the following two conditions: (1) this device may not cause harmful interference, and (2) this device must accept any interference received, including interference that may cause undesired operation.
Any changes or modifications not expressly approved by the party responsible for compliance could void the user’s authority to operate the equipment.
NOTE: This equipment has been tested and found to comply with the limits for a Class B digital device, pursuant to Part 15 of the FCC Rules. These limits are designed to provide reasonable protection against harmful interference in a residential installation. This equipment generates, uses and can radiate radio frequency energy and, if not installed and used in accordance with the instructions, may cause harmful interference to radio communications. However, there is no guarantee that interference will not occur in a particular installation.
If this equipment does cause harmful interference to radio or television reception,
which can be determined by turning the equipment off and on, the user is encouraged to try to correct the interference by one or more of the following measures:
— Reorient or relocate the receiving antenna.
— Increase the separation between the equipment and receiver.
— Connect the equipment into an outlet on a circuit different
from that to which the receiver is connected.
— Consult the dealer or an experienced radio/TV technician for help.
The device has been evaluated to meet general RF exposure requirement. The device can be u sed in portable exposure condition without restriction
FCC ID: 2AY4QT01A-TYAZ


