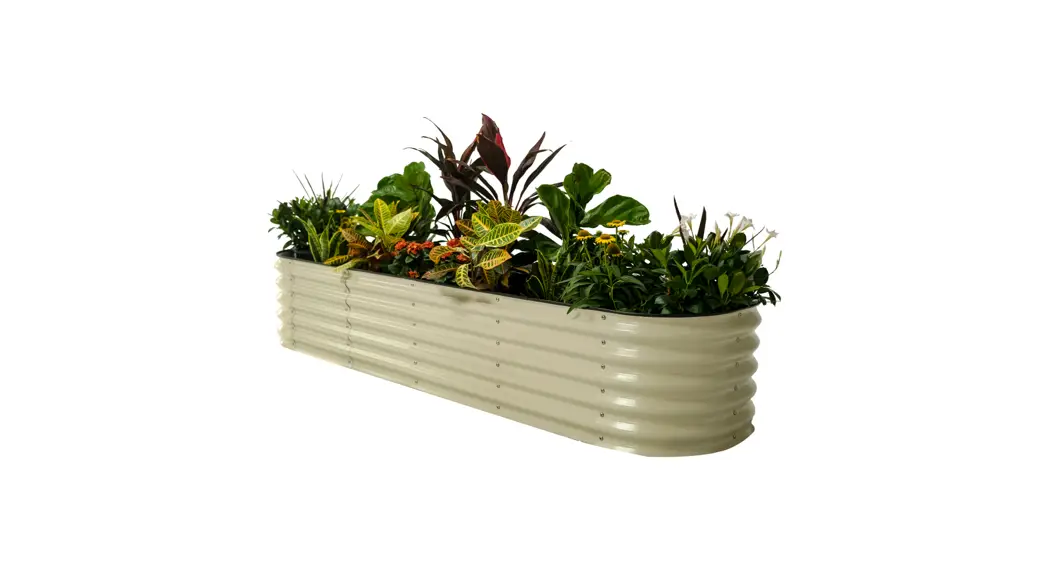
![]() 9-IN-1 MODULAR METAL RAISED BED
9-IN-1 MODULAR METAL RAISED BED
VB9N117BG 9 In 1 Modular Metal Raised Bed
 |  |
 Caution Please be aware that there are sharp edges in metal panels that may cause injury. The use of protective equipment such as gloves and closed-toe shoes is recommended.
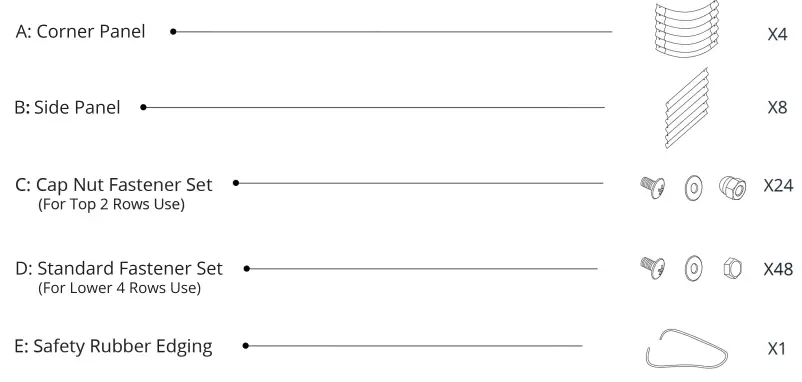
Packing List
![]() @vegogarden
@vegogarden![]() @vegojarden
@vegojarden
#vegogarden / #raisedbedgardening / #metalgardenbed 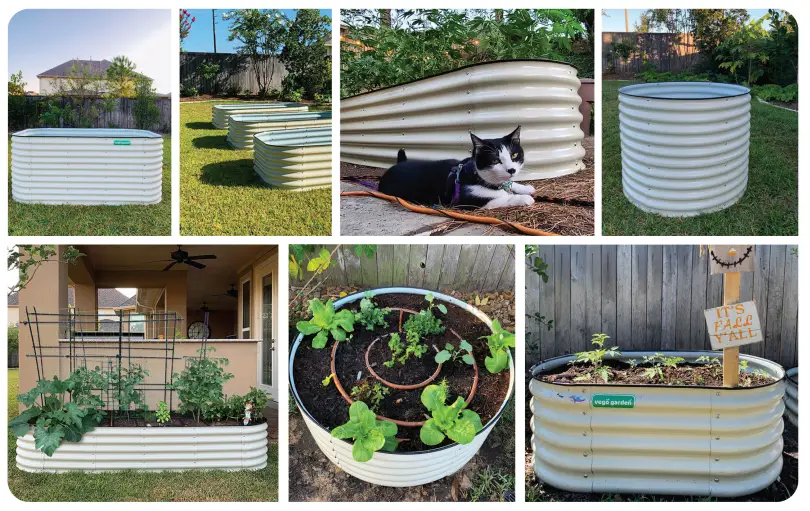
Assembly Guide
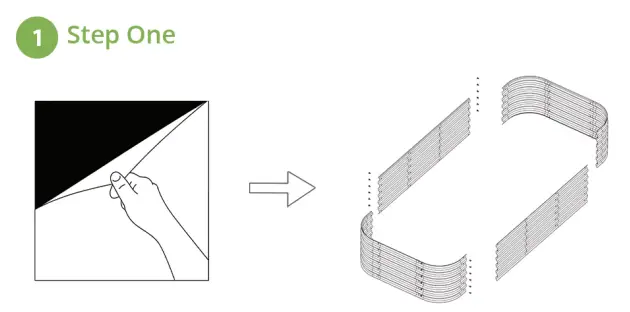 Remove protective films from all panels, and lay panels on a flat surface according to the chosen configuration. Remove protective films from all panels, and lay panels on a flat surface according to the chosen configuration. | 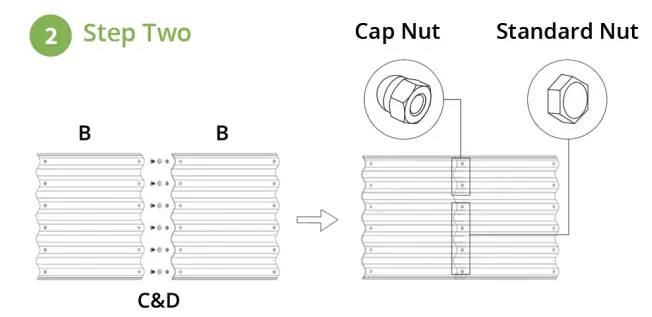 Cap nuts are used for the top two rows, standard nuts are used for the lower 4 rows. Assemble all straight panels: initially attach all bolts, washers, and nuts loosely, and then tighten up using the wrench tool (as supplied) with a screwdriver/cordless drill Cap nuts are used for the top two rows, standard nuts are used for the lower 4 rows. Assemble all straight panels: initially attach all bolts, washers, and nuts loosely, and then tighten up using the wrench tool (as supplied) with a screwdriver/cordless drill |
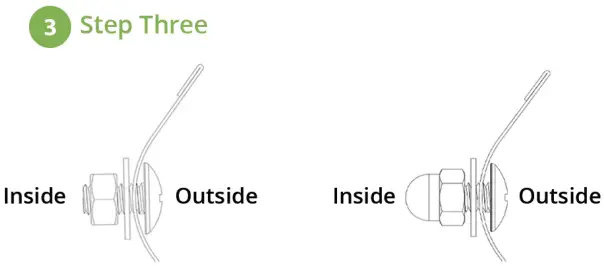 Make sure to tighten each nut and bolt for reinforcement of garden raised bed. Make sure to tighten each nut and bolt for reinforcement of garden raised bed. | 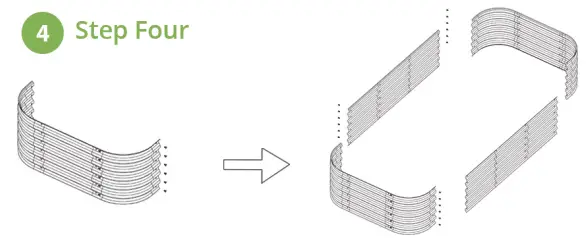 After straight panels are assembled, attach corner panels with straight panels using the same method. Make sure corner panels are attached outside of the straight panels. After straight panels are assembled, attach corner panels with straight panels using the same method. Make sure corner panels are attached outside of the straight panels. |
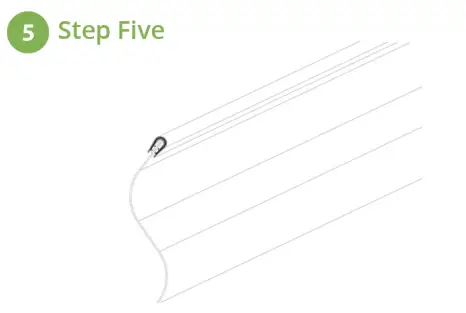 Push the safety rubber edging to the top rolled steel edge and cut the extra length oft. Make sure edging is attached securely. Push the safety rubber edging to the top rolled steel edge and cut the extra length oft. Make sure edging is attached securely. | 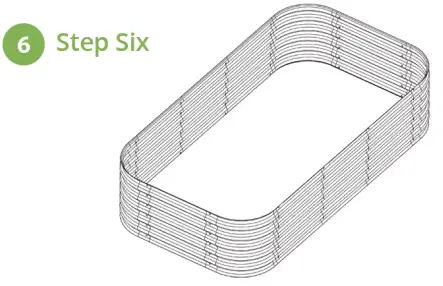 Congratulations on completing the assembly! We are sure there are more configurations that you can do with your great imagination! Congratulations on completing the assembly! We are sure there are more configurations that you can do with your great imagination! |
Configurations
With only one kit provided, Vego modular raised bed is able to assemble into 9 different configurations to fit any backyard space. From the classic 6’5″ x 3’5″ to the long 84 x 2′, or the jumbo square 5′ by 5′, you can always find one you like.
Note: Due to the manufacturing process raised bed sizing may vary +/- 2 inches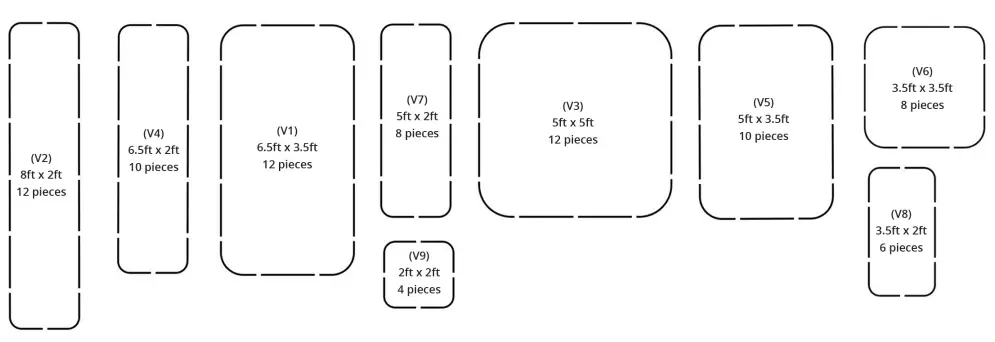
Dimensions
| Configuration | Length (ft) | Width (ft) | Height (in) | Cubic Fort | Cubic Yards |
| V1 | 7. | 4. | 17 | 32 | 1. |
| V2 | 8 | 2 | 17 | 22 | 0.8 |
| V3 | 5 | 17 | 35 | 1. | |
| V4 | 7. | 2 | 17 | 18 | 0.7 |
| VS | 5 | 4. | 17 | 25 | 0.9 |
| V6 | 4. | 4. | 17 | 17 | 0.6 |
| V/ | 5 | 2 | 17 | 14 | 0.5 |
| V8 | 4. | 17 | 10 | 0.4 | |
| V9 | 2 | 2 | 17 | 6 | 0.2 |
Contact Us

![]() +1(866) 597-1888
+1(866) 597-1888![]() [email protected]
[email protected]![]() www.vegogarden.com
www.vegogarden.com![]() Houston, TX 77032
Houston, TX 77032


