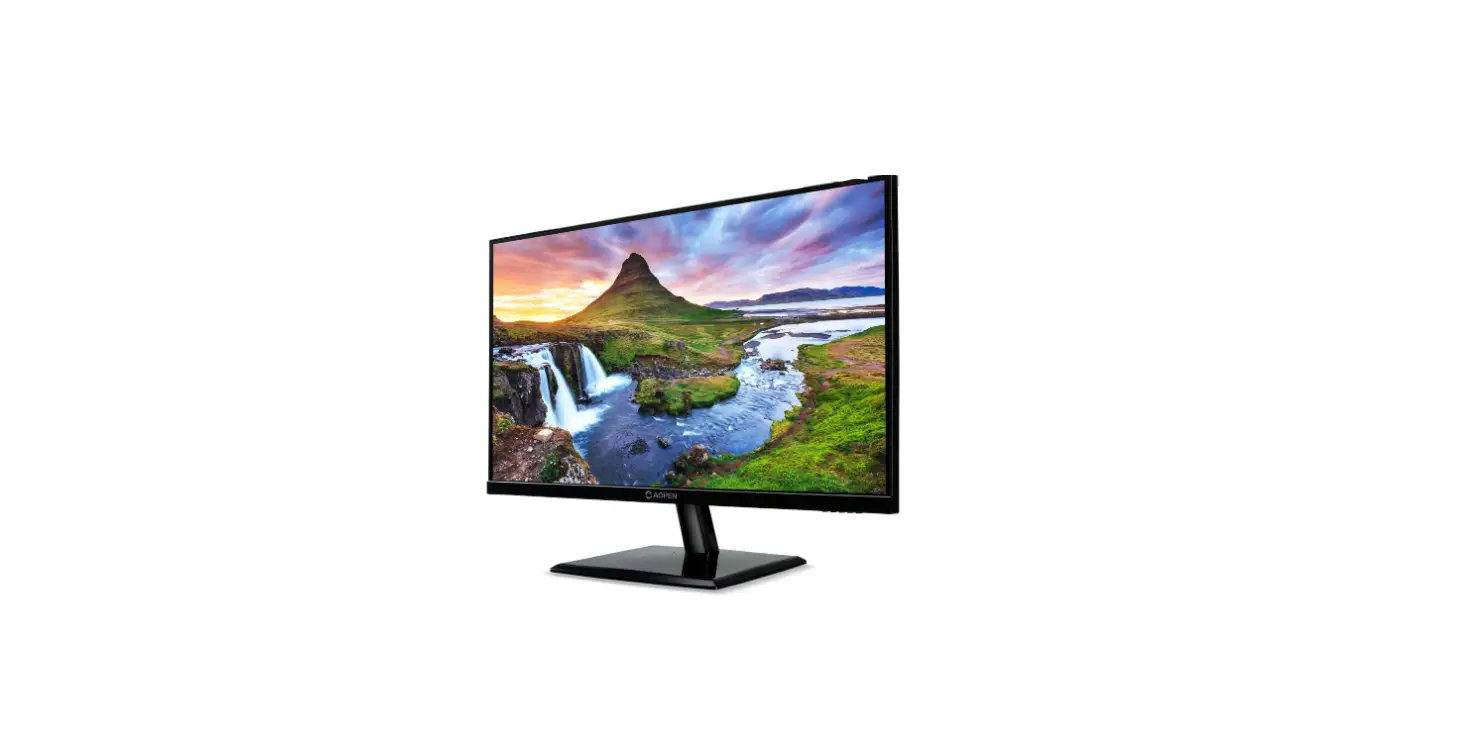
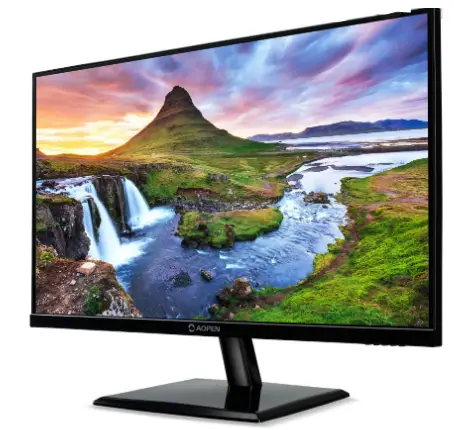
AOPEN 24CV1Y CV1 Series 23.8 Inch FHD Monitor
Important safety instructions
Please read the following instructions carefully.
- Cleaning the LCD monitor screen: First, make sure the power cord you are using meets the standards for your region.
- Turn off the LCD monitor and unplug the power cord.
- Spray a non-soluble cleaning solution onto a cloth and gently wipe the screen.
- Never spill any liquid directly onto or into the screen or its case.
- Do not use any ammonia- or alcohol-based cleaners on the LCD monitor screen or case.
- AOPEN is not responsible for damage caused by the use of any ammonia or alcohol-based cleaners.
- Do not place the LCD display near a window. Exposure to rain, moisture, or direct sunlight can cause serious damage to when the device.
- Do not press on the LCD screen. Excessively forceful pressing can cause permanent damage to the display.
- Do not remove the case or attempt to repair the machine by yourself. All maintenance tasks should be performed by an authorized technician.
- Store the LCD display in a room with a temperature between -20°C – 60°C (-4°F – 140°F). Permanent damage may result if the LCD display is stored outside of this range.
- If any of the following situations occur, unplug the monitor immediately and contact an authorized technician:
- The signal cable between the monitor and the computer is worn or damaged.
- Liquid spills onto the LCD display or the display is exposed to rain.
- The LCD monitor or case is damaged.
Attaching the monitor base
- Unpack the monitor base and place the base on a smooth work surface.
- Unpack the monitor.
- Attach the monitor stand arm to the base.
- Make sure the base snaps into the monitor stand arm. (Selected models only)
- Turn the white screw with the included tool or a suitable coin to secure the base to the stand arm (select models only)
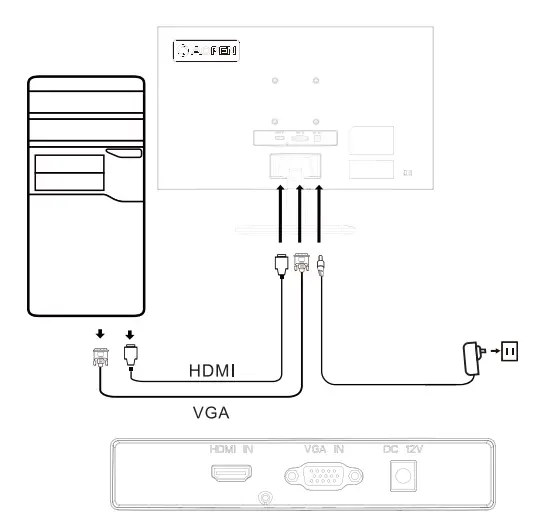
Connect the monitor to your computer
- Turn off your computer and unplug the power cord.
- Connecting a signal cable (VGA cable)
- a. Make sure the monitor and computer are powered off.
- b. Connect the signal cable to the computer’s graphics card port.
- Connecting a digital cable (Dual input models only)
- a. Make sure the monitor and computer are powered off.
- b. Connect one end of the HDMI cable to the back of the monitor and the other end to the HDMI port on your computer.
- Connect the audio cable (only Audio input model) (optional)
- Plug the power cord into the power port on the back of the monitor.
- Plug the power cords of your computer and monitor into a nearby electrical outlet.
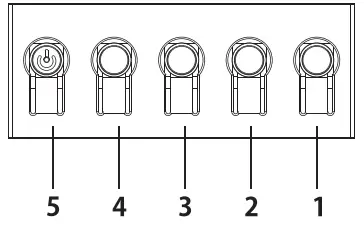
External control
| Number | Icon | Description |
| 1 | Go to the main menu. | |
| 2 | Enter the source mode. | |
| 3/4 | HotKey 1,2 buttons. Press to activate user defined hotkey function. | |
| 5 | In the powered-off state, pressing the button powers on the device; in the powered-on state, pressing the button normally enters the mode switching menu, and long-pressing for 3 seconds powers off the device. |
Regulatory and safety statements
FCC statement
This equipment has been tested and found to comply with the limits for a Class B digital device, pursuant to Part 15 of the FCC Rules. These limits are designed to provide reasonable protection against harmful interference when the equipment is installed in a residential area. This equipment generates, uses, and can radiate radio frequency energy, and if not installed and used in accordance with instructions, may cause interference to radio communications. However, there is no guarantee that interference will not occur in a specific installation. If the device does cause interference to radio or television reception (which can be determined by the switchgear), it is recommended that the user take one or more of the following measures to eliminate the interference:
- Readjust the direction or position of the receiver antenna.
- Increase the distance between the device and the receiver.
- Connect the device power to a power outlet that is different from the circuit to which the receiver is connected.
- Contact your retailer or an experienced radio/TV technician for help.
Note
To prevent damage to the monitor, do not lift the monitor using the stand.
Note: Shielded cable
All connections to other computing devices must be through shielded cables to comply with EMC regulations.
Note: Peripherals
Only certified peripherals (input/output devices, terminals, printers, etc.) that meet Class B limits should be connected to the device. Using uncertified peripherals may cause interference to radio and television reception.
Note
Any changes or modifications not expressly approved by the manufacturer could void the user’s authority to operate this product.
Operating conditions
This device complies with Part 15 of the FCC Rules. Operation is subject to the following two conditions: (1) this device may not cause harmful interference, and (2) this device must be able to accept any interference received, including interference that may cause undesired operation.
Note: Canadian users
This Class B digital device complies with Canadian ICES-003 specifications.
Abandonment of waste equipment for EU household users
This symbol on the product or on its packaging indicates that the product must not be disposed of with other household waste. When disposing of used devices, it is your responsibility to bring it to a collection point that recycles used electrical and electronic equipment. The separate collection and recycling of used devices at the time of disposal helps to conserve natural resources and ensures that they are recycled in a manner that protects human health and the environment. For more information about recycling points for used devices, please contact your local city office, household waste disposal service, or the shop where you purchased the product.
CE declaration of conformity
Hereby, AOPEN Smartview Inc., declares that this LCD monitor is in compliance with the essential requirements and other relevant provisions of EMC Directive 2014/30/EU, Low Voltage Directive 2014/35/EU, and RoHS Directive 2011/65/EU and Directive 2009/125/EC with regard to establishing a framework for the setting of ecodesign requirements for energy-related product. AOPEN monitor is purposed for video and visual display of information obtained from electronic devices.
SPECIFICATION
|
LCD Panel | Driving System | TFT Color LCD | |
| Size | 23.8”W (60 cm) | ||
| Pixel Pitch | 0.275 mm (H) x 0.275 mm (V) | ||
| Brightness | 250 cd/m2 (Typical) | ||
| Contrast | 100000000:1 Max (ACM) | ||
| Viewable Angle | 178° (H) 178° (V) (CR=10) | ||
| Response Time | 5 ms (G to G) | ||
| Panel Type | VA | ||
| H-Frequency | VGA: 31.469 – 83.894 kHz HDMI: 31.469 – 83.894 kHz | ||
| V-Frequency | VGA: 48 – 75 Hz HDMI: 48 – 75 Hz | ||
| Display Colors | 16.7M Colors | ||
| Dot Clock | VGA: 174.5 MHz HDMI: 174.5 MHz | ||
| Maximum Resolution | HDMI: 1920×1080 @ 75 Hz VGA: 1920×1080 @ 75 Hz | ||
| Plug & Play | VESA DDCCI/DDC2B | ||
| Power Consumption | On Mode | 20 W (Typical) | |
| Sleep mode | 0.4 W (Typical) | ||
| Off Mode | 0.3 W (Typical) | ||
| Input Connector | D-Sub HDMI (Only HDMI-Input Model) | ||
| Input Video Signal | Analog: 0.7 Vp-p (standard), 75 OHM, Positive HDMI (Only HDMI-Input Model) (Optional) | ||
| Speakers | 2 W x 2 (Only Audio-Input Model) (Optional) | ||
| Maximum Screen Size | Horizontal: 527 mm Vertical: 296 mm | ||
| Power Source | INPUT: 100 – 240 V, 50/60 Hz | ||
| Environmental Considerations | Operating Temp: 0° to 40°C Storage Temp: -20° to 60°C Operating Humidity: 20% to 80% | ||
| Dimensions | 551.4 (W) x 392.6 (H) x 180.5 (D) mm | ||
| Weight (N. W.) | 2.9 kg (net) | ||
|
Mechanism Specifications | Tilt: -5° to +20° Swivel: No Height adjustment: No Pivot: No Detachable foot stand: Yes | ||
|
External Controls | Switch/Buttons | Power Button Hotkey 1 Hotkey 2 | Hotkey 3 Hotkey 4 |
|
Functions | Brightness Contrast Blue Light Black Boost ACM Auto Config H. Position V. Position Focus Clock Gamma Color Temp. Modes sRGB Mode Grayscale Mode 6-axis Hue 6-axis Saturate Over Drive | FreeSync Refresh Rate Num Language OSD Timeout Transparency OSD Lock Input Auto Source Wide Mode Hot Key Assignment DDC/CI HDMI Black Level Quick Start Mode Information Reset All Settings | |
| Specifications vary depending on model and/or region. | |||
Declaration of Conformity
We,
AOPEN Smartview Incorporated
7F.-5, NO. 369, FUXING N. RD., SONGSHAN DIST., TAIPEI CITY 10541, Taiwan
And,
Acer Italy s.r.l
Viale delle Industrie 1/A, 20020 Arese (MI), Italy Tel: +39-02-939-921 ,Fax: +39-02 9399-2913 www.acer.it
- Product: LCD Monitor
- Trade Name: AOPEN
- Model Number: 24CV1Y
- SKU Number: 24CV1Y xxXXXX; (“x”=0-9, a ~ z, A ~Z, or blank)
We, AOPEN Smartview Incorporated, hereby declare under our sole responsibility that the product described above is in conformity with the relevant Union harmonization legislation as below Directive and the following harmonized standards and/or other relevant standards have been applied:
Federal Communications Commission Declaration of Conformity
This device complies with Part 15 of the FCC Rules. Operation is subject to the following two conditions: (1) this device may not cause harmful interference, and (2) this device must accept any interference received, including interference that may cause undesired operation.
The following local Manufacturer /Importer is responsible for this declaration:
- Product: LCD Monitor
- Brand: AOPEN
- Model Number: 24CV1Y
- SKU Number: 24CV1Y xxxxxx (“x” = 0~9, a ~ z, A ~ Z or Blank)
- Name of Responsible Party: Acer America Corporation
- Address of Responsible Party: 333 West San Carlos St. Suite 1500 San Jose, CA 95110 U. S. A.
- Contact Person: Acer Representative
- Phone No: 254-298-4000
- Fax No: 254-298-4147


