![]()
LUXOR®
QUICK START GUIDE
The Luxor lighting controller manages groups of lights and light intensity at desired times. Two-wire connections power and communicate with all lights in a system.
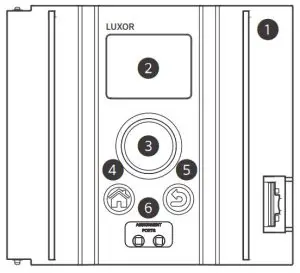
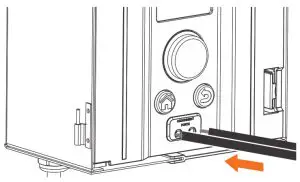
| 1. Facepack 2. LCD screen 3. Clickable scroll wheel | 4. Home button 5. Back button 6. Fixture assignment ports |
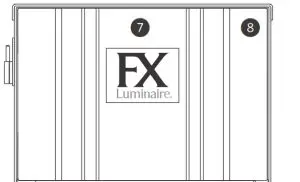
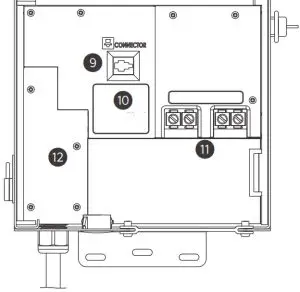
| 7. Core cover 8. Chassis 9. Facepack connection | 10. Chassis LED 11. Terminal blocks 12. Fuse cover |
Fixture Assignment
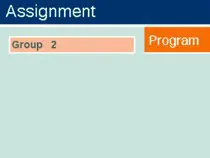
- Enter assignment mode by inserting stripped wire leads into the assignment ports on the front of the Luxor controller facepack.

- Select your desired group and press Program. If assignment fails, press Program again.

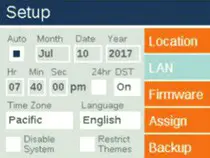
Controller Setup
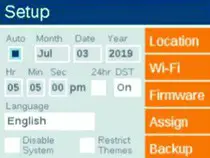
- Select Setup from the Home screen.
- Enter the current Month, Day, Year, and Time (Hour, Minutes, Seconds). Then select Auto.
- Select your desired Language.
Location Setup
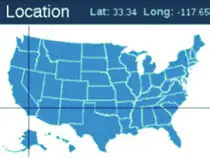
- Select your Location from the Setup screen.
- Select your Region.*
- Manually enter or select your Map.
- Use the scroll wheel to navigate to the desired location and toggle between up/down and left/right.
*The time zone and longitude/latitude will automatically change with your selected region.

Wireless Control
Wireless Control Options:
Option A LAN connection
Option B Wi-Fi module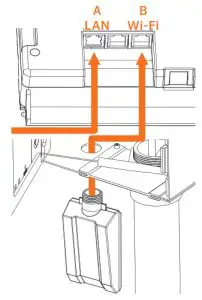 A. LAN Connection
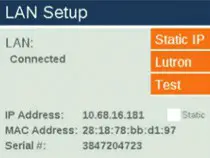
- Install a network cable into the LAN connector located on the back side of the Luxor facepack.
- Select Setup from the Home screen.
- Select LAN.
- Confirm the LAN field displays “Connected.”
Need help connecting?
Download the free Hunter Wi-Fi Wizard app. https://hunter.info/WifiWizardApp
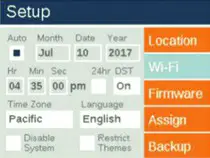
B. Wi-Fi Module
- Install the WIFIMOD2 or WIFIMOD2RMT into the Wi-Fi connector on the back side of the Luxor facepack.
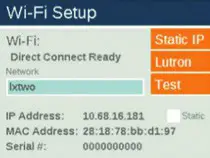
- Select Setup from the Home screen.
- Select Wi-Fi.
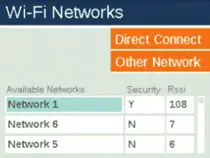
- Scroll to the Network field and press the scroll wheel.
- Select your desired network from the list of available networks.
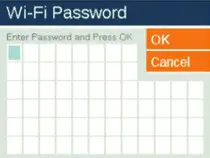
- If necessary, enter your network password and press OK.
- Confirm the Wi-Fi field displays “Connected.”
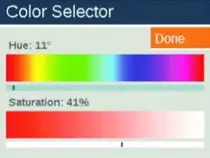
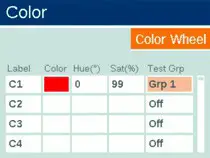
Colors
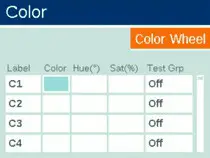
- Select Color from the Home screen.
- Scroll to your desired color label (C1C250).
- Scroll to the Color field. Press the scroll wheel to enter the color on the Color Selector screen.
- Scroll to the Test Grp field and select your desired group to test the color.
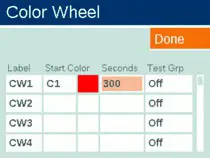
Color Wheel
- Select Color Wheel from the Color screen.
- Scroll to your desired Color Wheel label (CW1CW10).
- Select Start Color. Any color (C1C250) can be used as a starting color.
- Set your desired time interval (5 seconds to 300 seconds) for your Color Wheel cycle. The shorter the duration, the faster the cycle.
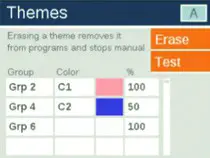
Themes
- Select Theme from the Home screen.
- Select your desired theme letter (AAN).
- Enter your desired Group(s), Color, and Intensities.
- Press Test to temporarily turn on the desired Theme.
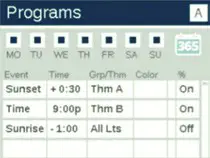
Programs
- Select Program from the Home screen.
- Select your desired Program (AG).
- Enter your desired event type (Sunset, Sunrise, or Time) in the Event field.
- Enter the time you want the event to occur in the Time field.
- Enter the Group or Theme that you want to be activated during the event.
- For Groups, select the Color (if applicable).
- Enter your desired intensity in the % field.
Group events can be 1%100%. Themes can be ON/OFF.Best practice: To ensure all lights are turned off, set the last event in the Grp/Thm field to “ALL LIGHTS” and set the % field to OFF.
 Best practice: To ensure all lights are turned off, set the last event in the Grp/Thm field to “ALL LIGHTS” and set the % field to OFF.
Apple and the Apple logo are trademarks of Apple Inc., registered in the U.S. and other countries. App Store is a service mark of Apple Inc. Google, the Google logo, and Google Play are trademarks of Google LLC.
LANDSCAPE & ARCHITECTURAL LIGHTING | Visit fxl.com
![]() FX-244-RevA QSG 1/21
FX-244-RevA QSG 1/21


