![]()
![]()
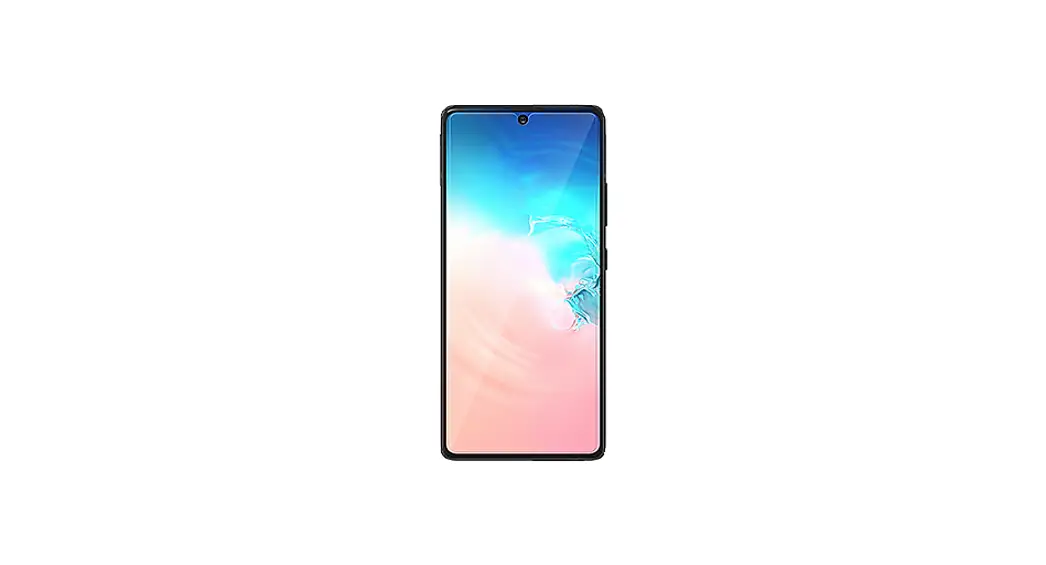
Installation Guide
ULTRA
amFilm S21U UV glass screen protector
Q&A
Q: I got an air bubble during installation. What now?
A: If the Screen Protector Is already on the phone with the adhesive spread, you will need a replacement Protector. Cure the Protector with the UV light, then remove it and discard it. Please send us an email for a free replacement.
Q: The Gel didn’t spread evenly during the application, and it’s been more than 3 minutes. What do I do?
A: Tilt the phone in the direction that the Gel needs to go. DO NOT TOUCH THE PROTECTOR.
Q: How do I reset my fingerprint after installing the screen protector?
A: Navigate: Settings > Lock screen > Looking for something else? > Fingerprints > Add Fingerprint
Q: How do I remove the Screen Protector?
A: Once the UV gel is cured, it becomes o solid adhesive gel. You can peel the screen protector off, starting with one corner and carefully lifting it up.
Q: The adhesive comes out of the tube, but a small amount splashed into its own puddle.
A: Tilt the phone so the larger pool will absorb the smaller one, and then tilt so the adhesive will return to the center. Or, use the adhesive tube to drag the small puddle into the larger one.
| Damaged or Arrived Broken? Try our 1-Click Warranty Claim Go to TechMatte.com/WarrantvClaim | Want More Coverage? Unlock our Lifetime Warranty Go to TerhMatte.com/Register 0R | 0R Scan the QR Code Below. |
 |  |  |
| http://www.techmatte.com/WarrantyClaim | http://www.techmatte.com/Register | www.TechMatte.com/install/UV3 |
| 1 Turn off your device and apply the leveling pads to the back of your phone. These will keep the phone from sliding. | 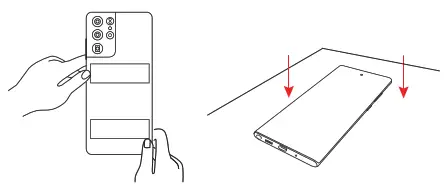 |
| 2 Clean the screen with wet wipes, a cleaning cloth, and dust removal stickers | 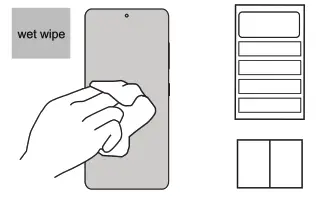 |
| 3 Use the Screen-Prep cloth to wipe the surface of the device screen a few times. Then use the cleaning cloth to clean the screen ac This will help to prevent the bubbles during application. | 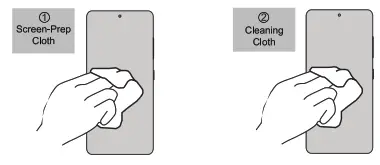 |
| 4 Place the application tray on your phone. Make sure to align the side labeled “top” with the top of the phone. Press firmly into place. Then insert the pins on each end of the application hay. | 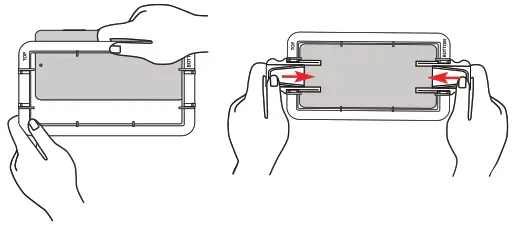 |
| 5 Make sure the phone is 100% level by using the included bubble level. Set it in the middle of the phone’s screen. The bubbles will be centered when the surface is fiat. |  |
| 6 Place absorption pads in the side slots located on the long edges of the application tray. Re-clean the screen using dust removal stickers if needed. | 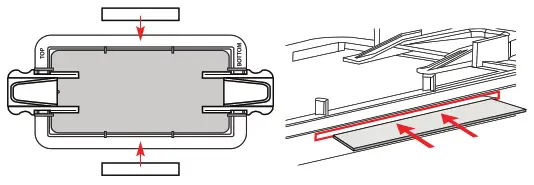 |
| Unscrew the RED cap of the first adhesive tube. Hold the tube. over the left set of pegs on the application tray with the opened end facing down. Unscrewing the black cap will release the adhesive in the tube. | 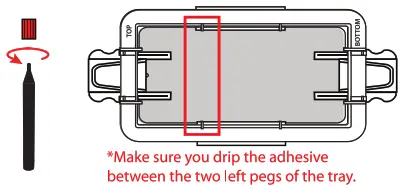 |
| 8 Drip all the adhesive onto the left side of the screen. Repeat step 7 with the second adhesive tube. Apply the adhesive to the right side of the phone screen, aligning the tube with the pegs. | 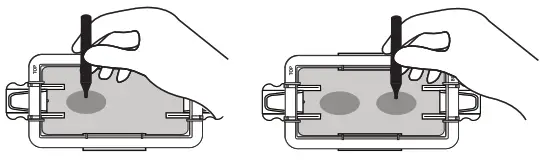 |
| 9 Peel off the mask film of the screen protector, and set it within the tray, resting it on the pins on either edge of the phone. Make sure the camera cutout is aligned with the top of the phone, where the device’s front-facing camera is located. | 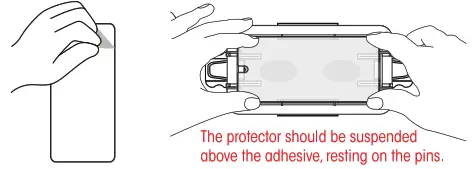 |
| 10 SLOWLY pull both pins outward to allow the protector to lower onto the adhesive. Once the protector touches BOTH adhesive puddles, pull the pins out the rest of the way AT THE SAME TIME. | 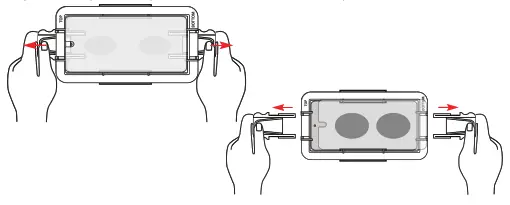 |
| 11 The adhesive will begin spreading on its own. While it is spreading, place the metal cylinder on the fingerprint scanner sticker. | 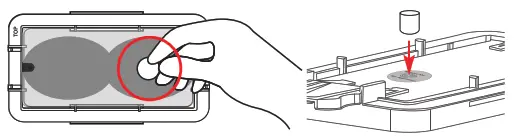 |
| 12 Wait for the adhesive to fully spread to all edges of the phone. DO NOT TOUCH the screen protector during this time | 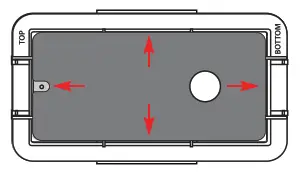 |
| 13 Plug in the UV light with your USBC cable and turn it on. Place the UV light over the tray and device. Cure for about 45 seconds. | 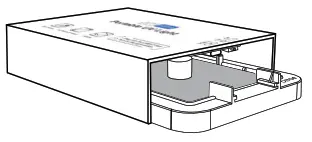 |
| 14 Remove the installation tray, metal cylinder, and scanner sticker. | 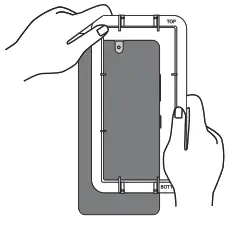 |
| 15 Use the UV light again to cure for about 60 seconds. | 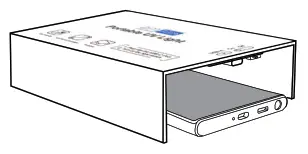 |
| 16 Rescan your fingerprints into the phone system if needed, and enjoy the screen protector! | 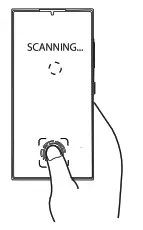 |
24/7 Customer Support![]() [email protected]
[email protected]
www.techmatth.com
STAY CONNECTED