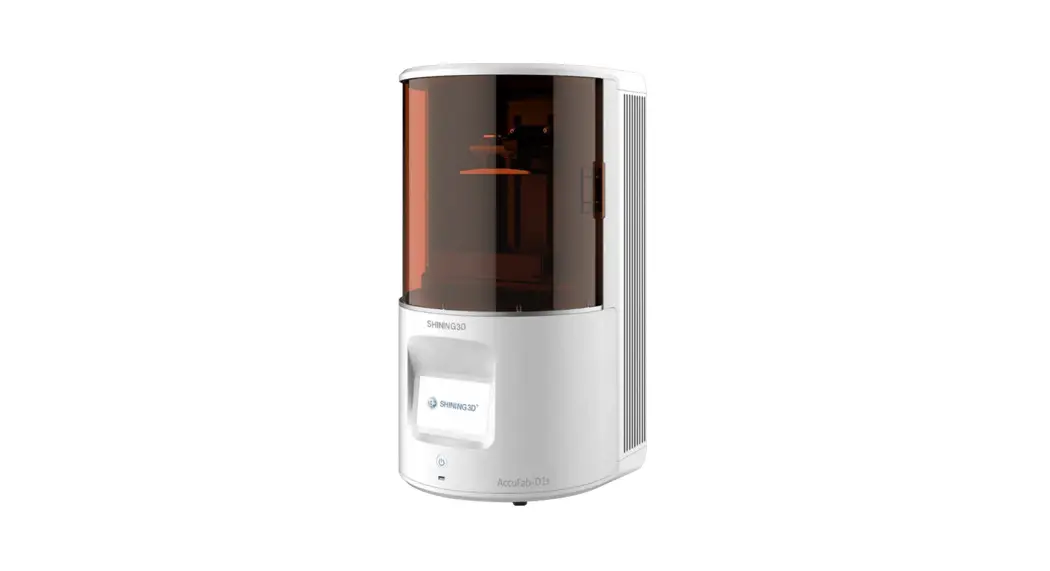
![]() 3D Printer AccuFab-D1sGo
3D Printer AccuFab-D1sGo
Digital With SHINING 3D Quick Start Guide
Installation Procedure
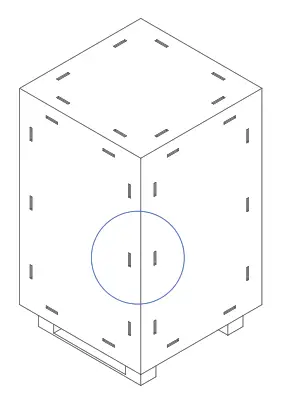
STEP 1 Unpacking
- Remove steel clasps on the wooden case to open it. Cut the straps and open the inner box.

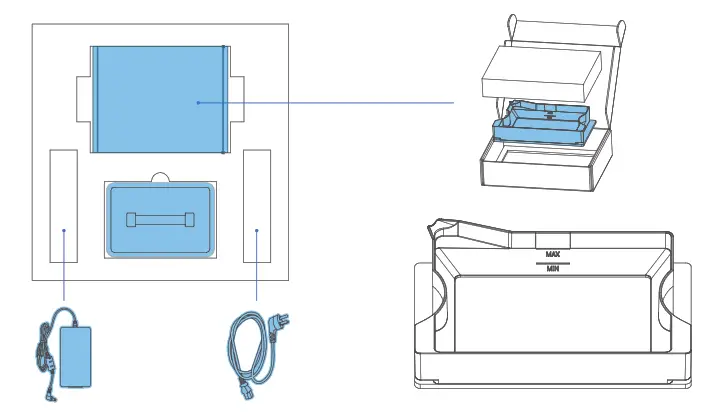
- Open the cover, take out the accessory box, resin tank x 2, power adaptor and power cable from fixing foam. Take out resin tanks and remove the protective films.

- Take out the printer and remove the PE bag. Open the chamber door, and take out the fixed foam1 &2 .

- Take out build platform 3 in the fixed foam 1.


STEP 2 Boot Printer
Plug in the power adaptor and connect it with the power cable. Press the power button 4 in the back, then press the power button 5 in the front.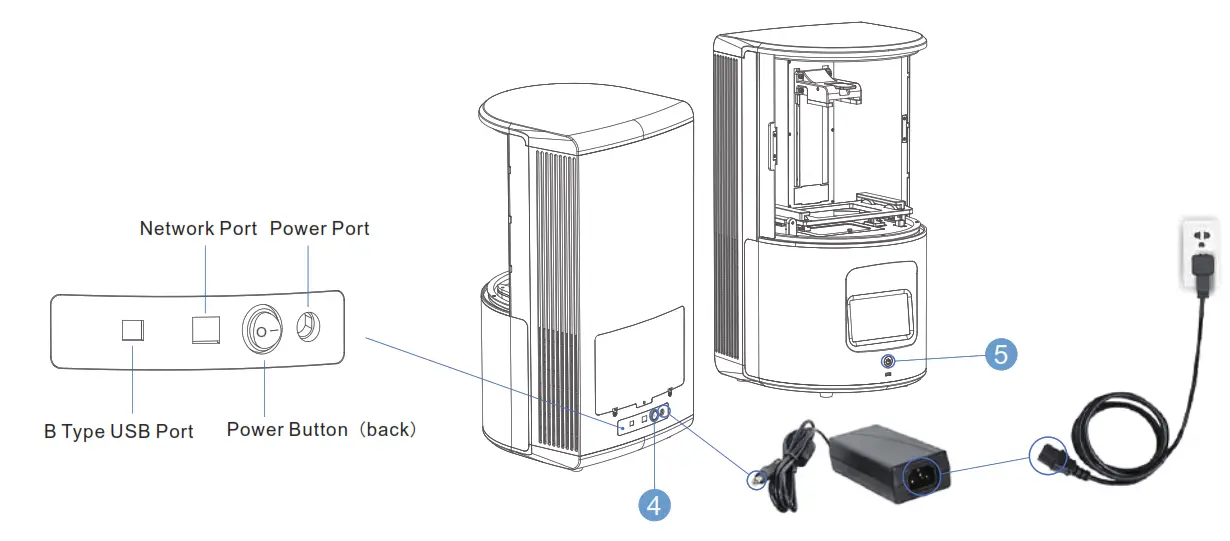
STEP 3 Install the Printer
The build platform bracket will move up automatically after booting the printer. It is time to install the resin tank and the build platform.
Install the resin tank Remove the protective film on the protection glass. Inset the resin tank into the card slot and push it to the end in the direction indicated in the
figure. When the edges of the resin tank are inside at right angles, it means the resin tank is placed appropriately.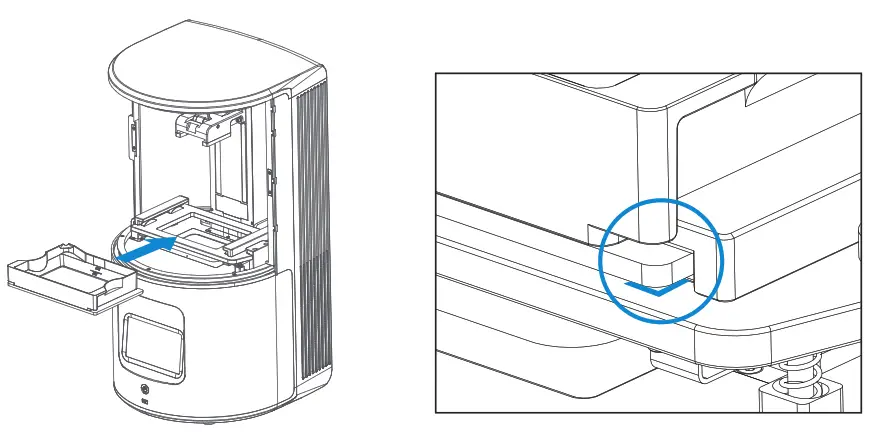
Install the build platform
Remove the protective film on the build platform. Open the handle and insert the build platform into the bracket in the direction indicated in the figure. Close the handle and lock the platform.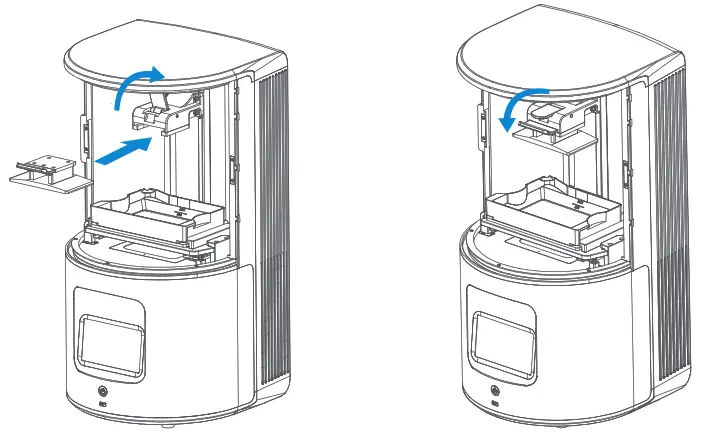
STEP 4 Add Material
Shake for 2 mins before pouring material into the resin tank to avoid sediment.
Note that the resin level should be between the indicator lines of minimum and maximum.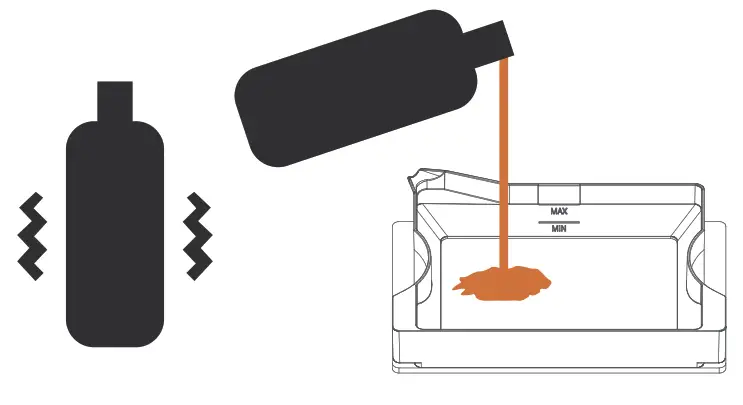
Note: You can also add resin during printing without pausing.
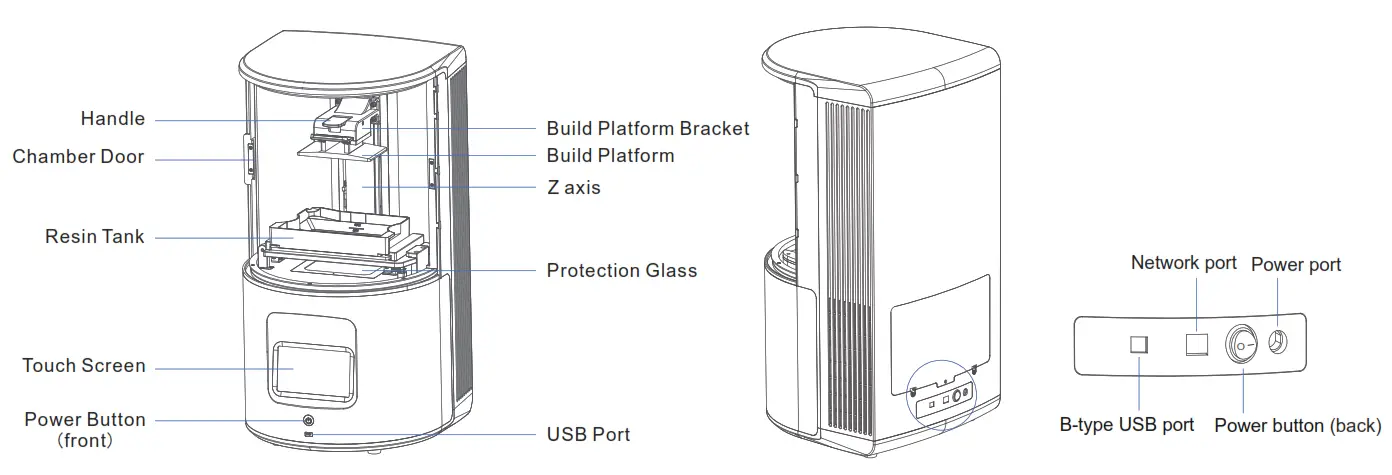
Product Preview
Part List.
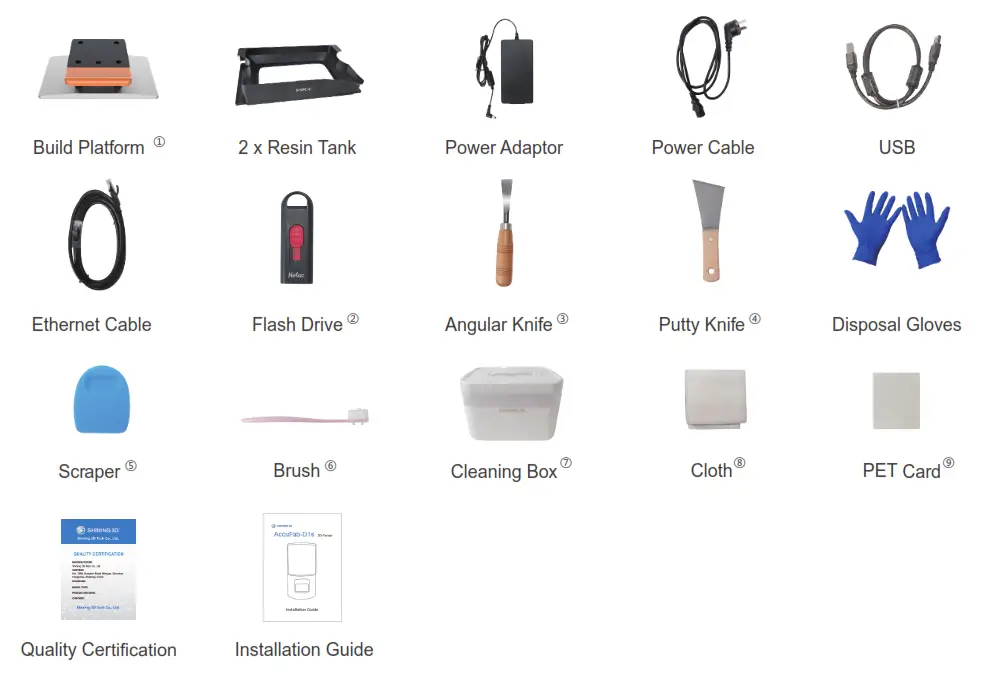
- Build Platform: Due to the test printing in the factory, the surface may have a few scratches, which will not affect regular use.
- Flash Drive: Flash drive contains Installer of AccuWare, Printer profile “*.sndev” , Activation file (.ac), User Manual, Quick Start Guide and “Factory test reports”.
- Angular Knife: Used to remove models from the platform after printing is finished.
- Putty Knife: Used to remove models from the platform after printing is finished.
- Scraper: Used to stir resin in the tank to avoid sediment.
- Brush: Used to clean extra resin on the model.
- Cleaning Box: Used to store parts or alcohol.
- Cloth: Used to clean optical path including projector lens, protection glass, and resin tank glass.
- PET Card: Used to level the platform and remove the cured layer
First Print
STEP 1 Installation of Software
Insert the flash drive that came with the printer into the PC, Copy the installation file to the PC. “AccuWare_3.1.X.XXX_release_install.exe” And run it. Install the software following the installation wizard. Click Finish to finish and run the software.
Note: DO NOT run the installation file from the flash drive.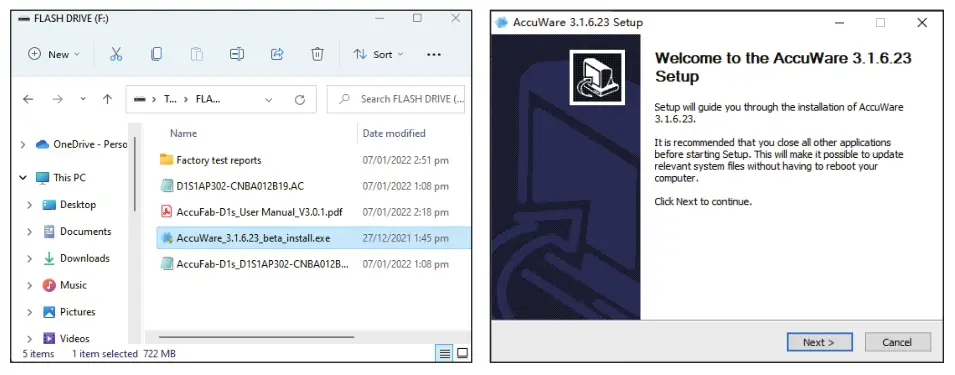 STEP 3 Import Printer Profile
Open the AccuWare software, and click “Settings” at the top right corner. Choose “Import printer profile”and “From Local”. Locate the data file (AccuFab-D1s_XXXX-XXXXX.sndev) and click. Click “Confirm” to finish.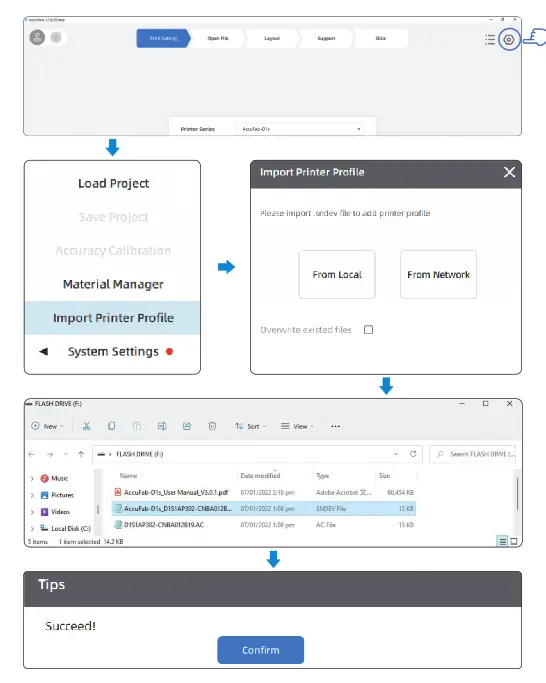
STEP 4 Update Material Profile
Click “Settings” on the top-right. Click “system setting-update check-update” to finish the update. 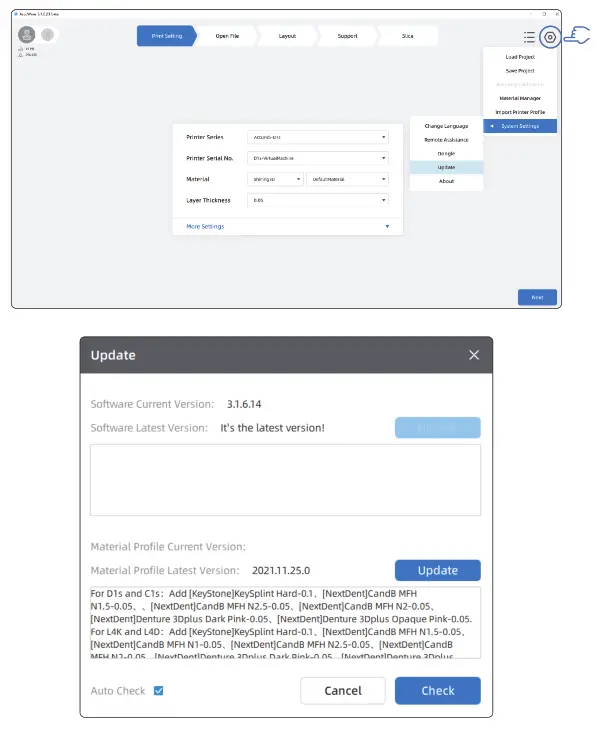
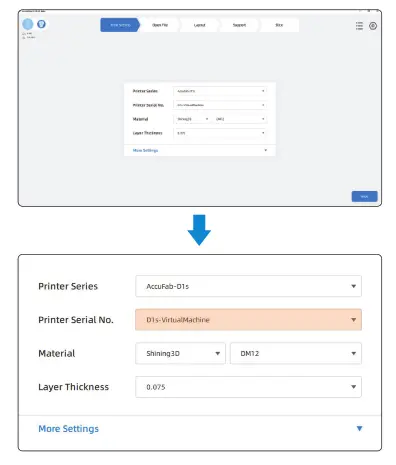
STEP 5 Data Preparation
- Make sure Printer Series(AccuFab-D1s), Printer Serial No.(same as the serial number on the printer label), material and layer thickness are correct and click “Next”.
 Note: When virtual machine is selected, The sliced file can’t be used for printing
 - Click “folder” on the left. Select the STL file for printing and click “Next”.

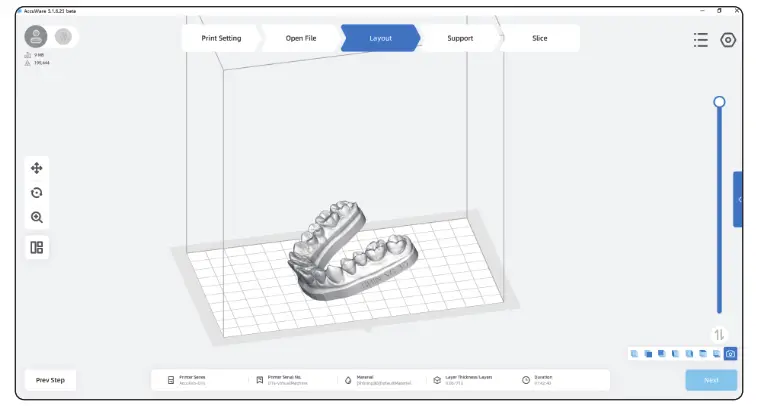
- In the “Layout” scene. The model can be manipulated by position, angle, size and quantity. For more detail operations, please check <AccuFab-D1s User Manual> for
detailed information. After the layout procedure is done, click “Next”.
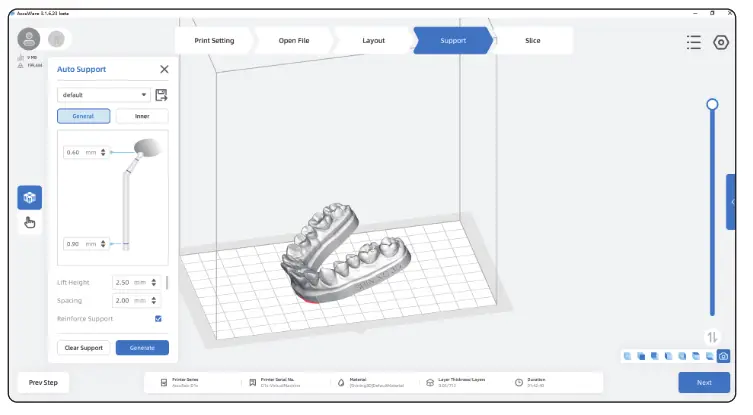
Click “Auto Support” to generate support automatically. Please check <AccuFabD1s User Manual> for detailed information if manually add/delete is needed. Click “Next”.

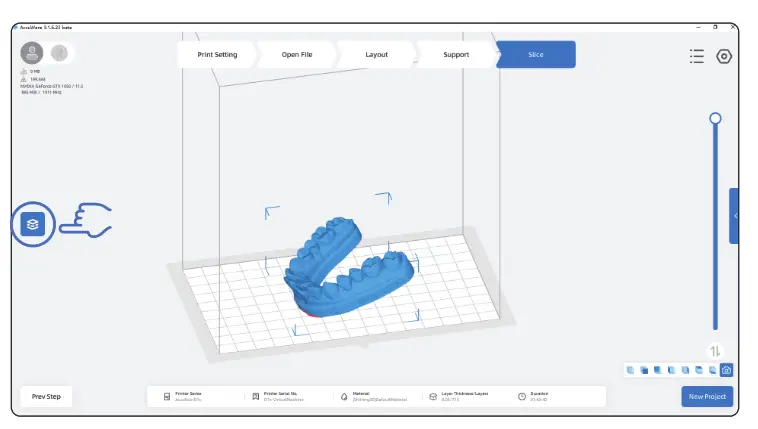
- Click “Slice” and save the “.slp3” file to a flash drive.

 Note: When virtual machine is selected, The sliced file can’t be used for printing
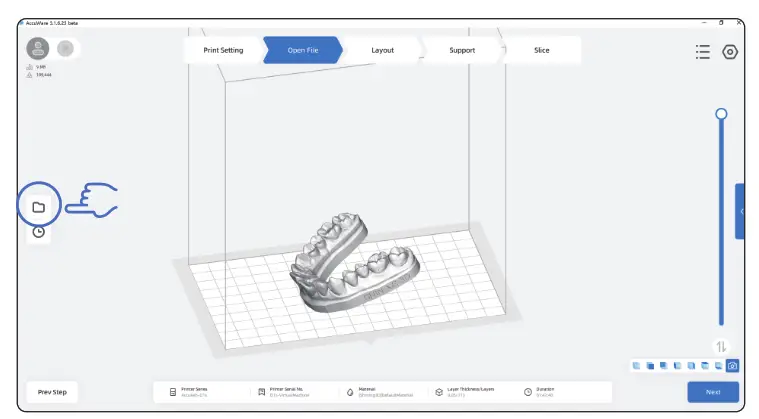
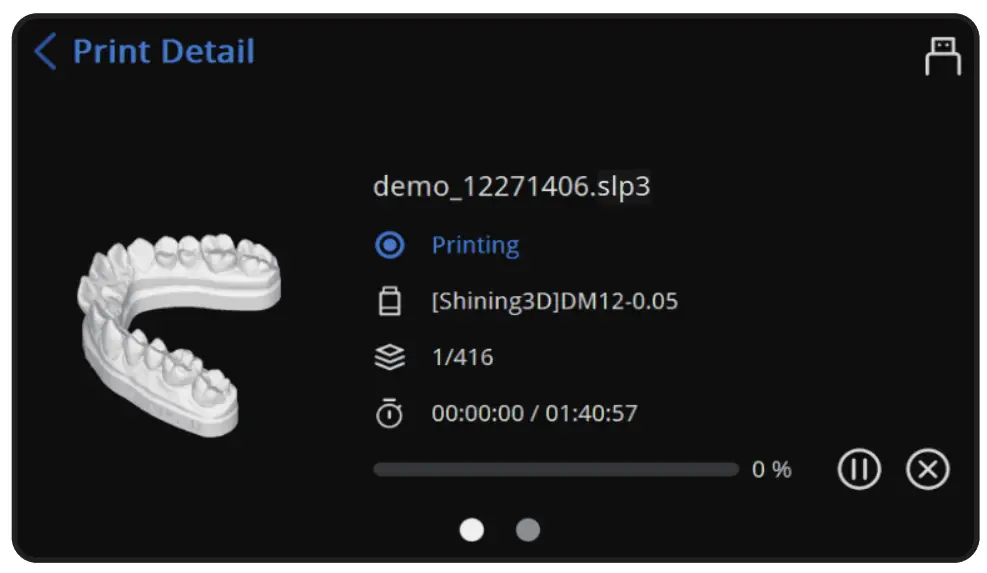
STEP 6 Print
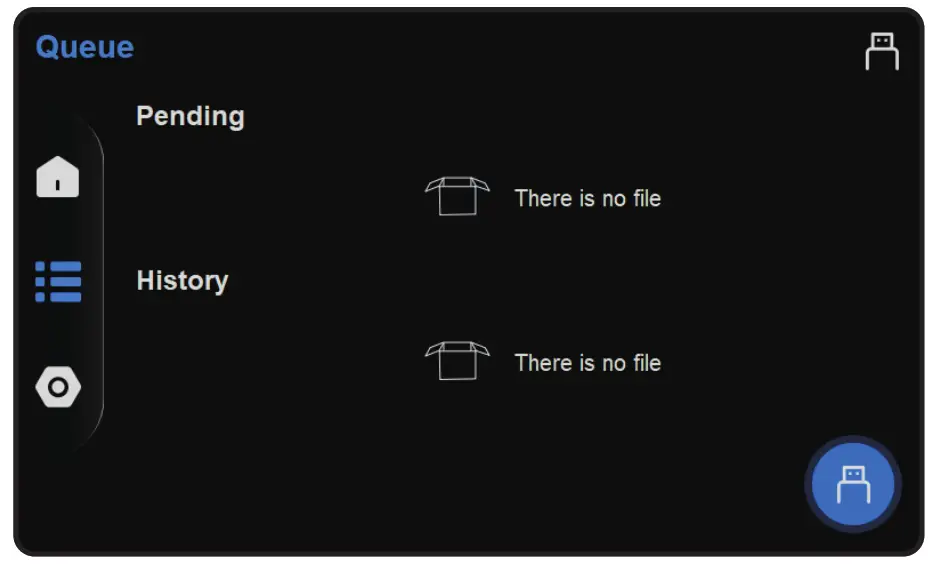
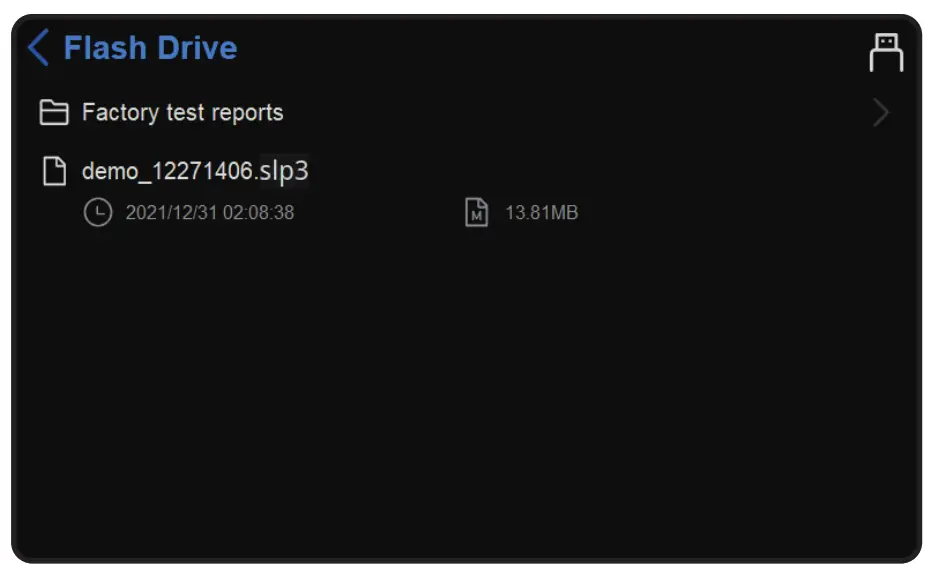
- Insert the flash drive. On FabWare’s main interface, tap “Queue”. And then tap the Flash drive button on the down-right.

- Click to choose the model to be printed in the flash drive file list.

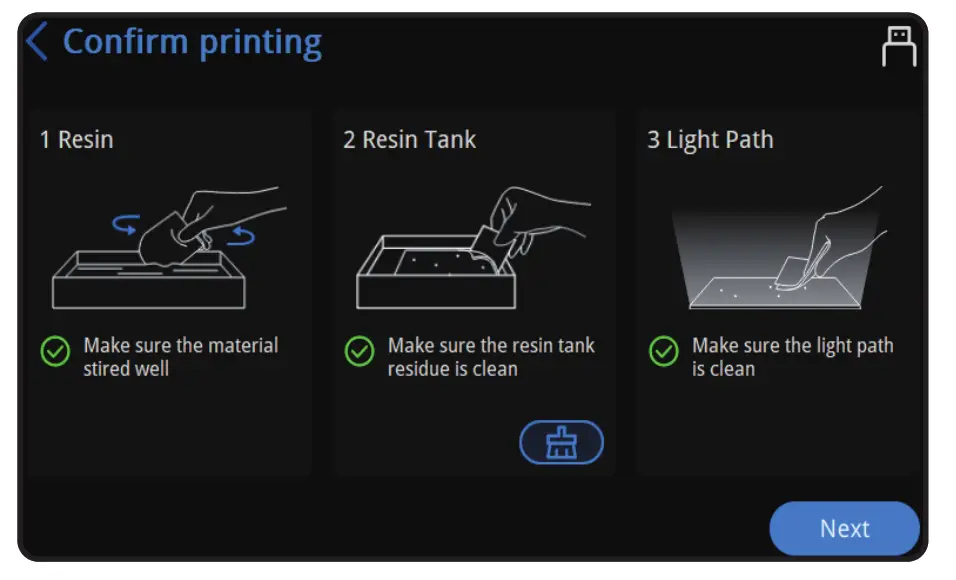
- Confirm printing (1.Resin 2.ResinTank 3.Light Path) ,and then click “Next”.

- Close the chamber door and tap next to start printing.

Note: If you find the software expired, please active the license according to the <AccuFab-D1s User Manual>.
STEP 7 Post-processing
After finishing the print, take down the build platform and remove the model. Clean, dry, and cure the model. For more details about postprocessing, please check <AccuFab-D1s User Manual>.
 http://support.shining3ddental.com/en/support/solutions
Document Download Center: https://www.shining3d.com/download-center/
Support Center: https://support.shining3ddental.com/en/support/solution
Aftersales service: -Create support ticket —-Check ticket status
Technical resource: – FAQs ‘Basic Tutorials -Useful tips. -Webinars
| APAC HEADQUARTERS SHINING 3D Tech.Co.,Ltd. P: +#86-571-82999050 No.1398 Xiangbin Road, Wenyan, Xiaoshan, Hangzhou, China, 311258 | AMERICAS REGION SHINING 3D Technology Inc. P: +1415 259 4787 1740 César Chavez St. Unit D. San Francisco, CA 94124, United States | EMEA REGION SHINING 3D Technology GmbH P: +49-711 28444089 BreitwiesenstraBe 28, 70565 Stuttgart, Germany |


