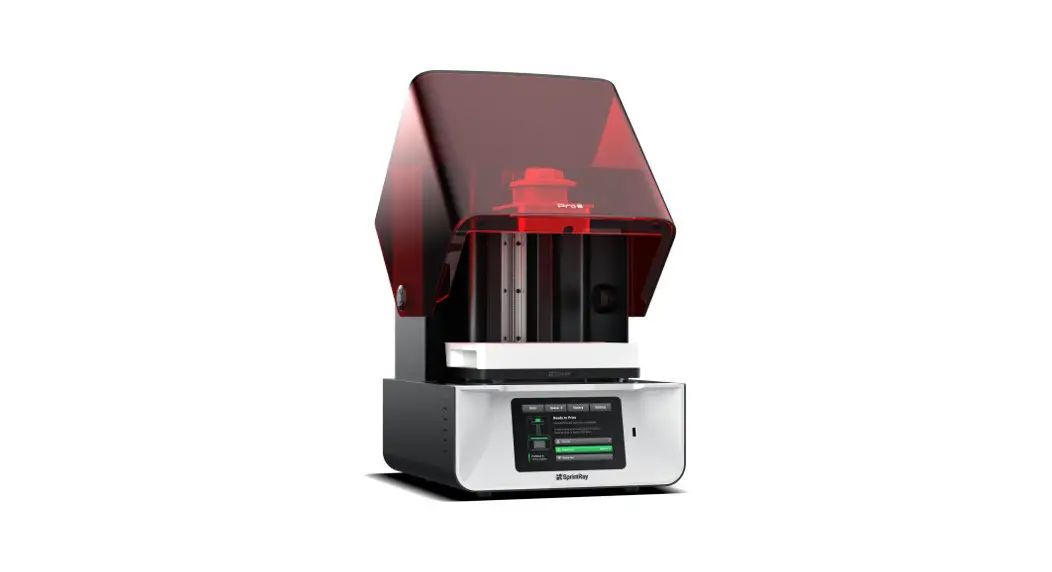
![]() Pro S Desktop 3D Printer Designed for Digital Dentistry
Pro S Desktop 3D Printer Designed for Digital Dentistry
User Guide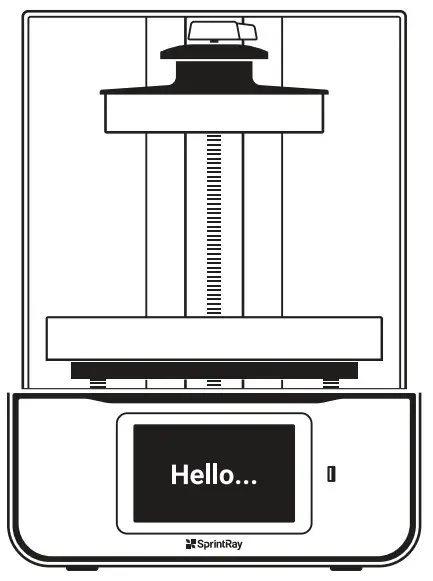
Congratulations!
In this brief guide, we’re going to show you how to set up and make your first model on the new SprintRay® Pro S Desktop 3D Printer.
Your purchase comes with a complimentary, live 30-minute Q&A with one of our expert technicians. For advanced users, visit our website for tips & tricks.
We’re so excited to see what you make!
Training and Support

Sign up for your free Q&A and contact our team of support technicians with questions.
Visit support.sprintray.com
Call 800-914-8004
Email [email protected]
In the Box
The print platform and resin tank are pre-installed and have a protective film that must be removed prior to first use.![]() The print platform and resin tank will be a different size depending on the model of your printer.
The print platform and resin tank will be a different size depending on the model of your printer.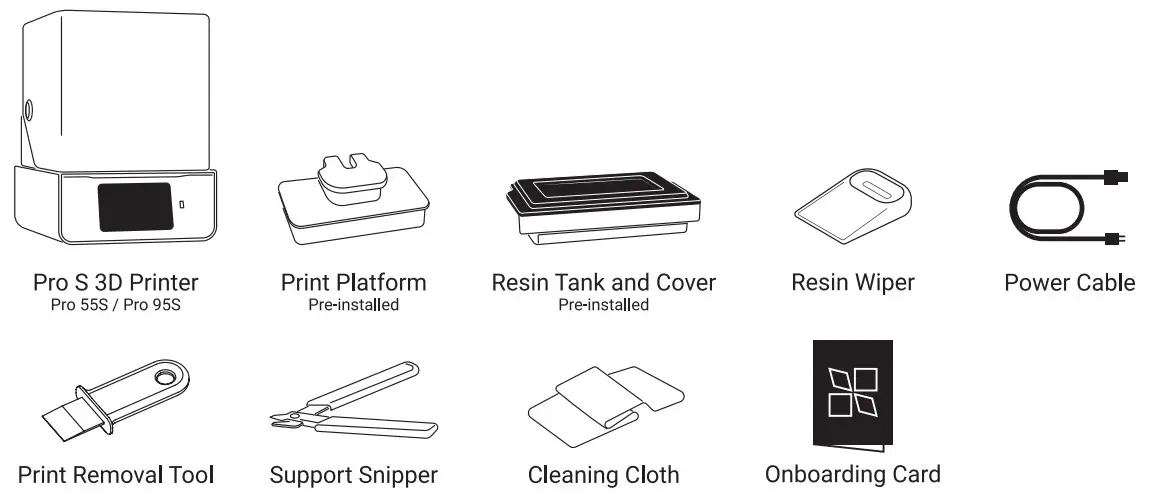
Where to Set Up
Situate your Pro 3D printer in a well-ventilated area on a flat and level surface.
Keep it away from extreme temperatures, windows, bright UV light sources, and direct sunlight. 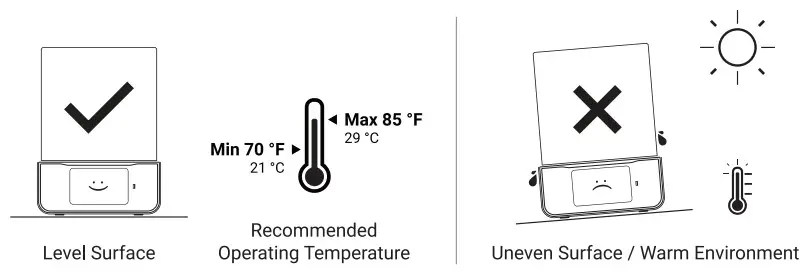
Plug in Pro S
Use the provided power cable to plug your printer into a surge protector or uninterrupted power supply.
When not in use, the printer automatically goes into lower power mode, and does not need to be turned off.
Use the power switch if you need to perform a hard reset or disconnect your Pro S from its power source. 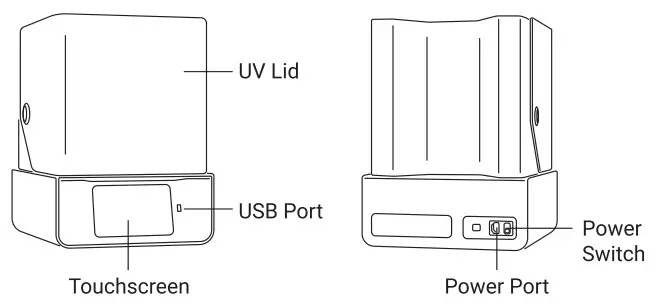
Set up Pro S
After powering-up your Pro S, you will be presented with onboarding instructions on the screen which will help you connect to the Internet. Make Printer Discoverable Ensure that your printer and computer are both connected to the same wireless network.
Prepare Resin Tank
(Pre-installed)
Lock: Place the tank in its cradle, then push away from you. You will hear a ‘click’ when the tank is properly locked.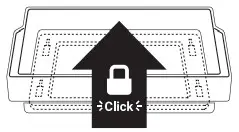 Unlock: Gently pull toward you until you hear a ‘click’ to unlock. Lift up to remove the tank from its cradle.
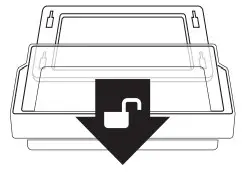 Smart Life Tracking
Your SprintRay Pro S is equipped with advanced electronics that allow the printer to track the lifetime and health of each tank. Follow onscreen instructions to properly set up new resin tanks to ensure longevity and proper tracking.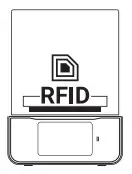 Resin Tanks Are Consumable
Resin tanks are consumable products that have an expected lifetime. Follow the onscreen instructions to understand the remaining life of your resin tank.![]() Backup Resin Tank: Keep a backup resin tank on hand to avoid downtime due to tank life.
Backup Resin Tank: Keep a backup resin tank on hand to avoid downtime due to tank life.
Resin Tank Fill Lines
When starting a print, the desktop software or touchscreen of your Pro S 3D printer will display the resin level necessary for the planned job.
Fill the tank to the suggested level, ensuring even distribution of the resin across the tank. Pay attention to the Min and Max indications in the tank to ensure that the correct amount of resin is present. Before printing, double check resin levels against the value needed which is displayed on the screen.
The Min/Max indicators on the Pro 55S and Pro 95S resin tank are in different locations and indicate different amounts.
Resin Tank Best Practices
For best results, use a dedicated resin tank for each different material you use. Keep a backup tank on hand in case of an emergency to avoid ordering downtime.![]() WARNING! Over pouring resin will cause spillage that is not covered by the limited warranty offered by SprintRay.
WARNING! Over pouring resin will cause spillage that is not covered by the limited warranty offered by SprintRay.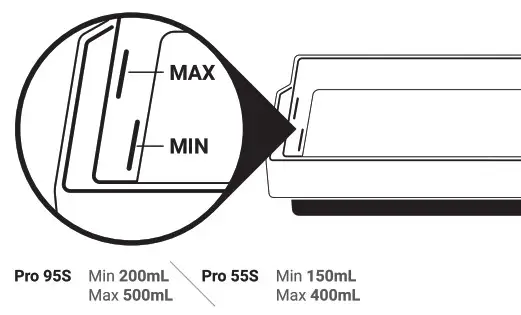 Stir Resin Before Print
If you keep resin in the tank between jobs, use the resin wiper to mix the tank before every print.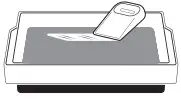 Cover Resin Tank After Print
If you’re done printing for the day, secure the tank cover to help extend the life of resin in tank.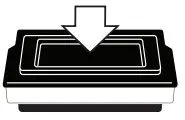
Prepare Print Platform
(Pre-installed)
Platform Heating
SprintRay Pro S is equipped with a heated build platform to improve printing reliability. The platform may be warm to the touch when this feature is enabled. Locking/Unlocking the Print Platform
The SprintRay Pro S print platform uses magnetic locking. When the platform is seated on the Z-axis arm, activate the magnetic lock by turning the red knob clockwise. Turn the knob counter-clockwise to unlock the platform before removal.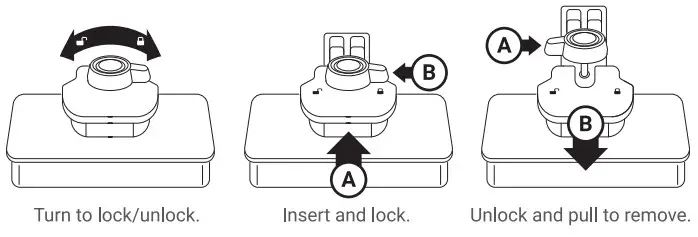
Get Software
Download RayWare Software from sprintray.com/software![]() Compatible with
Compatible with
Mac and Windows
3D Printing
Preparing the Pro S 3D Printer
Install resin tank and print platform. It is extremely important to make sure both the print platform and resin tank are fully secured and locked before you start a print.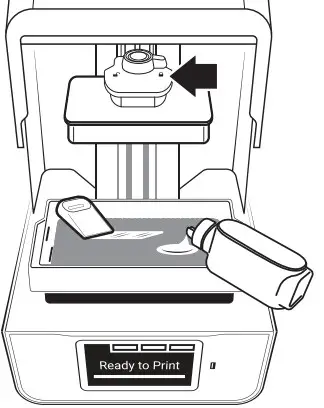
![]() Wear Gloves
Wear Gloves
We strongly recommend wearing gloves while handling printer and resin.![]() Gently Shake Resin Bottle to Mix
Gently Shake Resin Bottle to Mix
Inspect resin tank and mix resin with resin wiper before every print.![]() Inspect and Stir Gently
Inspect and Stir Gently
Before you pour resin into your Pro’s tank, it is important to shake the bottle until it is thoroughly mixed.
Prepare a Print Job in RayWare
After launching RayWare, select your printing material and the desired layer thickness. Import your STL model, orient the model, and add supports if necessary.
The model is now ready for printing. Click on the green printer icon, select your 3D printer from the list of available printer(s) and click Print.
The software will process the job and send it to your printer.![]() Make Printer Discoverable Ensure that your printer and computer are both connected to the same wireless network.
Make Printer Discoverable Ensure that your printer and computer are both connected to the same wireless network.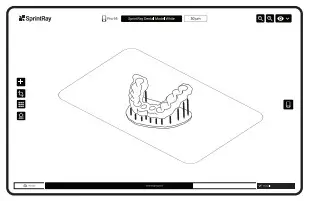
- Select printer/resin type
- Import Model(s)
- Orient Model(s)
- Add supports (if needed)
- Send to printer
![]() Firewall/Antivirus May Block Connection
Firewall/Antivirus May Block Connection
Keep in mind that firewall or antivirus software may prevent your computer from finding the printer. Consult SprintRay customer support if you need help with connection issues.
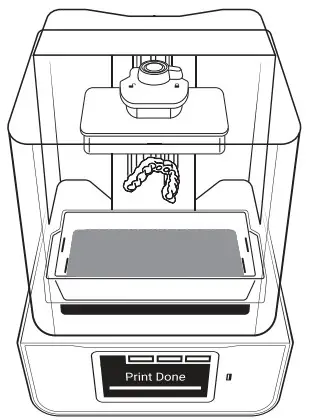
Printing
The print platform should now slowly descend into the resin tank. Once this has happened, the print process has begun.
Depending on the type of resin you are printing with, the printer may have to go through a warming resin process. Warming resin may take up to 15 minutes.
Your printer runs independently once it begins a print job. Any changes to your network or computer will not affect print progress as long as the printer maintains power.
Finishing a Print Job
Removing Prints from Print Platform When the print job is complete and the build arm has fully raised, remove the platform and place it on a flat surface.
Using the provided print removal tool, detach the part from print platform. Using the support snipper, remove the supports from your part.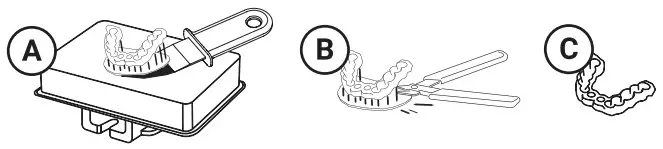
![]() Wear Gloves
Wear Gloves
We strongly recommend wearing gloves while handling printer and resin.![]() Minimize Clean Up
Minimize Clean Up
To minimize cleanup, always remove the platform before removing your resin tank.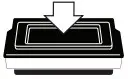 Cover Resin Tank After Print
If you’re done printing for the day, secure the tank cover to help extend the life of resin in tank.
Washing Models with SprintRay Pro Wash/Dry™
Use IPA 91% to wash the 3D printed models prior to post curing. To ensure complete cleanliness, the washing process can be repeated. We recommend using SprintRay Pro Wash/Dry to perform a fully-automated, two-stage wash and dry.
Start washing models by simply placing the print platform in the Pro Wash/Dry to wash models and the platform simultaneously.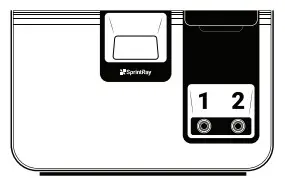 Post Curing Models with SprintRay ProCure 2™
Depending on the material specifications and regional regulatory requirements, you may need to post-cure the printed part after wash. You can use presets on SprintRay ProCure 2 to complete the post-curing in a few minutes.
SprintRay Pro Wash/Dry and ProCure 2 are sold separately.
Maintenance
Clean 3D Printer Optical Glass Regularly
If resin cures onto the optical window, spray the glass with IPA and wipe with a soft cloth. Repeat if needed. Spray with glass cleaner and use a soft cloth to clean away fingerprints or other smudges.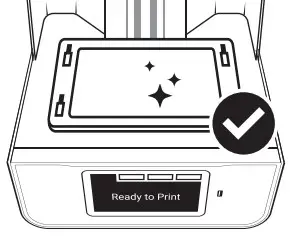 Cleaning the Printer Chassis
Clean the printer chassis with a soft, damp cloth. If resin is spilled on the printer, clean up immediately and wipe clean with a paper towel and IPA.
Clean Underside Tank Glass Regularly
Avoid touching the glass on the underside of the resin tank. To clean, spray with IPA to remove resin and then use glass cleaner to finish.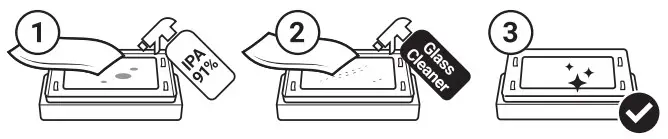 Backup Resin Tank
Resin tanks are consumable products that have an expected lifetime. Keep a backup resin tank on hand to avoid downtime due to tank life.
Software Updates
SprintRay will periodically publishes software updates for the Pro S 3D printer. Ensure your printer is connected to internet to receive software updates.
Resin Care
Cured resin can be discarded as regular trash. Never dispose of liquid resin in your sink or other plumbing.
Reorder Consumables
To reorder consumables, including materials and resin tanks, contact your equipment dealer representative.

FCC Warning:
This transmitter must not be co-located or operating in conjunction with any other antenna or transmitter.
Any Changes or modifications not expressly approved by the party responsible for compliance could void the user’s authority to operate the equipment.
This device complies with part 15 of the FCC Rules. Operation is subject to the following two conditions: (1) This device may not cause harmful interference, and (2) this device must accept any interference received, including interference that may cause undesired operation.
Note: This equipment has been tested and found to comply with the limits for a Class B digital device, pursuant to part 15 of the FCC Rules. These limits are designed to provide reasonable protection against harmful interference in a residential installation. This equipment generates, uses and can radiate radio frequency energy and, if not installed and used in accordance with the instructions, may cause harmful interference to radio communications. However, there is no guarantee that interference will not occur in a particular installation. If this equipment does cause harmful interference to radio or television reception, which can be determined by turning the equipment off and on, the user is encouraged to try to correct the interference by one or more of the following measures:
—Reorient or relocate the receiving antenna.
—Increase the separation between the equipment and receiver.
—Connect the equipment into an outlet on a circuit different from that to which the receiver is connected.
—Consult the dealer or an experienced radio/TV technician for help.
RF Exposure Statement:
This equipment complies with FCC radiation exposure limits set forth for an uncontrolled environment.
This equipment should be installed and operated with minimum distance 20cm between the radiator & your body.
FCC ID: 2A96L-SRP2301A
![]()


