Puig 21313N Protector Motor

INSTRUCTIONS TO ASSEMBLE
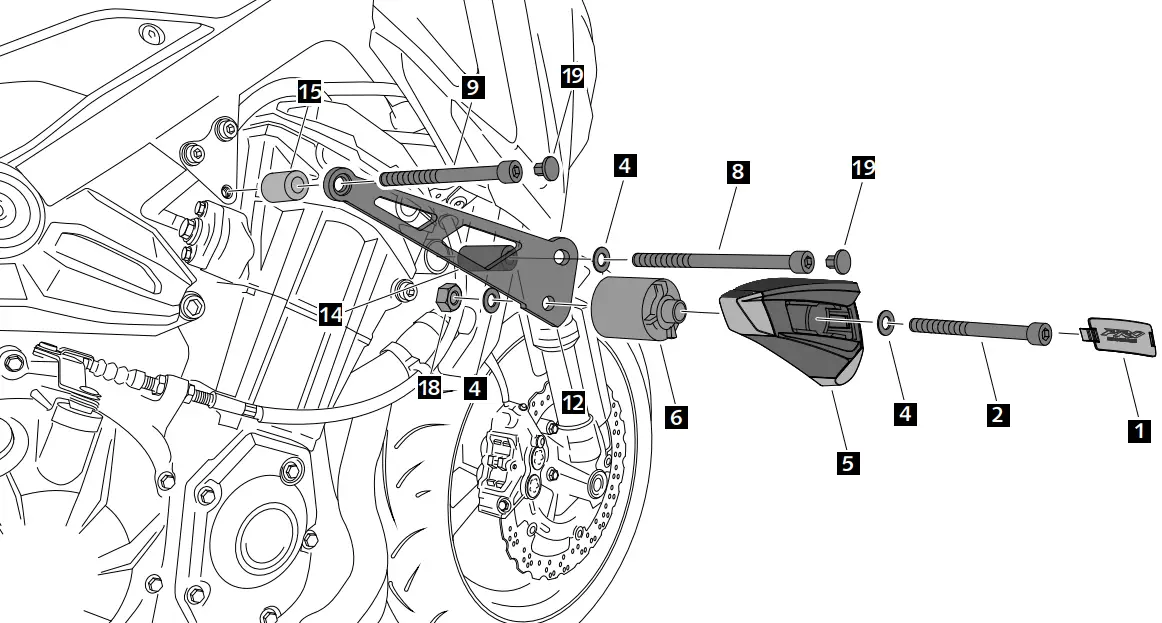
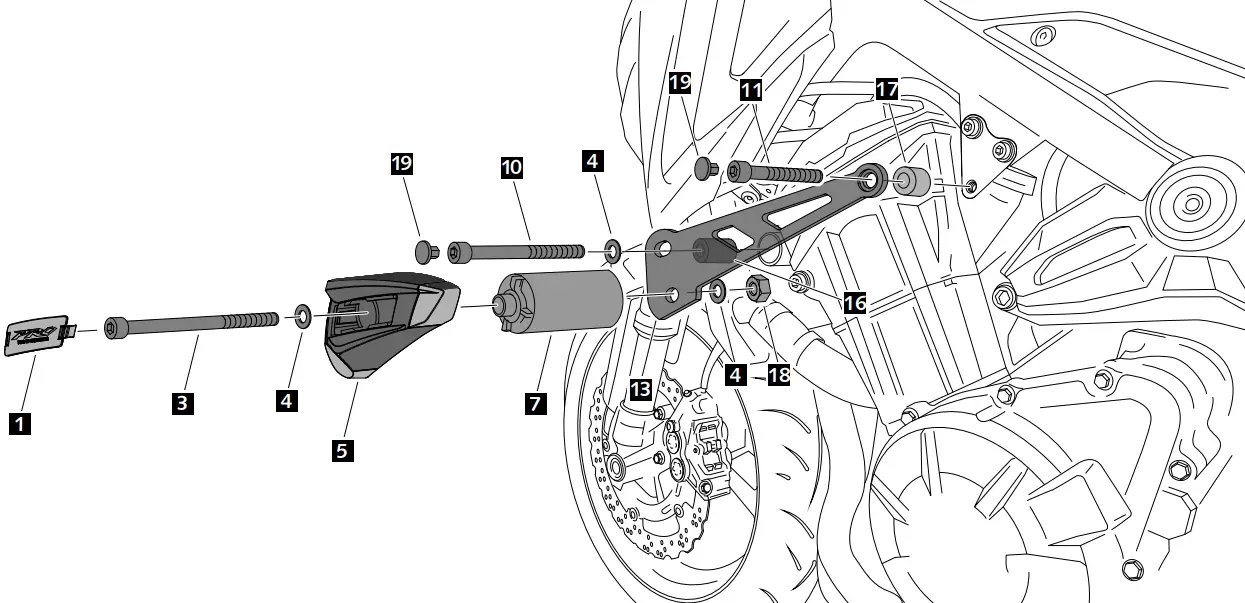
- Remove the fasteners that subject the chassis to the engine. Mount the protectors on each own side as the figure below shows. Tight the set, and place the caps.
- All the screws replaced, should be tightened to the torque specified in the oem maintenance manual for your motorcycle. if no torque specifications are provided in the oem maintenance manual, may be used 54Nm for all M10 screws.
- Medium strength liquid thread-locker (i.e. “Loctite”) should be used to secure all screws, bolts and nuts. All screws, bolts and nuts should be checked after driving the first 50 km to ensure that all are tightened to the proper torque.
Accessory verified in the basic configuration of the motorcycle. For models with extra factory settings. We cannot assure its compatibility, except for prior consultation. We decline any eventual claim.
| ID. | DESCRIPTION | QTY. |
| 1 | Plastic cap | 2 |
| 2 | M10/150X90 DIN912 screw | 1 |
| 3 | M10/150X120 DIN912 screw | 1 |
| 4 | Ø20ext. Ø10int x2 DIN125/A washer | 6 |
| 5 | Nylon protector | 2 |
| 6 | Right aluminium metal spacer | 1 |
| 7 | Left aluminium metal spacer | 1 |
| 8 | M10/125X130 DIN912 screw | 1 |
| 9 | M10/125X80 DIN912 screw | 1 |
| 10 | M10/125X100 DIN912 screw | 1 |
| 11 | M10/125X50 DIN912 screw | 1 |
| 12 | Right plate | 1 |
| 13 | Left plate | 1 |
| 14 | Ø24X79 spacer | 1 |
| 15 | Ø20X50 spacer | 1 |
| 16 | Ø24X47 spacer | 1 |
| 17 | Ø20X16 spacer | 1 |
| 18 | M10 DIN6923 nut | 2 |
| 19 | M10 DIN912 cap | 4 |
ASSEMBLY
LEFT SIDE
RIGHT SIDE