Apps Eo Charging App User Guide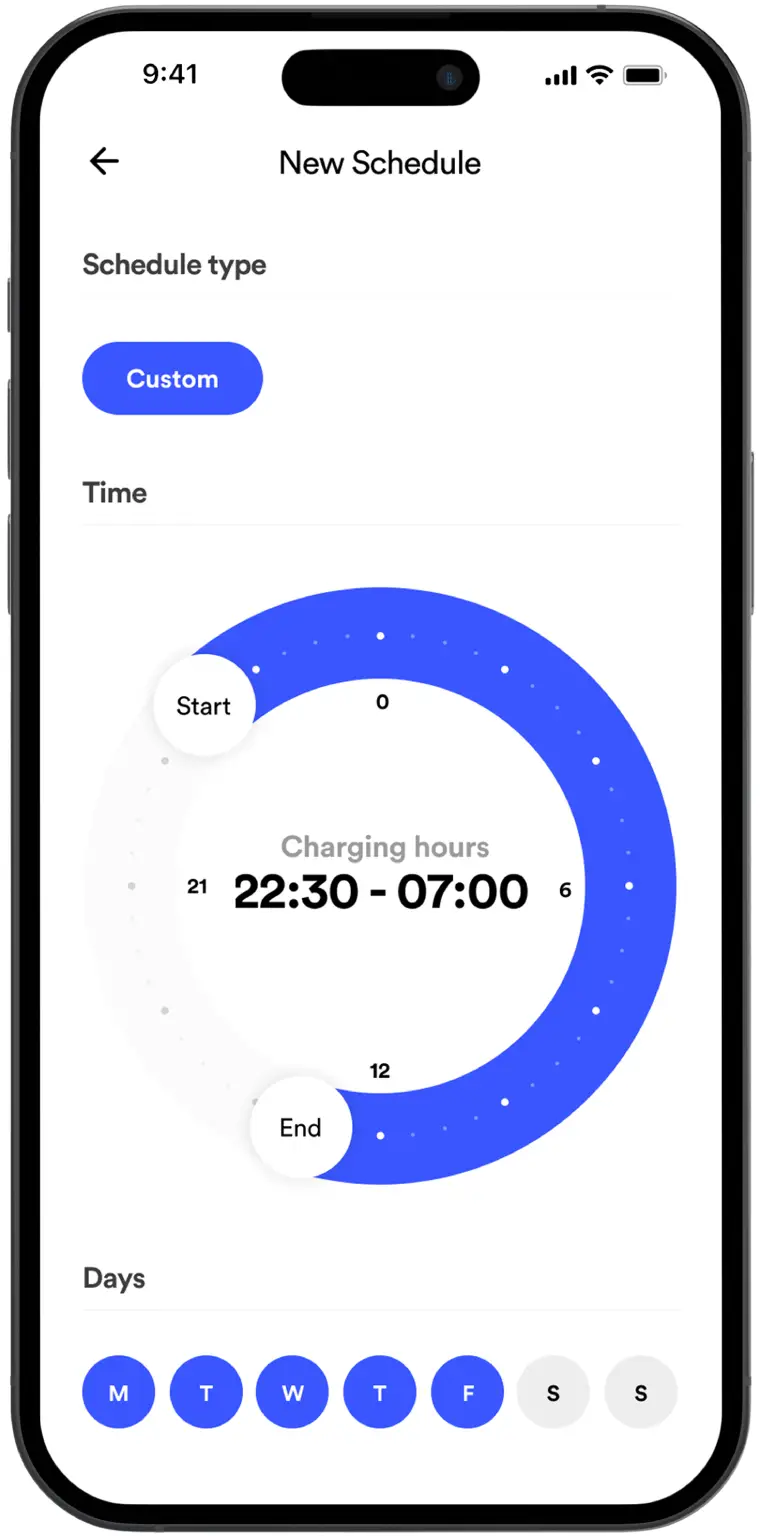
INTRODUCTION
Welcome to your new EV charge point, the EO Mini Pro 3.
This guide will cover the registration process for the EO Mini Pro 3 using the “EO Charging” smartphone app.
- The Homeowner will need to have the EO Charging app downloaded to their mobile device. The “EO Charging” app is available for both Android and iOS devices.
If the app is yet to be downloaded, you can do so by heading to the EO website here: https://www.eocharging.com/download-app. - When setting up the charger for Wi-Fi make sure to have the home router username and password available.
![]() Please note: The homeowner should position themselves next to the charger
Please note: The homeowner should position themselves next to the charger
for carrying out the initial registration steps.
![]() It is important to note that the information in this document is subject to change without notice as the EO Charging app evolves, please download the latest version from www.eocharging.com/support.
It is important to note that the information in this document is subject to change without notice as the EO Charging app evolves, please download the latest version from www.eocharging.com/support.
GETTING TO KNOW THE EO CHARGING APP
- Access to scheduling
- Logging out of the app
- Home screen
- Settings and history
- Stop & start charging
- Tariff settings (where available)
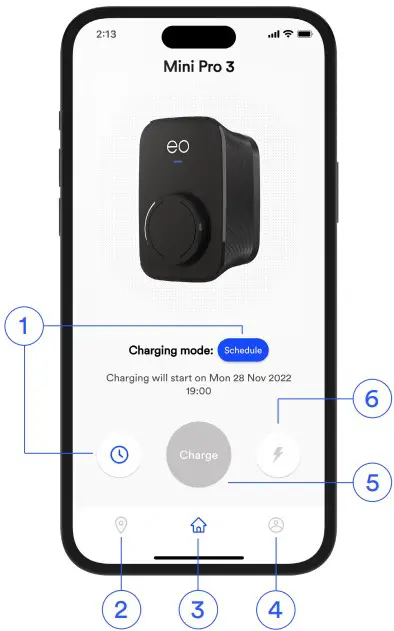
Figure 1: EO Charging app dashboard.
INITIAL REGISTRATION OF THE MINI PRO 3
The following assumptions are:
- The Wi-Fi signal from the charger to the home router has been verified as being suitable at point of installation or an ethernet cable has been fitted and connected to the home router. If a GSM unit is fitted, follow the process for ethernet connection.
- The charger must be powered on and display a blue pulsing status LED.
Allow 10 minutes after charger power-up before you begin the registration process.
- Download and launch the EO Charging app on either your iOS or Android mobile device.
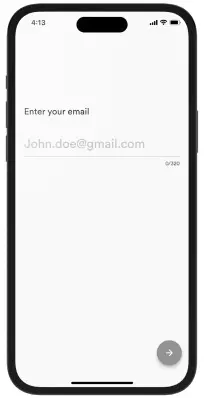
- Create a unique account by entering a valid email address and creating a password.

Figure 2: Registration email. Do not use an account already registered with another EO device.
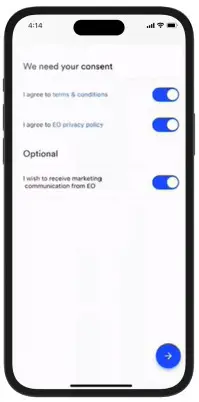
 - Accept the terms and conditions.

Figure 3: Terms and conditions. - A code will be sent to the email address you had entered. Enter this code into the app to verify the account.

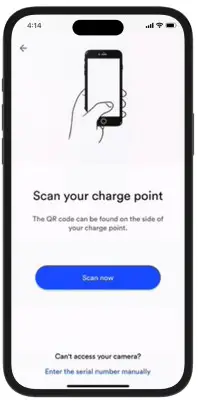
Figure 4: One Time Passcode (OTP). - You are presented with a welcome page where you are required to scan the charger QR code on the card provided in the packaging or manually enter the charger serial number, resembling:
eo-12345678901234 - The app will now connect to the EO Mini Pro 3 via Bluetooth.

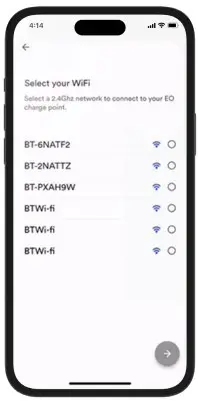
Figure 5: QR scanning. - The charger will prompt you to select your home Wi-Fi router. Select your router from the list of devices found.
- Enter your router access credentials. These are what you normally use to add a device to your home Wi-Fi. Note: If your device is already connected via LAN or GSM you can skip the Wi-Fi setup and continue.
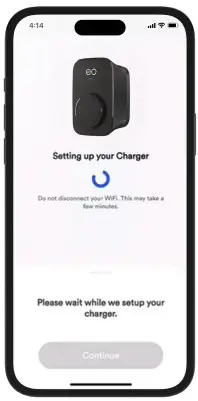
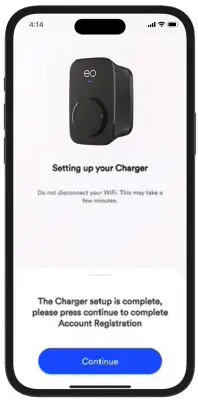
Figure 6: Home Wi-Fi selection. - Your Mini Pro 3 charger will now begin its registration and update process. This may take a few minutes to complete.
If required, you can navigate away from the EO app as the process will not be interrupted.
Figure 7: Processing registration. - The EO app will notify you when this process is complete and will prompt you to enter your details such as name, address, etc.
- Your initial product registration is now complete and you can now continue and personalise your device.
Figure 8: Successful registration.

PERSONALISING YOUR MINI PRO 3
Once the registration process is complete you are ready to personalise your Mini Pro 3.
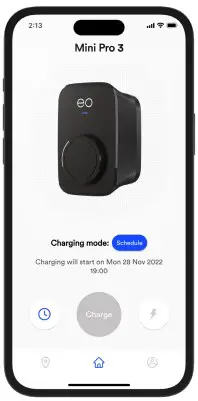
- Enter a name for your charger. An example could be “Paul” or “Lisa’s charger”.
- Choose the charging mode required. Press the “Charging Mode” button or the “Clock” icon to enter the options. Two modes are available, “Auto” or “Schedule”.
“Auto” mode will allow the charger to operate immediately when a vehicle is plugged in. This will depend on the “Random Delay” figure set when the charger was configured by your installer.
“Schedule” mode will only allow a charger session with the scheduled time window set.
Figure 9: Charge mode selection. - An override option is available and offers increments of 60 minutes, offering up to a maximum of 180 minutes, therefore if you have a schedule set, you can override the schedule by using this function.
Congratulations your new EO Mini Pro 3 is now ready to use.
Figure 10: Schedule charging.
ADDITIONAL FUNCTIONS
There are other settings and functions which are available such as:
- Schedule customisation
- Viewing historic charge session data
- Restricting charger operation
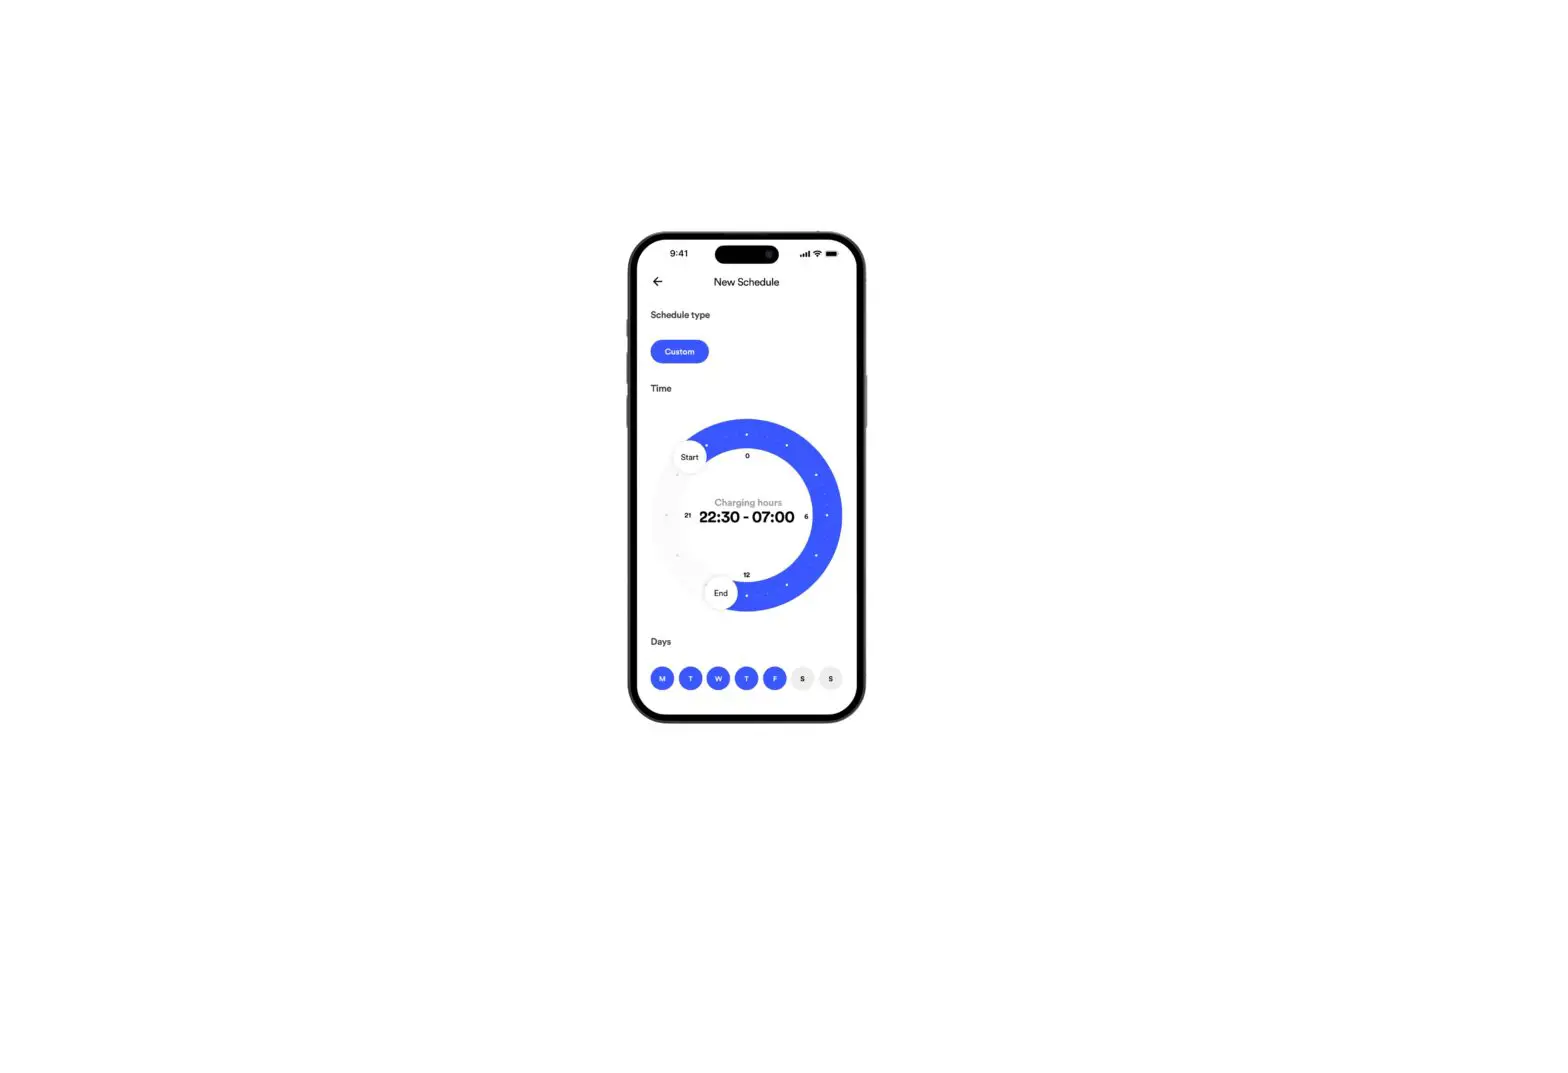
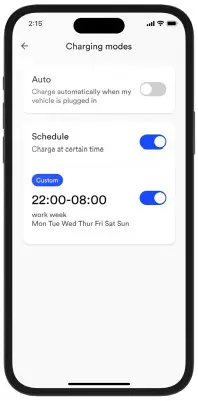
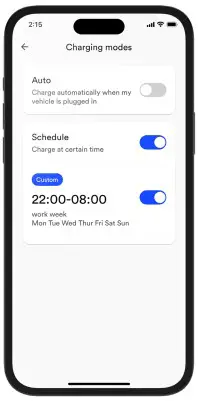
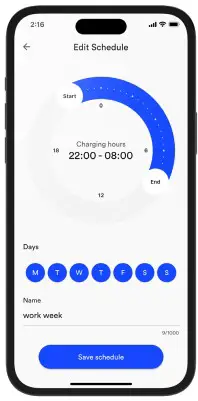
CUSTOMISING A SCHEDULE
- Within the charging mode page select “Custom”.
Figure 11: Custom schedule. - Set the time schedule required and add days of the week you wish the new schedule to apply. Save the new setting and return to the home screen.
If you wish to remove a saved schedule you can delete it from this screen by clicking “Delete schedule”.
Figure 12: Customisation dial.
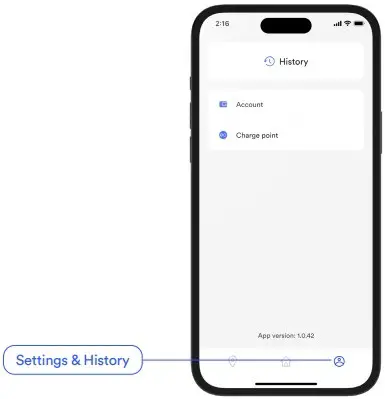
SETTINGS & HISTORY
- To enter this section, select the “Settings & History” icon lower right on the home screen.

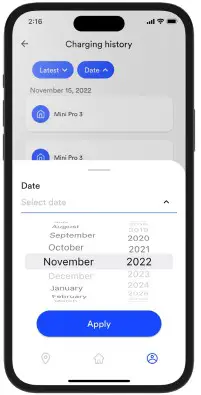
Figure 13: Settings. - Charge session history. Selecting “History” will provide access to historic charge session information. Charge sessions can be viewed by using one of two filters, “Latest” or “Month/Year”.

Figure 14: Session history.
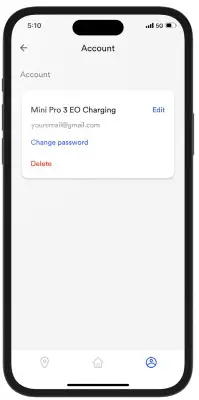
ACCOUNT
- Selecting “Account” provides you with the ability to edit your account details, change your app password or delete your account.

Figure 15: Account details.
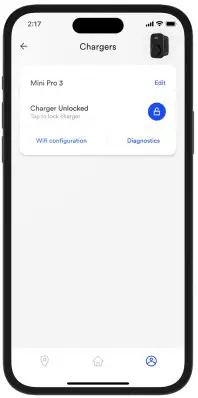
CHARGE POINT
- Selecting “Charge Point” provides you with the ability to change the charge point name given.
- You are able to lock the charge point thereby disabling it from charging by selecting the padlock icon.
- You can update the Wi-Fi connection. This is useful if your home router details have changed and need to get the charger back online.
- Clicking “Diagnostics” will display details about the device such as the app version number, the charger serial number, online status and your mobile device type.

Figure 16: Charge point details.
EO MINI PRO 3 STATUS LIGHT
The EO Mini Pro 3 charger has a status LED on its front face providing the user with its current status. Below describe the interpreted LED flash codes.
CHARGER STATUS LIGHT ON POWER-UP
The following LED sequence should be observed:
| LED colour | State | Notes |
| Not illuminated | Power off | No power is available |
| LED solid white | Initialising | Initialising |
| LED pulses blue | Ready | The Mini Pro 3 has started up successfully and is ready to charge |
NORMAL OPERATION
| LED colour | State | Notes |
| LED pulses blue | Ready | Ready to charge |
| LED pulses green | Cable is inserted | EO Mini Pro 3 is communicating with the vehicle and trying to start a charging session |
| LED solid green | Charging | A charging session has started successfully (subject to randomised delay) |
| LED pulses blue | Cable is removed | Ready to charge |
| LED solid yellow | Paused | The EO Mini Pro 3 has been put on pause |
| LED pulses red | Fault condition | A fault has occurred |
TECHNICAL SUPPORT
All EO Charging technical documentation is published in the EO support centre, this is found at: https://www.eocharging.com/support.
The EO Support team can be reached at:
Email: [email protected]
Phone: +44 (0) 333 77 20383
![]() This document contains information that is subject to change without notice.
This document contains information that is subject to change without notice.
The latest version of this publication can be downloaded at:
https://www.eocharging.com/support/home-charging/eo-mini-pro-3
![]() Disclaimer: No part of this publication may be reproduced or transmitted in any form or by any means, electronic or mechanical, including, but not limited to, copying, recording, retrieving data, or computer networks without the written permission of EO Charging.
Disclaimer: No part of this publication may be reproduced or transmitted in any form or by any means, electronic or mechanical, including, but not limited to, copying, recording, retrieving data, or computer networks without the written permission of EO Charging.


