Electrolux CKP800X Oven
WELCOME TO ELECTROLUX! THANK YOU FOR CHOOSING OUR APPLIANCE.
 In our drive to be sustainable, we are reducing paper assets and provide full user manuals online. Access your full user manual at electrolux.com/manuals
 Get usage advice, brochures, trouble shooter, service and repair information at electrolux.com/support
 For more recipes, hints, troubleshooting download My Electrolux Kitchen
app.
 |  |
PRODUCT DESCRIPTION
General overview
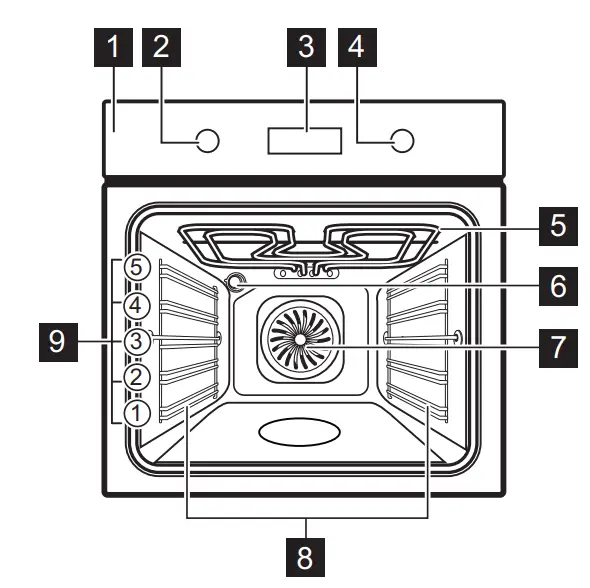
- Control panel
- Knob for the heating functions
- Display
- Control knob
- Heating element
- Lamp
- Fan
- Shelf support, removable
- Shelf positions
HOW TO TURN OVEN ON AND OFF
Control panel
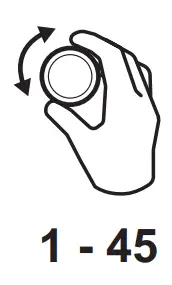
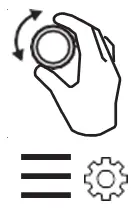
Control panel sensor fields | Press | Turn the knob | ||||
|
|
|
| OK |  | 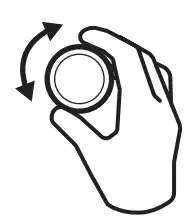 |
| Select a heating function to turn on the oven. | ||||||
| Turn the knob for the heating functions to the off position to turn the oven off. | ||||||
 Timer
Timer Fast Heat Up
 Light
LightHOW TO TURN OVEN ON AND OFF
 | When the knob for the heating functions is in the off position, the display goes to standby. |
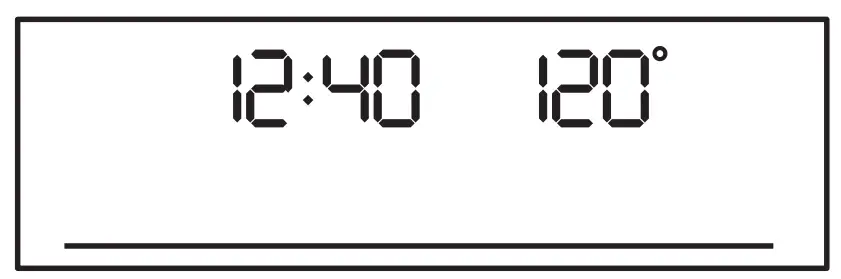 | When you cook, the display shows the set temperature, time of day and other available options. |
 | The display with the maximum number of functions set. |
Display indicators | ||||
|
|
|
|
|
| Timer indicators: |  | STOP |  |  |

 Assisted Cooking
 Cleaning
 Settings
 Fast Heat Up
| Progress bar – for temperature or time. | ______ |
| Food sensor indicator |  |
BEFORE FIRST USE
Initial cleaning
Before the first use clean the empty oven and set the time: | |||
 |  |  |
|
Initial preheating
Preheat the empty oven before the first use. | |
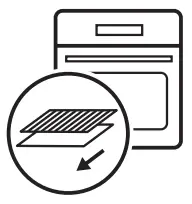
| Step 1 | Remove all accessories and removable shelf supports from the oven. |
| Step 2 | Set the maximum temperature for the function: Let the oven operate for 1 h. |
| Step 3 | Set the maximum temperature for the function: Let the oven operate for 15 min. |
DAILY USE
How to set: Heating functions
| Start cooking | |
| Step 1 | Step 2 |
 | 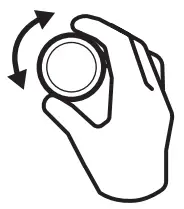 |
| Set a heating function. | Set the temperature. |
Heating functions
Standard heating functions
| Heating function | Application |
| Even baking, tenderness, drying |
| Traditional baking |
| French fries, potato wedges, spring rolls |
| Baking pizza |
| Baking cakes |
| Defrosting |
| Baking |
| Toasting, grilling |
| Roasting meat, browning |
 Menu Menu | To enter the menu. |
 True Fan Cooking
 Conventional Cooking
 Frozen Foods
 Pizza Function
 Bottom Heat
 Defrost
 Moist Fan Baking
 Grill
Grill Turbo Grilling
Notes on: Moist Fan Baking
This function was used to comply with the energy efficiency class and ecodesign requirements according to EU 65/2014 and EU 66/2014. Tests according to EN 60350-1.
The oven door should be closed during cooking so that the function is not interrupted and the oven operates with the highest energy efficiency possible. When you use this function the lamp automatically turns off after 30 sec. For general energy saving recommendations refer to “Energy Efficiency” chapter, Energy
Saving.
This function is designed to save energy during cooking. When you use this function, the
temperature in the cavity may differ from the set temperature. The heating power may be reduced.
How to set: Assisted Cooking
Every dish in this submenu has a recommended function and temperature. You can adjust the time and the temperature during cooking.
For some of the dishes you can also cook with: | The degree to which a dish is cooked: |
|
|
Assisted Cooking – use it to prepare a dish quickly with default settings: | |||
Step 1 | Step 2 | Step 3 | Step 4 |
 |  |  |  |
| Enter the menu. | Select Assisted Cooking. Press OK. | Select the dish. Press OK. Refer to “Menu structure” chapter. | Insert the dish to the oven. Confirm setting. |
CLOCK FUNCTIONS
Clock functions
Clock Function | Application |
| Minute minder. When the timer ends, the signal sounds. |
| STOP | Cooking time. When the timer ends, the signal sounds and the heating function stops. |
| Time Delay. To postpone the start and / or end of cooking. |
| Uptimer. Maximum is 23 h 59 min. This function has no effect on the operation of the oven. To turn on and off the Uptimer select: Menu, Settings. |
How to set: Clock functions
How to set: Time of day | ||
Step 1 | Step 2 | Step 3 |
| ||
| To change the time of day enter the menu and select Settings, Time of day. | Set the clock. | Press: OK. |
How to set: Minute minder | |||
Step 1 | The display shows: 0:00
| Step 2 | Step 3 |
| |||
| Press: | Set the Minute minder | Press OK. | |
| Timer starts counting down immediately. | |||
| How to set: Cooking time | ||||
| Step 1 | Step 2 | The display shows: 0:00 | Step 3 | Step 4 |
| | | ||
| Choose a heating function and set the temperature. | Press repeatedly: | Set the cooking time. | Press OK. | |
| Timer starts counting down immediately. | ||||
How to set: Time Delay | |||||||
Step 1 | Step 2 | Step 3 | Step 4 | Step 5 | Step 6 | ||
| The display shows: the time of day
| | The display shows:
| | |||
| Select the heating function. | Press repeatedly:. | Set the start time. | Press: OK. | Set the end time. | Press: . | ||
HOW TO USE: ACCESSORIES
Food Sensor
Food Sensor- measures the temperature inside the food.
There are two temperatures to be set: | |
ºC |
|
CARE AND CLEANING
How to use: Food Sensor
| Step 1 | Turn on the oven. | |
| Step 2 | Set a heating function and, if necessary, the oven temperature. | |
| Step 3 | Insert: Food Sensor. | |
| Meat, poultry and fish | Casserole | |
| Insert the tip of Food Sensor into the centre of meat, fish, in the thickest part if possible. Make sure that at least 3/4 of Food Sensor is inside of the dish. | Insert the tip of Food Sensor exactly in the centre of the casserole. Use the rim of the baking dish to support the silicone handle of Food Sensor. The tip of Food Sensor should not touch the bottom of a baking dish. | |
| Step 4 | Plug Food Sensor into the socket at the front of the oven. The display shows the current temperature of: Food Sensor. | |
| Step 5 | ||
| Step 6 | OK – press to confirm. When food reaches the set temperature, the signal sounds. You can choose to stop or to continue cooking to make sure the food is well done. | |
| Step 7 | Remove Food Sensor plug from the socket and remove the dish from the oven. There is a risk of burns as Food Sensor becomes hot. Be careful when you unplug it and remove it from the food. | |
CARE AND CLEANING
![]() WARNING!
WARNING!
Refer to Safety chapters.
Notes on cleaning
| Clean the front of the oven with a soft cloth with warm water and a mild deter‐ gent. |
| Use a cleaning solution to clean metal surfaces. | |
| Clean stains with a mild detergent. |
 Cleaning Agents
| Clean the cavity after each use. Fat accumulation or other residue may cause fire. |
| Moisture can condense in the oven or on the door glass panels. To decrease the condensation, let the oven work for 10 minutes before cooking. Do not store the food in the oven for longer than 20 minutes. Dry the cavity with a soft cloth after each use. |
 Everyday Use
| Clean all accessories after each use and let them dry. Use a soft cloth with warm water and a mild detergent. Do not clean the accessories in a dishwash‐ er. |
| Do not clean the non-stick accessories using abrasive cleaner or sharp-edged objects. |
 Accessories
How to use: Pyrolytic Cleaning
Clean the oven with Pyrolytic Cleaning.
![]() WARNING!
WARNING!
There is a risk of burns.
![]() CAUTION!
CAUTION!
If there are other appliances installed in the same cabinet, do not use them at the same time as this function. It can cause damage to the oven.
| Before the Pyrolytic Cleaning: | ||
| Turn off the oven and wait until it is cold. | Remove all accessories. | Clean the oven floor and the inner door glass with warm water, a soft cloth and a mild detergent. |
| Pyrolytic Cleaning | ||
| Step 1 | Enter menu: Cleaning | |
| Option | Duration | |
| C1 – Light cleaning | 1 h | |
| C2 – Normal cleaning | 1 h 30 min | |
| C3 – Thorough cleaning | 2 h 30 min | |
| Step 2 | OK – press to select the cleaning programme. | |
TROUBLESHOOTING
| Pyrolytic Cleaning | |
| Step 3 | OK – press to start the cleaning. |
| Step 4 | After cleaning, turn the knob for the heating functions to the off position. |
| When the oven is at the set temperature, the door locks. Until the door unlocks the display shows: | |
| When the cleaning ends: | ||
| Turn off the oven and wait until it is cold. | Clean the cavity with a soft cloth. | Remove the residue from the bottom of the cavity. |
![]() WARNING!
WARNING!
Refer to Safety chapters
What to do if…
In any cases not included in this table please contact with an Authorised Service Centre.
| The oven does not turn on or does not heat up | |
| Problem | Check if… |
| You cannot activate or operate the oven. | The oven is correctly connected to an electrical supply. |
| The oven does not heat up. | The automatic switch-off is deactivated. |
| The oven does not heat up. | The oven door is closed. |
| The oven does not heat up. | The fuse is not blown. |
| The oven does not heat up. | The Child Lock is off. |
| Components | |
| Problem | Check if… |
| The lamp is turned off. | Moist Fan Baking – is turned on. |
| The lamp does not work. | The lamp is burnt out. |
| The Food sensor does not operate. | The plug of the Food sensor is fully inserted in‐ to the socket. |
| Error codes | |
| The display shows… | Check if… |
| Err C2 | You removed the Food sensor plug from the socket. |
| Err C3 | The oven door is closed or the door lock is not broken. |
| Err F102 | The oven door is closed. |
| Err F102 | The door lock is not broken. |
| 00:00 | There was a power cut. Set the time of day. |
| If the display shows an error code that is not in this table turn the house fuse off and on to restart the oven. If the error code recurs contact an Authorised Service Centre. | |
Service data
If you cannot find a solution to the problem yourself, contact your dealer or an Authorised Service Centre.
The necessary data for the service centre is on the rating plate. The rating plate is on the front frame of the oven cavity. Do not remove the rating plate from the oven cavity.
| We recommend that you write the data here: | |
| Model (MOD.) | ………………………………….. |
| Product number (PNC) | ………………………………….. |
| Serial number (S.N.) | ………………………………….. |
ENERGY EFFICIENCY
Product Information and Product Information Sheet*
| Supplier’s name | Electrolux | |
| Model identification | CKP800X 949498459 COP801X 949498460 COP802X 949498461 EOE6P56X 949498465 | |
| Energy Efficiency Index | 81.2 | |
| Energy efficiency class | A+ | |
| Energy consumption with a standard load, conventional mode | 0.93 kWh/cycle | |
| Energy consumption with a standard load, fan-forced mode | 0.69 kWh/cycle | |
| Number of cavities | 1 | |
| Heat source | Electricity | |
| Volume | 72 l | |
| Type of oven | Built-In Oven | |
| Mass | CKP800X | 32.6 kg |
| COP801X | 32.7 kg | |
| COP802X | 33.2 kg | |
| EOE6P56X | 31.8 kg | |
| * For European Union according to EU Regulations 65/2014 and 66/2014. For Republic of Belarus according to STB 2478-2017, Appendix G; STB 2477-2017, Annexes A and B. For Ukraine according to 568/32020. |
| Energy efficiency class is not applicable for Russia. |
| EN 60350-1 – Household electric cooking appliances – Part 1: Ranges, ovens, steam ovens and grills – Methods for measuring performance. |
Energy saving
![]() The oven has features which help you save energy during everyday cooking.
The oven has features which help you save energy during everyday cooking.
Make sure that the oven door is closed when the oven operates. Do not open the oven door too often during cooking. Keep the door gasket clean and make sure it is well fixed in its position.
Use metal cookware to improve energy saving.
When possible, do not preheat the oven before cooking.
Keep breaks between baking as short as possible when you prepare a few dishes at one time.
Cooking with fan
When possible, use the cooking functions with fan to save energy.
Residual heat
The fan and lamp continue to operate. When you turn off the oven, the display shows the residual heat. You can use that heat to keep the food warm.
When the cooking duration is longer than 30 min, reduce the oven temperature to minimum 3 – 10 min before the end of cooking. The residual heat inside the oven will continue to cook.
Use the residual heat to warm up other dishes.
Keep food warm
Choose the lowest possible temperature setting to use residual heat and keep a meal warm.
The residual heat indicator or temperature appears on the display.
Cooking with the lamp off
Turn off the lamp during cooking. Turn it on only when you need it.
Moist Fan Baking
Function designed to save energy during cooking.
When you use this function the lamp automatically turns off after 30 sec. You may turn on the lamp again but this action will reduce the expected energy savings.
|
| Step 1 | Step 2 | Step 3 | Step 4 | Step 5 |
 | | O1 – O12 | | |
| Select the Menu, Settings. | Confirm setting. | Select the setting. | Confirm setting. | Adjust the value and press OK . |
Settings | |||||
| O1 | Time of day | Change | O2 | Display brightness | 1 – 5 |
| O3 | Key tones |
| O4 | Buzzer volume | 1 – 4 |
| O5 | Food Sensor Action | 1 – Alarm and stop 2 – Alarm | O6 | Uptimer | On / Off |
| O7 | Light | On / Off | O8 | Fast Heat Up | On / Off |
| O9 | Cleaning Reminder | On / Off | O10 | Demo mode | Activation code: 2468 |
| O11 | Software version | Check | O12 | Reset all settings | Yes / No |
Assisted Cooking | |||
| P1 | Roast Beef, rare | P2 | Roast Beef, medium |
| P3 | Roast Beef, well done | P4 | Steak, medium |
| P5 | Beef roast / braised | P6 | Roast Beef, rare LTC* |
| P7 | Roast Beef, medium LTC* | P8 | Roast Beef, well done LTC* |
| P9 | Fillet, rare LTC* | P10 | Fillet, medium LTC* |
| P11 | Fillet, done LTC* | P12 | Veal roast |
| P13 | Pork roast neck or shoulder | P14 | Pulled pork LTC* |
| Assisted Cooking | |||
| P15 | Loin, fresh | P16 | Spare Ribs |
| P17 | Lamb leg with bones | P18 | Whole chicken |
| P19 | Half chicken | P20 | Chicken breast |
| P21 | Chicken legs | P22 | Duck, whole |
| P23 | Goose, whole | P24 | Meat loaf |
| P25 | Whole fish, grilled | P26 | Fish fillet |
| P27 | Cheesecake | P28 | Apple cake |
| P29 | Apple tart | P30 | Apple pie |
| P31 | Brownies | P32 | Chocolate muffins |
| P33 | Loaf cake | P34 | Baked potatoes |
| P35 | Wegdes | P36 | Grilled mixed vegetables |
| P37 | Croquets, frozen | P38 | Pommes, frozen |
| P39 | Lasagna / Noodle casserole | P40 | Potato gratin |
| P41 | Pizza fresh, thin | P42 | Pizza fresh, thick |
| P43 | Quiche | P44 | Baguette / Ciabatta / White bread |
| P45 | All grain / rye / dark bread all grain in loaf pan | *LTC – Low Temperature Cooking | |
ENVIRONMENTAL CONCERNS
Recycle materials with the symbol ![]() . Put the packaging in relevant containers to recycle it.
. Put the packaging in relevant containers to recycle it.
Help protect the environment and human health by recycling waste of electrical and electronic appliances. Do not dispose of appliances marked with the symbol ![]() with the household waste.
with the household waste.
Return the product to your local recycling facility or contact your municipal office.
http://www.electrolux.com/shop