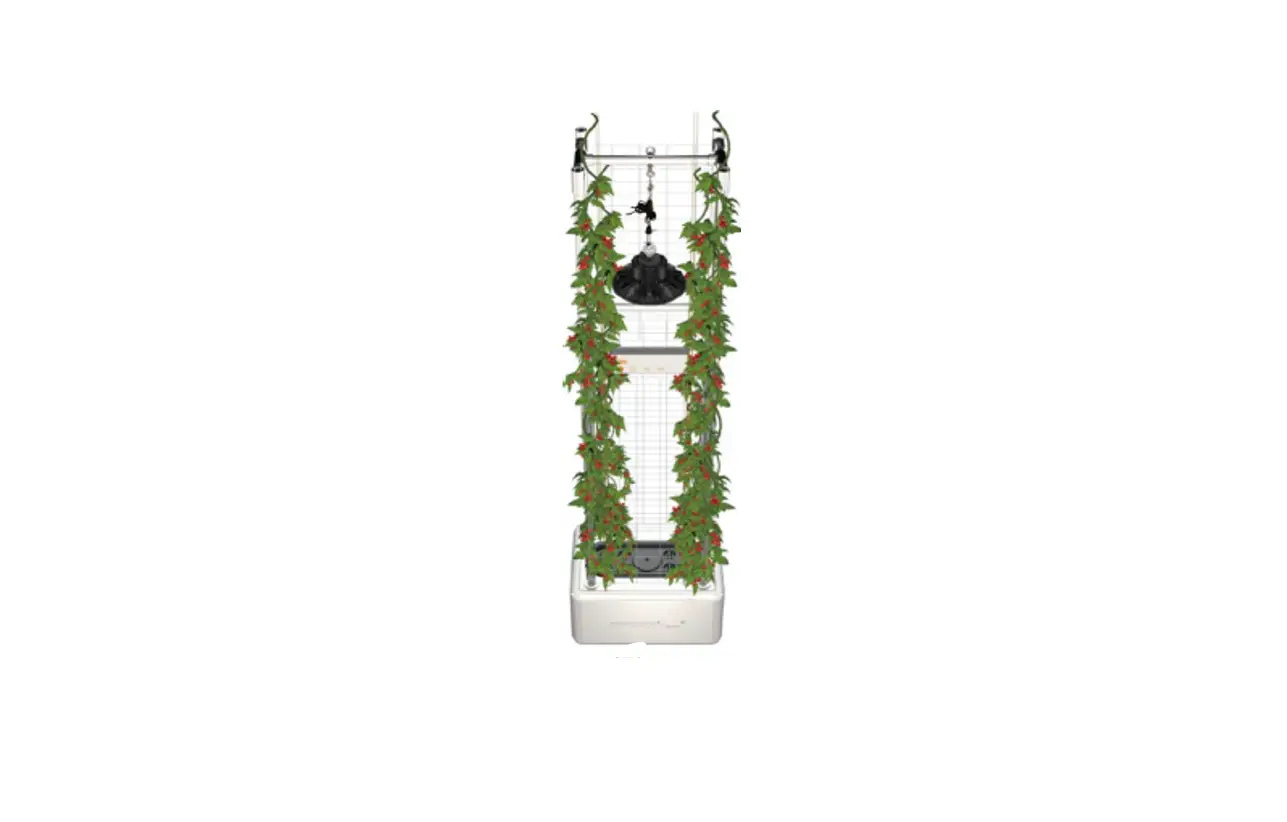
OPCOM OFG005 GrowTank Tall Plant Hydroponics
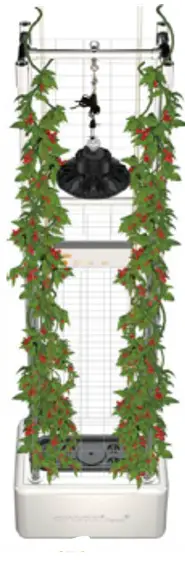
Thank you for purchasing OPCOM GrowTank, the indoor hydroponics growing system. It is designed for easy use and efficient growing system by one-touch AUTO mode. It holds up to 8 plants capacity. Please read the quick guide carefully before setting it up. For details video, please visit the Official Website: http://www.opcomfarm.com.
Assembly
A1. Remove all parts from the box and check all accessories.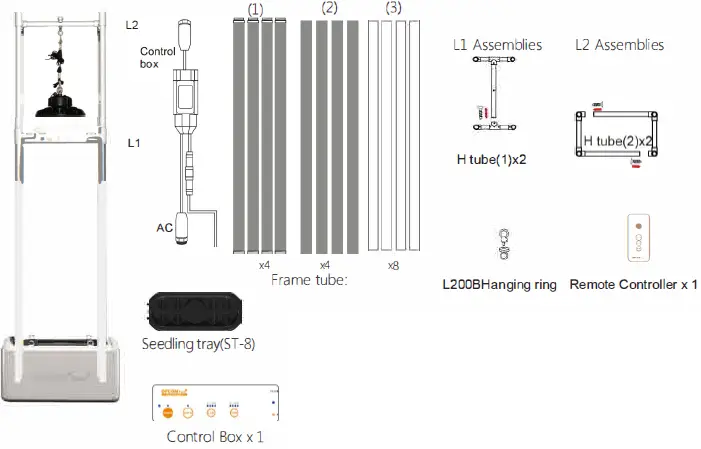
Grow Kit 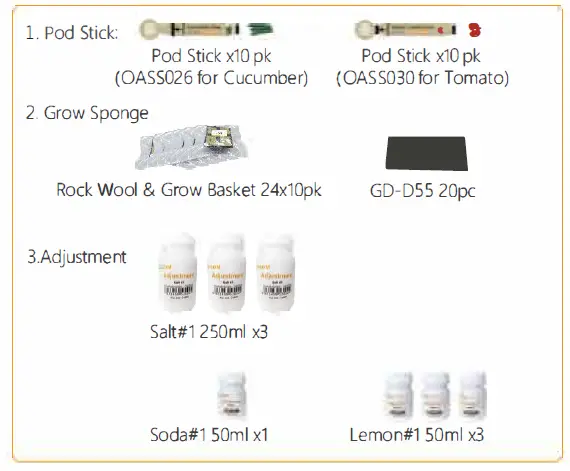
Accessory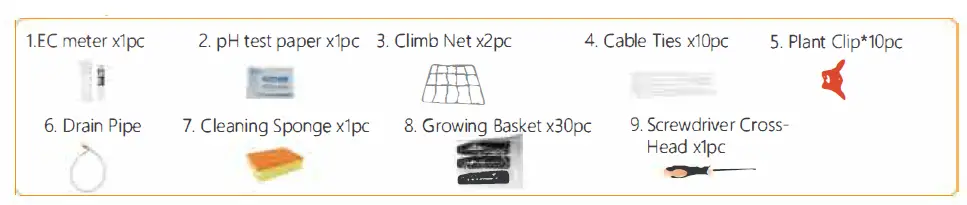 A2.Assemble GrowTanK
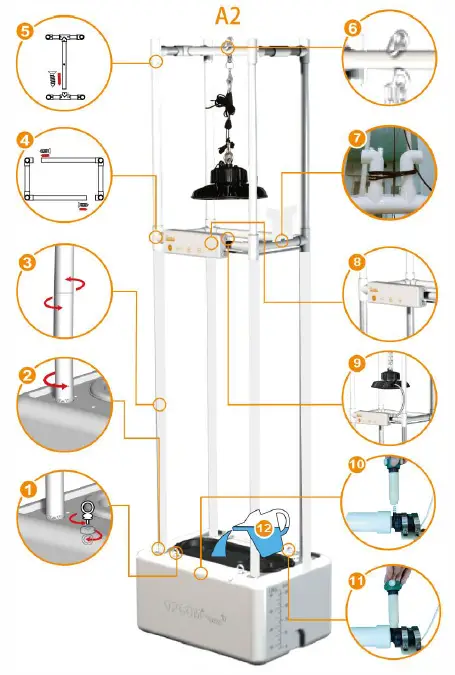
Assembly
- Place four Hanging rings on each corner of the water tank.
- Insert 4 aluminum Frame tubes (1) and secure their position.
- Extend the upper 4 aluminum Frame tubes (2) by aligning and twisting the treads on the poles of step 2.
- Use H tube(1) and Frame tube(4) to assemble L 1 square frame with extended poles of step 3 together and screw closely.
- Connect another upper 4 plastic Frame tube(3), then assemble L2 Frame with 2 H tube(2) and 1 Frame tube(5), and assemble it on the top of the plastic tubes, screw closely.
- Tighten the metal Hanging _Ring with L200B and the long plastic Frame tube(5). Hien ensure metal nng chain go through the metal nng in the LED light and set the height by bucl<ling two metal nng together.
- After adjusting the height of LED, wind the lifting rope around.
Electric line setup - Connect control box to the front tube of the square frame.
- Connect L200B LED lighe quick release adapter to the cable on the control box. L200B can adjust 2 ki_nas of grow light, R:B(S:1 )/R:8(9:1 ), to meet different planting stage requirement.
Water line setup - Place the pump to the slot base and fixed.
Other Installation - Add 21 gallons/ 80L(80% full) water to water tank.
Chart I: Control Box Mode

- Most plants can be grown using the AUTO mode.
- The remote controller supports wireless remote control.
- When Power On, press the hold POWER button until 2 beep sound (About 5 seconds) to reset power on the timeline.
- When Power Off, press the hold POWER button until 2 beep sound (About 5 seconds) to reset the power off the timeline.
Seedling
Germination Stage
- Open the Rockwool sponge package, wet the sponge(Fig 1)
- Open the pod stick package put it into each planting basket(Fig2)
- PUt into the seedling tray. (Fig3) Spray water and keep the sponge wet every day.
- Place the seedling tray with cover in the shade or cover it with black cloth.
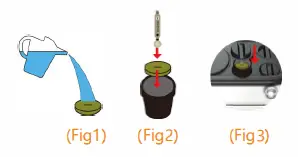
Chart II: Plant Stage 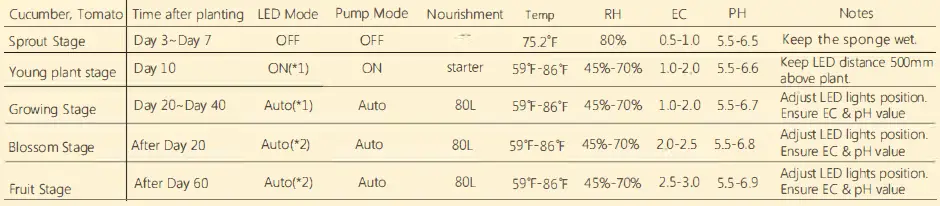
- Please keep the Pod stick package in the refrigerator if you don’t use it. Recommended temperature is 41°F-50°F.
- LED light moder1: R:8=9:1 is suitable for the plant leaf growth stage,moder2: R:8=9:1 is suitable for the plant blossom and fruit stage.
B2.Young Plant Stage 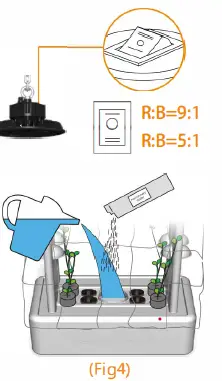
- Add 21 gallons of water to the water tank(Fig4).
- Add adjustment into the water tank and ensure EC value between(+ 1.0mS/cm)(Fig4) A spoon=1g / B spoon=5g / C spoon=10g

- Ensure ph between 5.5-6.S(adjust by pH+/-). For EC&pH adjustment instructions, please refer
- During the young plant stage (around 2 inches), turn on the LED and Pump. Please refer to the Chartwell.
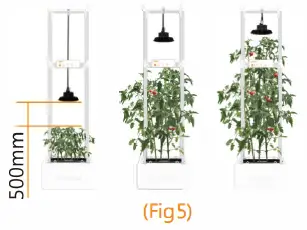
- You can choose different light hanging methods/positions for various plants base on you needs.(FigS)
- Change or adjust water every 1-2 weeks according to above item 3&4. Some flowers/ fruit plants may need higher EC(over 2.0) at flower/ fruit stage. Please refer to plants information before you choose and plant.


BJ.Growing Stage
- Set up the climbing net around the 4 tubes in the grow tank.
- Choose 4 plants and move them to suitable holes for better growing.
- Cover the empty plating sites to keep the rock wool wet and stop moss from growing up and
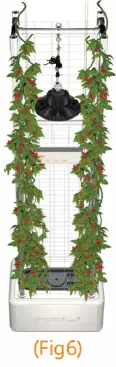
Stable them by using a climbing net or clip them on the poles. - Growtank can accommodate up to 8 plants and you can use ropes to go through the 4 metal rings on the water tank and fix them on the celling to allow the plants to climb(Fig6).
- When young plants grow to 3-4 inches in height, switch the control box to growing mode. Please refer to Chart II.
- After 4-6 weeks, harvest the larger plants for consumption and keep smaller plants growing.
- To save time, sow the new seeds in a sprout tray one week before you restart the planting process.
B4.Blossom Stage
- After about 6 weeks, add NT-adjuster to raise EC value to 2-2.5 for the flower stage of the plants.
- Ensure pH value between 5.5-and 6.5 (adjust by pH+/-). For EC and pH instructions, please refer to Chart II.
BS.Fruit Stage
- Note to add NT- Adjuster and water to raise EC value to 2.5-3 for fruit stage of the plants.
- if necessary set an Anti-insect net to prevent insects attack.
Optional Accessories
Maintenance
E1.Add Water
Measure the pH/EC value every 1-2 weeks and add water to achieve the value balance.
E2.Change Water
- After a cycle of planting, you may want to change water or clean the unit (fig 1)
- When changing water, clean water gateway on each planting layers, you may also add moss detergent in the water tank to avoid the moss remaining.
- On a regular basis of every 1-2 weeks, clean the filtering sponge in the pump.
E3.EC meter Use and Calibration
- keep the electrode of EC meter clean and cover the eletrode protective cap when not in use.
- Remove batteries when the EC/pH meter is not used for a long period of time.
Troubleshooting
| Lamps not Iighting up | Make sure all power cables are connected. |
| Make sure Power button is ON. Make sure LED status is ON.
| |
| Pump has a buzzing sound | Pump may make a buzzing sound in the beginning due to air inside the pump. After a minute with water running through the pump, this sould be reduced. |
| The lamp/ pump stop after hours | Control Box is designed with Auto, HI and LOW modes, which turn the lamps and the pump on
|
Installation steps of water pump
- Pick up Pump and slot base.
- Tear off the protective film of the slot base.
- Pump insert to slot base and affix.
- The slot affixed to the water tank (Keep water tank dry)
- Pump replacement is completed as shown in the figure.


