OPCOM OFG001 GrowBox Easy Grow User Manual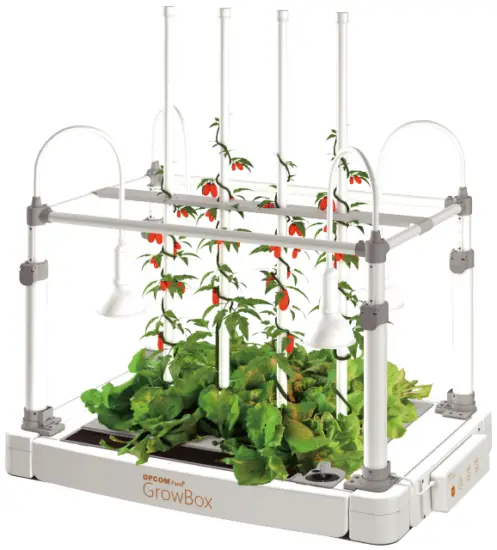
Thank you for purchasing OPCOM GrowBox, the indoor hydroponic growth system. It is designed with easy installation and high efficient growing system in one-touch AUTO mode. Please read the manual in detail before setting up. For further information, please visit our Official Website: www.opcomfarm.com
Assembly
A1. Check all accessories first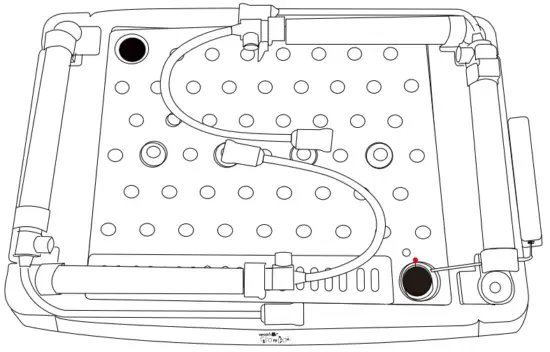
18W LED Growth Lamp (L18B) x 4 (OAEE02A)
Manual
Warranty
Manual
Grow Kit
- Adjustment Grow Sponge 4 x 60pk (OASP001)

- Salt #1 (Nutrition) 250ml x1

- Soda (pH+) 50ml x1

- Lemon (pH-) 50ml x1


Planting Accessories
- Water Spray x 1pc

- Plant Clip x 10pc

- EC Meter x 1pc

- pH test paper x1pc

- Cleaning Sponge x 1pc

- Draining Tube x 1pc (OAAS06A)

- Sprout Cover x 1(OAAS04A)

- Seed Moisturizing Cover x 6pc

- Sprout Sponges x 12pc (OAMS02A)


Lighting Support Kit
- Short Support Tube x 2 unit (OANS05A)

- Long Support Tube x 2 unit (OANS04A)

- Screw pack O4 x 10 mm x8
- Screwdriver) (OAAS03A)


Climbing Tube Kit
- Climdbing Tube l lolder x 1 (OAAS04A)

- Climbing Tube x 4 (OANS05A)


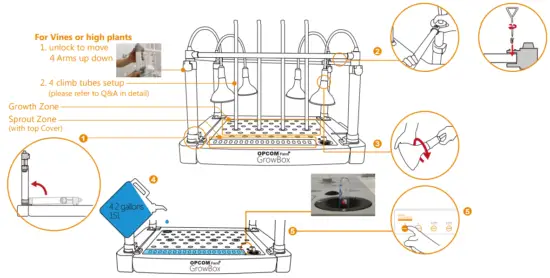
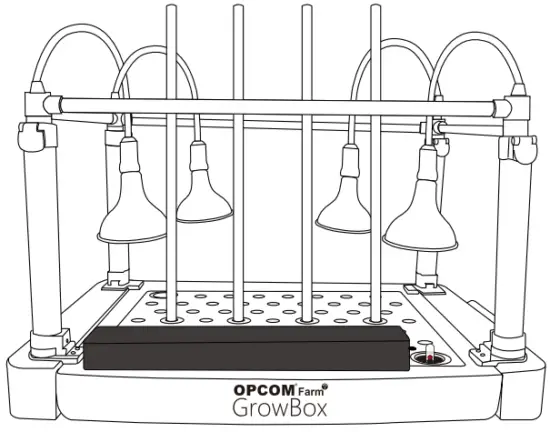
A2. Easy Set Up
- Stand the four Support Arms.
- Insert the Long and Short Supported Tubes.
Assemble tubes by using the contained screws and screwdriver. Caution: using power tools may damage the plastic. - Set up the LED Growth Lamps.
Setup four LED Growth Lamps into holder clockwisely and not too tight. - Add 4.2 gallons water to the unit.
Keep the water level l over 4.2 gallons indicator on the top. - Turn power on and test the unit.

Control Box Mode
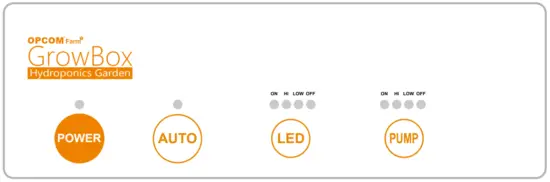
- Waking up:
When LED On,press Power button for 5 second LED will auto turn ON everyday at this press time - Sleeping time:
When LED Off,press Power button for 5 second LED will auto turn Off everyday at this press time
| Fuction | Status | Operation | Light | Time(On/Off) | Note |
| Power | On Off | One Press One Press | Follow last mode before turn off Off | ||
| Auto | On Off | One Press One Press | 12Hr/day ON mode of LED and Pump Follow LED and Pump manual mode seting | ||
| LED | Auto ON High Low OFF | One Press One Press One Press One Press One Press | 12Hr/day 24Hr/day 16Hr/day 8Hr/day 0Hr/day | ||
| Pump | Auto ON High Low OFF | One Click One Click One Click One Click | 12 Cycles/ day 24 Cycles/ day 4 Cycles/ day 2 Cycles/ day 0 Cycles/ day | 30 mins/cycle * 30 mins/cycle * 30 mins/cycle * 30 mins/cycle |
Planting
Ready to go
OPCOM Farm bundle with complete Grow kit, Plating accessories with 3 cycle consumption needs to easy your plating experienced, and go with EC Meter(Nutrition concentration test),pH tester paper and Food grade Salt(for Nutrition),Lemon(for pH-)and Soda(for pH+),may Safety and Efficiency to take over plant’s health grow, Please also try to keep in environment closer to 25 degree C and RH65% humidity of best condition
- EC Meter x 1pc
- pH test paper x1pc
- Salt #1 (Nutrition) 250ml x1
- Soda (pH+) 50ml x1
- Lemon (pH-) 50ml x1
Nutrition:
The Nutrition water need maintain each week for each stage of pH and EC as below, is better to change new Nutrition water each 2 weeks up to each cycle. Please use pure water (better RO water or steam water, please do not use Tap water! )
pH
Please Always keep pH between 6.0 (+/-0.5) in all plating period,use Lemon for pH- and Soda for pH+,maintain every week is better.
| Status | 4.0-4. | 4.5-5.0 | 5.0-5.5 | 5.5-6.5 | 6.5-7.0 | 7.0-7.5 |
| Soda#1 | Add Ax1 | Add Ax1 | Add Ax0.5 | Standard range | ||
| Lemon#1 | Standard range | Ax0 | Ax1.5 |
EC
EC meter purpose is testing the Nutrition concentration, Plant grow will consumpt the Nutrition and Concentration will reduce, also when plants grow, need more Nutrition to support, so that we need every week to adjust the EC according below instructin: Nutrition concentration may set on 1/1000,GrowBox Water with 15L, so that we just need add 15g Salt 1 for base Nutrition water, and use EC meter to fine test against add Salt 1 up to target setting number. you may add each tiem 1-2 spoon to fine adjustment against with EC meter.
Seeds
Local planting is best select to use local seeds to meet local weather environment, please refer opcomfarm web site products page for seed selection.
B1. Germination Stage
- GrowBox can grow Lettuce 25 plants and silm plants liek Basil, herb for 50 plants, with 70% germination rate, you can caculate how many grow sponges you need: Example: Lettuce: 25/0.7=36 sponges Basil: 50/0.7=70 sponges ——(the Germination rate number may depends on your seed selection between 70-95%)
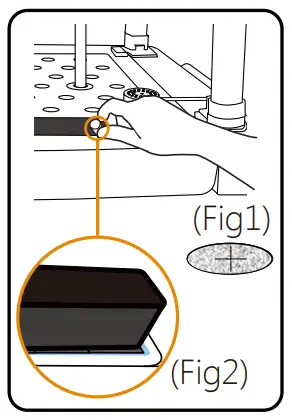
- Open Grow sponge package and keep label side up,Put 2-3 seeds in each sponge center Cross cut and under 5mm, put it into sprout Zone (Fig 1) soak the sponge into water for 5 seconds and wet the sponge completely.


- Keep water level on half of sponge to keep wet with seed moisturing cover cloth, and not over to seed, top with Sprout cover and done,(Fig2)
- Cover the sprout for 3-7 days for germination and make sure the sponge wet during this stage. #Please keep the seeds in refrigerator or 41-50 degree F (5-10degree C)and please use all seeds ASAP, to not damage germination rate.
| Control Box | Time after planting | LED Mode | Pump Mode |
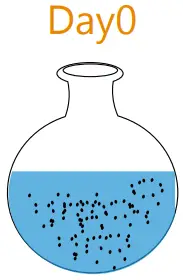
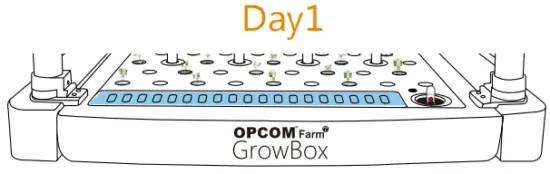
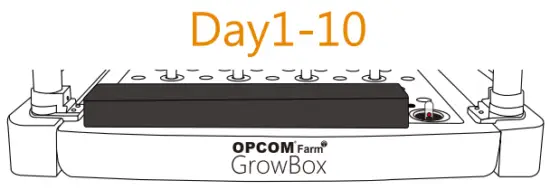
| Germinatio | Day 0~Day 7 | OFF | OFF |
Seedling Stage
- When the germination rate over 70% with green on seed, Please just keep one thickest root plant in each sponge and remove out all others(you also can select strong one to empty Sponge for continuously grow) You can take out the Sprout cover and move light on sprout zone with 24 hours to speed up the young plants growth.
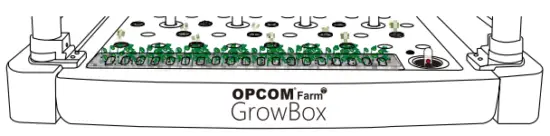
Control Box Time after planting LED Mode Pump Mode Seedling Day 7~Day 14 ON ON - Adjust pH between 6.0+/-0.5 according above pH instructions
- Follow above B-pH instruction to keep pH between 6.0+/-0.5
- Follow above B-EC instruction to Add Salt 1 to keep EC between 0.8ms/cm -1.0ms/cm
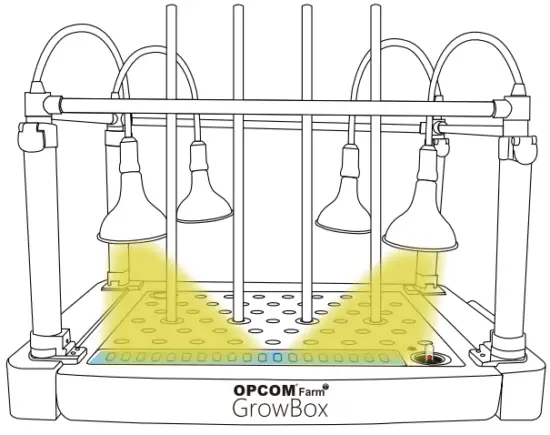
- Adjust LED light to cover all Sprout Zone.

Growing Stage
- When plants grow to 2-3inch become young plant, the leaf will no space to grow in sprout zone,is the time for transplant.
- Remove each plant to plating zone, keep one empty hole for Lettuce and full 50 plant holes for Basil or herb.

- keep spone top under hole top port.Fig 3
- Move LED direction to cover all plants
- Change LED and Pump setting to Auto
- You can adjust each plant distance depends one different plant size to reserve good enouigh space to continuously grow in all periof.

- Please keep EC between 1.0-1.4 ms.cm every week, when leaf larger you can adjust hight EC level
- For vine plants like tomato and Cucamber, you may take more time for sprout(2- 4weeks) and same nutrition as above leafy, justadd more nutrition when flower stage and fruit stage between 1.6ms/cm-2.2ms/cm. and also can add extra flower/Fruit nutrition.
- The light condttion can work regular 12 Hr per day in Auto mode, also can work Hr per day for working time and less nessary light plants with Low mode, also you can set high mode or ON for 16Hr/24Hr lighting, especlal for Sprout young plant or flower, harvest stage
- OPCOM L18B grow light bulb design with UV,IR inside White and Red LED, to result full spectrum simulated to sun light,great for plants aggresive growth, the standard E26 mount also can become extra Grow light to regular bulb socket for additional applications.

| Control Box | Time after planting | LED Mode | Pump Mode |
| Growing | After Day 14 | AUTO | AUTO |
B4. Harvest Stage
Around 35-42 day, your lettuce can harvest and enjoy your own plating Salad!
C. Optional
C1. Re Grow
When harvesting,cut out the larger leaves and allow the smaller ones to keep growing in your GrowBox. You can repeat the harvesting method weekly for the next 3-4 weeks without the need to re-seeding.
C2. For Sprout Production
Our free gift-sprout cover will make your GgrowBox not only a hydroponics system, but also a sprout equipment. (Every harvest cycle is about 7-10 days.)
- Put seeds in warm water 1 day,you can see the sprout.

- Move the Sprout seeds cover on sprout zone sponge,and keep sponge wet all the time.

- With sprout top cover for white sprout

- Under lighting for Green sprout,

Contact US
Please visit our OPCOM Farm website at www.opcomfarm.com for further information, including User Manual, Planting Q&A, videos and the news.