Contents hide
Acer UWA5 Projector Wireless Adapter USB
Installation and Connecting
OSD screen introduction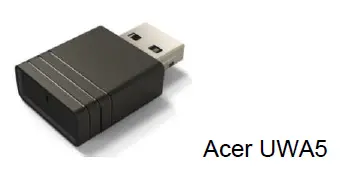
This page is the projector wireless display standby page for the first boot up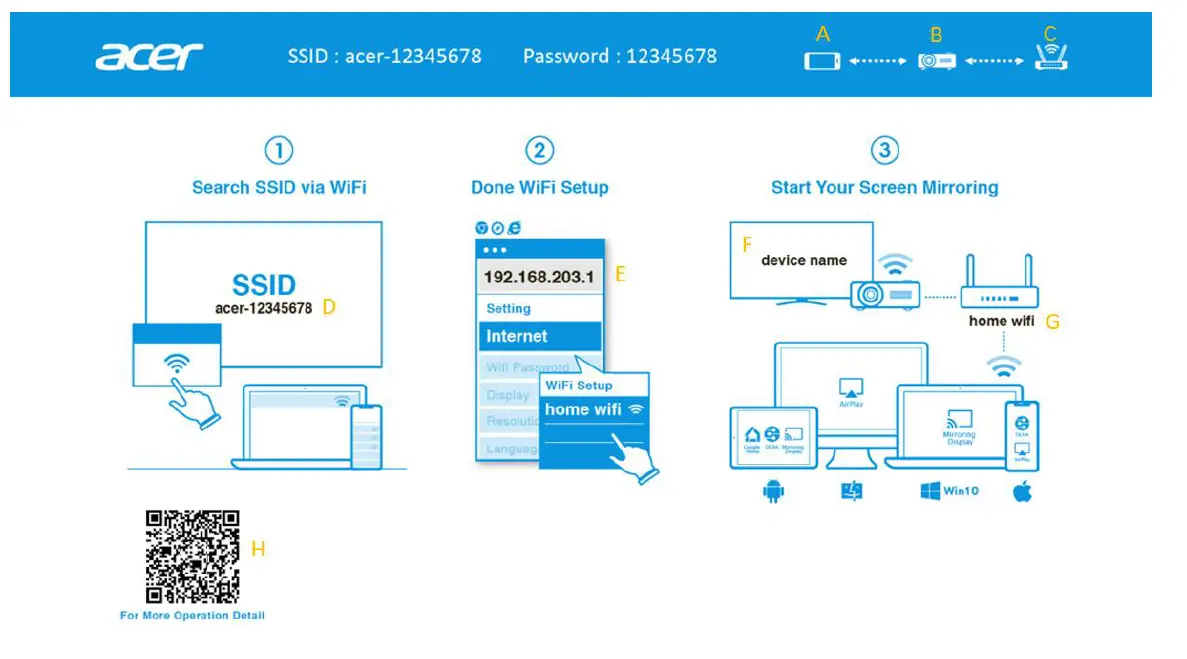
- The user’s device.
- Projector.
- Router, ex: Home WiFi, company WiFi.
- Projector’s SSID needs to plug in UWA5 first.
- Projector’s IP address for web setting, need user’s device connected to projector first.
- The IP address will change if the projector connects to the router.
- The device name will show after the projector is connected to the router.
- Router’s name.
- QR code for function description.
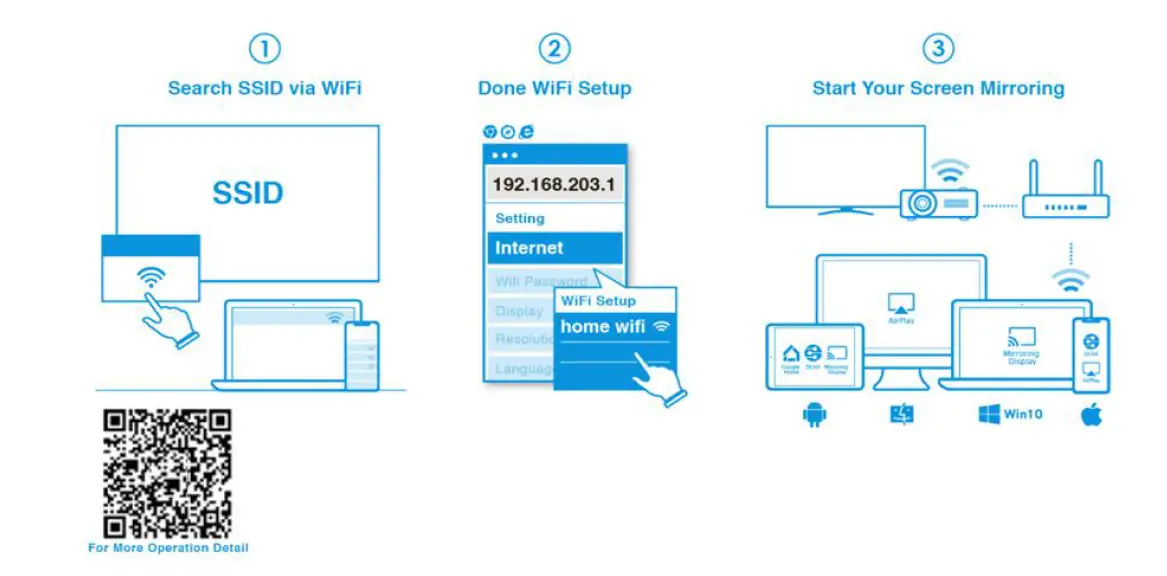
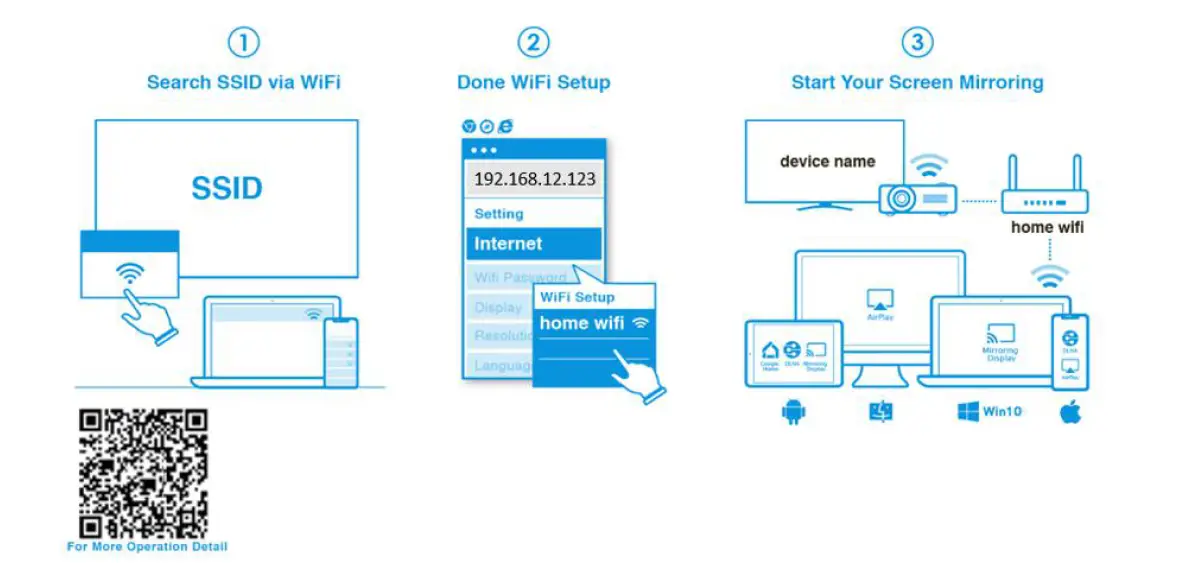
How to set up the client for 1st time:
Step 1, Make sure your projector plug in the UWA5 dongle.
- If no plug-in UWA5, the UI will not show the SSID and password, only show the ID.


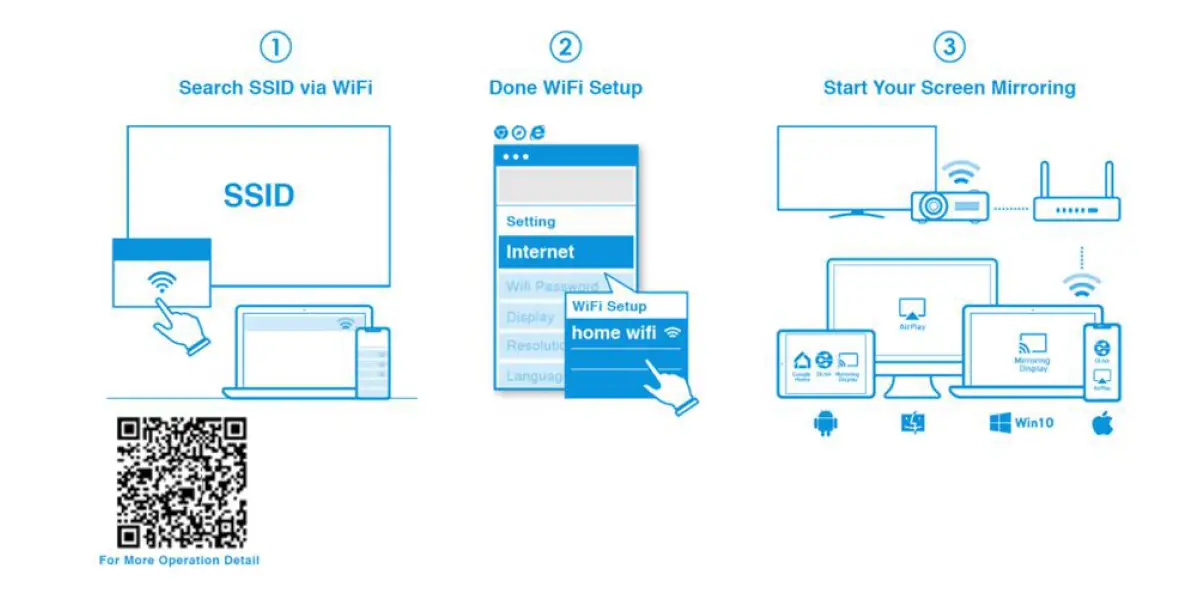

Step 2, Connect your device to the projector by Wi-Fi.
- Opens the WiFi settings on NB / PC / Smartphone / Tablet and find the SSID which is Acer-XXXXXXXX and connect it.
- When successfully connected, the projector’s IP address will appear and the SSID will disappear on.

- Users can do the “Miracast”, and “Airplay mirroring” in the step.
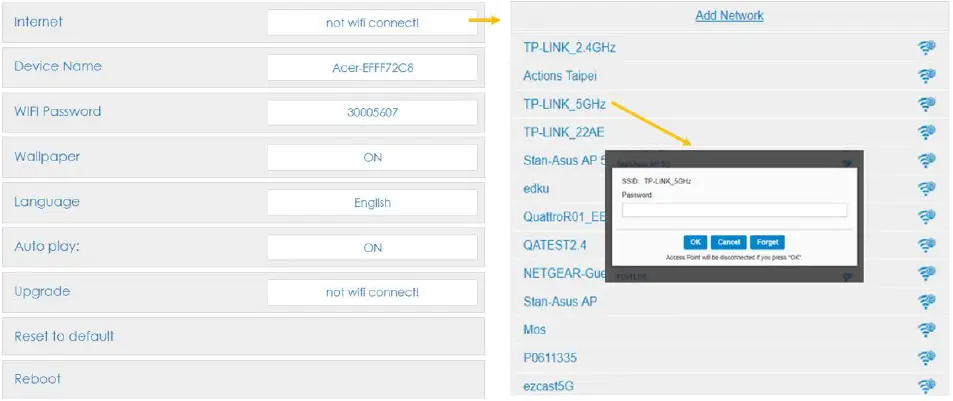
Step 3, Client setting for projector’s wireless setup - After Step2, open the device’s web browser and enter the IP address (192.168.203.1) into the setting page.
- Select the router to which want to connect.

- After setting, the projector wireless display standby page will switch as below, and the SSID and PWD information will replace with to devise name and router name.

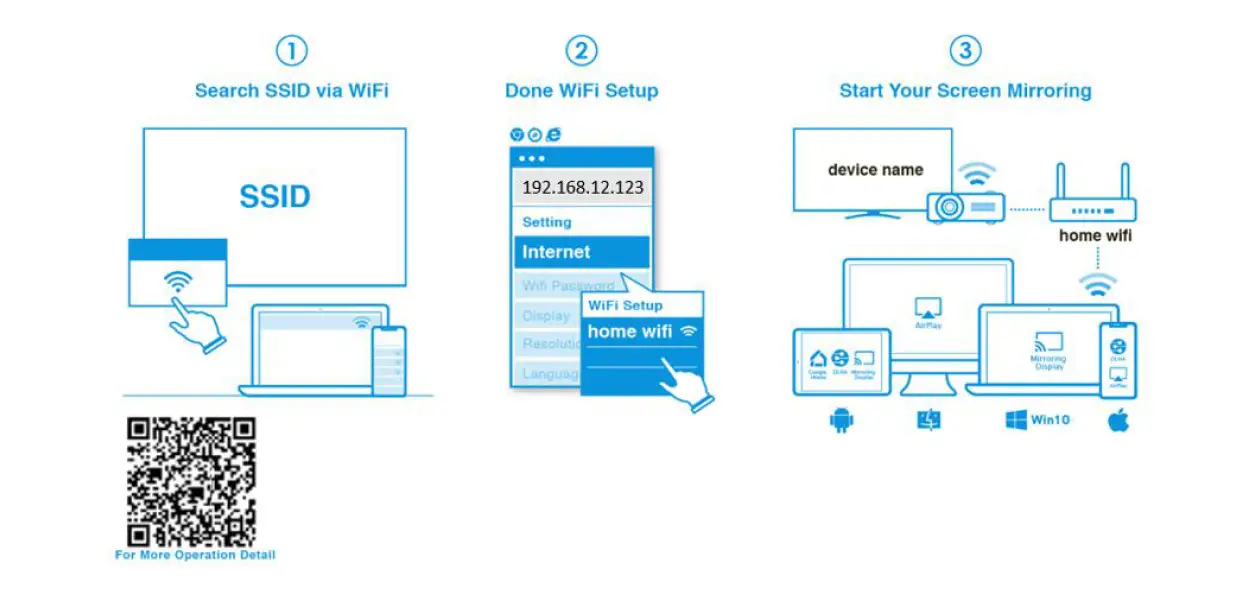
Step 4, Display
- Connect your device’s Wi-Fi to the router which is the same as the projector.
- Start to use Miracast, Airplay, DLNA, and Google mirror on your device.

Notes:
- Miracast is mainly for static document presentation.
- Video mirroring may cause voice and image lag.
How to do wireless display
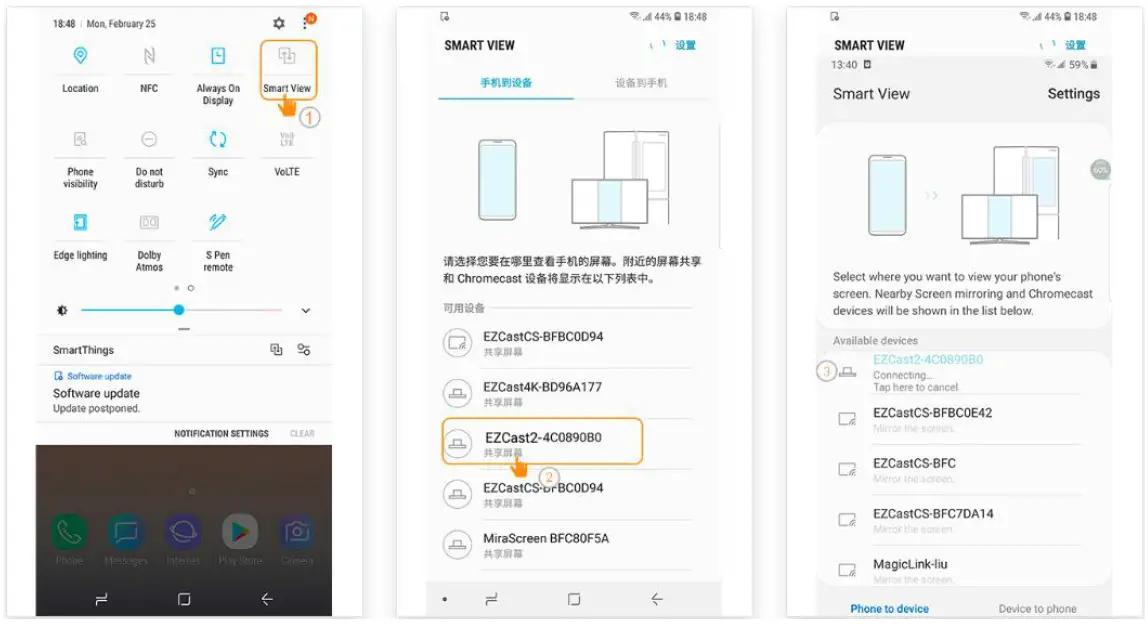
Android:
- Select the mirroring function in the setting of your phone and find the “Acer-xxxxxxxx” device in the device list to start your mirroring.
- Please notice the naming of the mirroring function varies for different brands and compatibility with Android 5.0 or above.
Samsung S series: Huawei Mate:
 Huawei Mate:
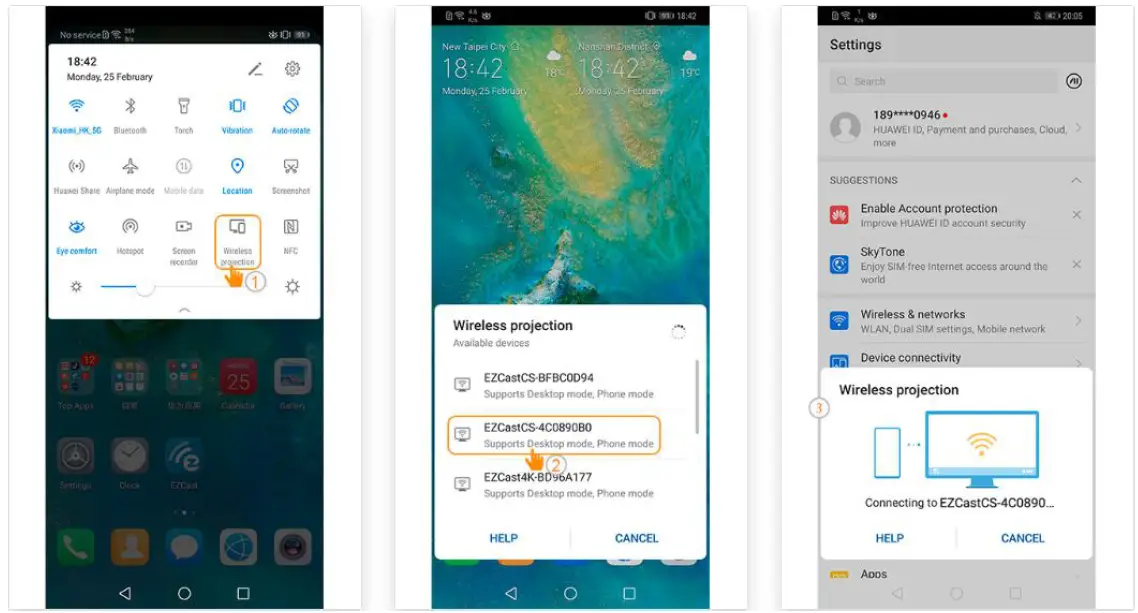
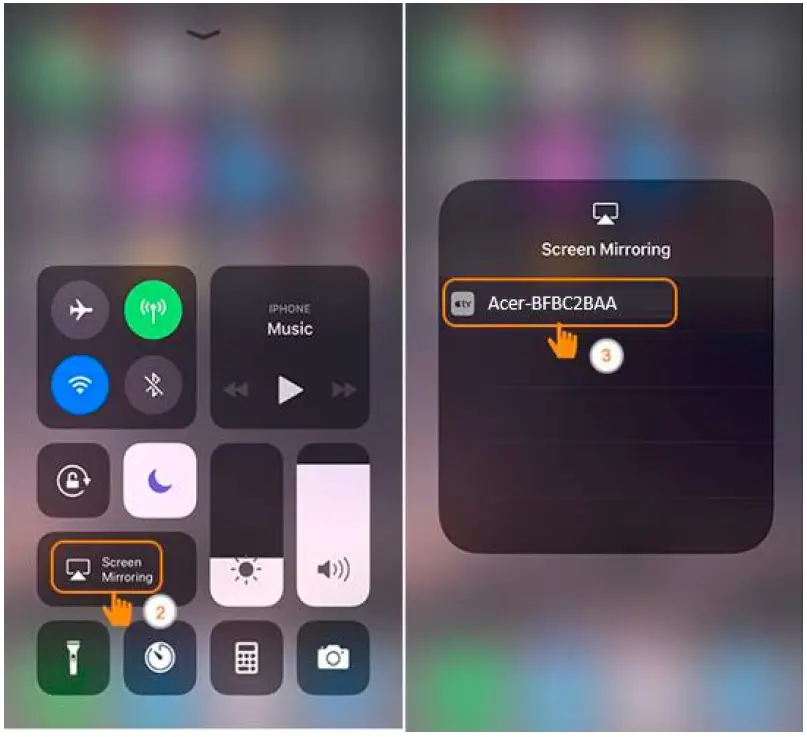
iPhone
- Make sure both of your projector and mobile are connected to the same Wi-Fi router.
- Go for Screen Mirroring of your mobile and select the “Acer-xxxxxxxx” shown on the list to start projection.
- Compatibility iOS 13 or above.
- Not support DRM content (like Netflix, iTunes video, Disney+)

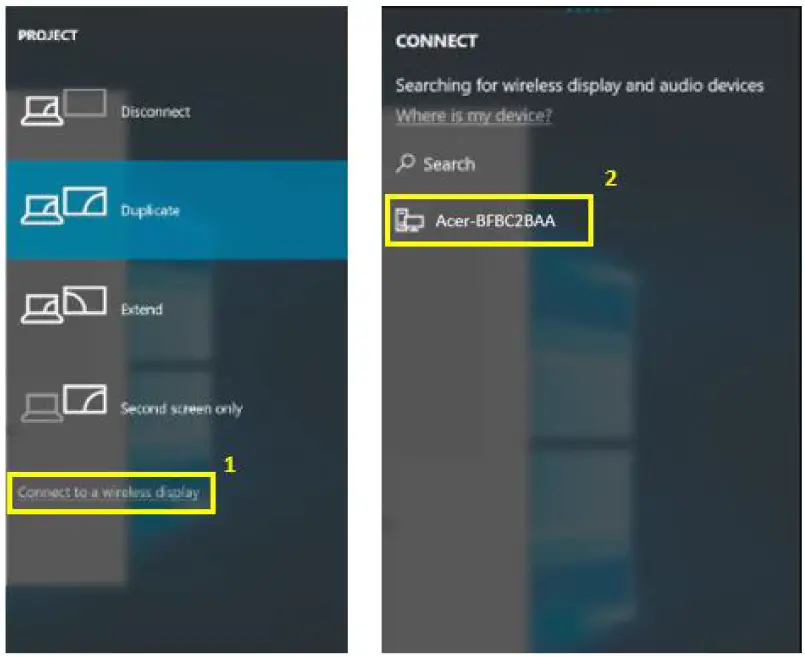
Windows 10
- Click the quick key on the computer, and connect to the device named “Acer-xxxxxxxx” to start your projection.
- The connecting may need a few seconds.
- Please upgrade your Windows 10’s operation system to the last version.

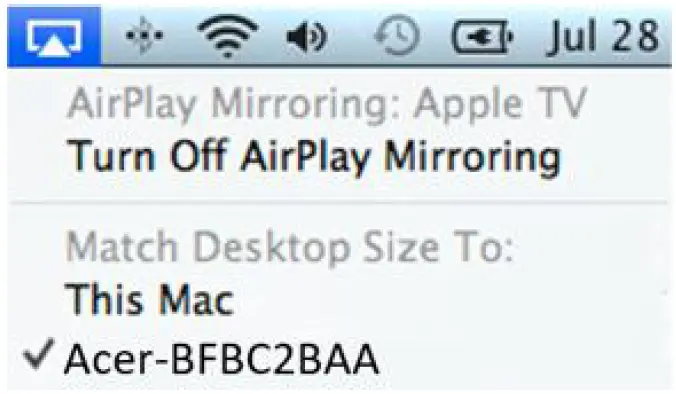
macOS
- Make sure both your projector and computer are connected to the same Wi-Fi router.
- Click for the Screen Mirroring icon on your computer and select the “Acer-xxxxxxxx” in the device list to start your projection,

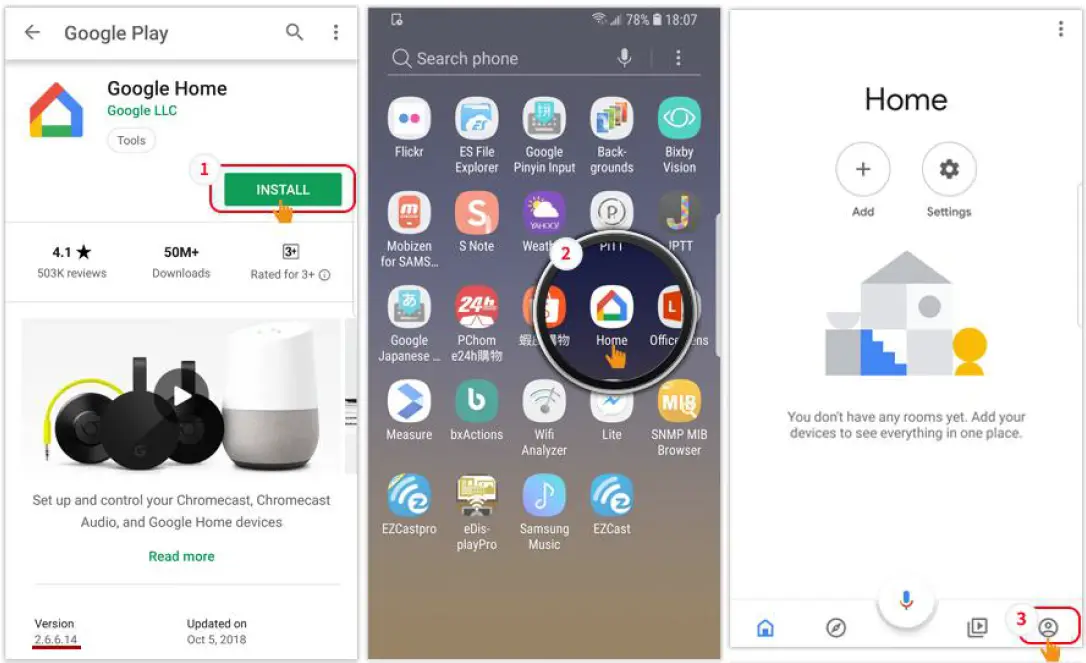
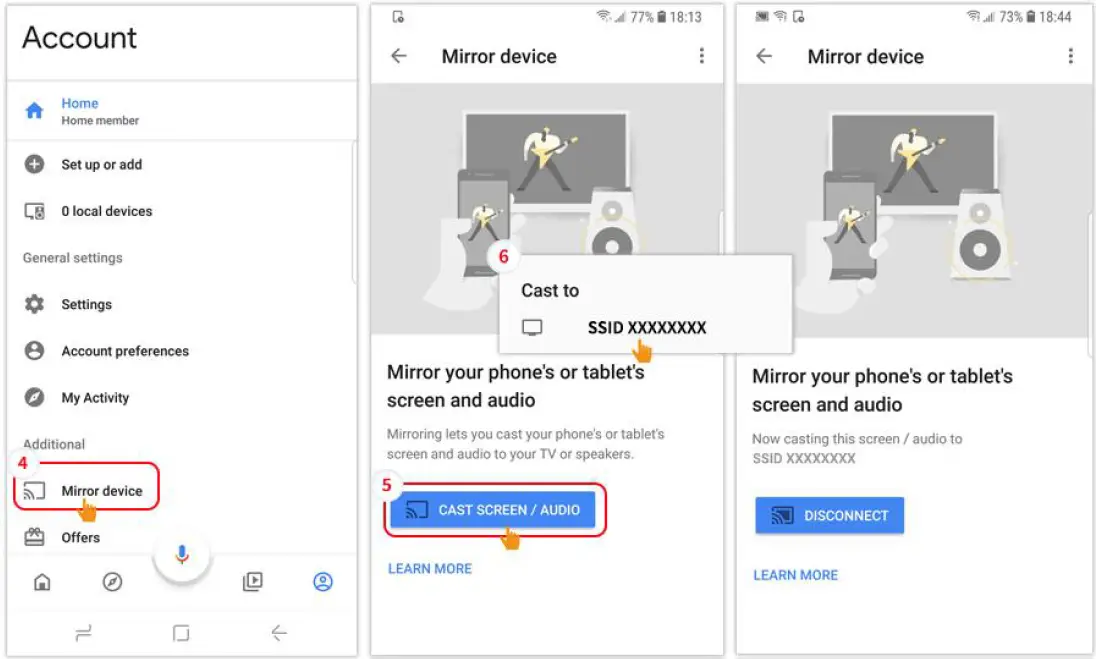
Google Home Screen Mirroring (Android only)
- Download and install the Google Home app from Google Play Store.
- Make sure both of your projector and computer are connected to the same Wi-Fi router.
- Enable the Google Home app and go to Account>>Mirror Device>>select the “Acer-xxxxxxxx” in the device list to start your projection.
- Not support DRM content (like Netflix, iTunes video, Disney+)


DLNA
- Download and install the cloud video app.
- Make sure both your projector and computer are connected to the same Wi-Fi router.
- Launch the cloud video app and click the DLNA icon to select the “Acer-xxxxxxxx” in the device list to start your projection.

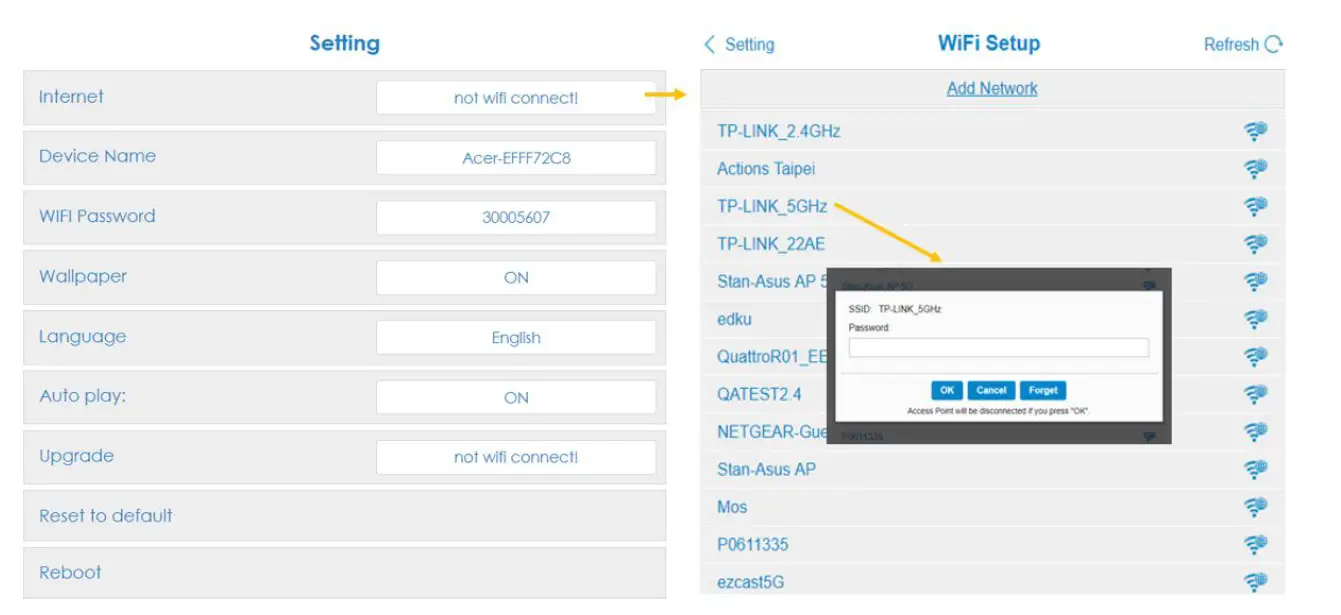
Projector’s wireless setting
Launch the device’s web browser and enter the projector’s wireless IP address to open the setting page for the projector.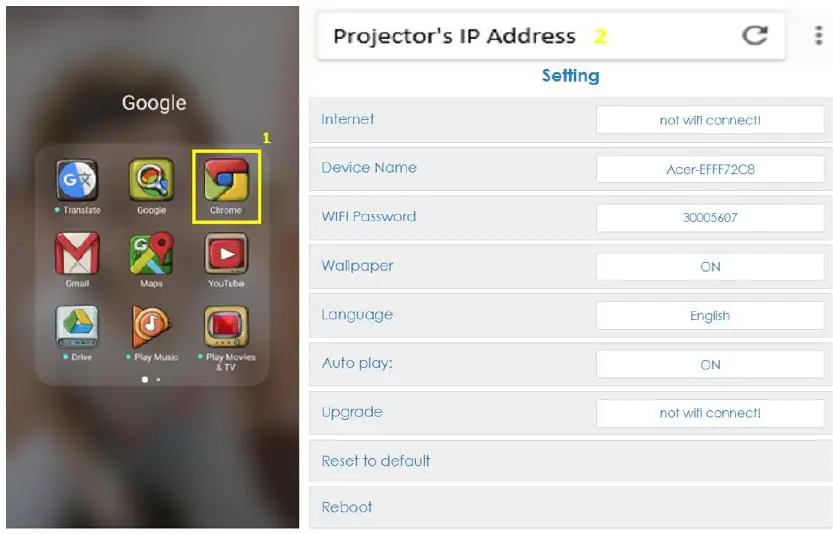
- Internet Projector’s wireless client setting, it can enable the Airplay streaming, DLNA and Google mirror function.

- Device name
- Default same with SSID/ID, and the User could modify it.
- WiFi password
- Support 0~9 and a~z, the user could modify it.
- Wallpaper
- When connected to the router then show the picture slide show from the cloud.
- Language
- Default auto (depend on the user’s device), the user could change the language for web page.

- Default auto (depend on the user’s device), the user could change the language for web page.
- Upgrade Please make sure both of projector and user’s device were connected to the same Wi-Fi router.( follow steps 1~3 in item 1 to set the internet) Please type in the projector’s wireless page’s IP in the web browser.


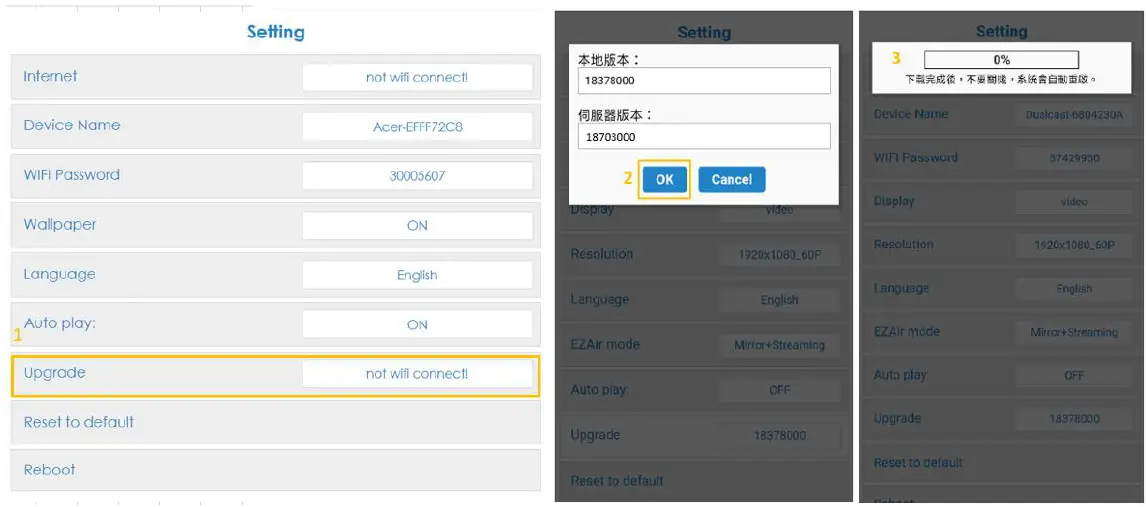
Upgrade UI on the projector:
It will auto-reboot when the upgrade is finished.
- Reset to default Set all settings to the default.
Other Important Notice
- Remove AC3, 3GP, RMVB, DTS, DivX, and MPEG2 support.
- Supported WiFi Dongles: UWA5.
- Wireless transmission distance: < 5 m.
System requirement (Mobile/NB/Desktop)
- Windows OS
Component Requirement CPU Dual Core Intel Core i 2.4Ghz Memory DDR 4GB and above Graphic card 256MB VRAM or above Operating System Win 10 last version. - Mac OS
Component Requirement CPU Dual Core Intel Core i 1.4 GHz or higher (PowerPC not supported) Graphic card Intel, nVIDIA or ATI graphic card with 64MB VRAM or above Operating System Mac OS X 10.14 or above. (Please make your OS is update-to-date)
- Android System
Component Requirement CPU Quad Core or above with 1GB RAM Mirror Resolution WVGA~1080p Operating System Android 9.0 above and support Miracast. - iOS System
Component Requirement Device All iPhone™ models after iPhone 5 All iPad™ models after A7 CPU Mirror Resolution WVGA~1080p Operating System iOS 13 or above


