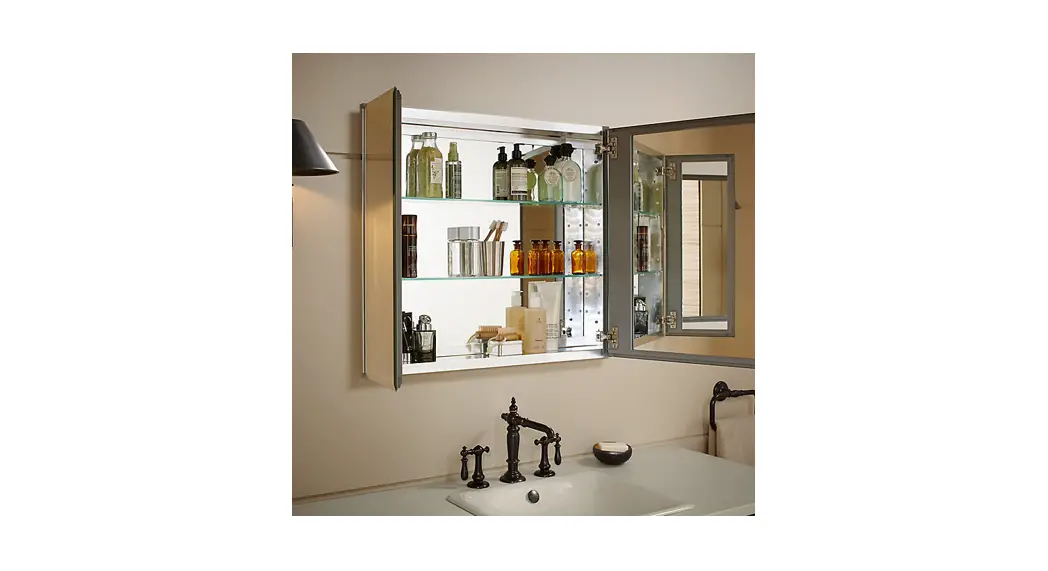
![]() 1133135-2 Surface-Mount
1133135-2 Surface-Mount
Instruction Manual
1133135-2 Surface-Mount
Required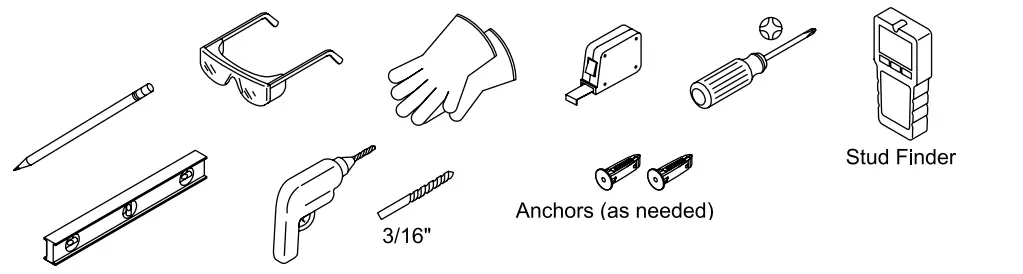
Parts Supplied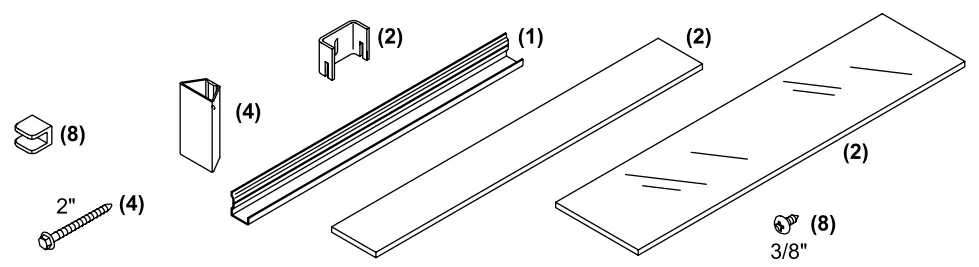
![]() If you are missing parts, DO NOT RETURN this product to the store.
If you are missing parts, DO NOT RETURN this product to the store.
Service parts can be ordered by calling 1-800-4KOHLER (456-4537) or online at kohler.com/serviceparts![]() CAUTION: Risk of electric shock. Electrical wiring may need to be relocated.
CAUTION: Risk of electric shock. Electrical wiring may need to be relocated.![]() CAUTION: Risk of property damage. Use anchors (not provided) rated for the load weight of this product. Refer to the anchor manufacturer’s instructions.
CAUTION: Risk of property damage. Use anchors (not provided) rated for the load weight of this product. Refer to the anchor manufacturer’s instructions.
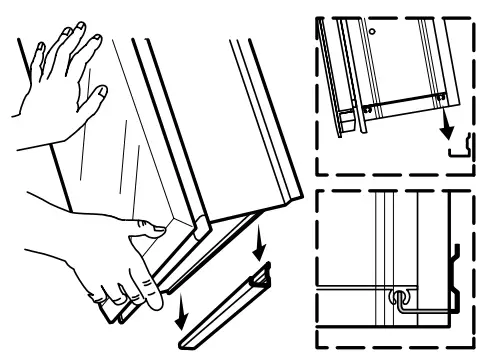
NOTICE: Risk of product damage. Do not leave the door supported with only one hinge during removal or reinstallation. Disengage the bottom hinge first during removal, and reattach the top hinge first during installation.
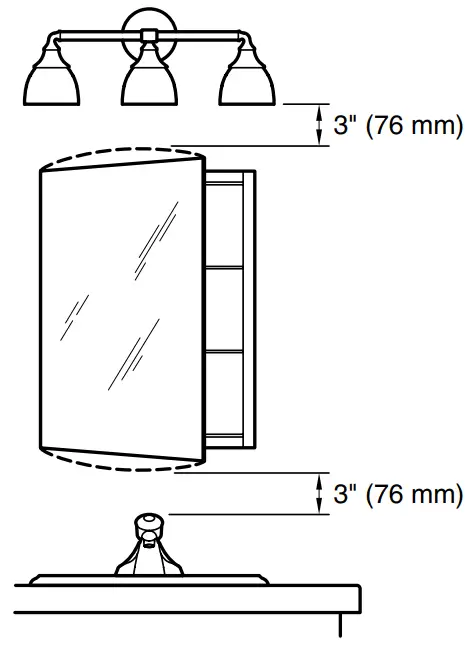
- Verify minimum clearances.

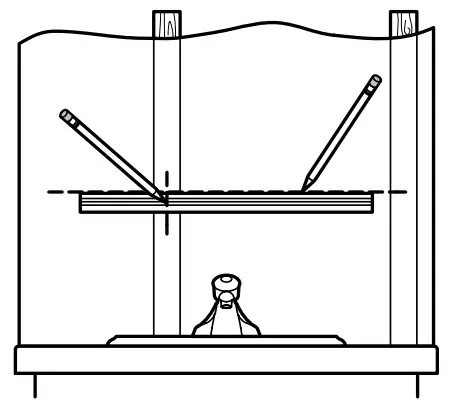
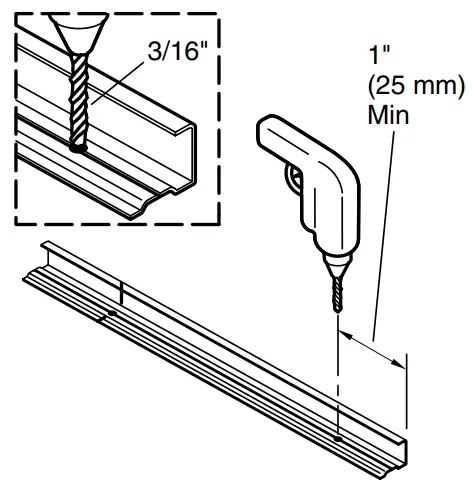
- Mark the position of the mounting bar. Mark the stud locations.

- Drill holes on the groove. One hole must be on a stud location.

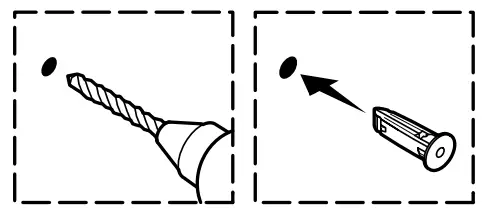
- Mark hole locations on the wall. Drill holes. Insert anchors (not provided) where needed.

- Secure the bar with two 2” hex head screws or screws provided with the anchors.

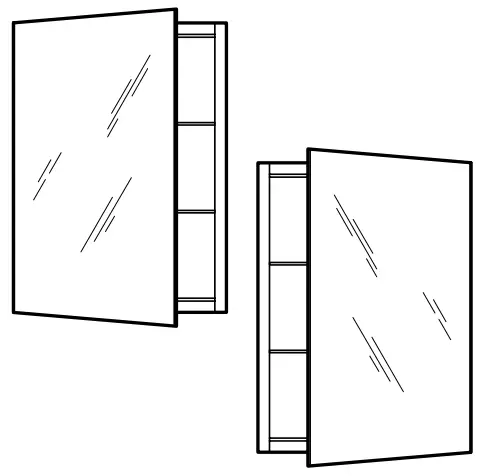
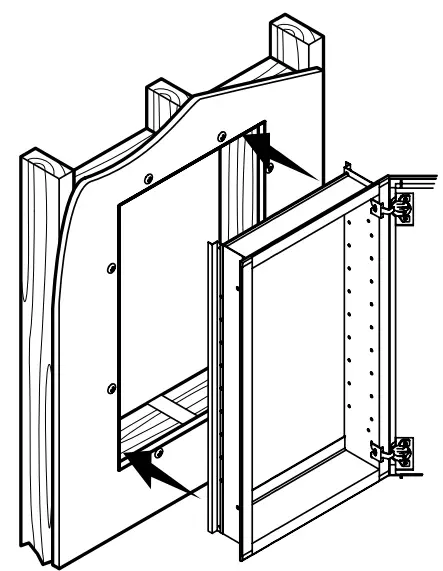
- If applicable, rotate the cabinet for a right or left door swing.

- With help, place and hold the cabinet on the mounting bar.

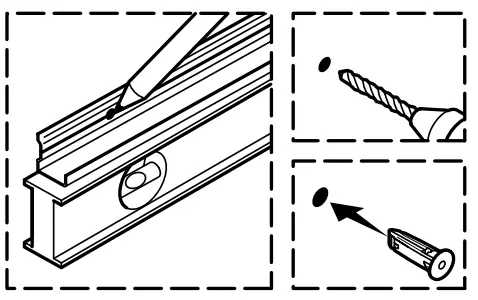
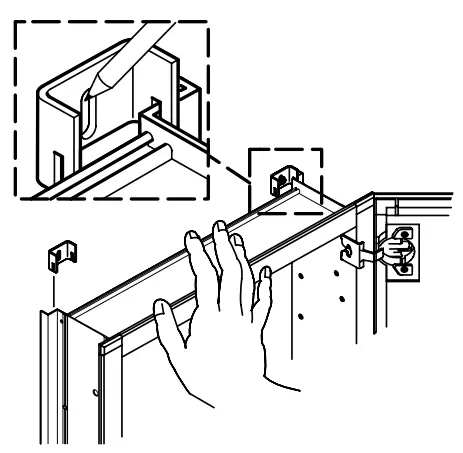
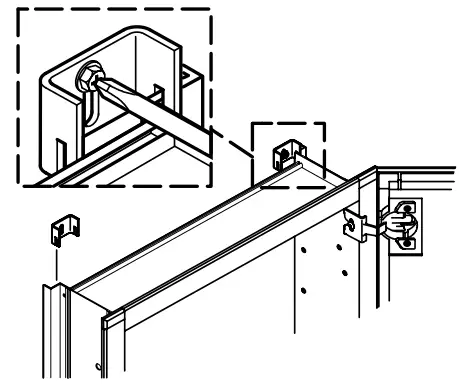
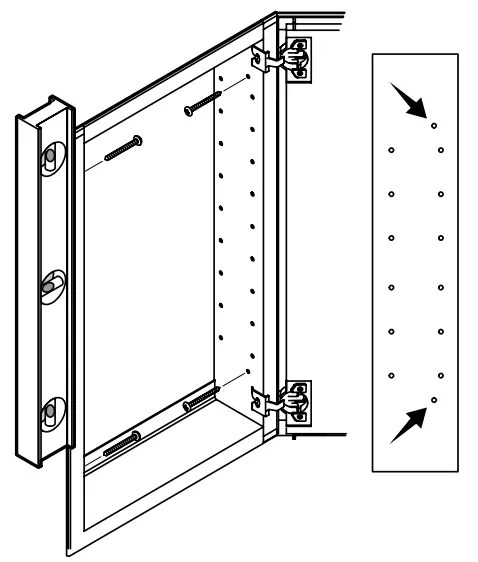
- Position the mounting clips. Mark the upper part of the slot.

- Set the cabinet aside. Drill holes and insert anchors where needed.

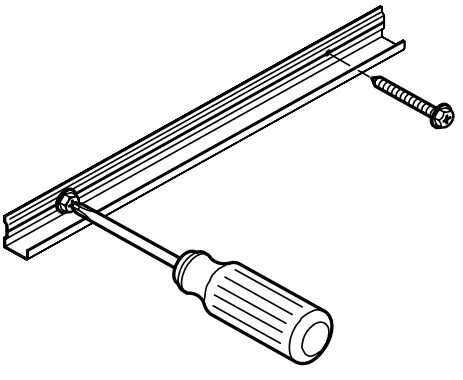
- Secure the clips with 2” hex head screws or screws provided with the anchors.

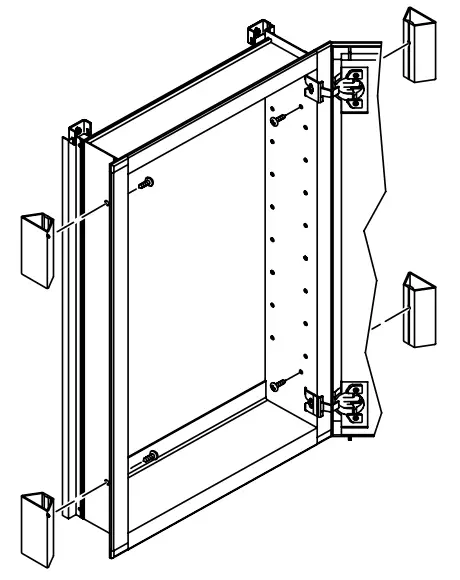
- Install the side brackets. Remove the backing.

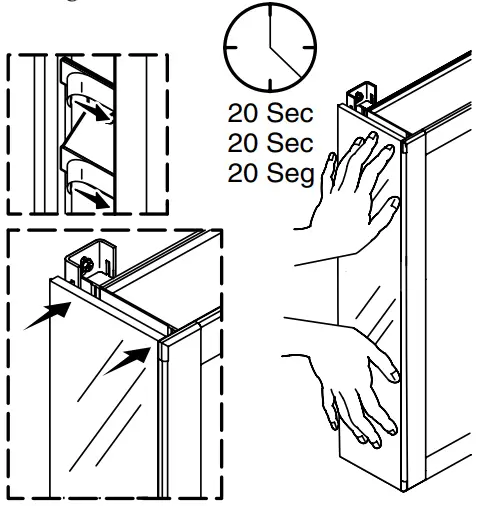
- Install the side mirrors. Apply pressure for 20 seconds.

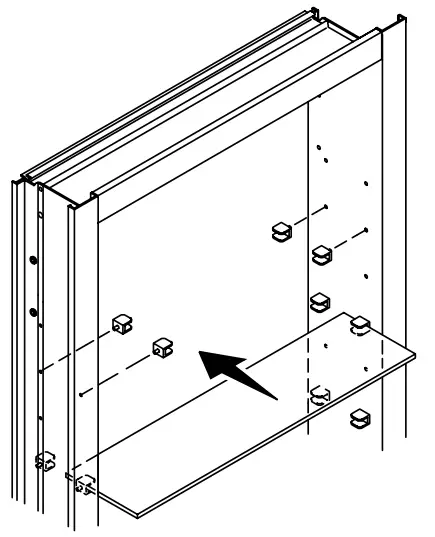
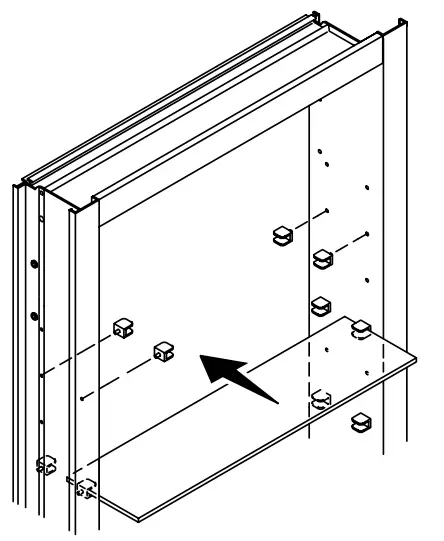
- Install the shelf clips. Install the shelves.

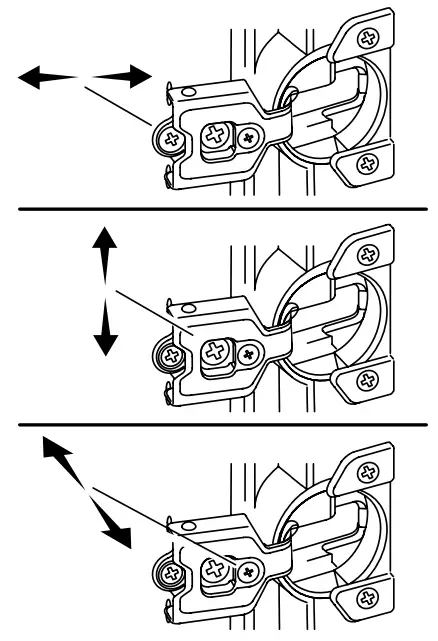
- If needed, align the door.


Required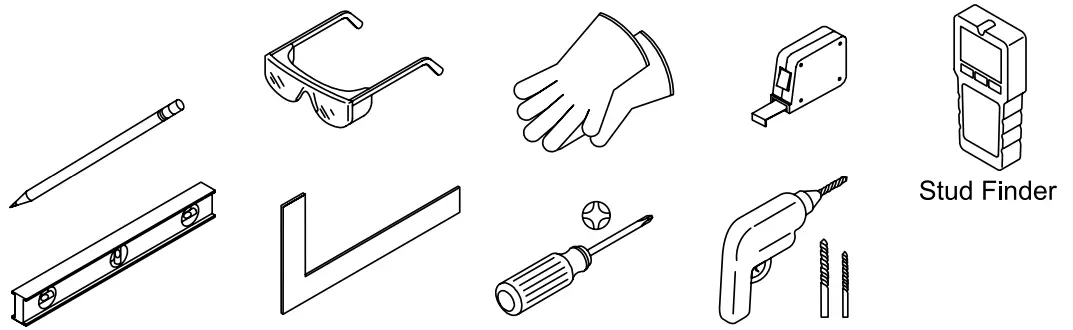
Plus
Framing and Drywall Tools
Parts Supplied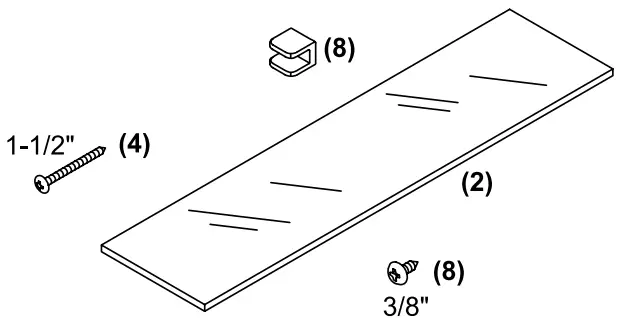 Record your model number.
![]() If you are missing parts, DO NOT RETURN this product to the store.
If you are missing parts, DO NOT RETURN this product to the store.
Service parts can be ordered by calling 1-800-4KOHLER (456-4537) or online at kohler.com/serviceparts.![]() CAUTION: Risk of electric shock. Electrical wiring may need to be relocated.
CAUTION: Risk of electric shock. Electrical wiring may need to be relocated.
NOTICE: Risk of product damage.
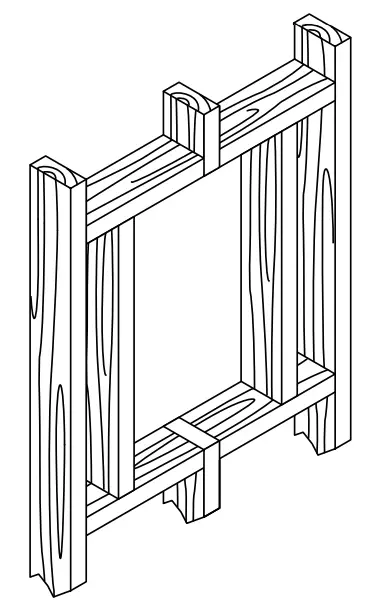
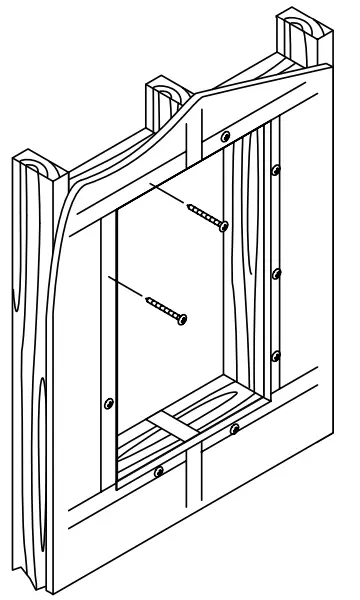
The wall cavity must be framed. The cabinet must be secured to framing studs.
NOTICE: Risk of product damage.
Do not leave the door supported with only one hinge during removal or reinstallation. Disengage the bottom hinge first during removal, and reattach the top hinge first during installation.
IMPORTANT: Reroute any electrical wires or water supply piping from the wall cavity. If you encounter drain or vent piping or if your wall is load-bearing, consult a professional before proceeding.
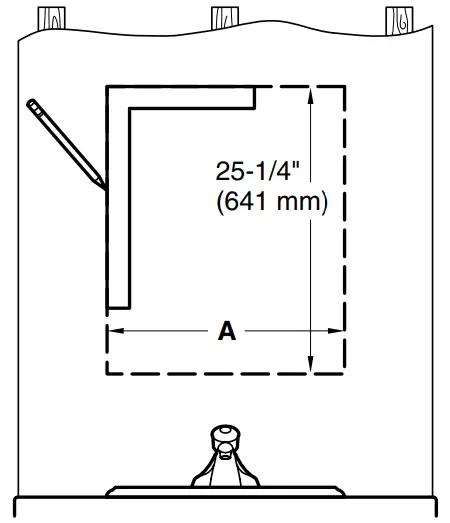
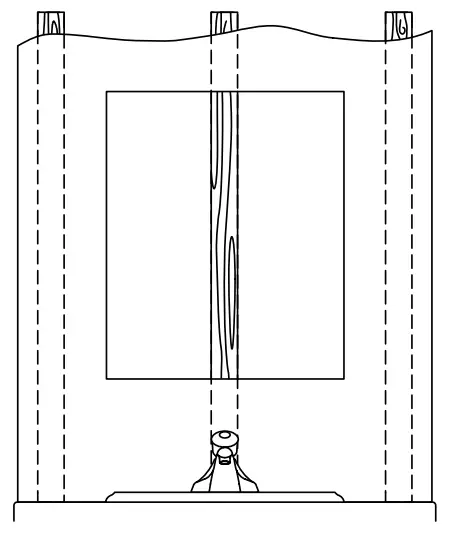
Cutout Dimensions
| Model K-CB-CLC | Width “A” |
| 1526FS, K-R79215, K-99890, K-11808, K-R79217 | 14-1/4″ (362 mm) |
| 2026FS, 2026SS, 2030VAS, K-99895, 2030DAW, K-2967, 2031BAN, K-99891-R79218, K-3073,’ K-R79222, K-R32065, K-R32067, | 19-1/4″ (489 mm) |
| 2526FS | 24-1/4″ (616 mm) |
| 3026FS, K-99893, K-R79221, K-R32066 | 29-1/4″ (743 mm) |
| 3526FS, K-99042 | 34-1/4″ (870 mm) |
- Verify minimum clearances.

- Measure and mark the cutout.

- Cut away the drywall.

- Frame out the wall cavity.

- Secure the drywall to the framing.

- If applicable, rotate the cabinet for a right or left door swing.

- With help, lift and hold the cabinet in the cutout.

- Secure the cabinet to the framing.

- Install the shelf clips. Install the shelves.

- If needed, align the door.


![]()
 Record your model number.
©2022 Kohler Co.
USA/Canada: 1-800-4KOHLER
México: 001-800-456-4537
kohler.com
1133135-2-L


