![]()
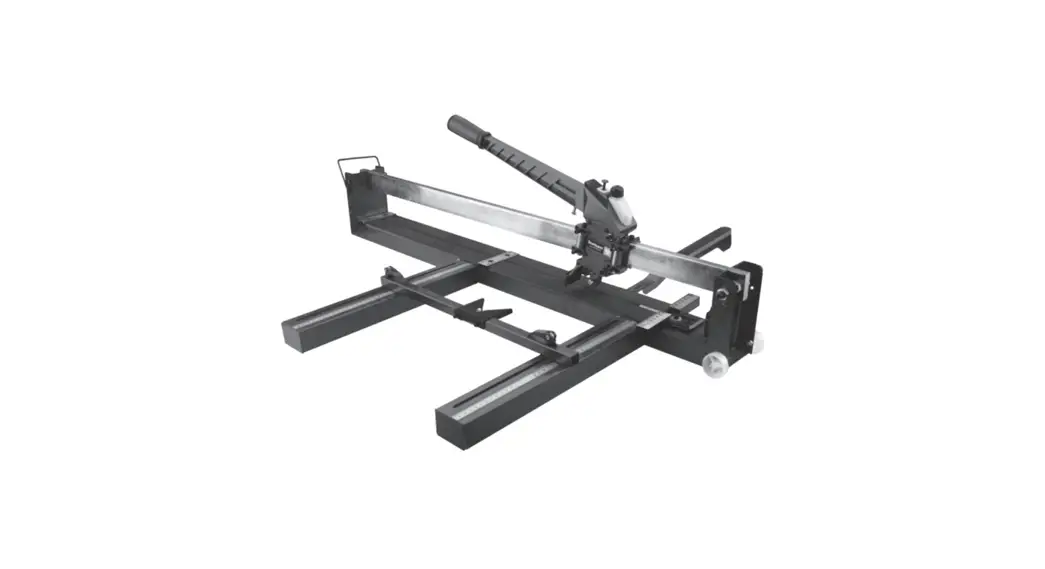
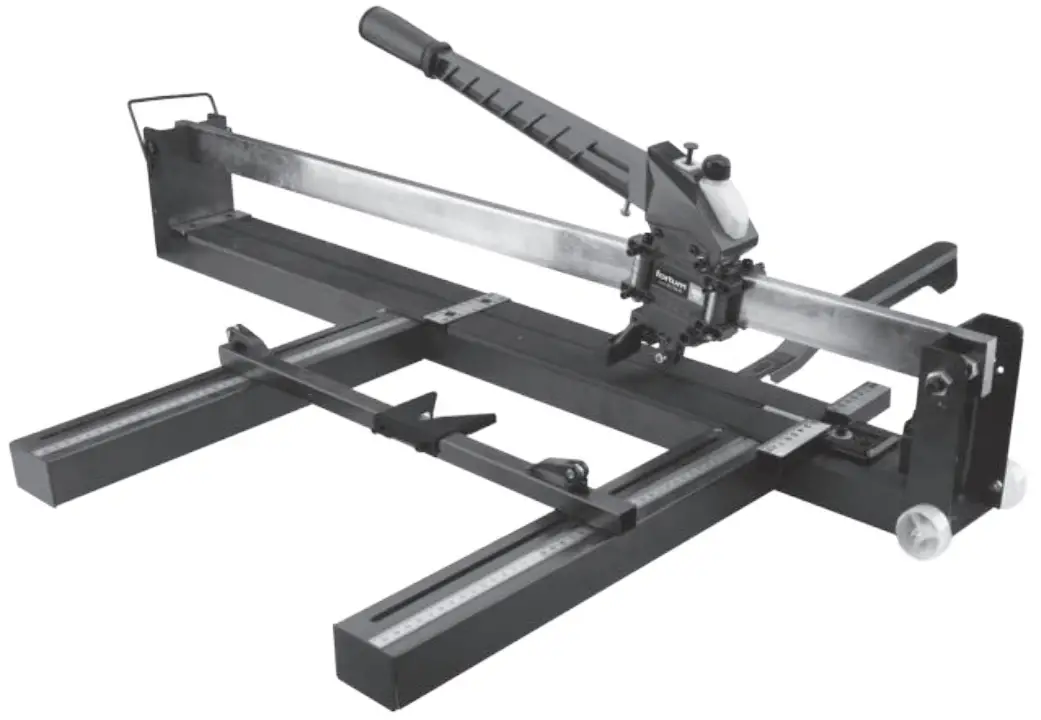
4770840A Tile Cutter
Instruction Manual
4770840A Tile Cutter
Translation of the original user‘s manual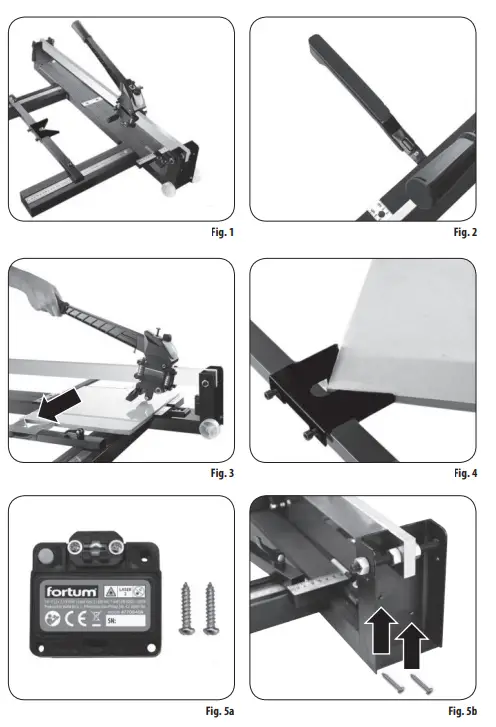
Introduction
Dear customer,
Thank you for the confidence you have shown in us by purchasing this product.
This product has been tested for reliability, safety and quality according to the prescribed norms and regulations of the European Union.
Contact our customer and consulting centre for any questions at: www.fortum.cz [email protected]
Manufacturer: Madal Bal a. s., Průmyslová zóna Příluky 244, 76001 Zlín, Czech Republic. Date of issue: 12. 5. 2020
I. Technical specifications
| Part number | 4770840 | 4770841 | 4770842 |
| Max. cut length | 800 mm | 1000 mm | 1200 mm |
| Max. tile thickness | 18 mm | 18 mm | 18 mm |
| Min. thickness of cut tile | 35 mm | 35 mm | 35 mm |
| Folded out cutter dimensions | 1060 × 550 mm | 1260 × 550 mm | 1460 × 550 mm |
| Weight | 14 kg | 16 kg | 18 kg |
| Number of NSK ball bearings | 25 | 25 | 25 |
| Lubricating oil tank with manual pump | Yes | Yes | Yes |
| Type of lubricating oil | Sewing machine oil | ||
| Cutting wheel dimensions | 22 × 6 × 6 mm |
Accessories available for purchase if required
| Spare cutting wheel | Part number: 4770805 |
| Laser source (not include with the cutter) | Part number: 4770840A |
PARAMETERS OF THE LASER SOURCE (not included with the cutter)
| Part number | 4770840A |
| Wave length | 650 nm |
| Power output | 1 mW |
| Class | 2 |
| Laser colour | red |
| Power source | batteries 2× AAA, 1.5 V |
![]()
II. Preparing the tile cutter for use
- Setup the tile cutter according to fig. 1. Secure both side bars with scales in place. For cutting larger tiles, tilt out the side support bar as shown in fig. 2 and secure it in place so that the tile is supported by this support to prevent it from damage while snapping it off.
- There is a sliding „corner“ on the side bar that serves to secure the corner of the tile in place when making diagonal cuts, see fig. 4. To perform other types of cuts, it is not necessary to remove the sliding „corner“, simply slide it to such a distance so that it provides the tile with stability while the cut is made (see fig. 3), whilst properly securing it using bolts againstaccidental movement.
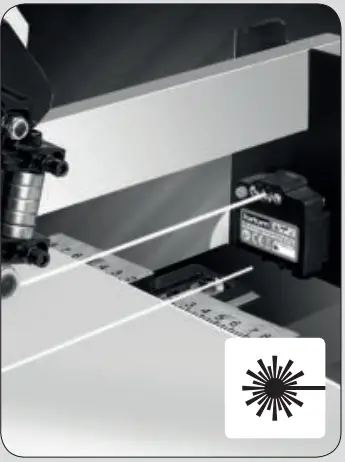
- A laser (fig. 5a) can be purchased as an optional accessory, that is mounted on the front part of the tile cutter using two screws (fig. 5b), that projects the cut line (fig. 5c). The laser is not included, but can be
 purchased under the part number 4770840A and it can also be used as an accessory for all tile cutters of this model line. The laser is powered using two type AAA, 1.5V batteries. The laser is turned on and off using a button.
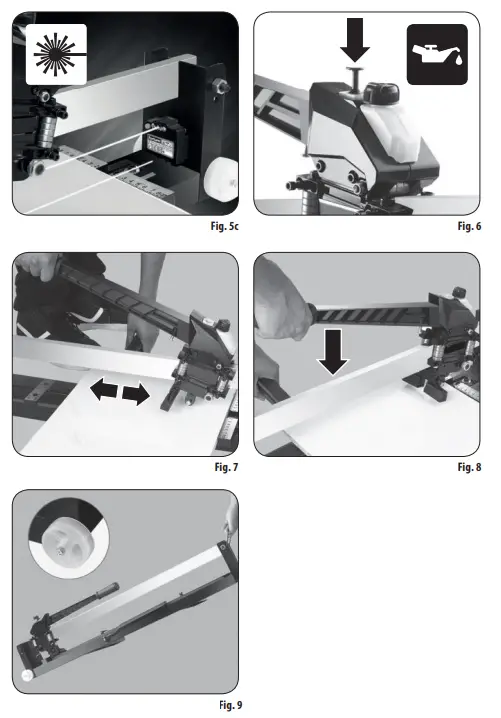
 - The tile cutter comes with a lubricating oil tank with a manual pump. Sewing machine oil can be poured into the tank and pressing the pump button several times will lubricate the mechanism of the tile cutter. For the manual pump to function properly, it is necessary for the oil in the tank to be kept filled above half the volume of the tank.
III. Scoring the tile
- Place the tile on the plate of the cutter with the glazed surface facing upwards utilising the guide to achieve the required position of the cut. If the cutter is fitted with an additional laser, turn it on to mark out the cut line (fig. 5c). Gently hold down the tile with one hand and use the other hand to drag the lever handle to ride the cutting wheel over the full length of the glazed surface of the tile there and back again (fig. 7).
Notes: - The function of the cutting wheel is only to score the glazed surface and not to cut through the tile.
- The maximum tile cutting thickness is 18 mm and the minimum width is 35 mm.
- The cutter can also be used to cut frost-resistant paving tiles, with the exception of paving tiles that have stones on the surface or other similar surfaces.
IV. Snapping the tile
- Place the snapping head of the cutter on to the edge of the tile as close to the guide as possible (fig. 8), i.e. to the position of the snapping ridge with the rubberised
surface, and make sure that the tile is freely positioned on the snapping ridge of the cutter with the glazed surface on top and that there are no undesirable items underneath the tile, e.g. tile fragments, etc. The snapping ridge of the cutter underneaththe tile must be in alignment with the cut line on its glazed surface. - Using the handle, gently start pushing the snapping head down on the tile, gradually applying increasing pressure in order to achieve the minimum force necessary for
snapping the tile into two parts along the cut line.
![]() ATTENTION!
ATTENTION!
- Prevent the cutting wheel from coming into contact with the tile when snapping it as this could cause the tile to crack in an undesirable manner.
V. Safety instructions for the laser source
- Prevent small children, physically and mentally unfit persons and uninstructed persons from using the device. Ensure that children do not play with the device.
- Do not remove the technical rating label from the device.

- Never look into a laser beam. This could result in damage to eye sight. In the event that a laser beam enters your eye, immediately close your eye and move your head out of the line of the laser beam. It is not possible to use standard eye protection aids such as for example sun glasses with UV filters for protection against the laser. Never view the beam with optical devices.
- Never point the laser beam at people, animals or at yourself.
- Do not use the device in an environment with an explosion or fire hazard, where there are flammable materials, flammable gases or dust.
- Do not disassemble the device and do not modify it in ny way.
- Do not point the beam at reflective surfaces. The beam could be deflected and hit the eyes of people.
- When not using it, turn the laser off. This could result in eyes being hit.
- Do not place the device near data storage devices, pacemakers and devices sensitive to magnetic fields. A magnetic field could result in the loss of data, endanger the life of a user with a pacemaker or damage sensitive devices.
- The laser source is sensitive equipment, so protect it against impacts and rough handling. Protect the laser beam outlet window against breakage.
MEANINGS OF THE MARKINGS ON THE LABEL OF THE LASER SOURCE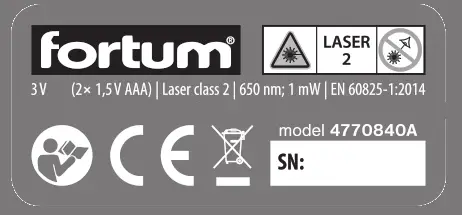
| Before using the device, carefully read the user’s manual and ensure that you understand the markings on the device. | |
 | Corresponds to respective EU harmonisation legal directives. |
 | Do not throw the electrical equipment out with household waste, see subsequent paragraph about waste disposal. |
| Laser radiation. Do not look into the ray. Class 2 laser equipment. |
VI. Storage of the laser source
- Store the cleaned device in a safe, dry location that is out of reach of children and protect it against direct sunlight, radiant heat sources, frost, high humidity aningression of water. Prior to storing the device, take ouits batteries.
VII. Disposal of the laser source
- Throw packaging into the appropriate sorted waste container.
- An unusable laser device is electrical equipment that must not be thrown out with household waste, but rather according to the European Directive (EU) 2012/19, it must be handed over for ecological disposal/ recycling at an appropriate electrical waste collection point.

- Prior to handing over the device for disposal, the batteries must be removed, which, likewise, must not be thrown out with household waste, but rather must be handed over separately for ecological disposal at a battery collection point. You will receive information about electrical equipment collection points at your local town council office.


![]()


