SUNSKY OBD2 Head-Up Display L3
INTENDED USE
The head-up display is intended for:
- Display vehicle data such as speed, engine RPM, battery voltage, fuel consumption, coolant temperature, etc.
- Warnings related to engine malfunctions and exceeding the programmable speeds or the engine RPM.
- Support information related to monitoring driving time and distance
CONTENTS
Check the package contents immediately after unpacking. Check the device and all parts for damage. Do not use a defective device or parts.
- head-up display
- Non-slip mat
- OBD connecting cable
- Operating instructions
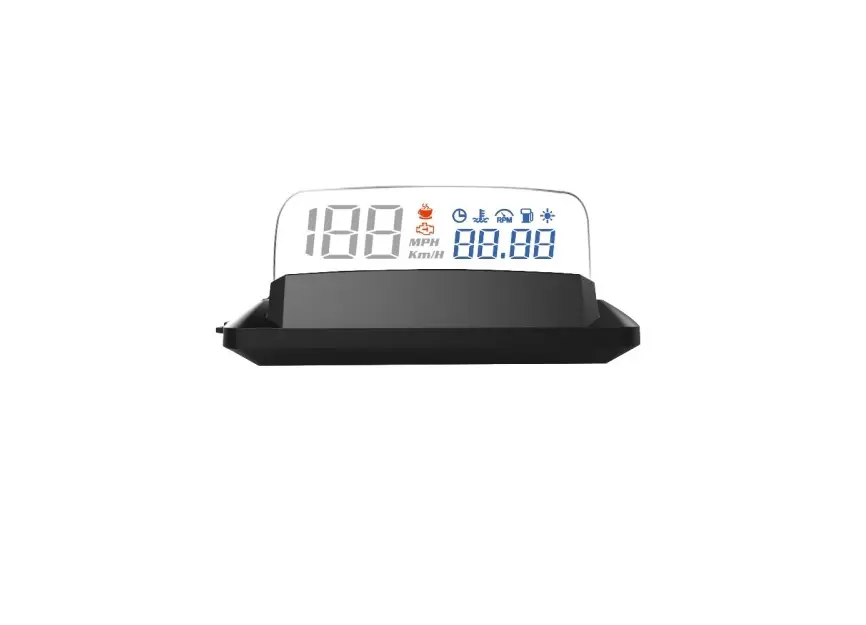
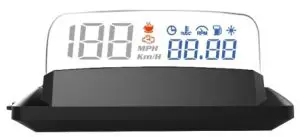
PRODUCT OVERVIEW
| No. | Description |
| 1 | Speed < 199 |
| 2 | Engine malfunction |
| 3 | Alertness assistant |
| 4 | Speed unit (km/h or MPH) |
| 5 | Symbols |
| 6 | Brightness sensor |
| 7 | Multifunction display, speed > 200 |
| 8 | Projection surface |
| 9 | Function wheel |
| 10 | On/Off switch |
| 11 | OBD connecting interface |
Symbols
 | Clock |  | Coolant temperature |
 | Engine RPM |  | Fuel consumption |
CONNECTING
The head-up display connects to the vehicle via OBD2 cable, plug and play.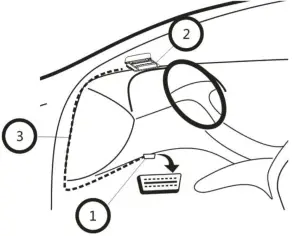
Usually the OBD2 interface is typically located on the driver’s side, approx. 30 cm from the middle of the instrument panel.
- Turn the ignition off, connect the OBD cable to vehicle OBD2 interface
- Connect the OBD cable to the interface [11] on the head-up display
- Hide the OBD cable like above picture show. Turn the ignition on, flip open the projection surface, then it can work.
ASSEMBLY
Attention! when installing the head-up display, be sure it does not diminish your vision. The connecting cable must not interfere with your ability to drive and the head-up display must be firmly secured.
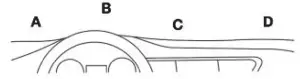
- Select a mounting location [A-D] on the dashboard.
- Place the non-slip pad in the desired location.
- Place the head-up display on the non-slip pad.
OPERATION
Warning: do not operate the head-up display whilst driving, as this will distract you from traffic. Maintain your focus on driving and traffic.
Switching on the head-up display
- Use the On/Off switch [10] to switch on the head-up display. Set the switch to the ON position.
- The display will show the battery voltage for approx. 10 seconds. It will then show the current speed (km/h).
Switching off the head-up display
- Use the On/Off switch [10] to switch off the head-up display. Set the switch to the OFF position.
- The display will turn off.
Switching the display interface
A. When head-up display power on, it will show voltage voltage first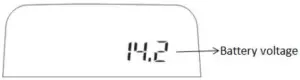
B. The display on the projection surface [8] will change, the left part is speed, the right part can change to multi-function
- Speed + clock
- Speed + coolant temperature
- Speed + engine RPM
- Speed + fuel consumption
- Speed + driving distance
- Speed + driving time
- Speed + oil temperature
- Speed + intake pressure
- Speed
C. When ignition off, head-up display will show the average fuel consumption for this trip (Liter/100km)

SETTINGS
The value on the head-up display should match the values on your vehicle’s dashboard. If this is not the same, you can change the settings of head-up display in the setting menu.
- Hold on the function wheel [9] for 5 seconds to open the setting menu. 2
- Push the function wheel [9] forward or backward to move to the next setting.
- Briefly press the middle of the function wheel [9] to change a value.
- Hold the function wheel [9] for 5 seconds again to exit the setting menu.
| No. | Option | Display | Range | Description |
 | Speed |  | -9~9 | Correction value if the speed in the head-up display does not match the vehicle’s data. |
 | 4 level speed alarm |  | 0~1 | 0- on ( alarm when speed reach 60 km/h, 80km/h,100km/h,120km/h) 1- off |
 | 1 level speed alarm |  | 30~250 | Alarm when speed reach 180 km/h |
 | Engine RPM |  | -25~25 | Correction value if the engine RPM in the head-up display does not match the vehicle’s data. |
 | Engine RPM alarm |  | 1000~8500 | Alarm when engine RPM reach 5000r |
 | Voltage alarm |  | 9-16 | Alarm when voltage reach 10 V |
 | coolant temperature alarm |  | 60-150 | Alarm when coolant temperature reach 120 ℃ |
 | Alarm sound on/off |  | 0-1 | 0-Off the alarm sound 1-On the alarm sound |
 | Shifting reminder |  | 1000~8500 | Alarm when engine RPM reach 5000r |
 | Brightness by manual |  | 0-11 | 0 = auto brightness 1-11 = manual brightness |
 | Lowest brightness in auto mode |  | 1-11 | 1-11 can adjust the auto brightness |
 | Fuel consumption calculation |  | – | 0-use Inlet flow to calculate the fuel consumption 0.2~10.0 – use Engine displacement to calculate the fuel consumption |
 | Fuel consumption |  | -20~20 | Correction value if the fuel consumption in the head-up display does not match the vehicle’s data, adjust range is -20%~20% |
 | Clock |  | – | Push the function wheel [9] forward to set the hours, backward to set the minutes. |
 | Speed unit |  | 0-1 | 0- 1- KM/H MPH |
 | Clear the engine malfunction |  | – | Unplug HUD ⇨ Turn the key to ON (power on) ⇨ connect the HUD and wait for the normal display ⇨ find menu 15, push the function wheel [9] forward or backward once ⇨HUD will give a beep sound, it means clear the engine malfunction. |
| Problem | Solution |
| No display | Start the engine. Verify the head-up display is switched on. Verify the OBD connecting cable is correctly and firmly connected. If the problem continues, test the head-up display in a different vehicle with OBD2 interface and protocol |
| Display incorrect | Adjust the correction values. Restore the factory settings of the head-up display from the settings menu. Older vehicles may not display all values. |
| How to restore to factory setting | First, keep the HUD in the off state, and then push the function wheel [9] forward first, and turn on the on/off switch[10] at the same time, HUD will give a Long beep, it means restore to factory setting successful. |
| Inaccurate speed | In the setting menu, find menu 0, the adjust range is -9~9, if HUD show faster 2 km/h than dashboard, adjust the setting value to -2, if HUD show slower 2 km/h than dashboard, adjust the setting value to 2. |
| Inaccurate clock |
|
NOTICE
- If set speed unit to KM/H, the water temperature unit will automatically be °C, driving distance unit will automatically be KM, fuel consumption unit will automatically be L/100 KM
- If set speed unit to MPH, the water temperature unit will automatically be °F, driving distance unit will automatically be Mile, fuel consumption unit will automatically be MPG.


