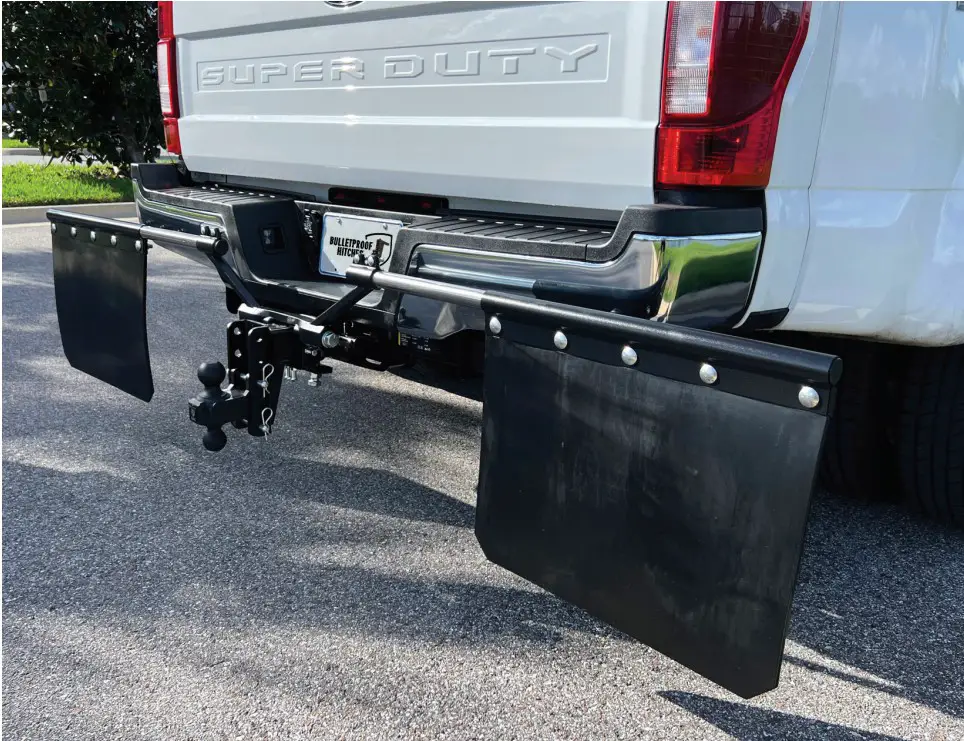
![]() Bullet Proof Road Shield Mud Flap System
Bullet Proof Road Shield Mud Flap System
 Instruction Manual
![]()
FOR SAFETY AND PROPER INSTALLATION PLEASE READ THIS INSTRUCTION MANUAL!
Overview
Product benefits
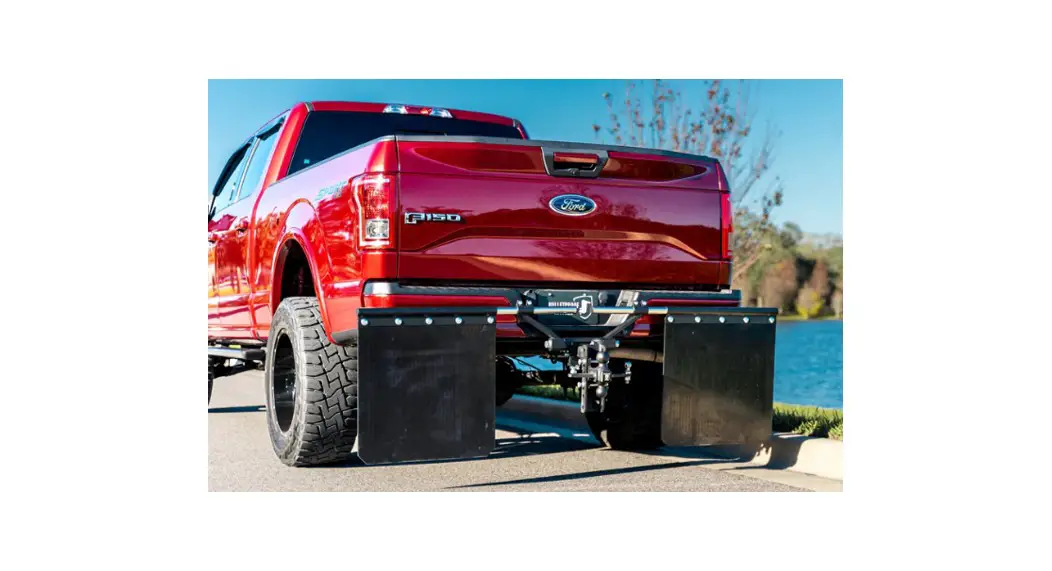
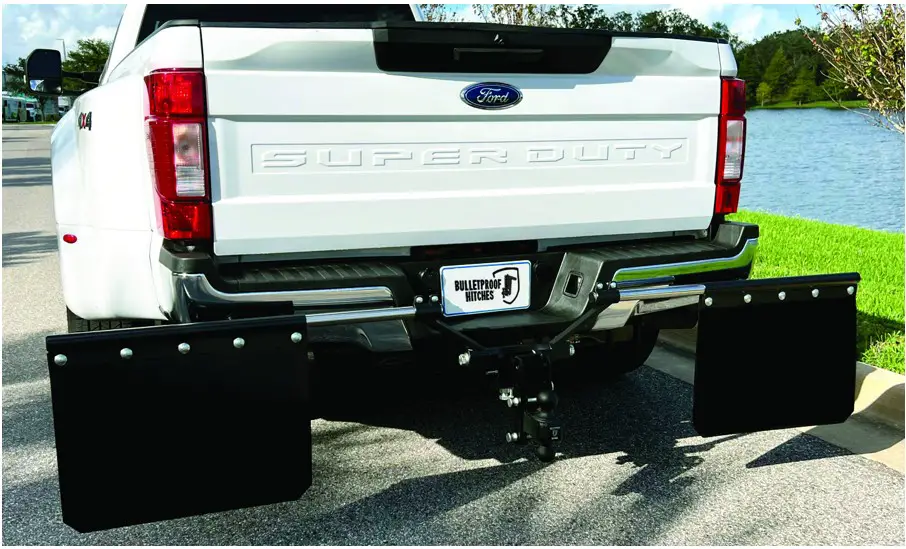
The Bullet Proof Road Shield is designed to fit all vehicles and hitch sizes.
With our easy to adjust flaps, all vehicle widths are covered. The adjustable arms work with all custom bumpers. The perforated rubber flaps are easy to cut for all types of vehicles.
CAUTION!
The Bullet Proof Road Shield is designed to protect your truck and trailer against flying objects such as rocks and other debris picked up by your vehicle’s tires. For maximum protection, use correctly adjusted rubber flaps combined with appropriate driving based on the road conditions.
Remove the Bullet Proof Road Shield from your vehicle before entering a drive-through car wash to avoid damage to the product and your vehicle.
Heat from your vehicle’s exhaust could damage the rubber flaps. Adjust the rubber flaps as far as possible from your vehicle’s exhaust.
REQUIRED TOOLS
- Tape Measure
- 1/2” Wrench
- 9/16” Wrench
- 3/4” Wrench
- 1-1/8” Wrench
- Razor Blade Knife
- Hammer
- Straight Edge
Specs
SPECIFICATIONS
- Compatible with all hitches and receivers
- Requires only 1” of space on the shank to fit
- 24”x 24” flaps with the ability to cut down to 13.5”
- 12” of vertical height adjustment
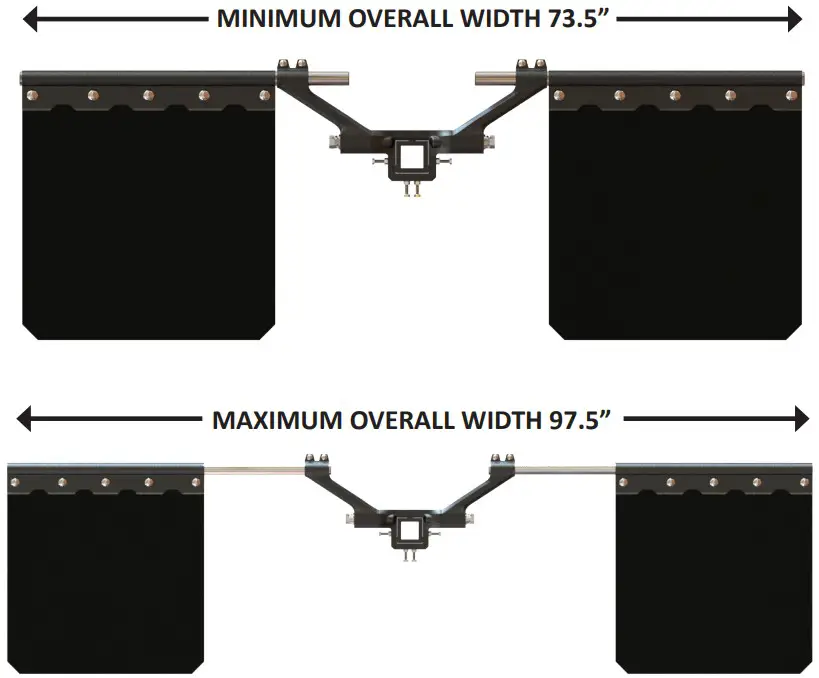
- 24” of horizontal width adjustment
- 3/8” rubber flaps for durability
- No drilling is required on your vehicle for installation
- Weight: 47 lbs
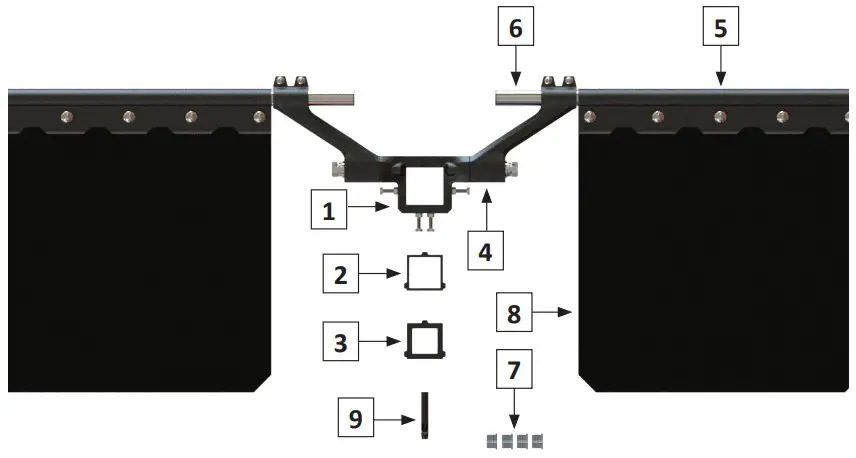
PARTS
| PART LIST | ||
| ITEM # | PART | QTY |
| 1 | 3.0″ Hitch Bracket | 1 |
| 2 | 2.5″ Hitch Bracket | 1 |
| 3 | 2.0″ Hitch Bracket | 1 |
| 4 | Adjustable Arm | 2 |
| 5 | Flap Fastener | 2 |
| 6 | Adjustable Tube | 2 |
| 7 | Tube End Cap | 4 |
| 8 | Rubber Flap | 2 |
| 9 | Hole Punch | 1 |
 Use this QR code to view the online installation video!
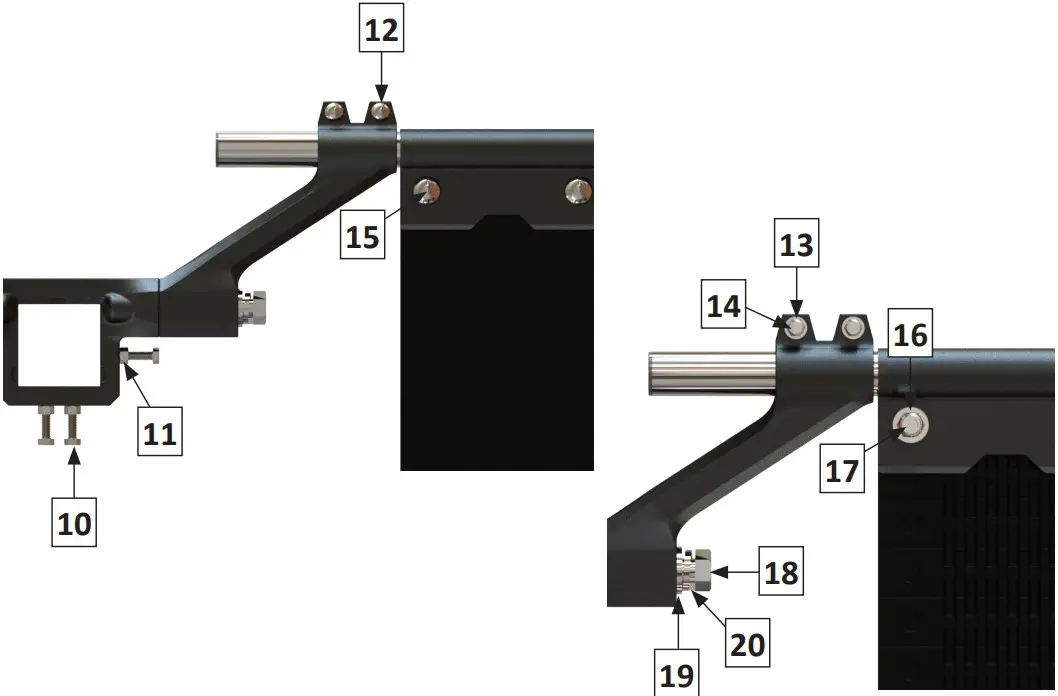
| HARDWARE LIST | |||
| ITEM # | HARDWARE | TORQUE SPEC. | QTY |
| 10 | 3/8″ Hex Bolt | 12 ft-lbs | 4 |
| 11 | 3/8″ Hex Nut | — | 4 |
| 12 | 5/16″ Carriage Bolt | — | 4 |
| 13 | 5/16″ Flat Washer | — | 4 |
| 14 | 5/16″ NY lock Nut | 12 ft-lbs | 4 |
| 15 | 1/2″ Carriage Bolt | — | 10 |
| 16 | 1/2″ Flat Washer | — | 10 |
| 17 | 1/2″ NY lock Nut | 42 ft-lbs | 10 |
| 18 | 3/4″ Hex Bolt | 85 ft-lbs | 2 |
| 19 | 3/4″ Flat Washer | — | 2 |
| 20 | 3/4″ Lock Washer | — | 2 |
Assembly Instructions
Step 1 – measure hitch receiver opening on your vehicle
Tools Needed: Tape measure or ruler.

NOTE: Hitch receiver standard sizes: 2”, 2-1/2” or 3”
Step 2 – hitch bracket assembly
Select the hitch adapter as needed. 3” receiver does not require an adapter.
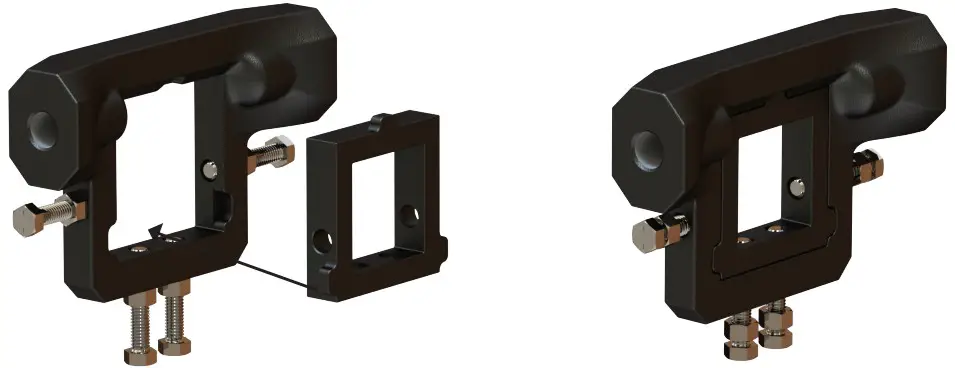
Slide the hitch adapter into the assembly. The adapter only fits one way.
Hand-tighten the bolts until they are flush with the inside of the sleeve. Bolts will hold the adapter in place.
Step 3 – install the hitch bracket assembly
Tools Needed: 9/16” wrench or torque wrench

Slide the assembly over the hitch shank. Make sure the flat side of the hitch bracket is facing toward the vehicle.
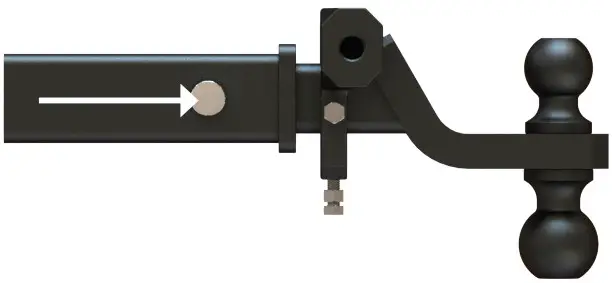
Slide the hitch assembly into the receiver. Secure your hitch with a Bulletproof locking pin.
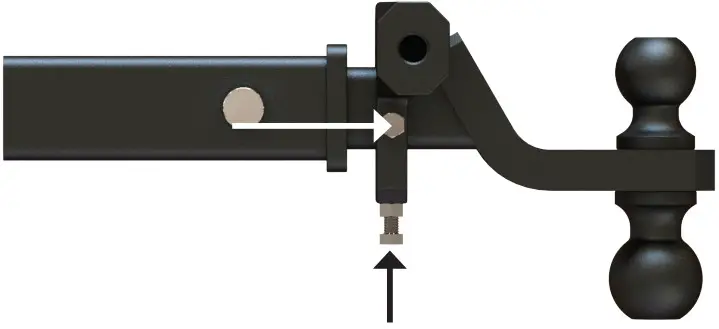
Hand-tighten all four bolts evenly while keeping the assembly parallel with the rear of the vehicle. Tighten bolts with the 9/16” wrench. If you have a torque wrench, torque them to 12 ft-lbs. Tighten jam nuts with the 9/16” wrench.
Step 4 – attach adjustable arms onto the hitch bracket With 3/4” bolt and washers
Tools Needed: 1-1/8” wrench or torque wrench.
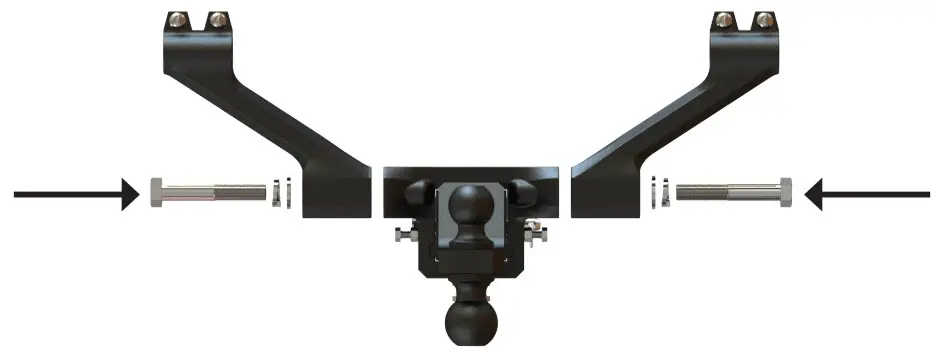
Note: Angle the position of the arms depending on the type of vehicle, and the bumper configuration.
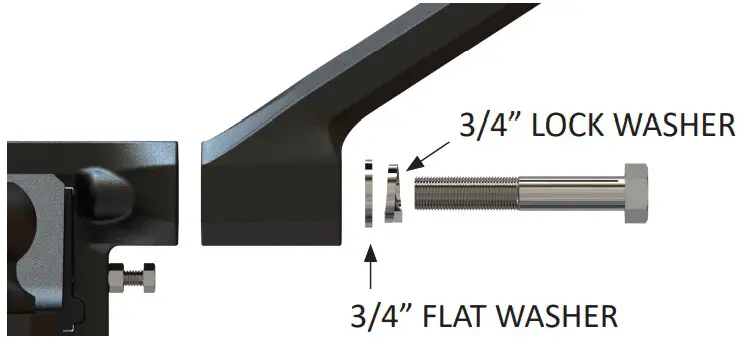
IMPORTANT: THE CORRECT ORDER OF THE WASHERS IS CRUCIAL!
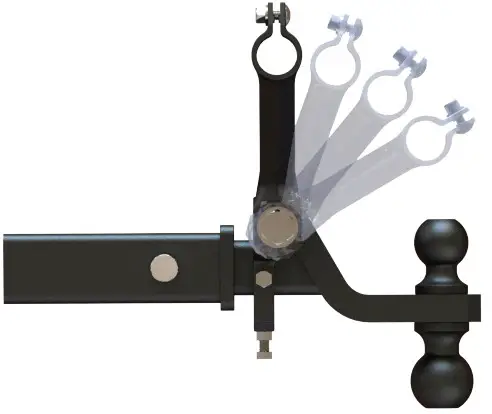
Adjust the arms to the desired position.
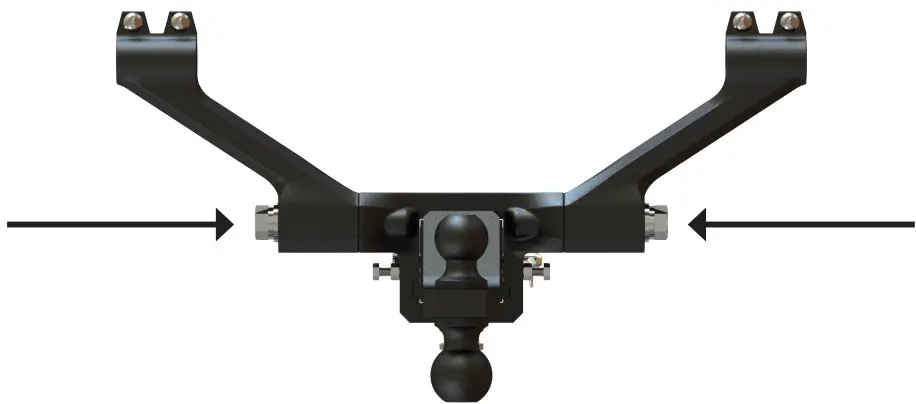
Tighten the bolts on both sides with the 1-1/8” wrench. If you have a torque wrench torque to 85 ft-lbs.
Step 5 – install tube end caps
Push the (4) plastic end caps firmly into the tubes.
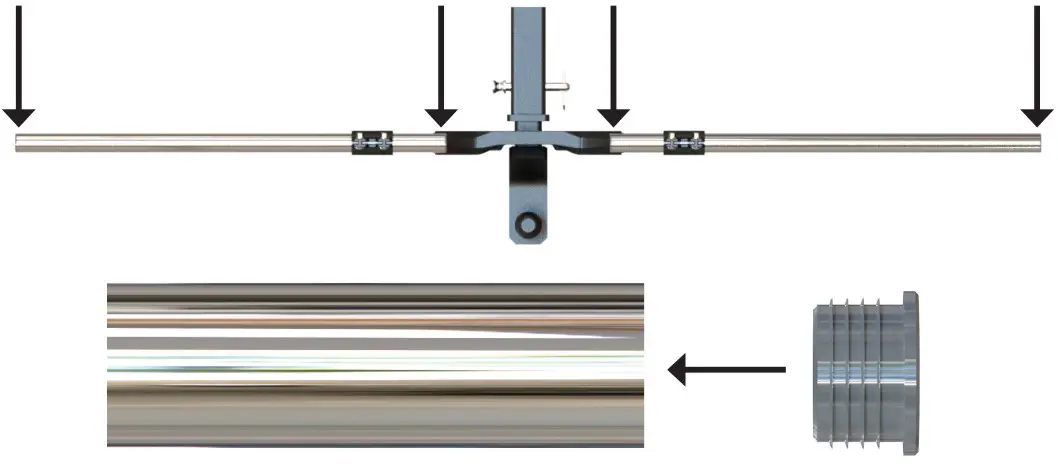
NOTE: Make sure the caps are fully seated.
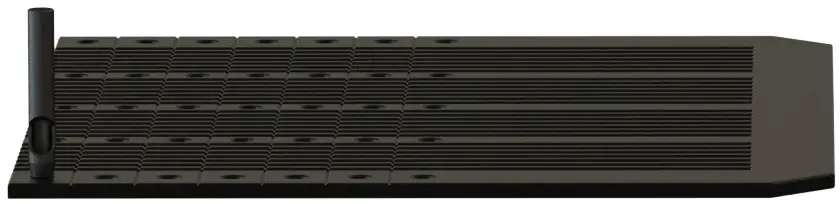
Step 6 – INSTALL THE ADJUSTABLE TUBES
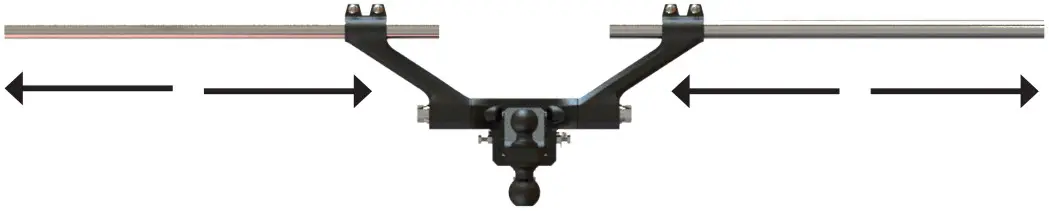
Slide the pole into the assembly and line up the end of the pole 1” past the outside of the rear tire. Repeat this step for the other side.
Step 7 – tighten THE 5/16” carriage bolts & Secure tubes
Tools Needed: 1/2” wrench or torque wrench
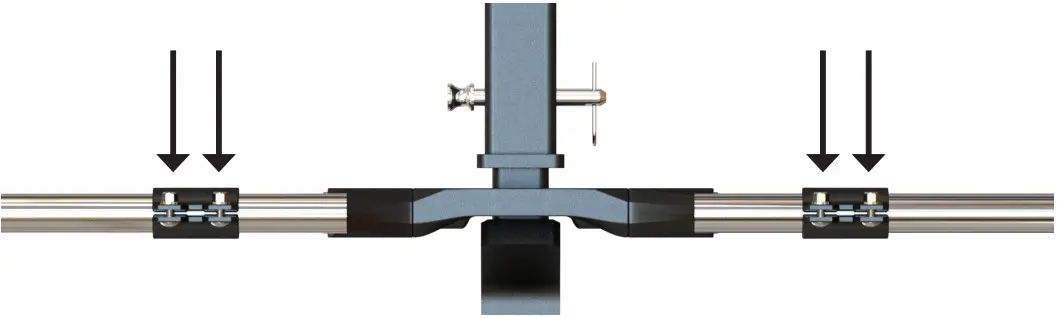
Tighten all four bolts evenly with the 1/2” wrench. If you have a torque wrench torque to 12 ft-lbs.
Step 8 – SIZE RUBBER FLAPS
Tools Needed: Tape measure or ruler.
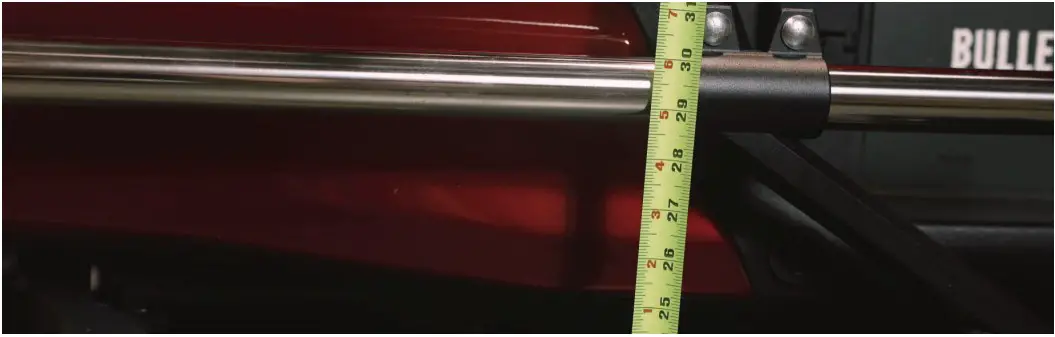
Measure from the ground to the bottom of the tube. You must have a minimum of 3” to 4” of clearance under the flaps.
If your measurement is less than 28”, you will need to cut the flaps down by the exact length you are shy of 28”. For example, if you are 24” to the bottom of the tube, you will need to cut 4” off each flap. If your vehicle is going to squat 1-2” or more when towing, you will need to cut this amount off each flap also.
If this measurement is 28” or more, you will not need to cut down the flaps. If so, skip step #9.
If your measurement is over 30”, you may need to adjust the arms down.
Skip step #9. The ideal height of the flaps is 6” from the ground.
Step 9 – cutting the RUBBER FLAPS
Tools Needed: Tape measure, straight edge, and razor blade knife.
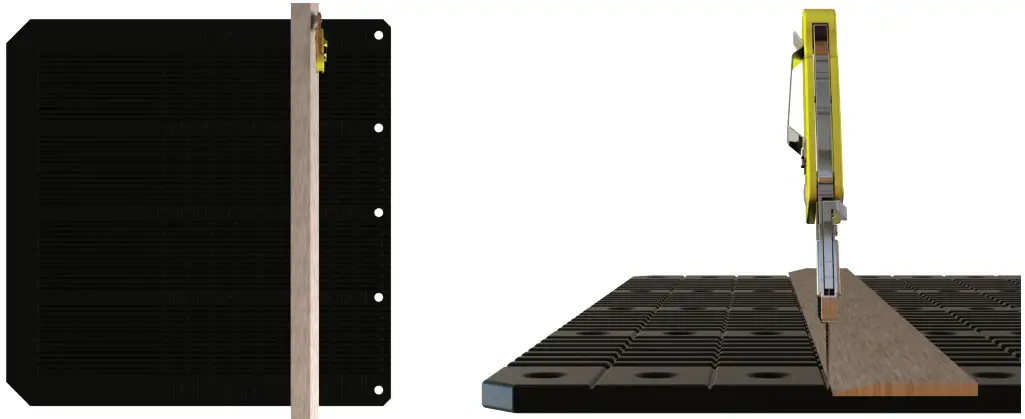
IMPORTANT! Protect the surface under the rubber flap!
To cut the flap, measure how much you want to remove. Place a straight edge across the flap and use a razor blade knife to cut the flap; this may take several passes. Remove rubber from the top straight edge of the flap where the holes are already punched. You will be removing the already punched holes and making your own once you are done removing the amount of flap you do not need. It is best to complete this step on a wood surface, so you do not damage the knife. For example a wood pallet.
Step 10 – PUNCH THE FLAP
Tools Needed: Hammer and the supplied hole punch.
IMPORTANT! Protect surface under rubber flap!
Once your flaps are the correct size, you will need to punch the holes for the mounting bolts. The hole positions are in recessed pockets. It is best to complete this step on a wood surface so you do not damage the punch. For example a wood pallet.
Step 11 – assemble flap fastener
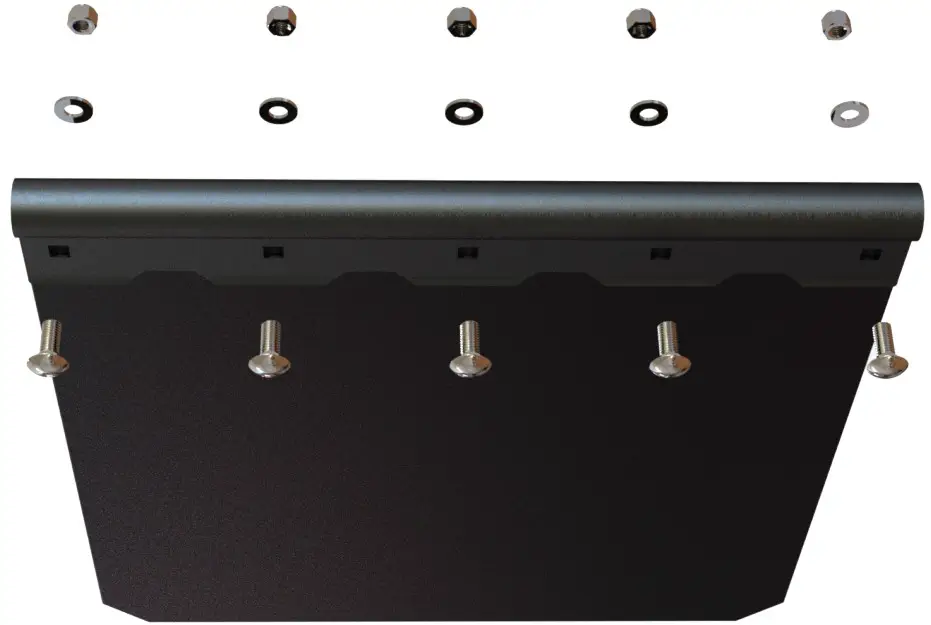
Place the flap on a flat surface with the smooth side facing down. Slide the mounting bracket over the flap with the square holes facing down. Place the carriage bolts into the hole from underneath the bracket, so the head of the bolt is facing the flat surface. Start with 1 bolt on each end and then continue with the middle bolts. Place the washers over the bolts, followed by the lock nuts. Hand-tighten the bolts until snug. Repeat these steps for the other flap.
Step 12 – install rubber flaps
Tools Needed: 3/4” wrench or torque wrench

Slide the rubber flaps onto the installed poles flush with the end of the pole. Ensure the smooth side of the flaps is facing away from the vehicle.
Tighten all the bolts, from left to right, with the 3/4” wrench. If you have a torque wrench torque to 42 ft-lbs.
Step 13 – double check
Take one final look over your Bullet Proof Road Shield System and ensure that all bolts are tightened.
YOUR INSTALLATION IS COMPLETE!
If you notice excess movement in your Bullet Proof Road Shield due to a loose receiver on your vehicle, a Bullet Proof Anti-Rattle Clamp will eliminate this movement.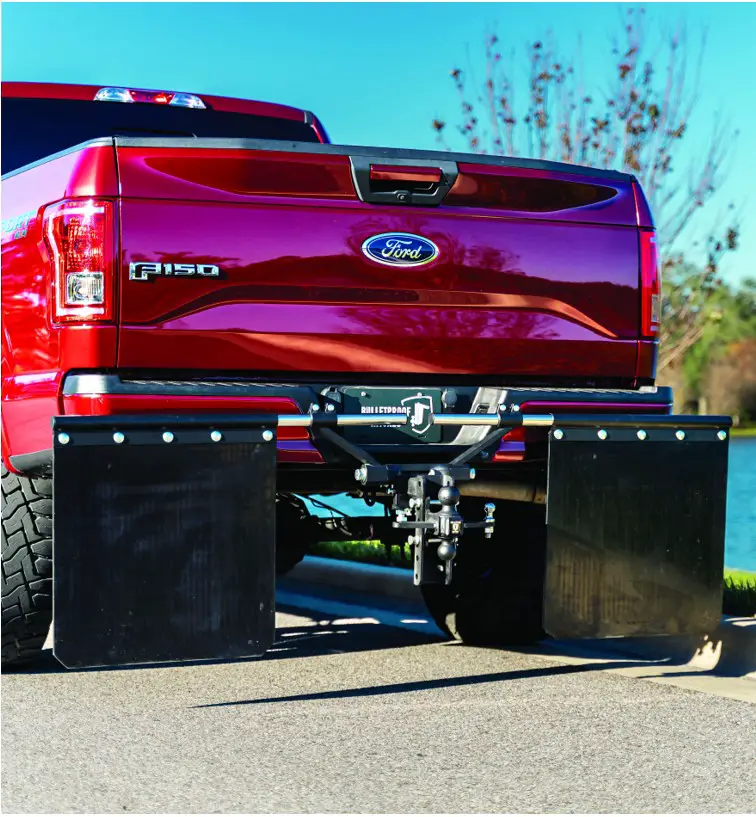
WARRANTY
At Bullet Proof Hitches™, we strive for the best, and we expect the best from our products! We want you to be 100% confident in the products that you have purchased.
Let’s be honest though, our products don’t fail! So chances are you will never need this warranty, but, for your peace of mind, we will replace your Bullet Proof Road Shield Mud Flap System if any issues related to the construction of the system happens to arise within one year of purchase by the original owner.
Please call us if you have any questions! 844-894-6448.
CUSTOMER SERVICE
Local: 941-251-8110
Toll Free: 844-894-6448
We are available Monday through Friday, 8:00 AM to 5:00 PM EST. Choose an option from the automated menu and you will be immediately connected to a live representative!
[email protected]
Our representatives are standing by to answer any questions you may have. A Bullet Proof Hitches™ representative will reply to you within 1 business day!
Company headquarters & showroom
3145 Lakewood Ranch Blvd Suite 106
Bradenton, FL 34211
M-F, 8:00 AM to 5:00 PM EST

We invite you to our showroom. Bring the vehicle you will be towing with, and we will measure to ensure you get the correct BulletProof Hitch™. We keep our full line of hitches and accessories in stock. Visit us today and get set up with the last hitch you will ever need!
 Use this QR code to submit A contact request online!
www.bulletproofhitches.com


