
 ASUS AMISH WiFi System User Manual
Step 1 Preparation
Before you start to set up ASUS AiMesh, you have to prepare:
- Two (2) ASUS routers (models supporting AiMesh https://www.asus.com/AiMesh/).
- Assign one router as the AiMesh router, and another router as the AiMesh node. The router with the highest specifications should be used as the AiMesh router.
- Locate the AiMesh router and node within 1-3 meters of when setup process.

Step 2 Firmware upgrade
Upgrade all routers with AiMesh-supported firmware
- Plug in the power adapter and press the power button at the back of your router.
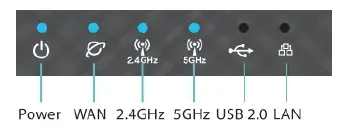
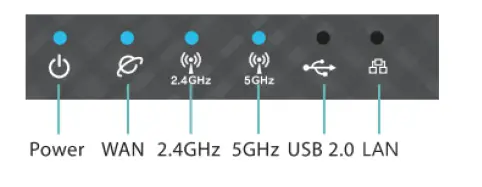
- Check the WAN and 2. 4GHz / 5GHz LED lights to ensure the hardware connection is ready.

- Connect your PC to the router via a network cable.
- Launch a web browser. You will be redirected to the ASUS Setup Wizard. If not, navigate to http://router.asus.com.
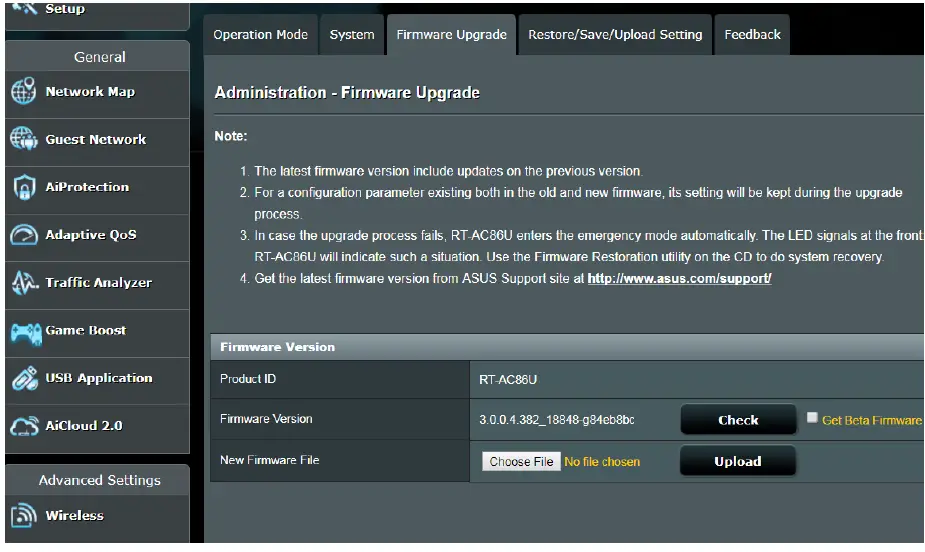
- Go to Administration Firmware Upgrade. Click on Check, and it will upgrade firmware automatically.

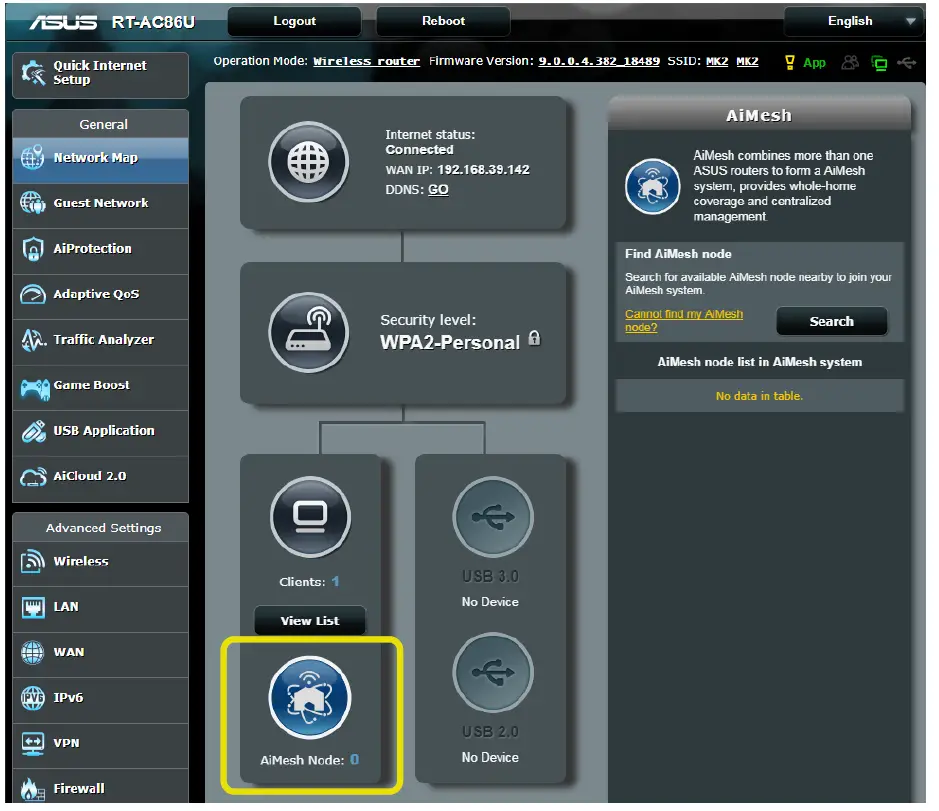
- After the firmware update is completed, please go to the Network Map page to confirm whether the AiMesh icon showed up.

Step 3 Restore the AiMesh node
Reset the AiMesh node to the factory default
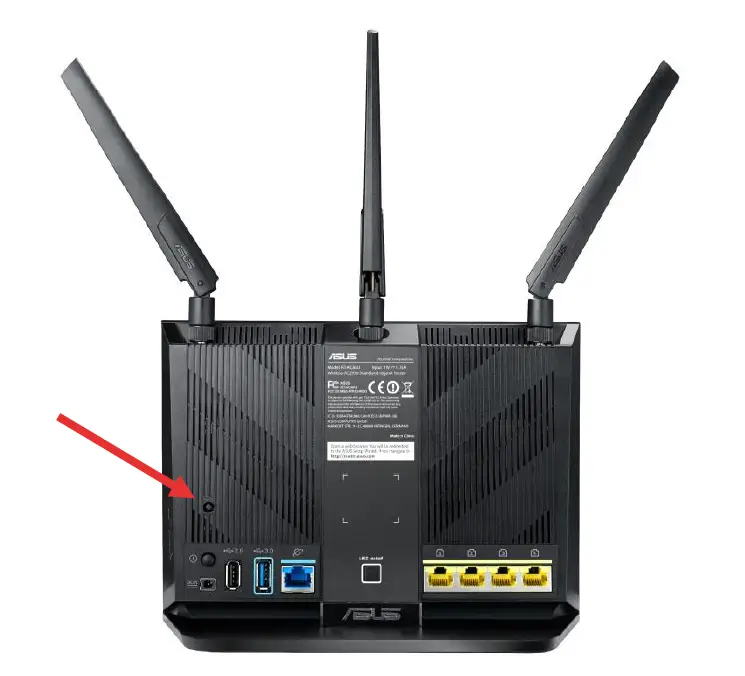
- Press the reset button of the AiMesh node at least 5 seconds, and release the reset button until the power LED is flashing slowly.

- When the reset process is completed, remove the network cable, let the AiMesh node keep the power on, and stand by for the AiMesh system setting.


AiMesh node:
- Firmware upgrade
- Reset to default
- Remove the network cable
- Keep the power on
- Standby
Step 4 Setting up the AiMesh router
Setting up the AiMesh router
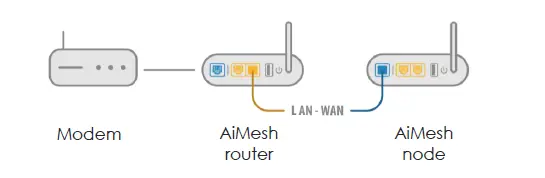
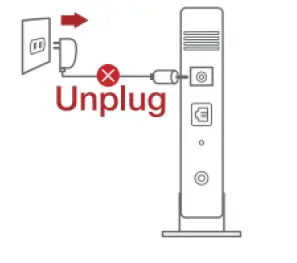
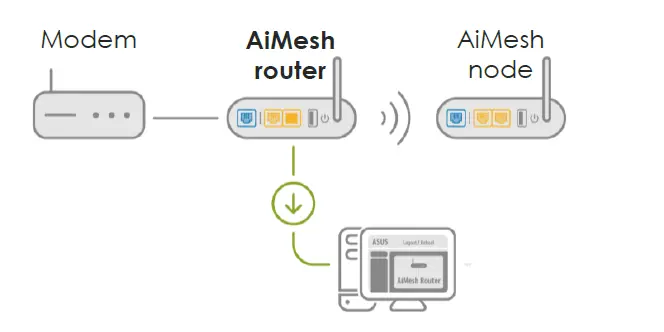
- Unplug your cable/DSL modem. If it has a battery backup, remove the battery.

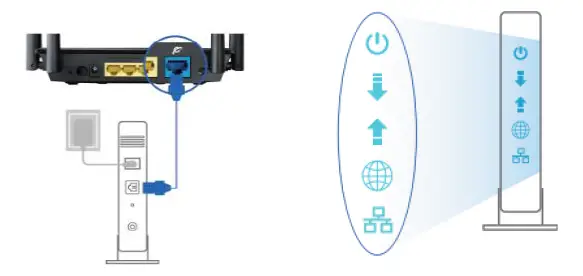
- Connect your modem to the WAN port of the AiMesh router with a network cable. And then power on your modem. Check your modem LED lights to ensure the connection is active.

- Plug in the power adapter and press the power button at the back of your router. Check the WAN and 2.4G / 5G LED lights to ensure the hardware connection is ready.

- You can choose to set AiMesh on
- Web GUI. Go to step Option a.
- ASUS Router APP-Android. Go to step Option B
- ASUS Router APP-iOS. Go to step Option C
Option a: Set up AiMesh on Web GUI
- Connect your PC to the AiMesh router with a network cable: turn off Wi-Fi on your PC, and then use an Ethernet cable to connect the one of LAN port of your AiMesh router and your PC.**If you want to use Wi-Fi to connect your PC and AiMesh router instead of network cable, on your PC, search the network name (SSID) of your AiMesh router and connect it. You can find the default network name (SSID) at the back label of your AiMesh router.

- Launch a web browser. You will be redirected to the ASUS Setup Wizard. If not, navigate to

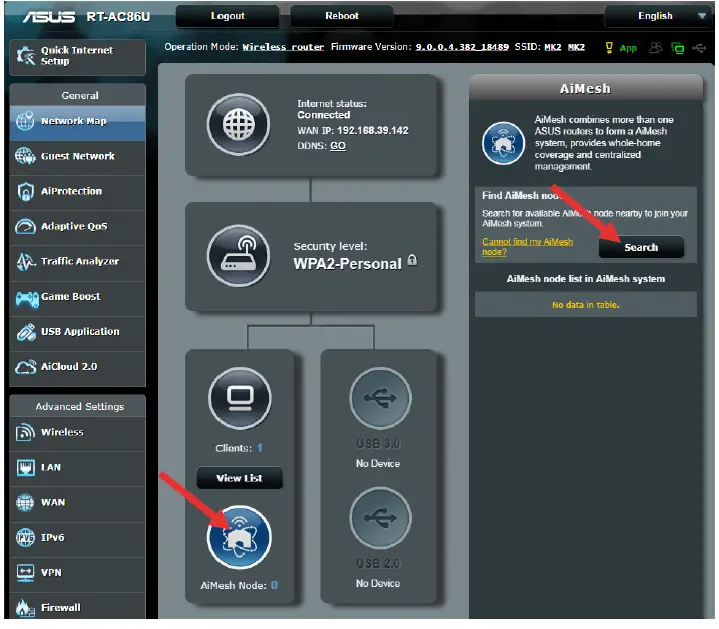
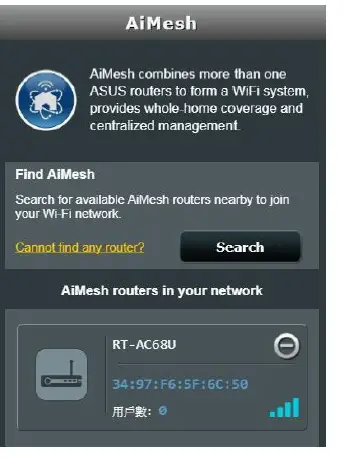
- Go to the Network Map page, click the AiMesh icon and then Search for your extending AiMesh node.
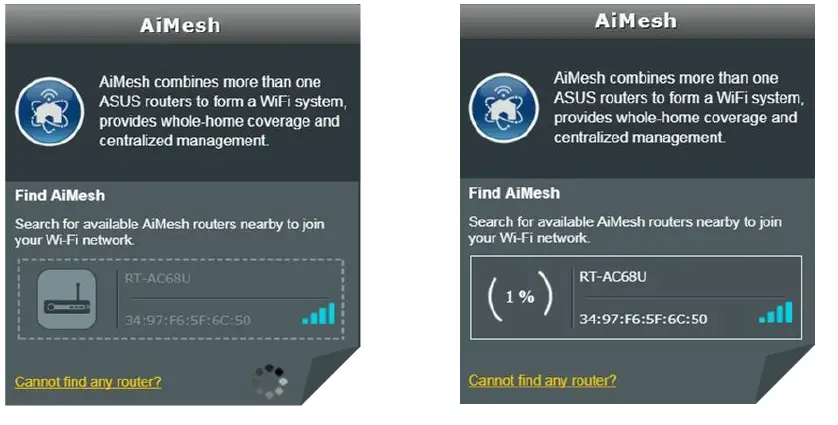
- After clicking Search, it will search the AiMesh node automatically. When the AiMesh node sh ows on this page, click it to add it into the AiMesh system. It is best to place all routers in close proximity when synchronizing for the first time in case of interference.

- If it cannot find any AiMesh node nearby or synchronization fails, please check following and try again.
- Move your AiMesh node closed to the AiMesh router within 1-3 meters.
- Your AiMesh node is powered on.
- Your AiMesh node is upgraded to AiMesh-supported firmware.
- Your AiMesh node is reset to default.
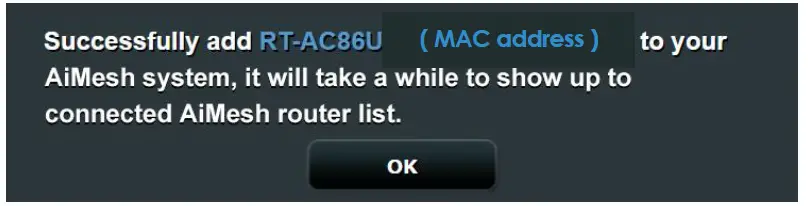
- A message is displayed when synchronization is completed.

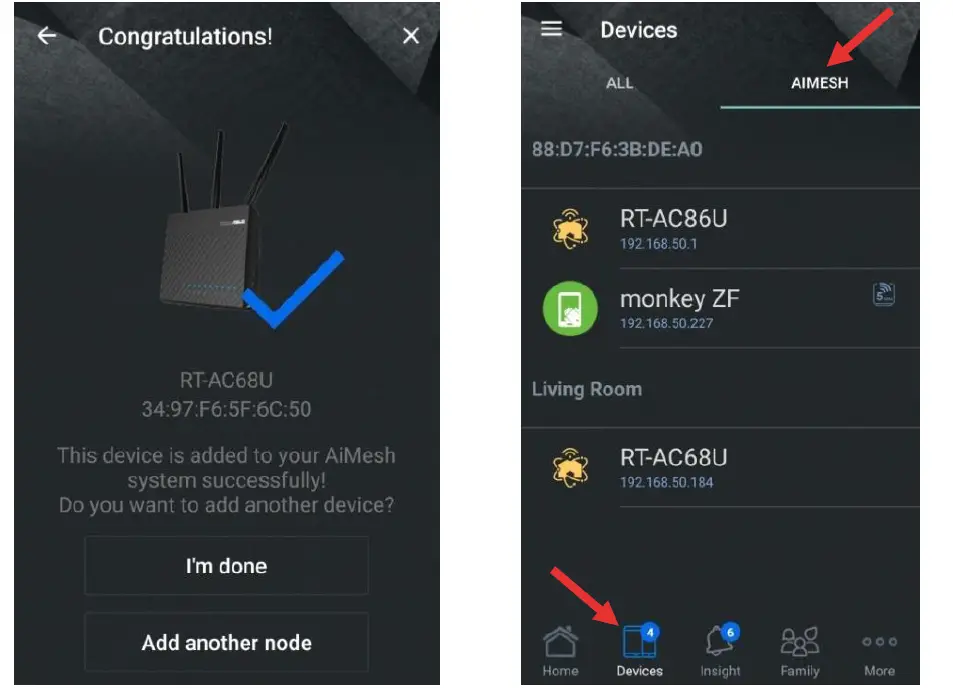
- Congratulation! You can find below pages show up when AiMesh node has successfully added to AiMesh network.

Option b: Set up AiMesh on ASUS Router APP-Android
- Download ASUS Router APP on Google Play.
- Search the network name (SSID) of your AiMesh router, and connect it. You can find the default network name (SSID) at the back label of your AiMesh router.
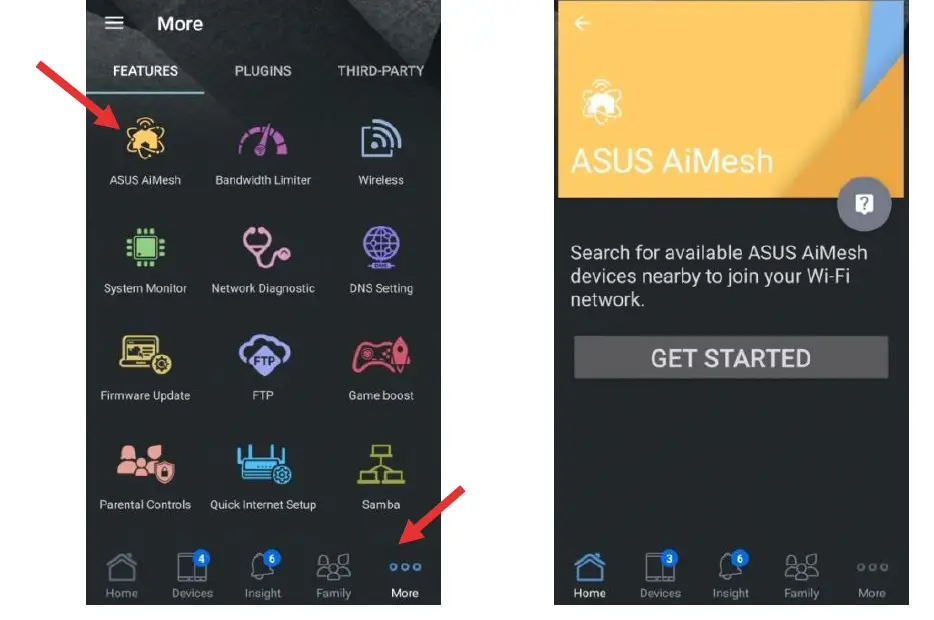
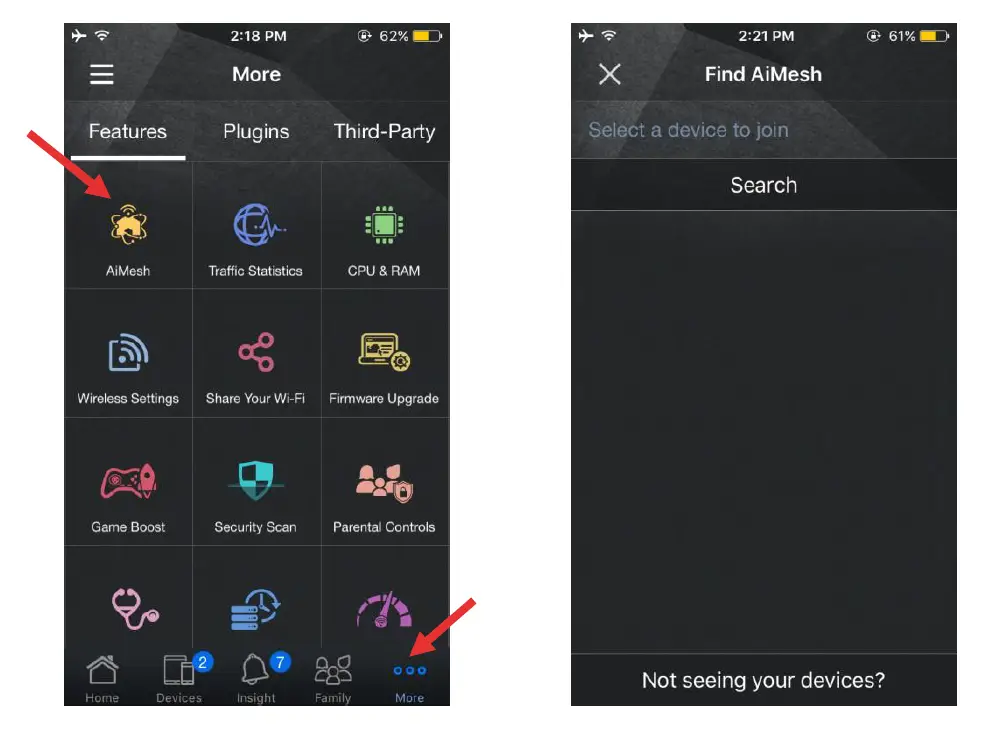
- After login, go to More AiMesh and get started.

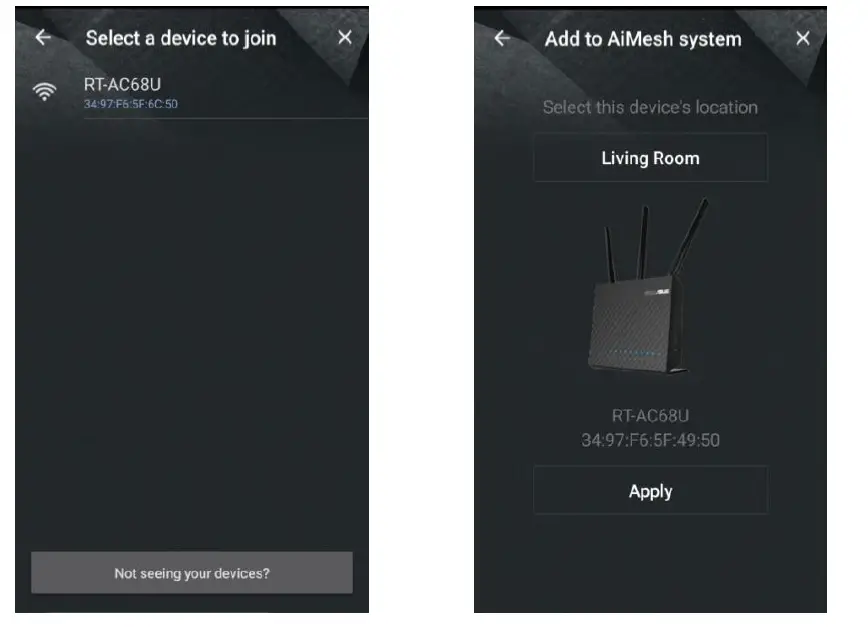
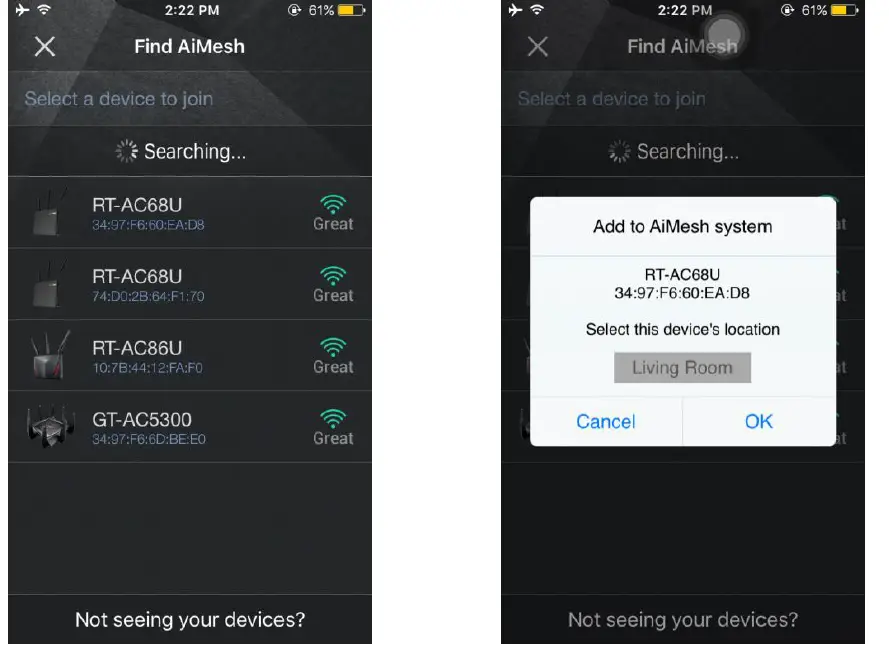
- After clicking Get Started, it will search the AiMesh node automatically.When the AiMesh node shows on this page, click it to add it into AiMesh system. It is best to place all routers in close proximity when synchronizing for the first time in case of interference.

- If it cannot find any AiMesh node nearby or synchronization fails, please check the following and try again.
- Move your AiMesh node closed to the AiMesh router within 1-3 meters.
- Your AiMesh node is powered on.
- Your AiMesh node is upgraded to AiMesh-supported firmware.
- Your AiMesh node is reset to default.
- A message is displayed when synchronization is completed.
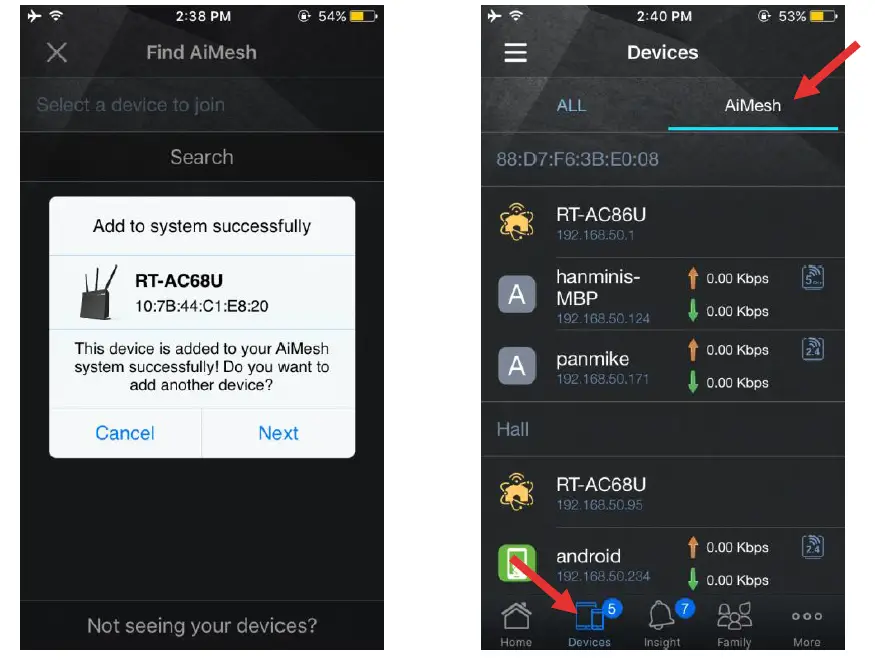
- Congratulation! You can find below pages show up when the AiMesh node has successfully been added to the AiMesh network. Go to Devices AiMesh for more information.

Option c: Set up AiMesh on ASUS Router APP-iOS
- Download ASUS Router APP on App Store.
- Search the network name (SSID) of your AiMesh router, and connect it. You can find the default network name (SSID) at the back label of your AiMesh router.
- After login, go to More AiMesh and get started.

- After click, it will search the AiMesh node automatically. When the AiMesh node shows on this page, click it to add it into the AiMesh system. It is best to place all routers in close proximity when synchronizing for the first time in case of interference.

- If it cannot find any AiMesh node nearby or synchronization fails, please check the following and try again.
- Move your AiMesh node closed to the AiMesh router between 1-3 meters.
- Your AiMesh node is powered on.
- Your AiMesh node is upgraded to AiMesh-supported beta firmware.
- Your AiMesh node is reset to default.
- A message is displayed when synchronization is completed.
- Congratulation! You can find below pages show up when AiMesh node has successfully been added to the AiMesh network. Go to Devices AiMesh for more information.

Put the AiMesh router and node aim high and in open space.Now it’s time to move your AiMesh node to a preferable location. You can monitor how many devices are connected to the AiMesh node, and how good the reception is from the AiMesh router. You can access the information using the ASUS Router App or web GUI (http://router.asus.com).
- You can add up to 2 nodes to your AiMesh system under daisy chain topology, and up to 4 nodes when mix daisy chain and star topology. Overall, you can have up to 5 in an AiMesh system. (1 AiMesh router + 4 AiMesh nodes)
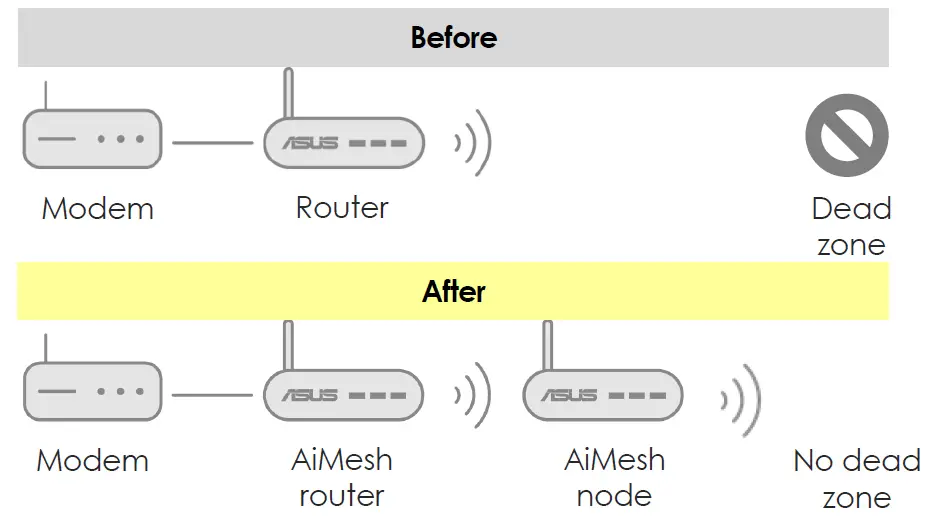
- Strongly recommend you to put the AiMesh node BETWEEN your AiMesh router and your existing dead zone.

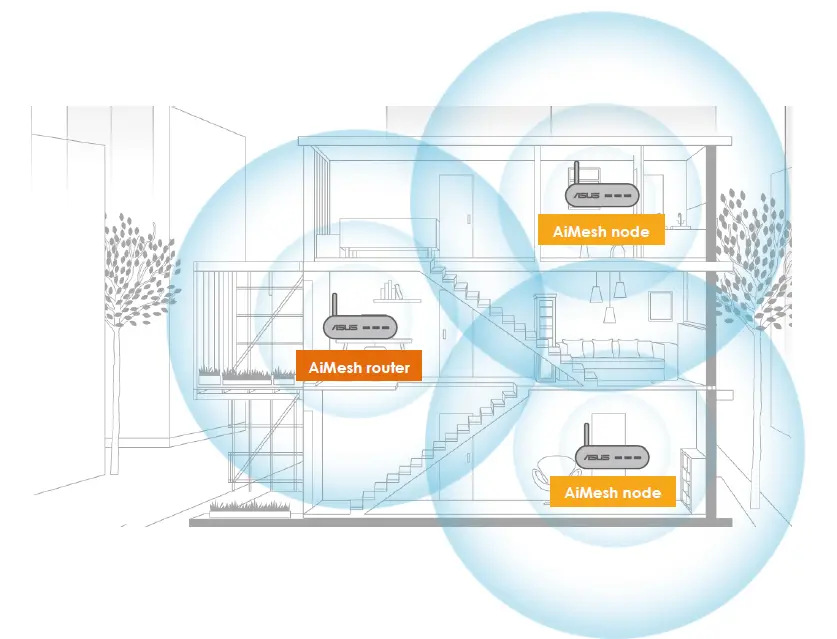
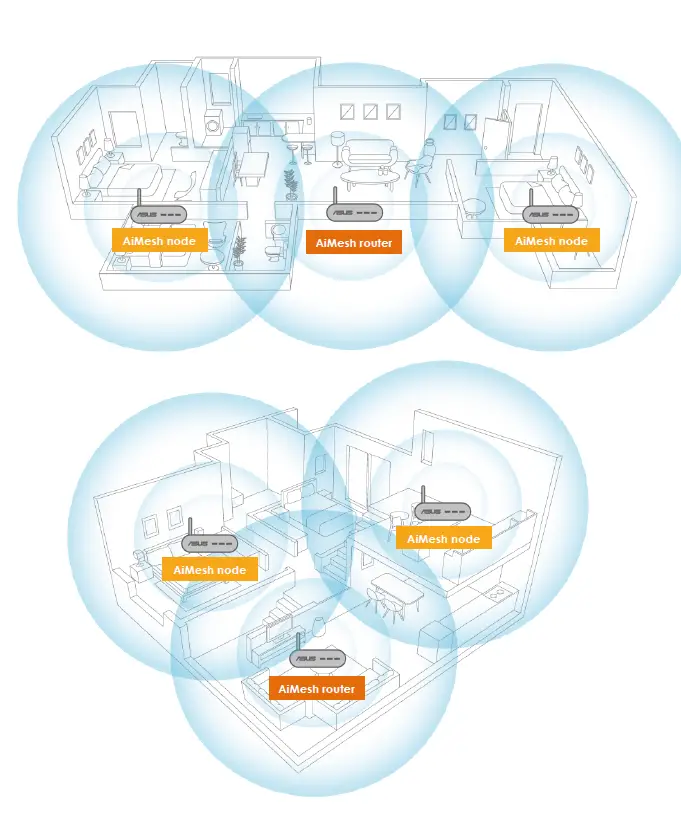
- Put AiMesh router in the center of the house. We recommend various location placement examples.


Ethernet backhaul
Wired connection between AiMesh router and node
AiMesh system supports both wireless and wired connections between AiMesh router and node to maximize throughput and stability. AiMesh analyzes the wireless signal strength for each frequency band available and then determines automatically whether a wireless or wired connection is best to serve as the inter-router connection backbone.
Follow the setup steps to establish a connection between the AiMesh router and node via Wi-Fi first. After that:
- Place the node in the ideal locations for best coverage. Run Ethernet cables from the LAN port of the AiMesh router to the WAN port of AiMesh node. AiMesh system will auto-select the best path for data transmission, whether wired or wireless.
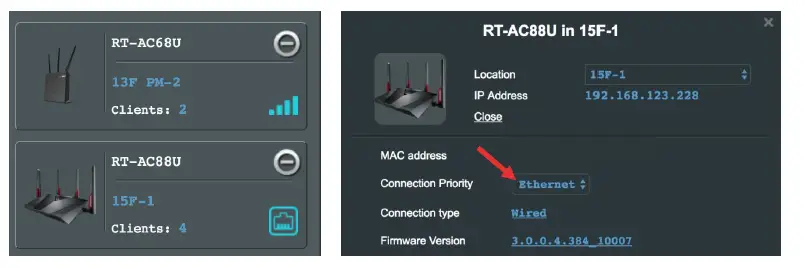
- If you want to keep wired connection manually between the AiMesh router and node, launch web GUI http://router.asus.com, and go to Network Map. Click on AiMesh icon, you will find the node list at the right side. And then click on the node picture More Config Connection Priority Ethernet.

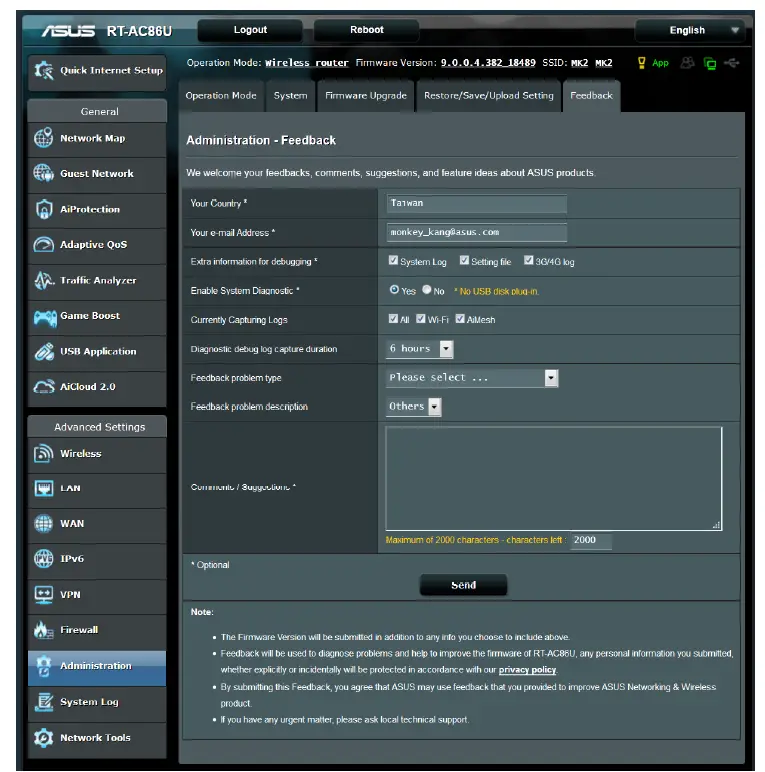
Feedback
If you have encountered any problem or issue when set up or use ASUS AiMesh, please go to web GUI (http://router.asus.com), and go to page Administration Feedback.
- Fulfill the feedback form.
- Enable system diagnostic and check all capturing logs.
- Send the feedback form, and ASUS will reply you as soon as possible.


 Wifi Gaming Router User Manual")


