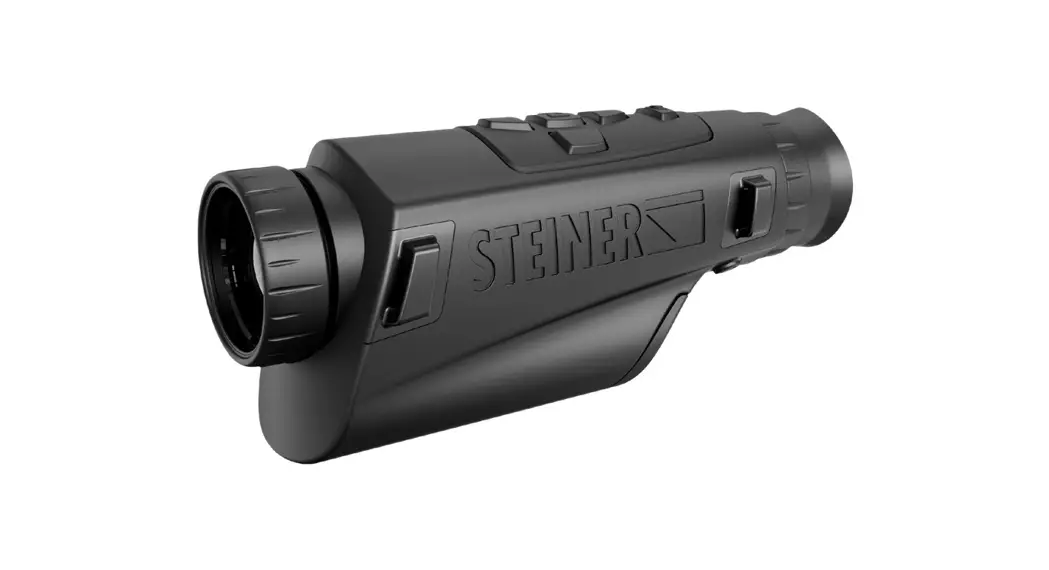
![]() Nighthunter H35 Thermal Imager
Nighthunter H35 Thermal Imager
User Manual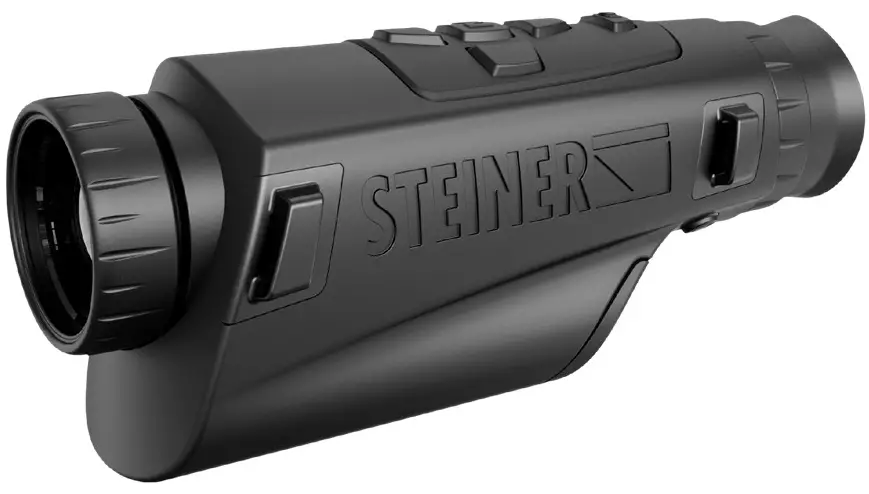
Thank you for purchasing this product. Please read this Guide first and keep it properly for future reference.
The picture is for reference only, the product shall prevail in kind.
– IMPORTANT –
This Guide is a general guide for a series of products, which means that the specific model you receive may differ from the picture in this Guide. Please refer to the actual product you receive.
This Guide is organized for users to use and understand our products. We will do our best to ensure the accuracy of the contents of this Guide. However, we still cannot guarantee the completeness of the contents thereof. As our products are subject to continuous upgrading, we reserve the right to modify this Guide from time to time without prior notice.
– LIST OF PARTS –
Standard accessories:
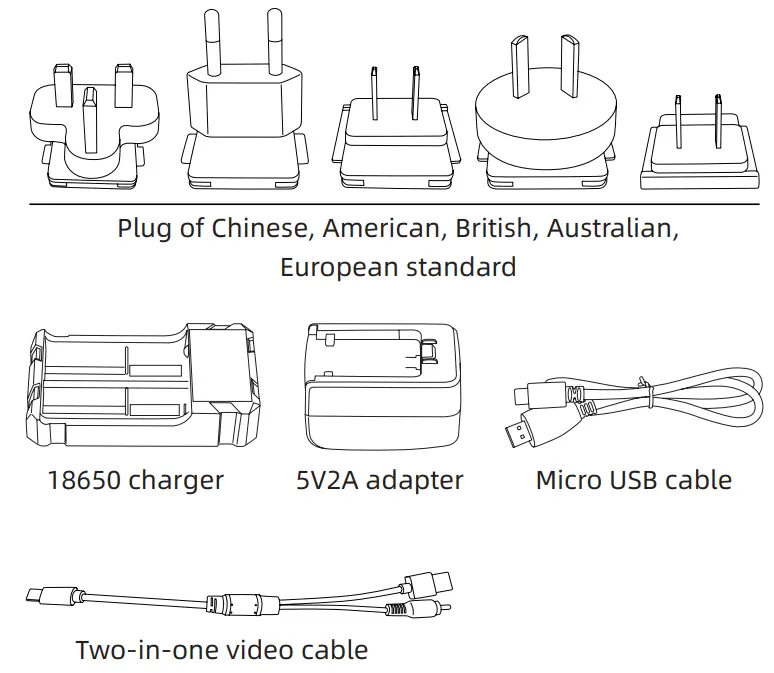
Options:
- Hand strap – individually changeable for left and right handers
- Better strap attachment
- Higher standard strap
- Changeable objective cover
- Ocular rain cover
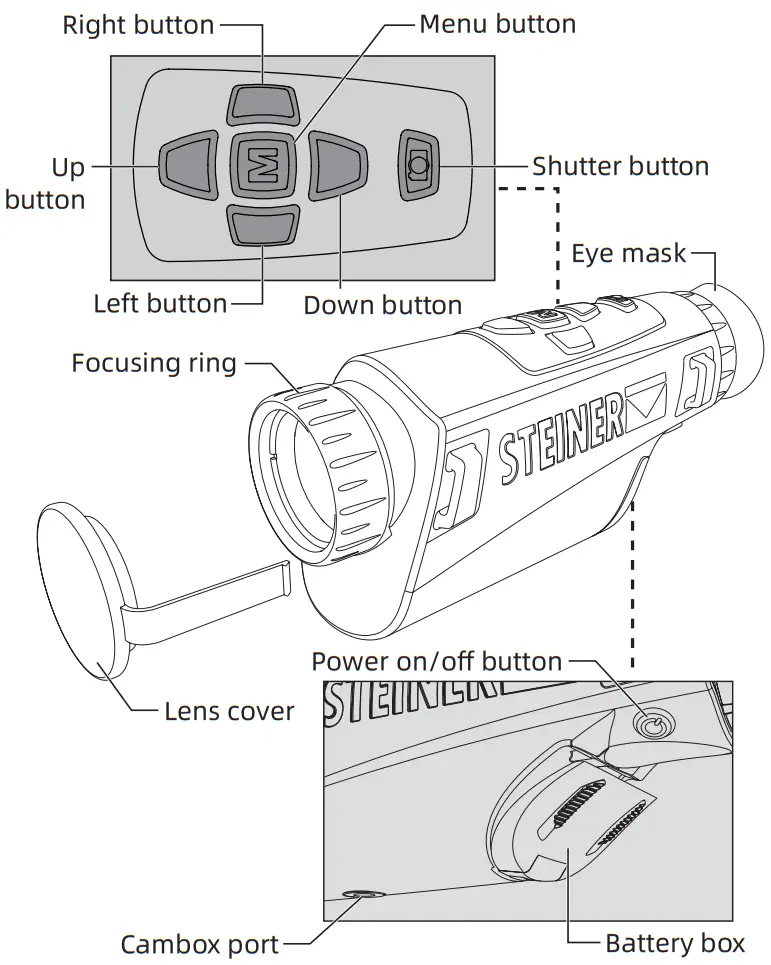
– INTRODUCTION TO THE PARTS –
This Guide is applicable to several models of this series, and the illustration is only for one of them.
– QUICKSTART INSTRUCTIONS –
| Buttons | Operation | Purpose | Current Device Status | Results |
| Power on/off button | Short-press | Compensation | Power on | Compensate based on the current compensation option |
| Long-press | Power off progress bar | Power on | Display the power off progress bar | |
| Cancel while long- pressing the power on/off button | Display off | Power on and the power off countdown is displayed | Display off | |
| Release the Power on/ off button when the fifth power off progress bar is completed | Power off | Power on and the fifth progress bar of the power off countdown is completed | Power off | |
| Long-press | Power on | Power off | Enter the real- time screen after the boot screen appears | |
| Long-press (2s) | Power on | Power off and battery low | Power off after battery low appears |
| Buttons | Operation | Purpose | Current Device Status | Results |
| Menu button | Short-press | Enter the main menu | Power on and the menu is not called out | Display the main menu |
| Short-press | Enter the next menu | Power on and there is a next menu | Enter the next menu | |
| Short-press | Confirm | Power on and in menu state | Confirm the current option and back to the previous menu at the same time | |
| Long-press | Return to previous menu/Exit menu | Power on and in menu state | Do not save the current settings and return or exit the menu | |
| Up button | Short-press | Zoom in | Power on and the menu is not called out | Zoom in to 1x, 2x, 4x, 8x, |
| Long-press | Infinite zoom in | Power on and the menu is not called out | Infinite zoom in until the button is released or to 8x | |
| Short-press up | Move the menu | Power on and in menu state | Move the menu or option up | |
| Long-press up | Move the menu | Power on and in menu state | Move the menu or option up and cycle through the display |
| Buttons | Operation | Purpose | Current Device Status | Results |
| Left button | Short-press | Switch the pseudo color | Power on and the menu is not called out | Switch the pseudo color mode |
| Short-press | Return to previous menu | Power on and in menu state, and there is a previous menu | Do not save the current settings and return to the previous menu, and no response occurs if there is no parent directory | |
| Long-press | Keep returning to previous menu | Power on and in menu state, and there is a previous menu | Do not save the current settings and return to the previous menu until the real-time screen appears | |
| Select left | Move the menu | Power on and in menu state | Move the menu or option left |
| Buttons | Operation | Purpose | Current Device Status | Results |
| Right button | Short-press | Switch the scene mode | Power on and the menu is not called out | Switch the scene mode |
| Short-press | Enter the next menu | Power on and in menu state, and there is a next menu | Enter the next menu, and no response occurs if there is no subdirectory | |
| Long-press | Keep entering the next menu | Power on and in menu state, and there is a next menu | Enter the next menu and press the Menu button to confirm if a dialog box pops up | |
| Select right | Move the menu | Power on and in menu state | Move the menu or option right |
| Buttons | Operation | Purpose | Current Device Status | Results |
| Down button | Short-press | Zoom out | Power on and the menu is not called out | Zoom out to 8x, 4x, 2x, 1x |
| Long-press | Infinite zoom out | Power on and the menu is not called out | Infinite zoom out until the button is released or to 1x | |
| Select down | Move the menu | Power on and in menu state | Move the menu or option down/right | |
| Long press down | Move the menu | Power on and in menu state | Move the menu or option down, recyclable display | |
| Shutter button | Short-press | Photo | Power on and the menu is not called out | Take a photo and freeze it for 300ms to restore the real-time screen |
| Short-press | Photo | Video recording | Take photos | |
| Long-press | Video | Power on and the menu is not called out | Start video recording | |
| Long-press | End video recording | Video recording | End and save the video |
【BUTTON DESCRIPTION】
- Power button
· Power on
Long-press the Power button until the boot screen appears in the eyepiece, then the device is turned on successfully.
· Power off
Manual power-off: Long-press the Power button to display the shutdown progress bar until the progress bar is completed and the shutdown is successful. Automatic power-off: If there is no button operation within the set automatic shutdown time, it will power off.
· Display off
Long-press the Power button to display the shutdown progress bar. Before the progress bar is completed, release the Power button to cancel the shutdown and enter the Display off mode.
· Display on
In Display off mode, press any button to wake up the screen.
· Compensation
When it is turned on and before the menu appears, press the Power button briefly to complete the corresponding compensation action (except automatic compensation). - Up button
· Zoom in
When it is turned on and before the menu appears, short-press the button to zoom in the image to Normal/2X/4X/8X in turn and long-press to zoom in by 0.5X step by step.
· Move the menu and option
When it is turned on and the menu appears, short press or long-press the Up button to move the menu or option up. - Down button
· Zoom out
When it is turned on and before the menu appears, short-press the button to zoom out the image to Normal/8X/4X/2X in turn and long-press to zoom out by 0.5X step by step.
· Move the menu and option When it is turned on and the menu appears, short press or long-press the Down button to move the menu or option down. - Left button
· Switch the pseudo color
Short-press the Left button in the real-time screen to switch the pseudo color in the order of White hot, Black hot, Red hot, Iron red, Flame and Amber in loop mode.
· Return to previous menu
When it is turned on and in menu state, and there is a next menu, short-press the Left button, and do not save the current settings and return to the previous menu, and no response occurs if there is no parent directory; long-press the Left button, and do not save the current settings and return to the previous menu until the real-time screen appears.
· Move the menu and option left
When it is turned on and in menu state, short-press the Left button to move the menu or option left. - Right button
· Switch the scene mode
Short-press the Right button in the real-time screen to switch the scene mode in the order of Enhanced , Detect and Standard in loop mode.
· Enter the next menu
When it is turned on and in menu state, and there is a next menu, short-press the Right button to enter the next menu, and no response occurs if there is no subdirectory; long-press the Right button to keep entering the next menu and press the Menu button to confirm if a dialog box pops up.
· Move the menu and option right
When it is turned on and in menu state, short-press the Right button to move the menu or option right. - Shutter button
· Photo Short-press the Shutter button to save the current screen and freeze it for 300ms to restore the real time screen. The current watermark UI and steiner logo information is saved and other UI information is not saved.
· Video
Long-press the Shutter button to start video recording and long-press the Shutter button again to end video recording. The current watermark UI and steiner logo information is saved and other UI information is not saved. The video file will be automatically split into two files if it is larger than 4GB.Short-press the Shutter button while video recording to take photos. - Menu button
When it is turned on and before the menu appears, long press the Menu button to pop-up the menu.
· OK and back/exit
When it is turned on and the menu appears, short press the Menu button to enter the next menu or confirm the current option, and back to the previous menu at the same time. Long-press the Menu button to return or exit the menu without saving the current setting.Icon Function Icon Function 
Image quality adjustment 
Image enhancement 
Scene mode 
PIP 
Pseudo color 
Stroke algorithm 
Hotspot tracking 
Brightness 
Screen brightness 
Contrast 
Compensation mode 
Rough ranging 
WiFi Power settings Icon Function Icon Function 
Auto sleep 
Automatic power off 
Power saving mode 
Boot vibration 
Local settings 
Watermark 
Time format 
Date format Time settings 
Language settings 
Format the memory 
Restore default · Scene mode:
The scene mode can be switched to Enhanced , Detect and Standard.
· Zoom in/out:
Display in 1x, 2x, 4x and 8X in loop mode.
· Color Palettes:
Colors can be adjusted to White hot, Black hot, Red hot, Iron red, Flame and Amber.
· Edge Detect:
Stroke the edge of the observation object when turned on.
· Compensation mode:
There are three compensation modes: automatic compensation, scene compensation and shutter compensation.
· Sharpness Filter:
Adjust the parameters to change the imaging quality.
· PIP:
In PIP mode, the image can be magnified to 2X within 256px×192px and located in the upper left, upper middle and upper right, which can be saved in photos and videos.
· Hotspot tracking:
A white cross cursor displays and at this time, and the cursor appears at the point with the largest AD value in the screen to achieve real-time preview.
· Brightness:
The detector brightness can be adjusted from level 1 to 10.
· Screen brightness:
The screen brightness can be adjusted from level 1 to 10.
· Contrast:
The contrast can be adjusted from level 1 to 10.
· Stadiametric Range:
The position of the lower horizontal line remains unchanged and the upper horizontal line can be moved. The number of pixels between the two horizontal lines is ≥6. The rough ranging interface will not actively exit, unless the user presses the Menu button or Shutter button.
· WiFi settings:
WIFI switch. When the mobile client and the device are connected, real-time videos can be transmitted to the mobile phone, the device can be operated through the APP and the photos/videos of the device can be accessed, and photo/video play, sharing, deletion, etc. can be performed. Each device has independent MAC address.
· Automatic sleep:
Automatic sleep time can be set at 5/10/15min. If no operation is made within the set time, a countdown to sleep will appear and the countdown can be canceled by pressing any button. The ARM will enter the low power mode if no operation is made during the countdown. If the WIFI is turned on and connected to the device or video output, the countdown to auto sleep will stop and restart when the device is not connected to WIFI.
· Automatic Shutdown:
Automatic power off time can be set at 15/30/60min. If no operation is made within the set time, a countdown to power off will appear and the countdown can be canceled by pressing any button. The device will be powered off when the countdown is over. If the WIFI is turned on and connected to the device or video output, the countdown to auto power off will stop and restart when the device is not connected to WIFI.
· Power saving mode:
When the power saving mode is enabled, the ARM switches to the low power mode; the brightness is fixed at 20%, which cannot be adjusted, and WIFI cannot be turned on. If the current WIFI has been already turned on, the above functions are disabled.
· Power Vibration:
The boot vibration can be set on/off. If it is on, the device will vibrate for 1s before the boot screen appears.
· Watermark settings:
Options can be made from Date only/Time only/ Time and date/Off.
· Date format:
The date format can be YYYY-MM-DD/MM-DD-YYYY/DD-MM-YYYY.
· Time format:
The time format can be 12H/24H.
· Time settings:
The time adjustment interface will display based on the time format and date format. Leap year needs to be considered for time adjustment. The time range is from January 1, 2016 to December 31, 2037.
· Language settings:
Language can be selected in English/German/ French/Italian/Spanish.
· Memory card formatting:
Memory card formatting can be selected. Select “Yes” to format the memory card and select “No” to cancel the operation.
· Restore default:
Users can choose whether to restore the default value. Select ‘Yes’ to restore all parameters to factory settings; select ‘No’ to cancel the operation. - Battery status
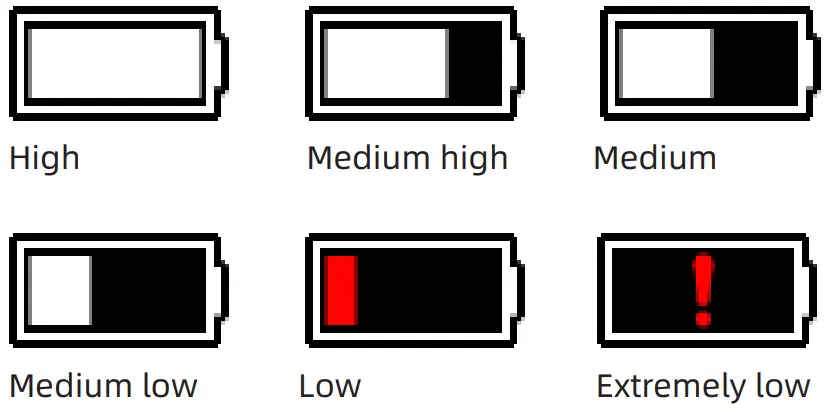
When the thermographic camera is turned on and the battery capacity changes, the capacity indicator is displayed in the left lower corner of the screen, and the part of the lit power indicator shows the remaining battery capacity.
After starting up and entering the real-time screen, the icon corresponding to the power levels below will be displayed in the left lower corner of the screen.
The power levels are as follows: Notes:
1. Please replace the battery in a timely manner when the battery is low!
2. When a rechargeable battery is used, the duration of full capacity is long, i.e., the time of switching to
to  is longer than the time of switching between other capacity levels!
 Notes:
– TROUBLESHOOTING –
- The device cannot be powered on
Solution: replace the battery or connect the adapter for power supply - The device cannot take photos/videos
Solution: the internal storage space of the device is full. It is needed to format the memory card or disconnect the device from the computer - The display time of the device is inconsistent with the actual time
Solution: reset the time and date of the device in the menu - The screen goes black during use
Solution: short-press any button to wake up sleep and light up the screen - The image is blurred
Solution: turn the lens for manual focusing until the image sharpens
– STORAGE AND TRANSPORT –
The following is about the correct storage and transportation methods of the product. In order to prevent danger and property loss, please read this guide carefully before using the device and strictly observe it during use. Please keep this guide properly after reading.
Storage
- The storage environment of packaged products is -30 ℃ ~ 60 ℃, the relative humidity is not more than 95%, without condensation and corrosive gas, and is well ventilated and clean indoor.
- Please charge the thermographic camera once every 3 months.
Transportation
The thermographic camera shall be protected from rain, water, inversion, violent vibration and impact during transportation, and shall be handled with care. Throwing is not allowed.
– FCC WARNING –
This equipment may generate or use radio frequency energy. Changes or modifications to this equipment may cause harmful interference unless the modifications are expressly approved in the instruction manual. The user could lose the authority to operate this equipment if an unauthorized change or modification is made.
This device complies with part 15 of the FCC Rules. Operation is subject to the following two conditions:
- This device may not cause harmful interference, and
- This device must accept any interference received, including interference that may cause undesired operation.
The device has been evaluated to meet general RF exposure requirement. The device can be used in portable exposure condition without restriction.
NOTE: This equipment has been tested and found to comply with the limits for a Class B digital device, pursuant to part 15 of the FCC Rules. These limits are designed to provide reasonable protection against harmful interference in a residential installation. This equipment generates, uses and can radiate radio frequency energy and, if not installed and used in accordance with the instructions, may cause harmful interference to radio communications. However, there is no guarantee that interference will not occur in a particular installation. If this equipment does cause harmful interference to radio or television reception, which can be determined by turning the equipment off and on, the user is encouraged to try to correct the interference by one or more of the following measures:
- Reorient or relocate the receiving antenna.
- Increase the separation between the equipment and receiver.
- Connect the equipment into an outlet on a circuit different from that to which the receiver is connected.
- Consult the dealer or an experienced radio/TV technician for help.
- The rating information is located at the bottom of the unit.
– PRECAUTIONS –
![]() DANGER
DANGER
- Please charge the battery with the method described in this Guide and follow the charging procedure and precautions. Improper battery charging will cause heating, damage and even physical injury;
- Do not try to open or disassemble the battery at any time. In the event the battery leaks and the spill enter the human eye, wash the eyes with clean water immediately and take medical care.
![]() WARNING
WARNING
- When using the device, please try to keep it stable and avoid violent shaking;
- Do not use or store the device in an environment that exceeds the allowable operating temperature or storage temperature of the device;
- Do not directly aim the device at high-intensity thermal radiation sources, such as the sun, lasers, spot welding machines, etc.;
- Do not block the holes on the device;
- Do not knock, throw or vibrate instruments and accessories to avoid damage;
- Do not disassemble the machine by yourself, which may cause device damage and loss of warranty rights;
- Do not use soluble or similar liquids on device and cables, which may cause damage to the device;
- Please do not use the device in an environment that exceeds the operating temperature of the device, which may cause damage to the device;
- Please observe the following requirements when wiping this device:
· Non-optical surface: use a clean soft cloth to wipe the non-optical surface of the thermographic camera when necessary;
· Optical surface: when using the thermographic camera, please avoid polluting the optical surface of the lens, especially avoid touching the lens with your hands, because the sweat on your hands will leave traces on the lens glass and may corrode the optical coating on the glass surface. When the surface of the optical lens is polluted, use special lens paper to wipe it carefully; - Do not place the battery in a high temperature or near a high-temperature object;
- Do not short circuit the positive and negative poles of the battery;
- Do not expose the battery to moisture or water.
![]() NOTICE
NOTICE
- Do not expose the device to dust or moisture. Avoid water splashing to the device when using it in an environment with water. Cover the lens when not using the camera;
- Please put the device and all accessories in the special packaging box when not using it;
- Avoid using SD cards for other purposes;
- Using the eyepiece for a long time will reduce the contrast of the eyepiece, and the picture will turn white. You can switch to LCD display, and then to eyepiece display after a period of time.
Special statement: the version of the Guide will be updated after the technical improvement of the product.
![]()


