Martha Stewart INS-0031 20 Inch Depth Perry St White Woodgrain/Gold Metal

INTRODUCTION
Congratulations on your purchase of the The Everyday System.
Installing your system is straightforward if you follow our instructions in the order provided.
Remember – measure twice, drill once!
PRODUCT OVERVIEW
Front View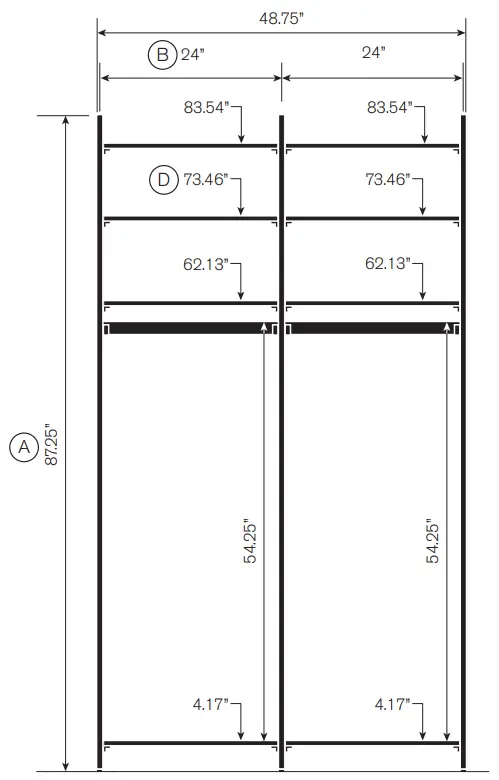
Top View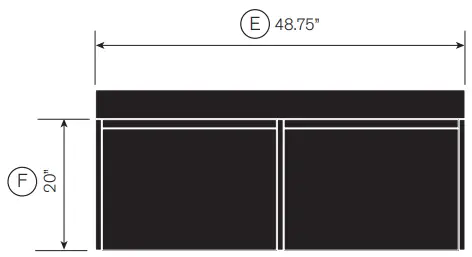
- A. Height of system
- B. Distance between uprights
Cabinet height - D. Shelf and shelf bracket height
- E. Width of system
- F. Depth of system
Order of Installation
Please follow the instructions in this order for optimum results and stability of your Everyday System.
- Prepare your space
- Uprights
- Shelf Brackets
- Standard Shelf
- Long Shelf
- Shoe Shelf
- Drawer Cabinet
- Bin Cabinet
- Mesh Door Cabinet
- Media Cabinet
- Desk Unit
- Closet Rod
![]() Rules and Warnings:
Rules and Warnings:
- THIS IS NOT A FREE-STANDING UNIT. FOR SAFETY, ALWAYS ANCHOR TO THE WALL.
- Do not attempt to assemble without FIRST securing Upright to the wall.
- Failure to anchor this product to a wall and/or otherwise not follow assembly instructions shall void this warranty.
- NEVER allow children to stand, climb, or hang on drawers, doors, or shelves.
- After assembly, make sure all leveler feet are touching the ground.
- Your system should be assembled per the template design. For stability of the system, each section must have at least 2, or combination of, the following with a minimum 40” spacing apart: Shelf, Shoe Shelf, Cabinet Unit.
- Ceiling height must be at least 90” high to allow clearance for installation.
- Trim must be less than 1-1/8” thick to allow for unit clearance.
- Maximum height that a cabinet can be mounted is 44” from the top of the cabinet to the floor.
- Do NOT re-use parts to attach wall bracket including screws and wall anchors.
If you intend to disassemble and reassemble this unit, please scan the QR code to visit the website for further instruction.
To watch videos detailing the installation process, please scan the QR code with your mobile device, or visit: shop.californiaclosets.com/pages/installation-everyday
| Components Included | |
| Qty | Description |
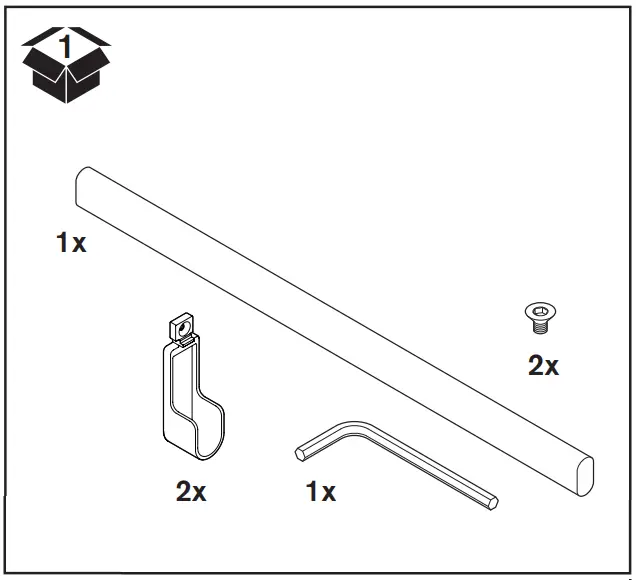
| 2 | Closet Rods with Mount 24 inch |
| 3 | Uprights 87.25 x 20 inch |
| 8 | Basic Shelves 24 x 20 inch |
| 8 | Shelf Bracket 20 inch |
UPRIGHT Installation Manual
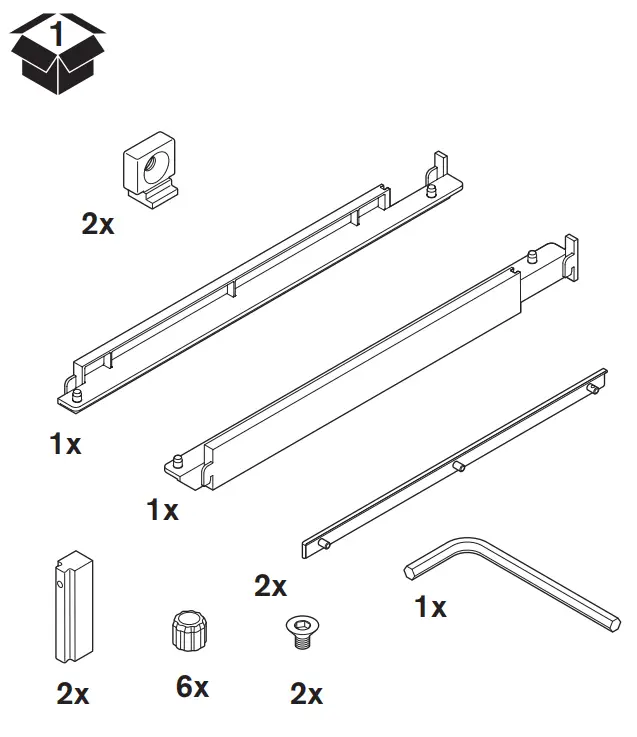
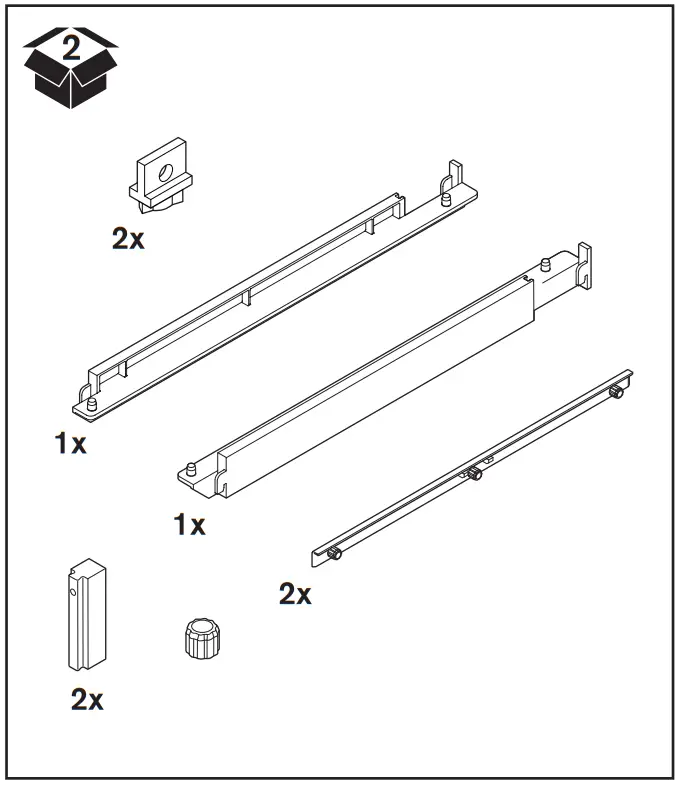
Included Parts
Note: Box may include more than one upright and hardware set.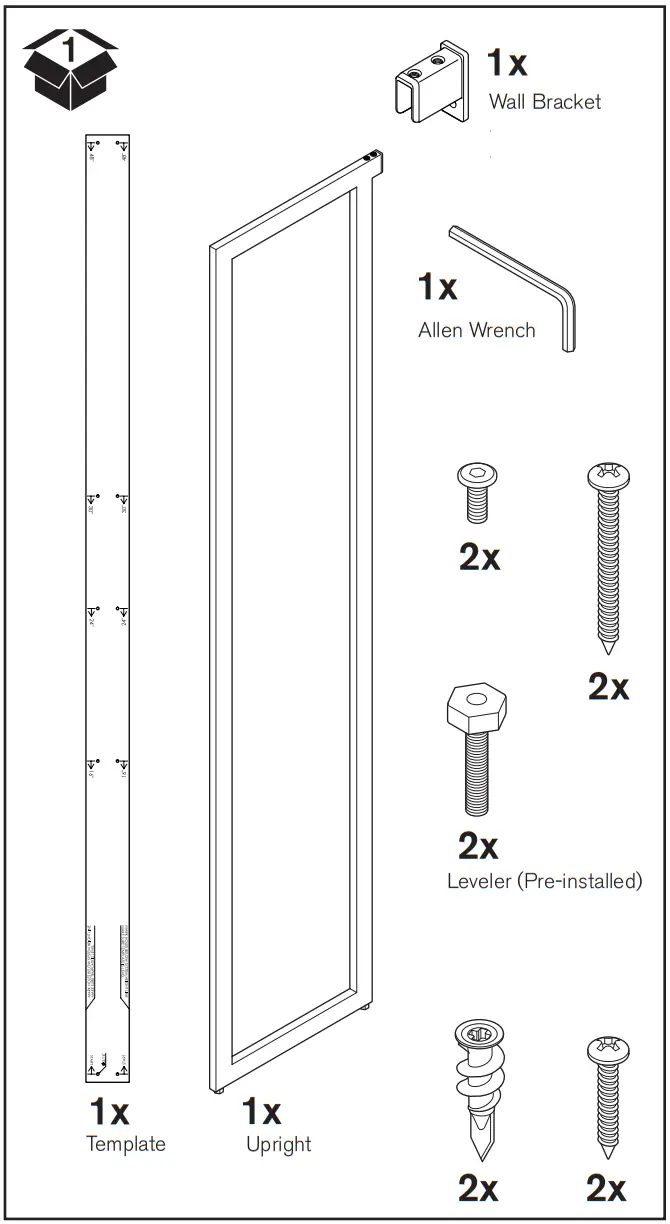
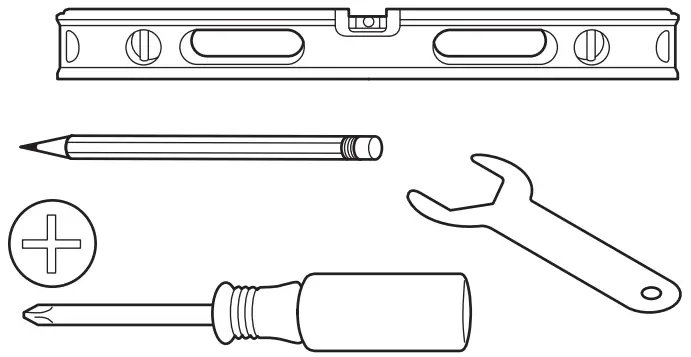
Tools Required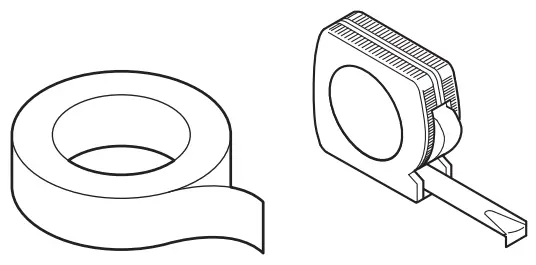
To watch videos detailing the installation process, please scan the QR code with your mobile device, or visit: shop.californiaclosets.com/pages/installation-everyday
Before you start
Before you start your build do not forget to prepare your space!
- Step 1: Tear out any unwanted structures (Example: previous wire closet)
- Step 2: Repair any holes or damaged areas by patching and painting.

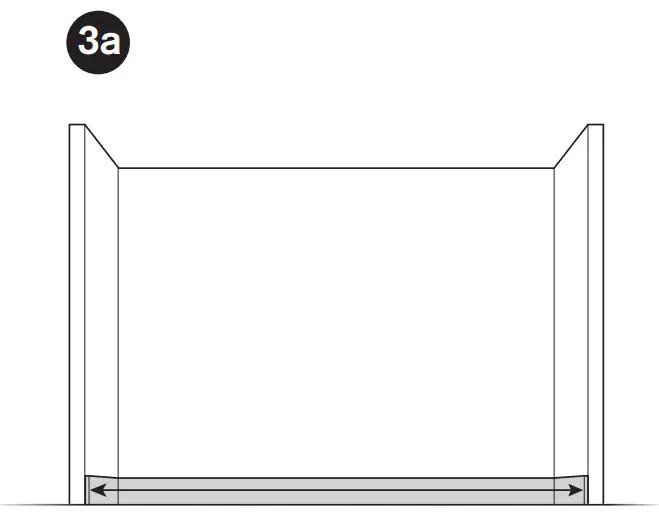
- Step 3: Verify your measurements and confirm the installation will fit. Examples:
- Step 3a: If between two walls, measure baseboard to baseboard.

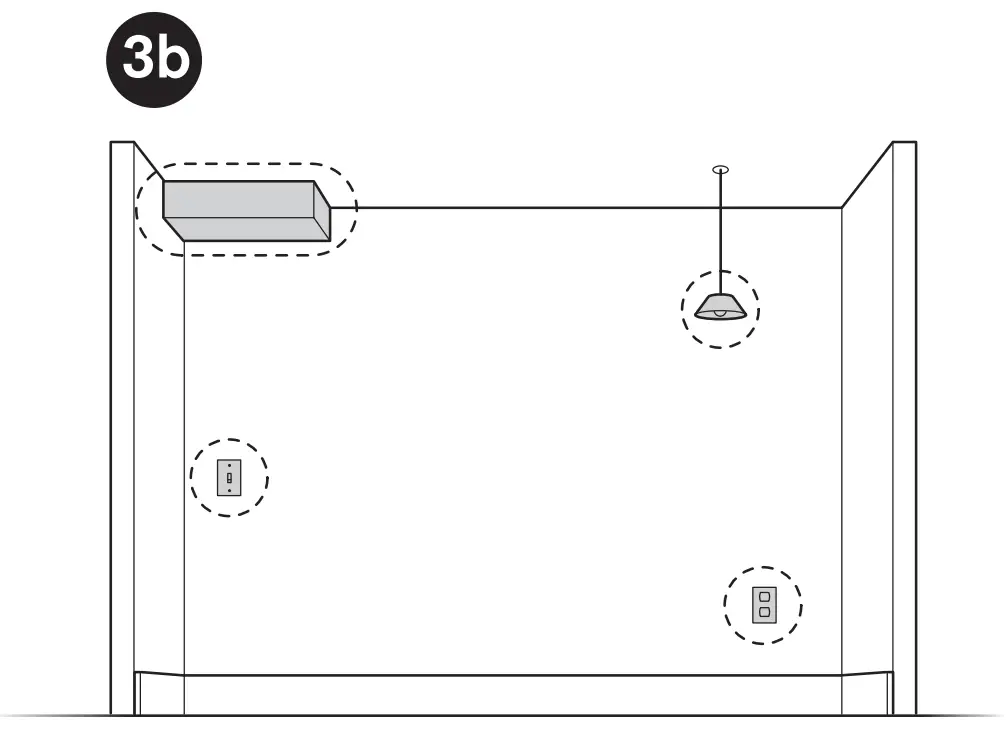
- Step 3b: Be aware of obstructions around the space such as wall lights, hanging lights, outlets, switches, etc.

- Step 3a: If between two walls, measure baseboard to baseboard.
- Step 4: Make note of anything that could be in the walls such as gas lines, electric wires, or water lines at Upright locations.
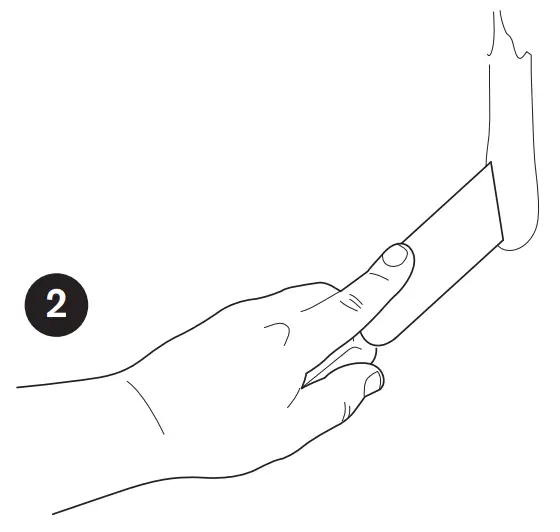
Find the high spot in the floor
- Option 1: Use a long level and move along perimeter of the floor noting where the highest point is. This is the high spot in the floor. (1a)
- Option 2:
- Step 1 – Draw a light line on the wall that can be erased later.
- Step 2 – Find the shortest distance between the floor and the line. This is the high spot in the floor.
Measure 87-1/4” from the high point (1b) and make a light mark (1c). This is your System Height.
For steps 2-5, use your Layout Design to locate your Upright positions on your wall.
Helpful Hints:
- Always make sure the top of the template aligns with your System Height.
- Always make sure the template is level before marking hole locations.
- Use painters tape to hold the Wall Template in place while you mark hole location.
The Wall Template will assist you in properly spacing distances between uprights. To mark the first two upright locations, align the top of the template with the System Height line drawn in Step 1 (2a) and the middle of the first partition (2b) Make sure that the template is level. It is recommended to use tape to keep the template in position (2c).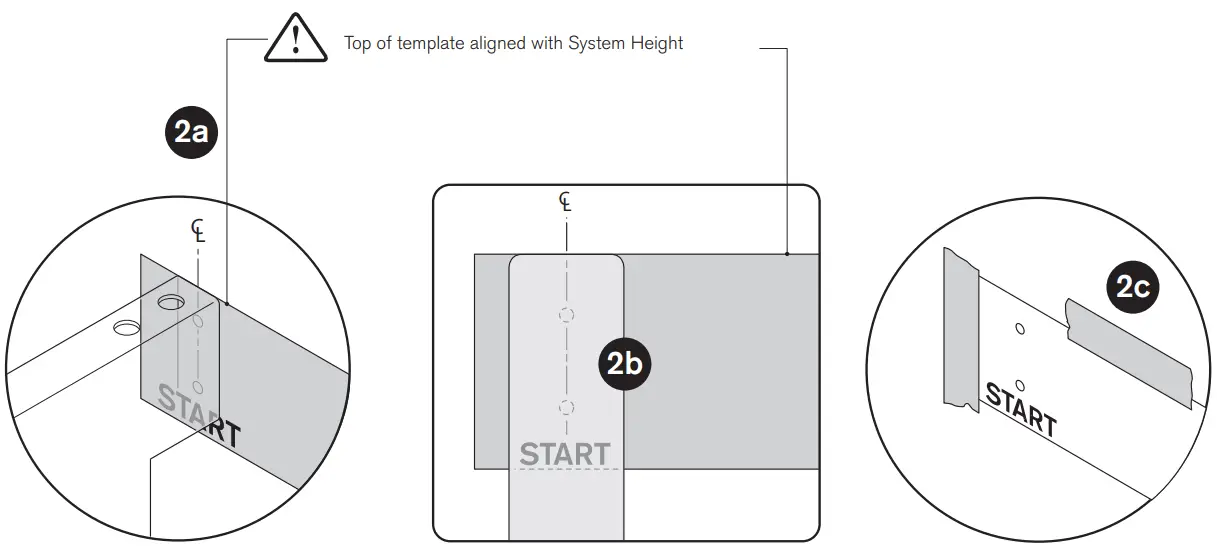
Depending on your Layout Design you will be using either the 16”, 24”, 30” or 48” holes for this span. Mark the two holes for each appropriate Upright location.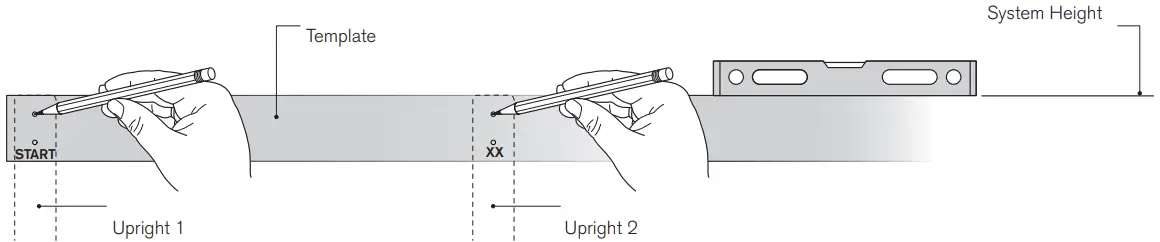
Reuse the Wall Template for the spacing for the next Upright. Using the previous marked holes as a starting point “START”, space out the next location depending on your Layout Design (16, 24, 30 or 48” span). Remember to check that the template is level and aligns with the System Height. Mark the next upright holes.
Repeat until all Upright hole locations are marked.
![]() WARNING: This wall bracket mount installation is specific to drywall with studs. If your wall is of different construction, you must find appropriate means to attach the wall bracket. It is not required to have the upright brackets be tied into a stud as drywall is acceptable.
WARNING: This wall bracket mount installation is specific to drywall with studs. If your wall is of different construction, you must find appropriate means to attach the wall bracket. It is not required to have the upright brackets be tied into a stud as drywall is acceptable.
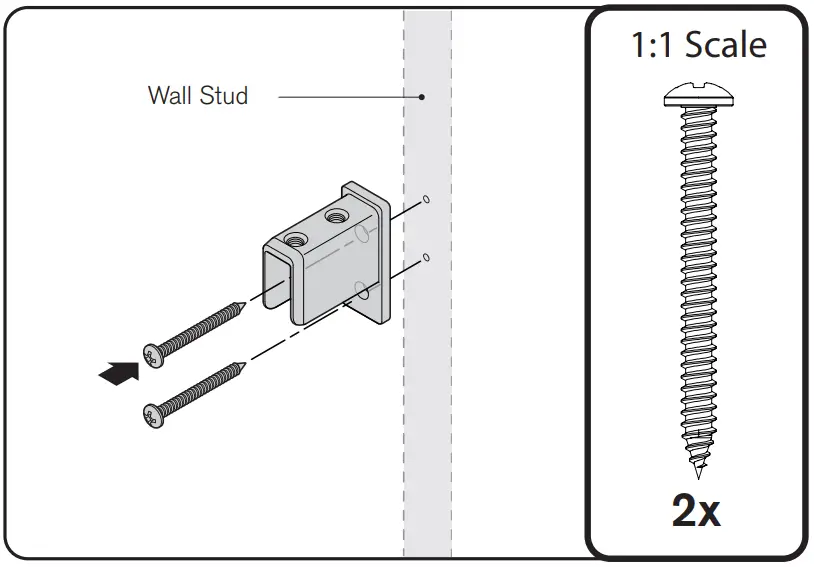
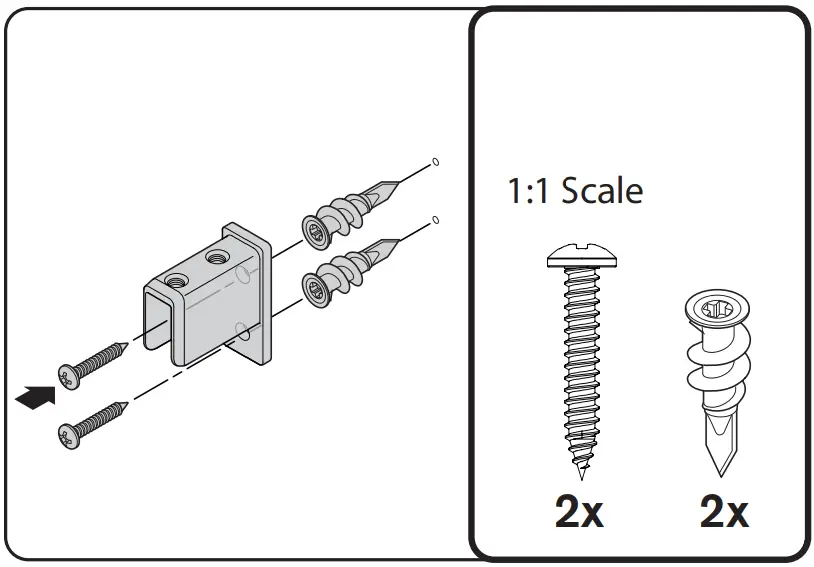
If hole location is located on a stud, install wall mount bracket using method “A”. If the hole location is not located on a stud, install wall mount bracket using method “B”.
- Method A: Wall Mount Bracket into a stud. Use two screws and attach wall mount bracket to wall.

- Method B: Wall Mount Bracket no stud (Drywall).
Using a #2 Philips bit, Install EasyAnchor into the 1/8” hole until flush. The Anchor will self drill. Use two screws and attach wall mount bracket to wall.
Ensure leveler is installed all the way into Uprights.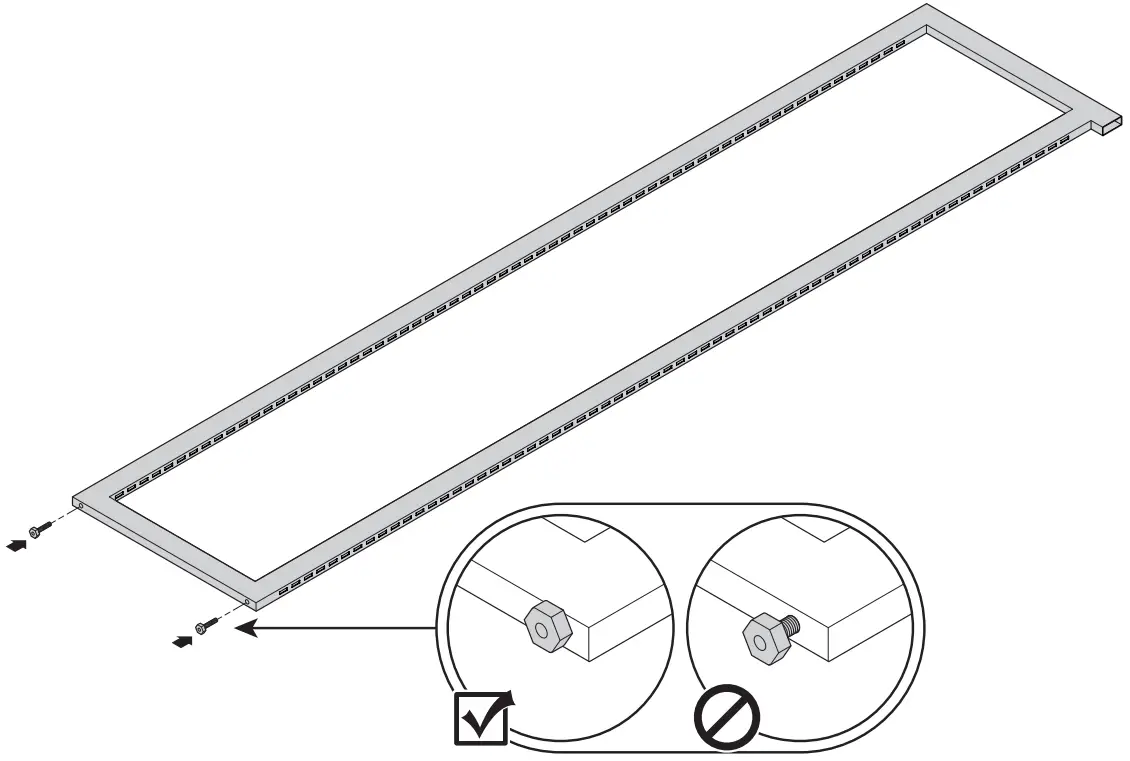
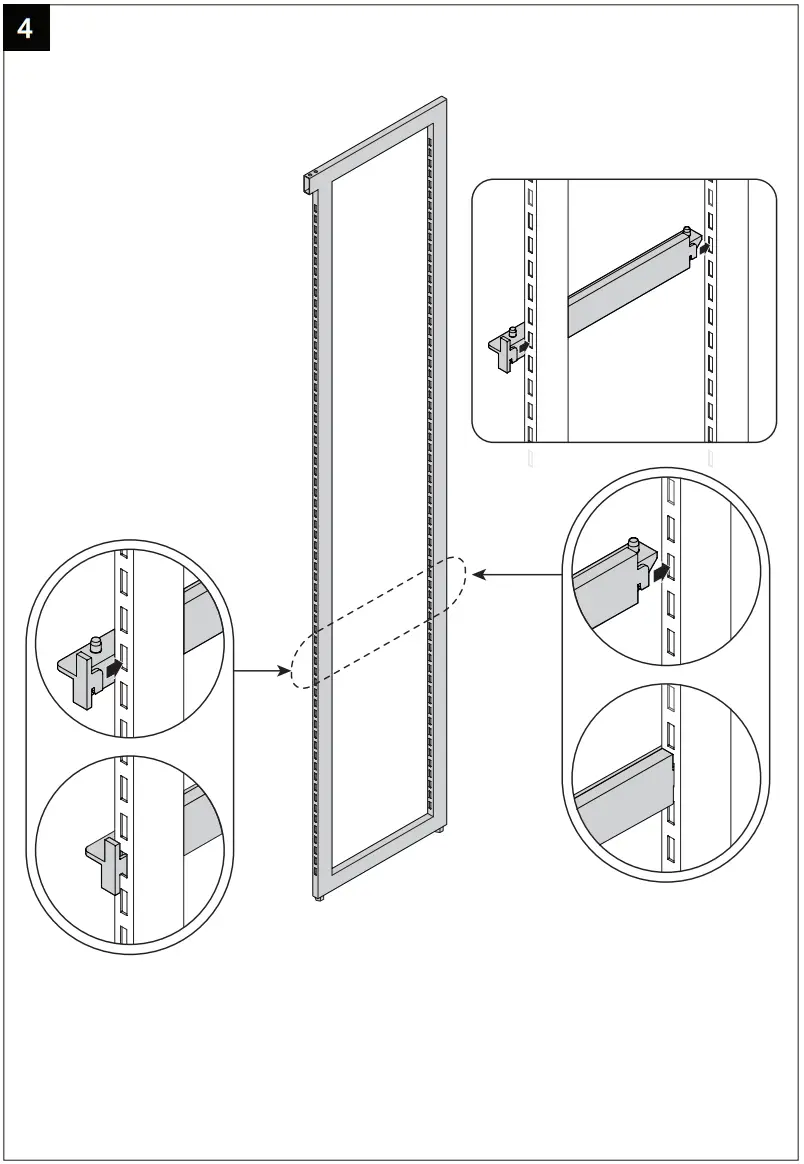
Place Upright on bracket (8a), and partially install screws to secure (8b). Do not tighten.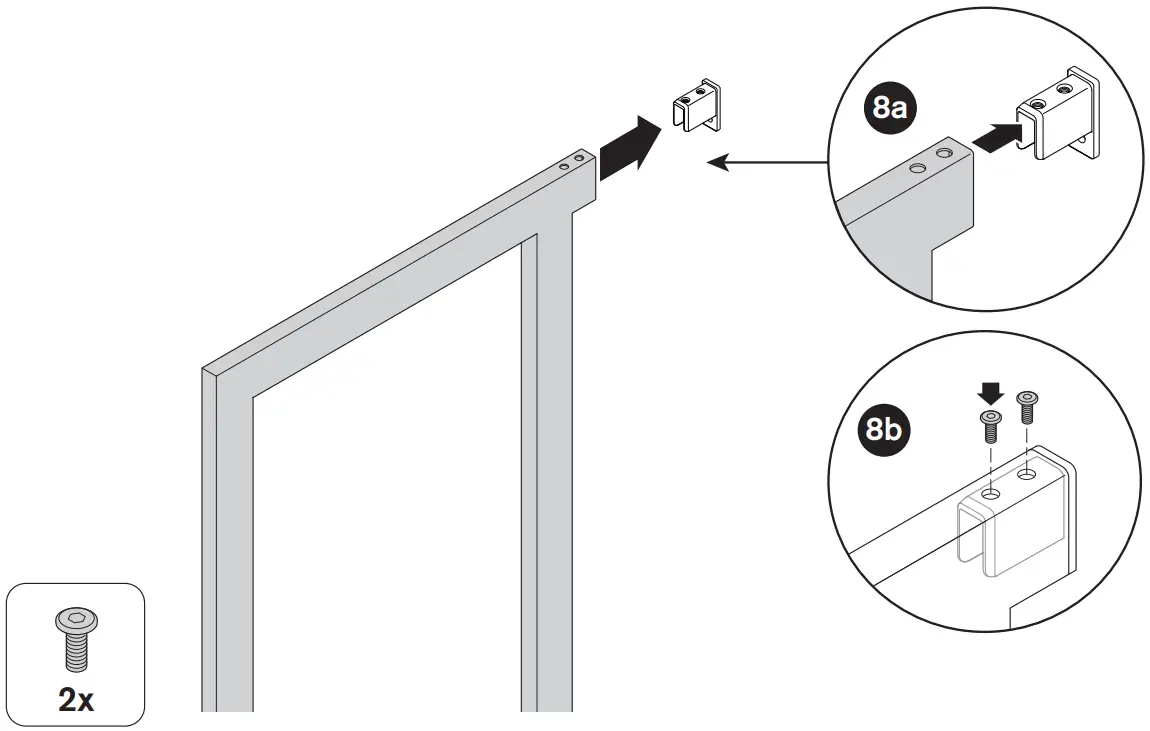
Adjust leveler leg to level Upright. Then make sure the back leveler also touches the ground. Ensure Uprights are level to adjacent Uprights.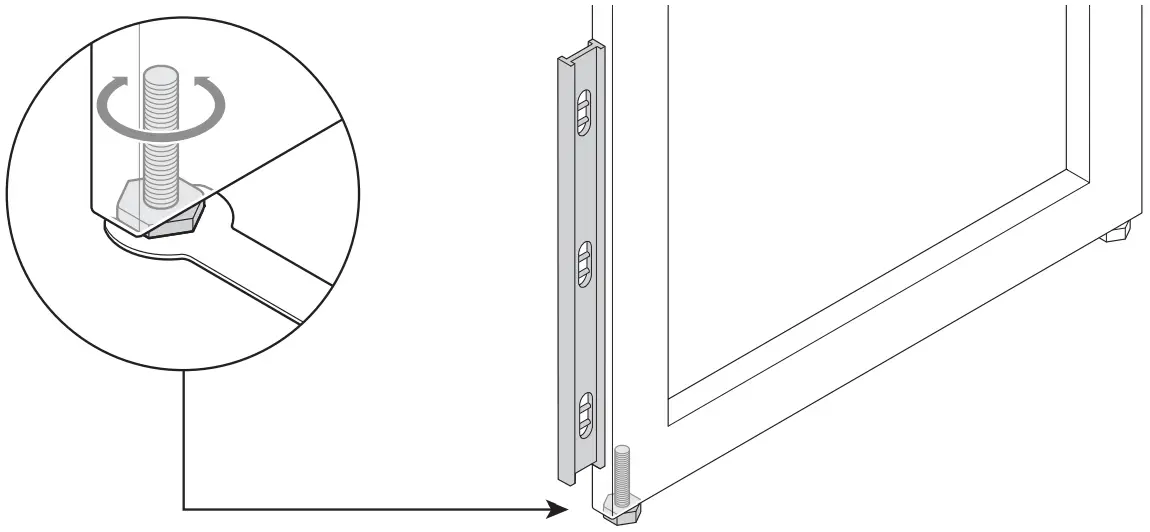
Once system is level, tighten all top screws. Double check that all levelers are touching the ground.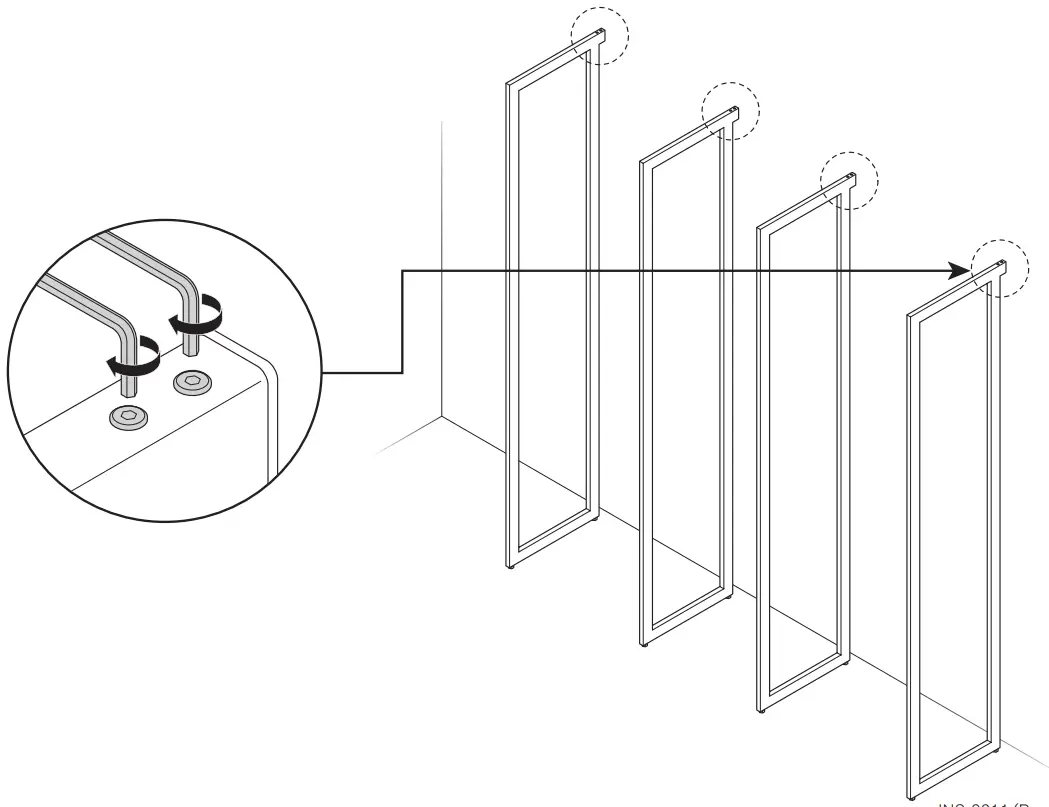
BRACKET Installation Manual
- • THIS IS NOT A FREE-STANDING UNIT. FOR SAFETY, ALWAYS ANCHOR TO THE WALL.
- Do not attempt to assemble without FIRST securing Upright to the wall.
- NEVER allow children to stand, climb, or hang on drawers, doors, or shelves.
Included Parts
Tools Required
To watch videos detailing the installation process, please scan the QR code with your mobile device, or visit: shop.californiaclosets.com/pages/installation-everyday
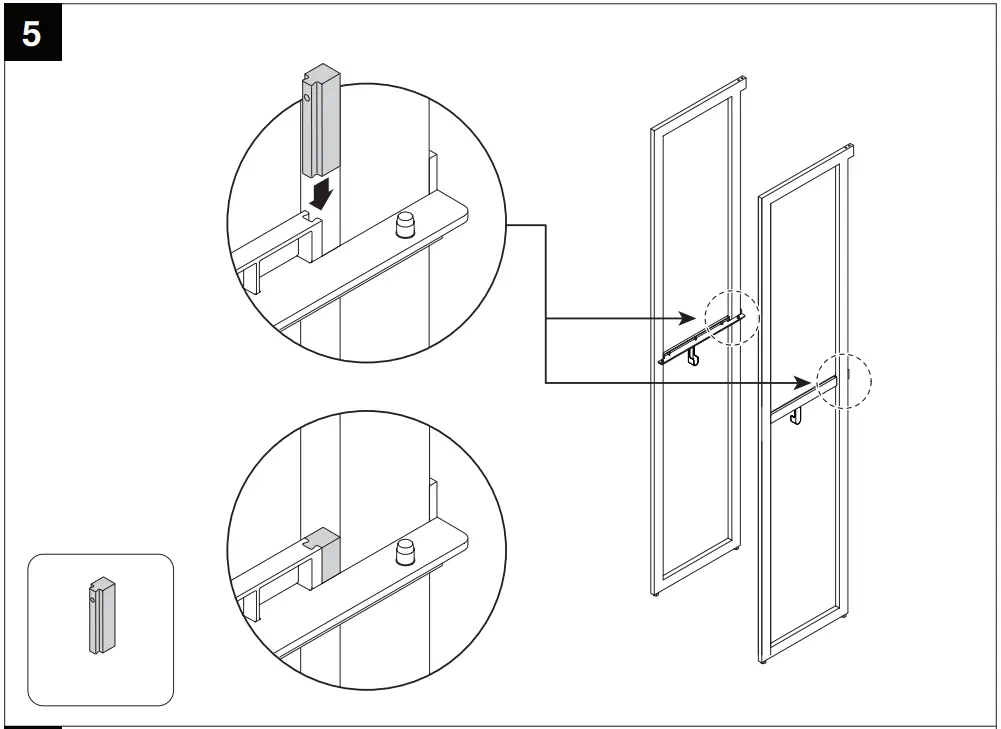
Installation Manual
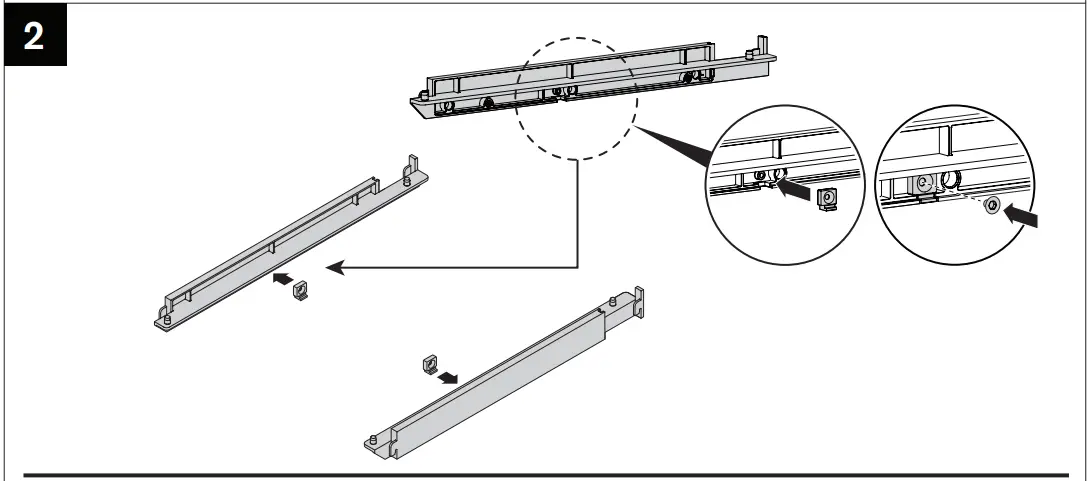
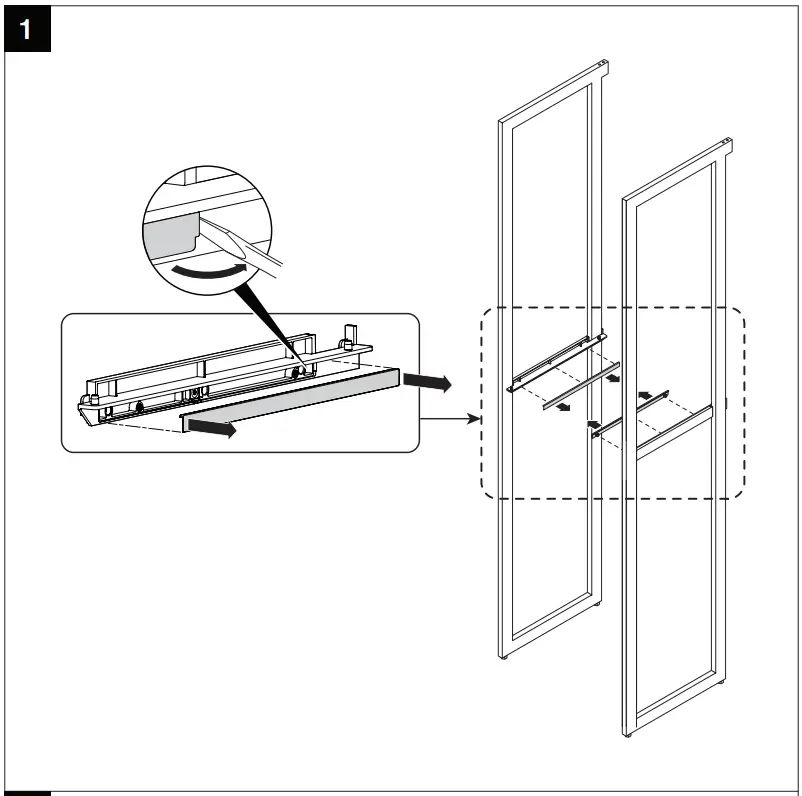
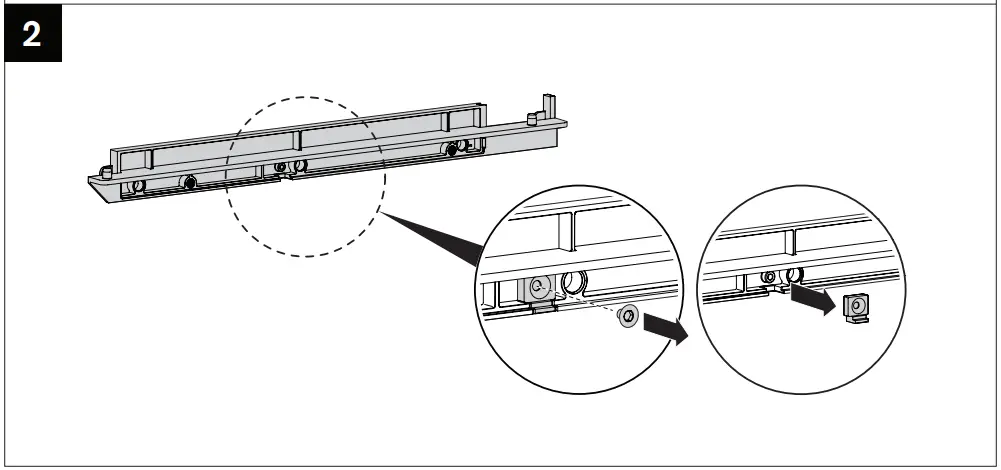
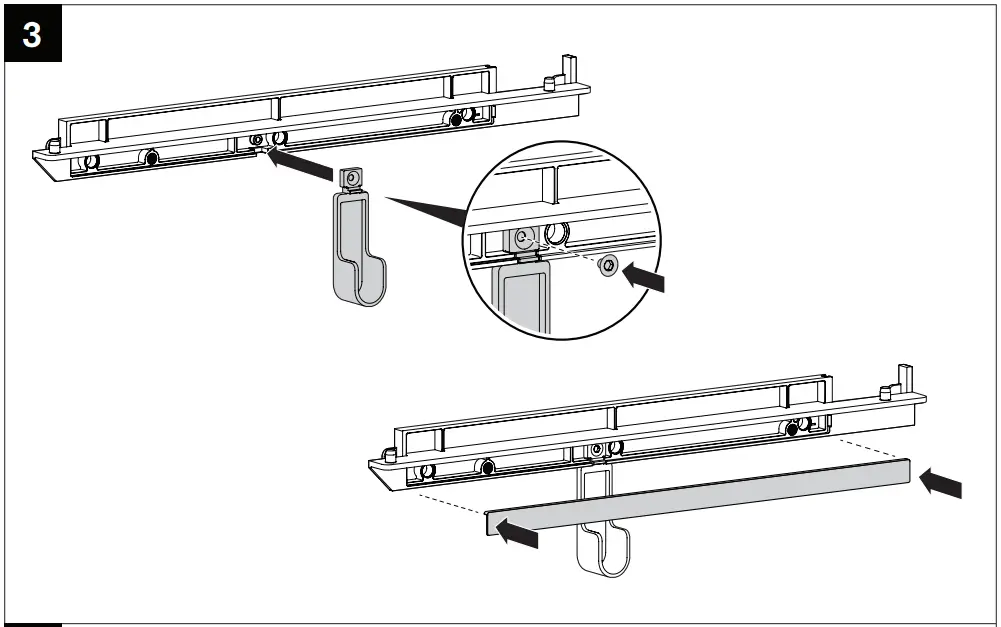
![]() Do not install hole plug if bracket is used with a pole.
Do not install hole plug if bracket is used with a pole.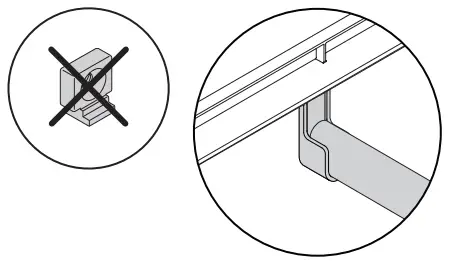
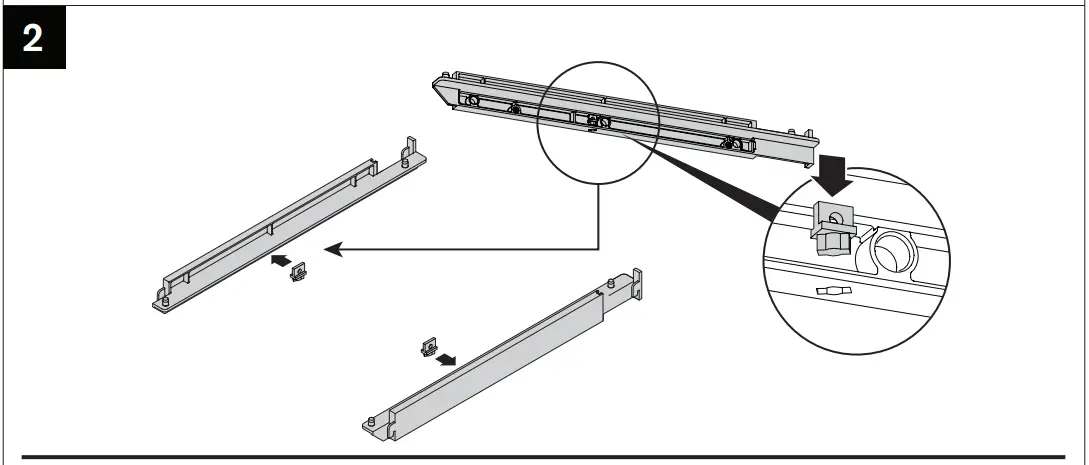
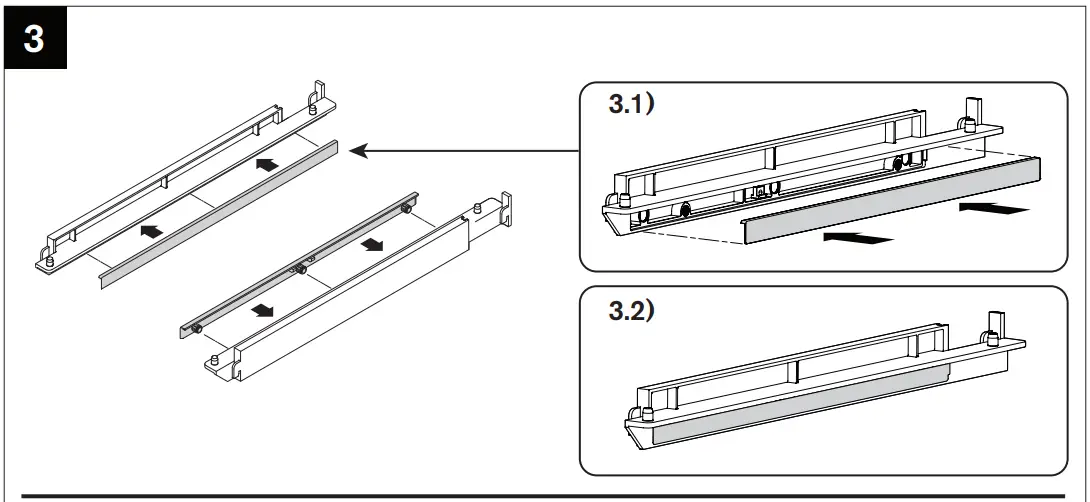
If cover is accidentally installed, pry cover with screwdriver.![]() Do not install cover if bracket is used with drawer
Do not install cover if bracket is used with drawer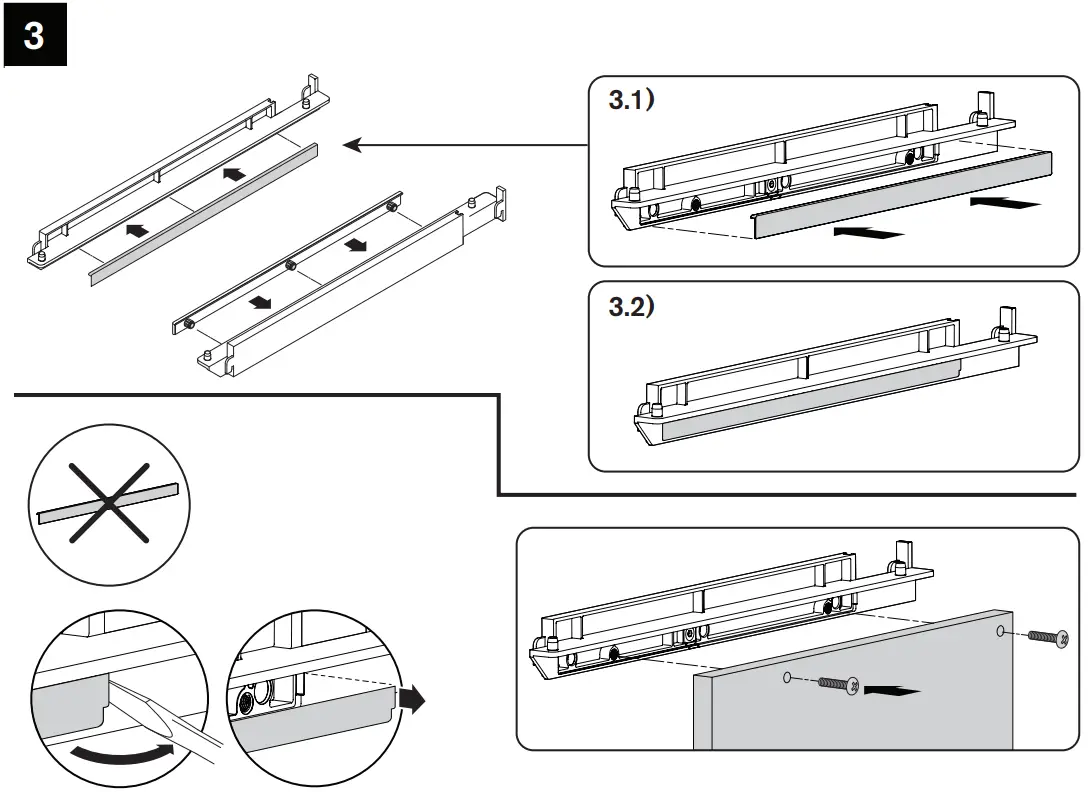
SHELF Installation Manual
- THIS IS NOT A FREE-STANDING UNIT. FOR SAFETY, ALWAYS ANCHOR TO THE WALL.
- Do not attempt to assemble without FIRST securing Upright to the wall.
- NEVER allow children to stand, climb, or hang on drawers, doors, or shelves.
Included Parts
Tools Required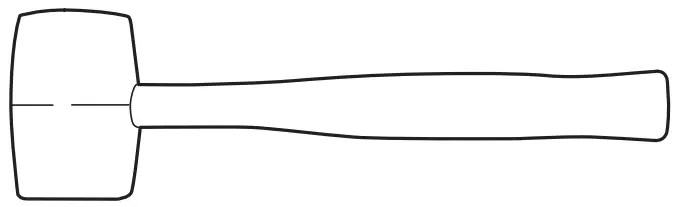
To watch videos detailing the installation process, please scan the QR code with your mobile device, or visit: shop.californiaclosets.com/pages/installation-everyday
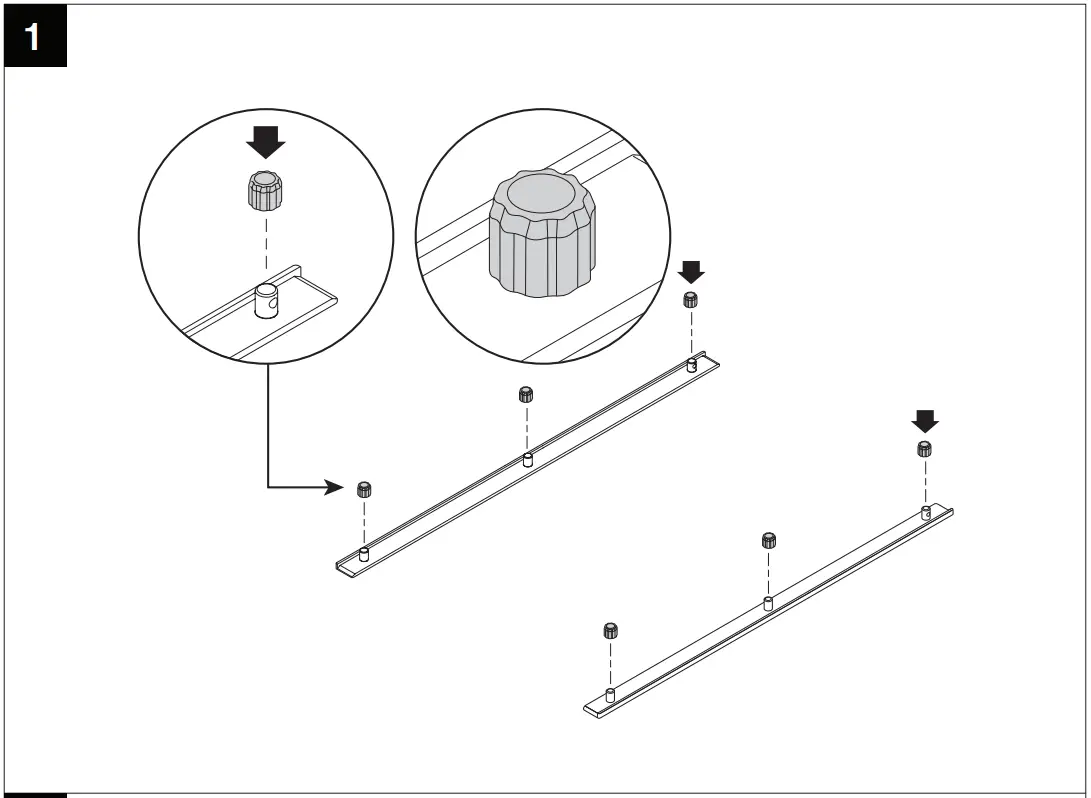
Installation Manual
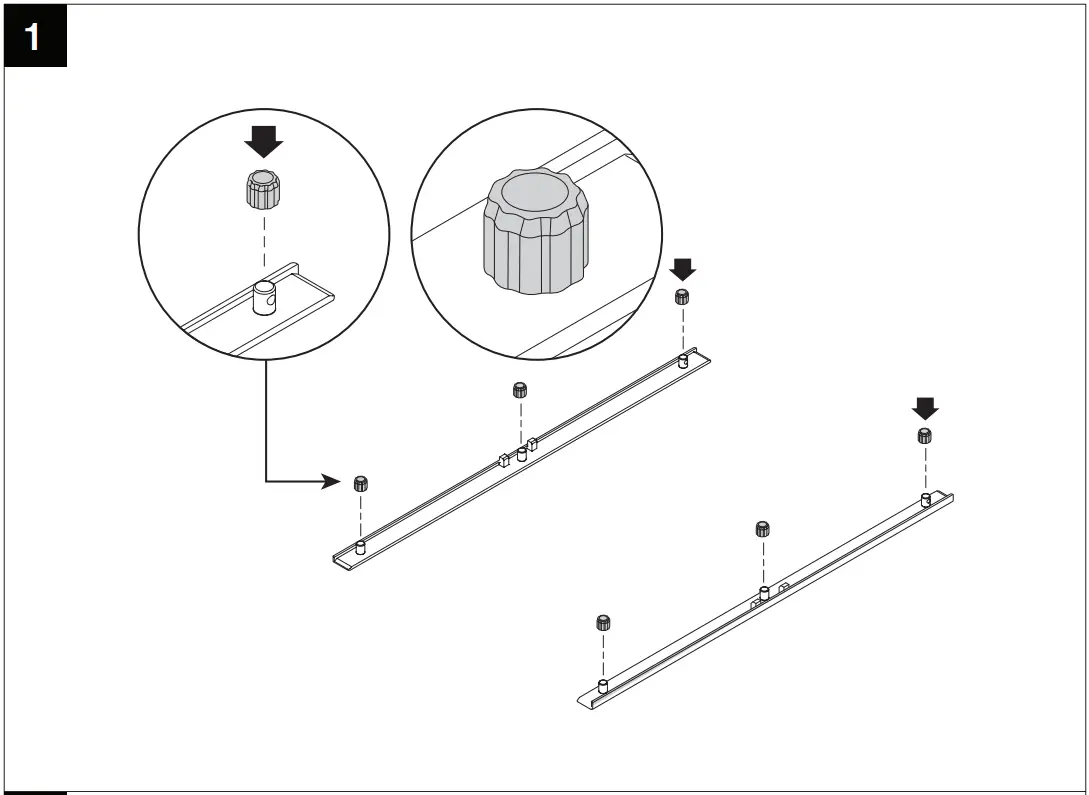
![]() Do not install hole plug if bracket is used with a pole.
Do not install hole plug if bracket is used with a pole.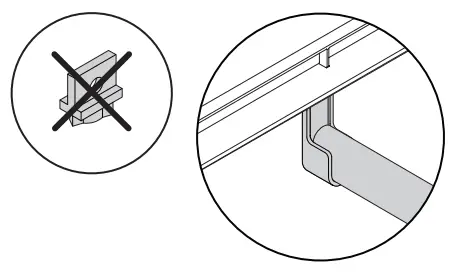
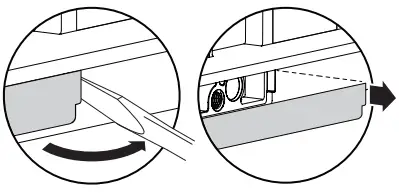
If cover is accidentally installed, pry cover with screwdriver.
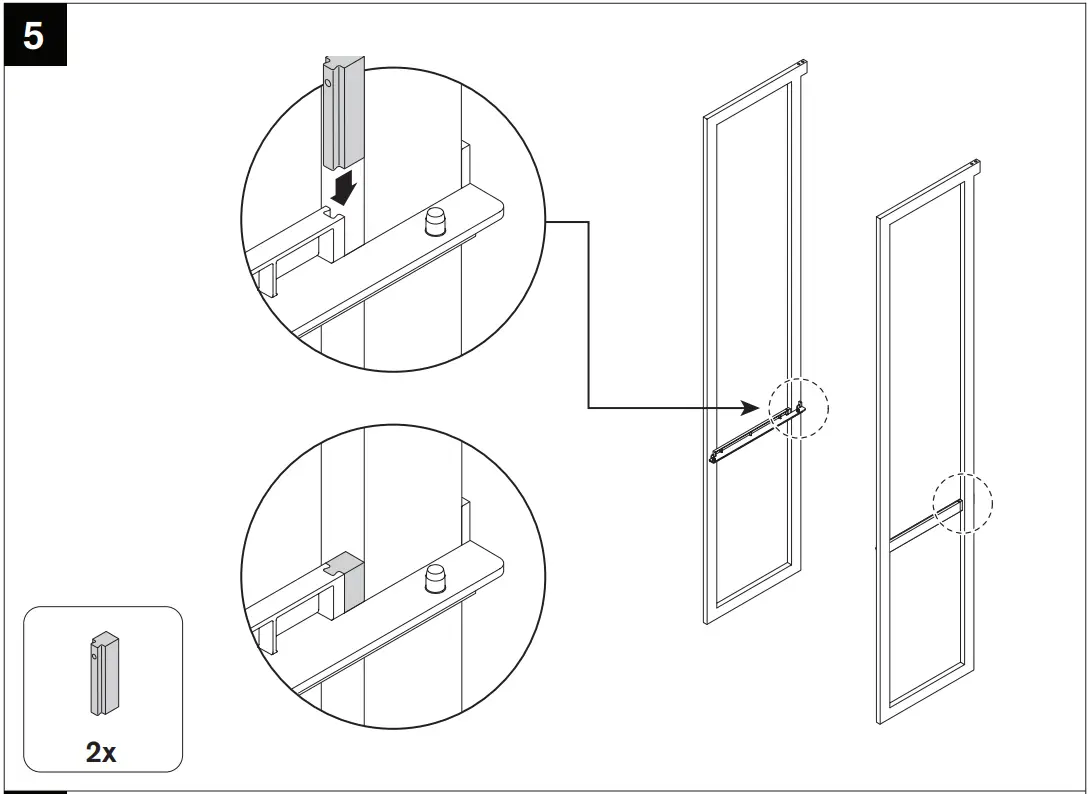
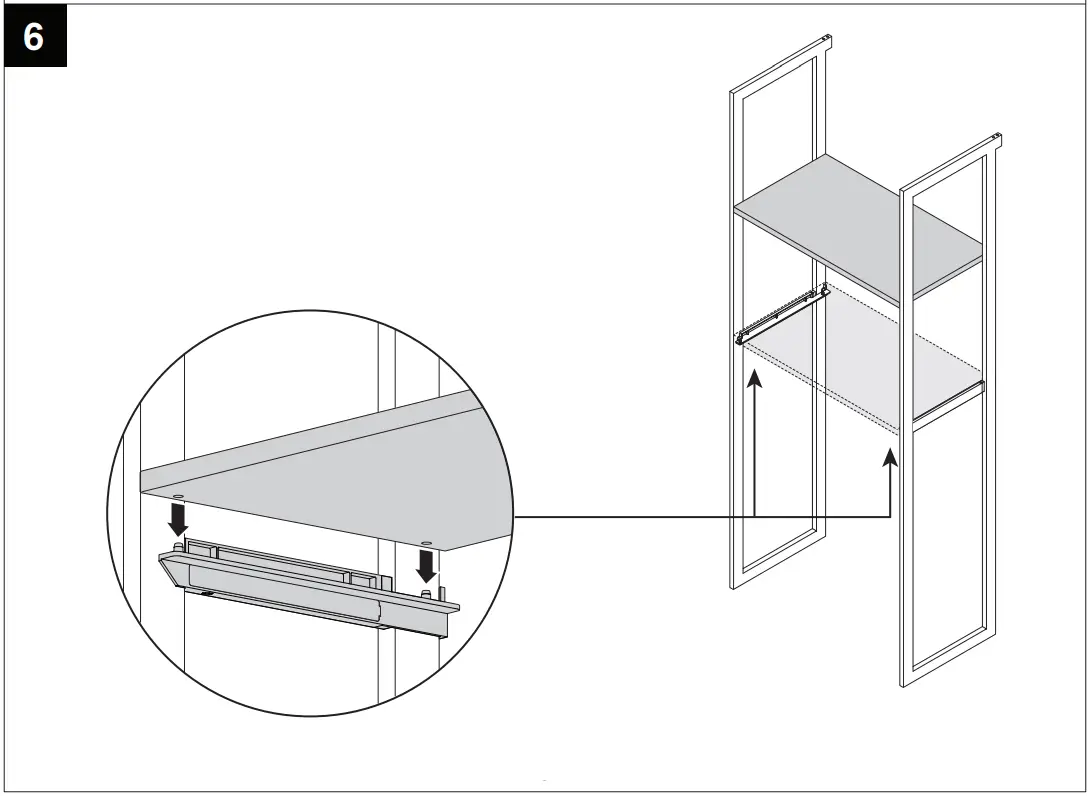
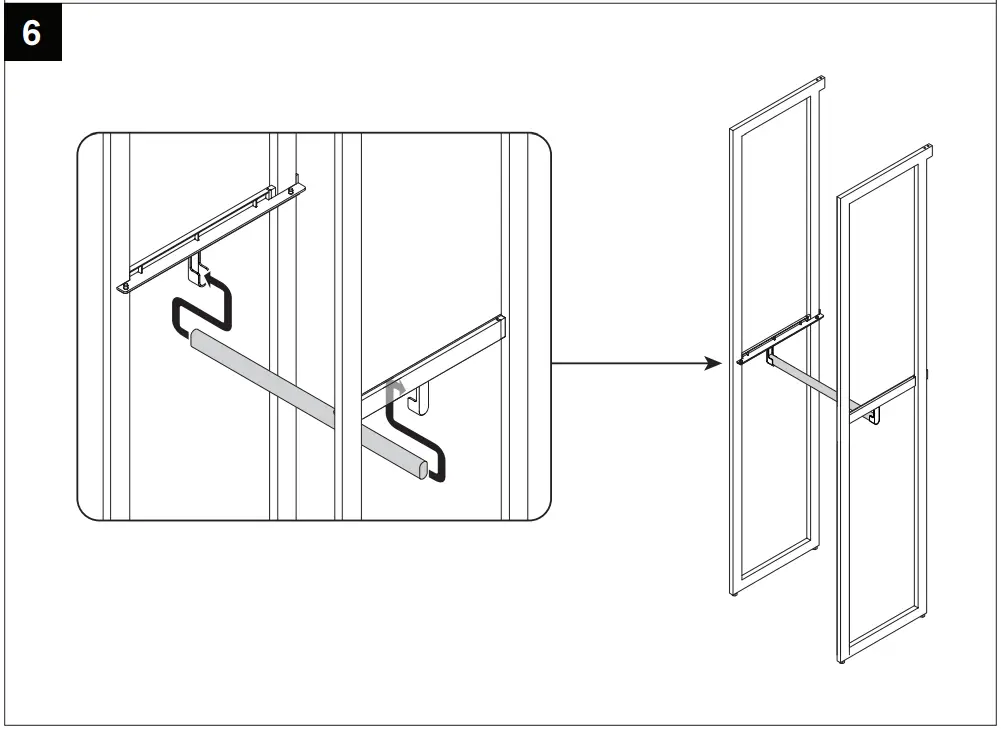
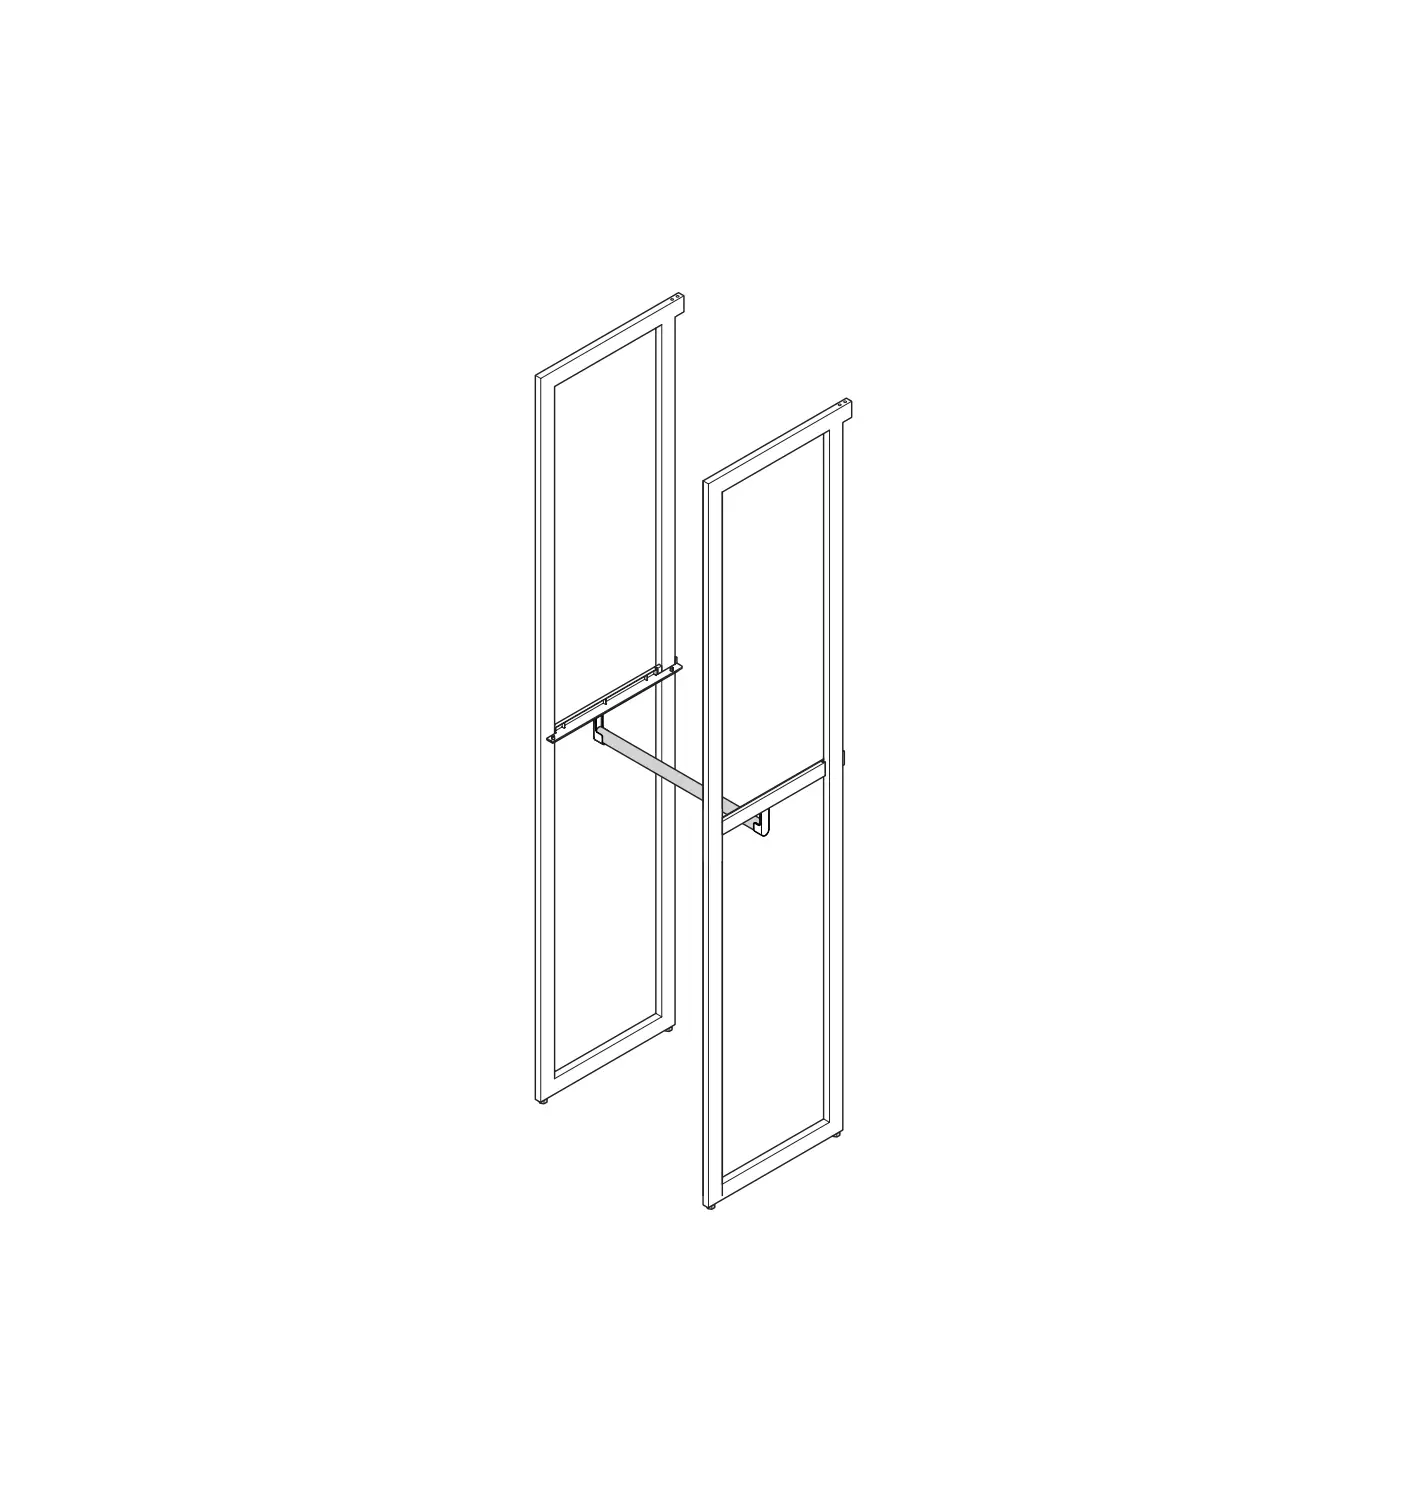
CLOSET ROD Installation Manual
- THIS IS NOT A FREE-STANDING UNIT. FOR SAFETY, ALWAYS ANCHOR TO THE WALL.
- Do not attempt to assemble without FIRST securing Upright to the wall.
- NEVER allow children to stand, climb, or hang on drawers, doors, or shelves.
Included Parts
To watch videos detailing the installation process, please scan the QR code with your mobile device, or visit: shop.californiaclosets.com/pages/installation-everyday
Installation Manual