![]() under-3 S1 Pro 3D Printer
under-3 S1 Pro 3D Printer
User Manual
To further improve your user experience, you can find more about our devices via the following methods: User manual: Please find instructions and videos in the SD card provided with the printer.
Instruction for Use
- Do not use this printer by methods or operations not described in this manual, otherwise, it may result in accidental injury or property damage.
- Do not place this printer near flammable materials, explosive materials or high heat sources. Please place this printer in a ventilated, cool and low-dust environment.
- Do not place this printer in a vibrating or any other unstable environment, as the printing quality will be compromised when the printer shakes.
- Please use the filament recommended by the manufacturer, otherwise, the nozzle may be clogged or the printer may be damaged.
- Do not touch the nozzle or hotbed while the printer is in operation, otherwise, you may get burned.
- After the printing process is complete, please use tools to clean up the filament on the nozzle while the nozzle is still hot. Do not touch the nozzle with your hands when cleaning, otherwise, your hands may get burned.
- Please regularly clean the printer body with a dry cloth while the power is off, and wipe off dust, sticky printing materials, and foreign objects on the guide rails.
- This printer has a safety protection mechanism. Please do not manually move the nozzle or printing platform quickly while the printer is on, otherwise the printer will automatically power off for protection.
- Users should abide by the laws and regulations of the corresponding country and region where the equipment is located (place of use) abide by professional ethics, and pay attention to safety obligations. The use of our products or equipment for any illegal purpose is strictly prohibited. Our company is not responsible for the relevant legal responsibilities of any violators.
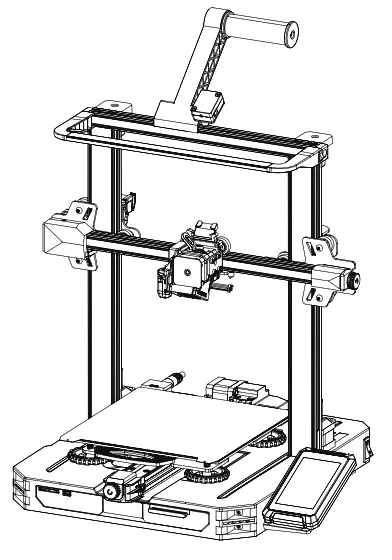
List of Main Parts
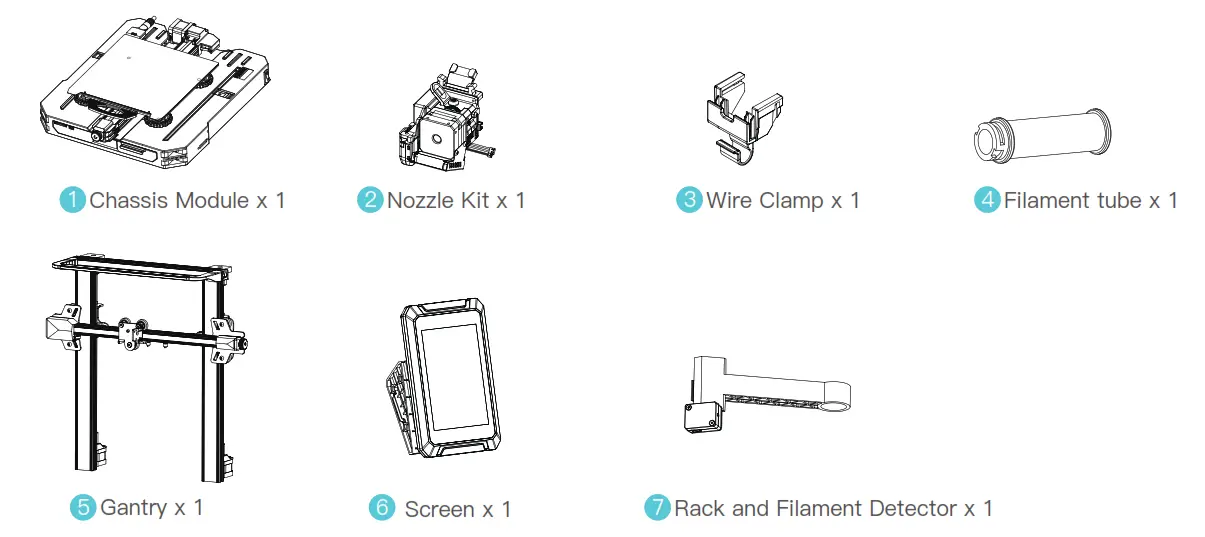
List of Accessory Kit Items

 | |||
| 16.M5x45 Socket Head Cap Screw with Spring Washer x 4 | 17.M4x30 Hexagon Flat Round Head Screw x 3 | 18.M3x6 Hexagon Socket Head Cap Screw x 5 | 19. Z-Axis Limit Switch Kit |
![]() Note: The components above are for reference only. The actual product may vary
Note: The components above are for reference only. The actual product may vary
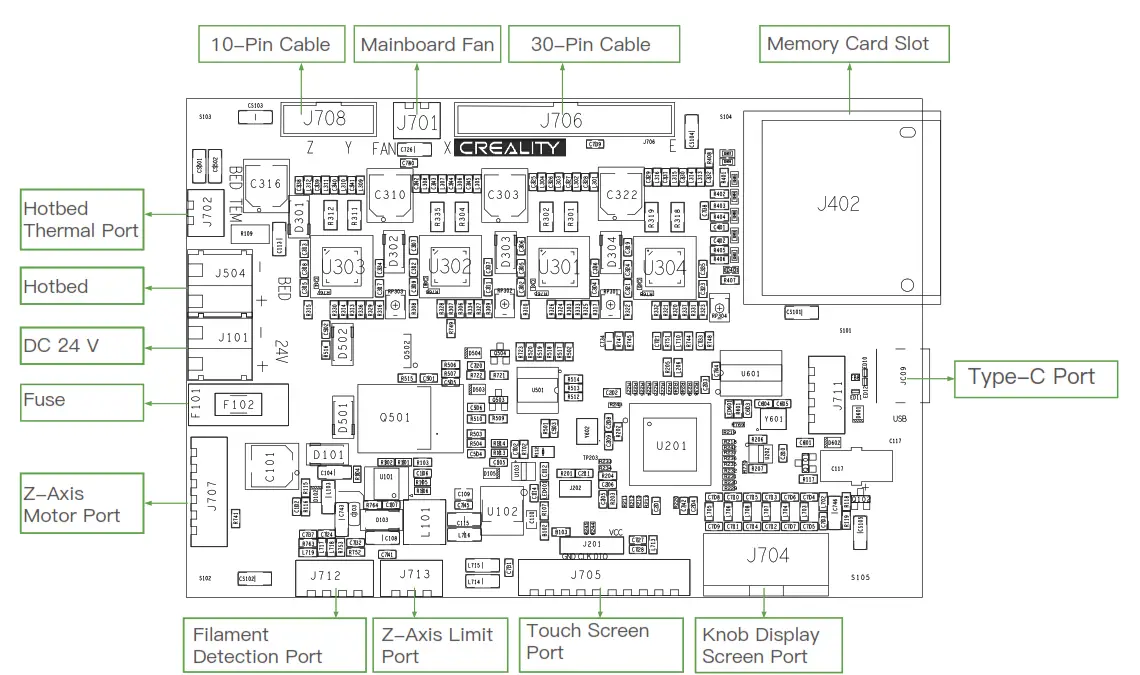
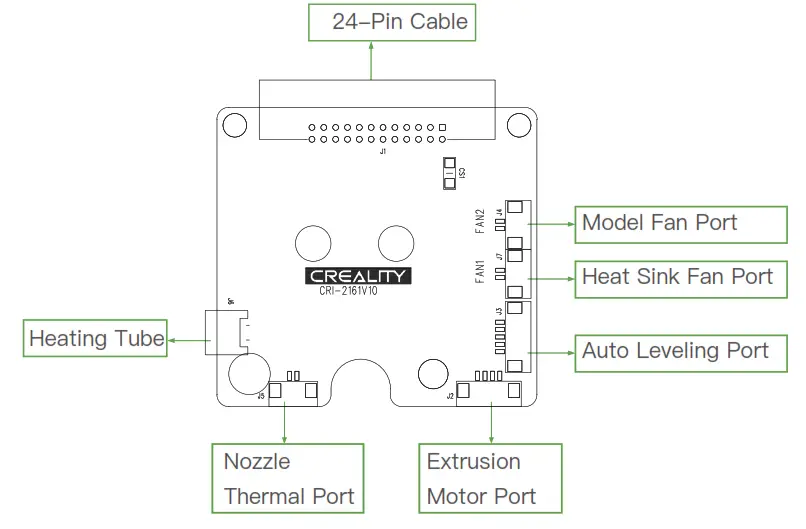
Printer Port Instructions
- Mainboard Port Instructions

- Nozzle Port Instructions

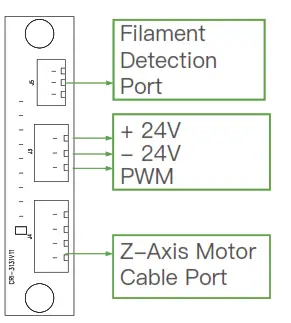
- Z-Axis Pinboard Instruction
 Install the Printer
 Install the Printer
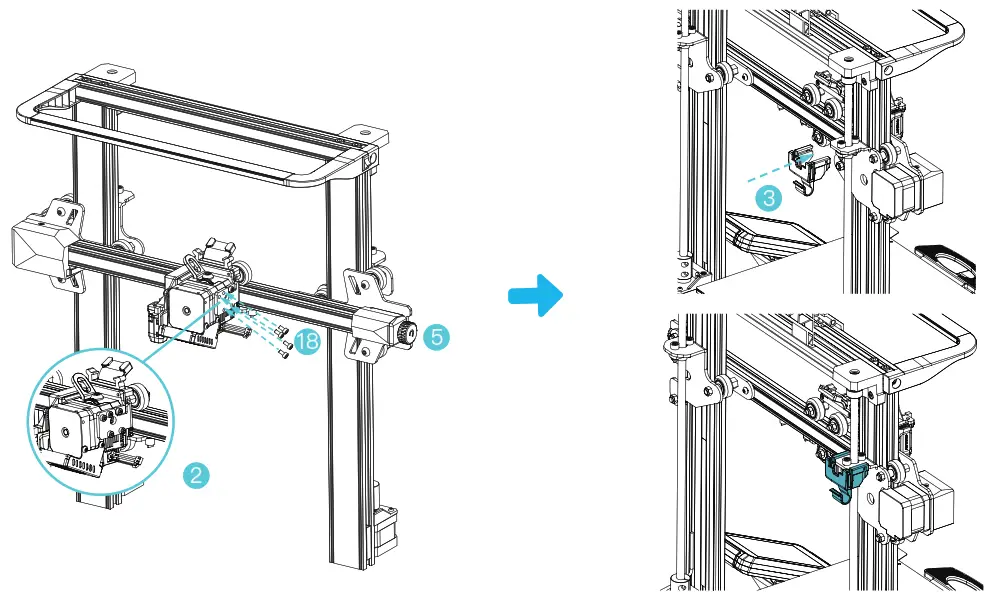
- Install the nozzle module and wire clamp
A.Place the nozzle module on the back of the extruder, pre-lock the nozzle with 4 M3x6 hexagon socket head cap screw and then tighten it.
B.Clamp the wire clamp onto the X motor black plate
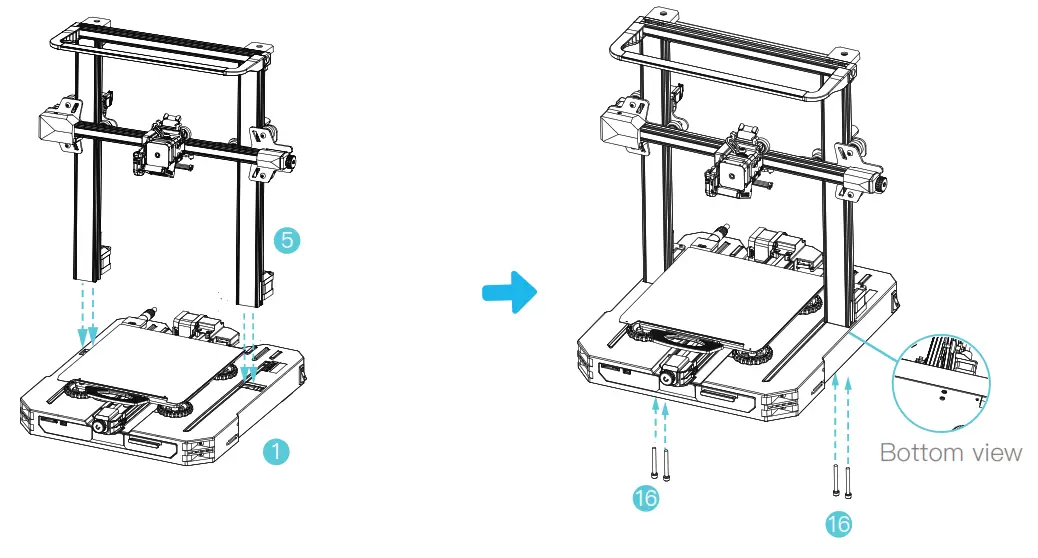
- Install the gantry
A.Move the right profile of the bottom module 35 mm out of the desktop to reveal the installation hole.
B.Place the gantry in the slot of the chassis, and pre-lock it with two M5x45 hexagon socket round screws with spring washers from the bottom to the top.
C. Rotate the base module 180° to ensure that the profiles on both sides are level up and down. Use two M5x45 hexagon socket round screws with spring washers to align the holes on the left side of the hole to pre-lock, and then tighten to fix.
D. Rotate the base module 180° and tighten the screws on the right side. Use the short side of the wrench when tightening the screws.
- Install the screen
Place the screen bracket to the side of the plastic that’s on the right, and tighten it with 3 M4x30 hexagon flat round head screws.
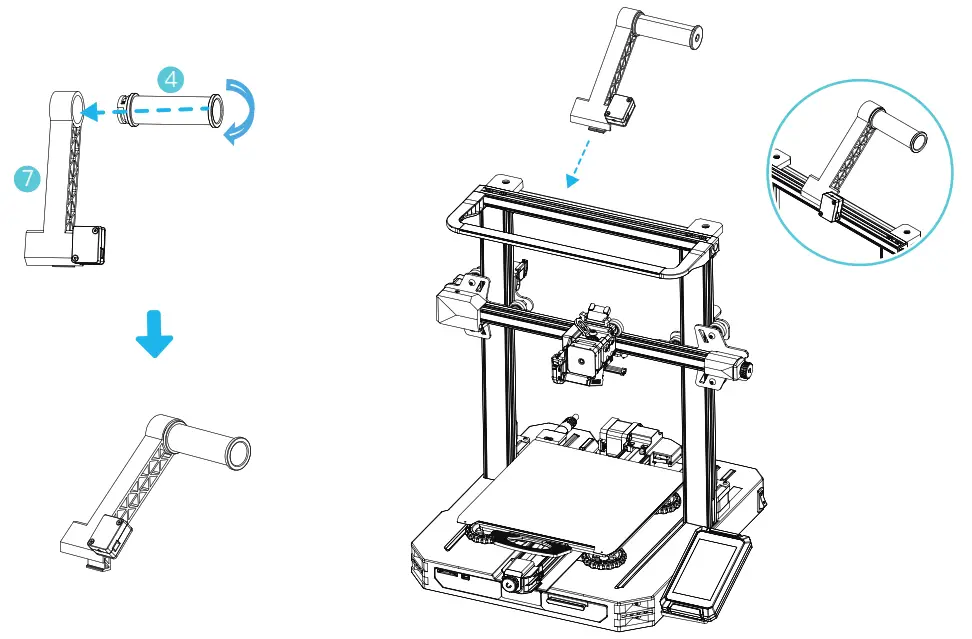
- Install the rack
A.Find the filament tube fittings and fix the threaded end on the right end of the rack.
B.Fit the front slot of the installed rack to the front slot of the profile, and then press down to clamp the bottom of the profile.
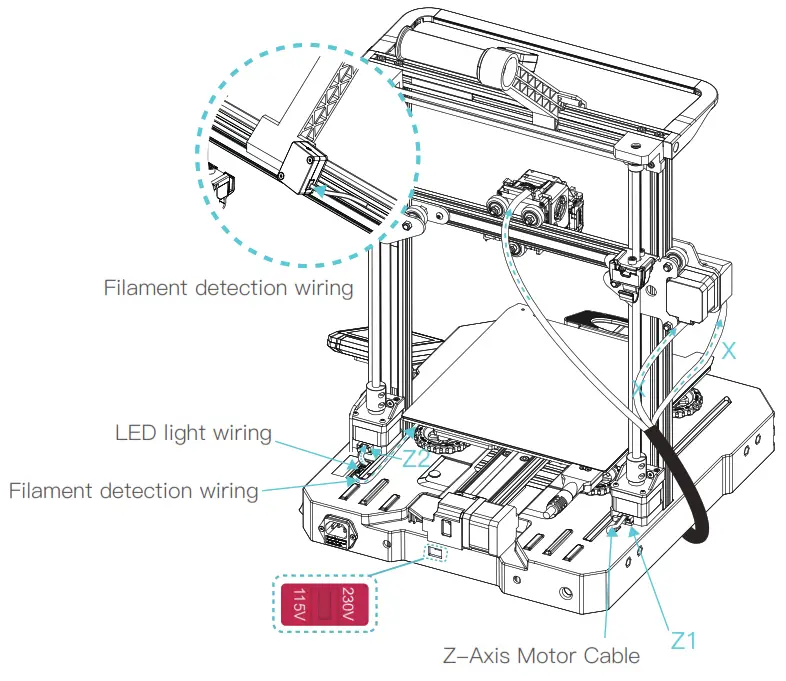
- Wiring
 X-Axis and Z-Axis Motor Port
 X-Axis Limit Switch

 X-Axis and Z-Axis Motor Port
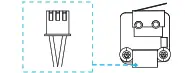 X-Axis Limit Switch
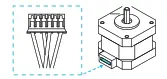
1. Connect the nozzle to the 24-pin port as shown in the figure. 2. Follow the yellow label on the 6-pin (4 wires) port to connect the X-axis and Z-axis stepper motors. 3. Connect the X-axis limit motor according to the yellow label on the 3pin (2 wires) port. 4. Connect the 3-pin (3 wires) 2.0 port to the pinboard, and connect the 3-pin (3 wires) 2.54 port o the filament detector. 5.The LED light 3pin (2 wires) 2.54 port is connected to the expansion port of the adapter board.
![]() Caution
Caution
- Please ensure the correct position for the power supply switch and mains before supply connection, in order to avoid damage to the device.
- If the mains are between 200V and 240V, please select 230V for the power supply switch (the default is 230V).
- If the mains are between 100V and 120V, please select 115V for the power supply switch.
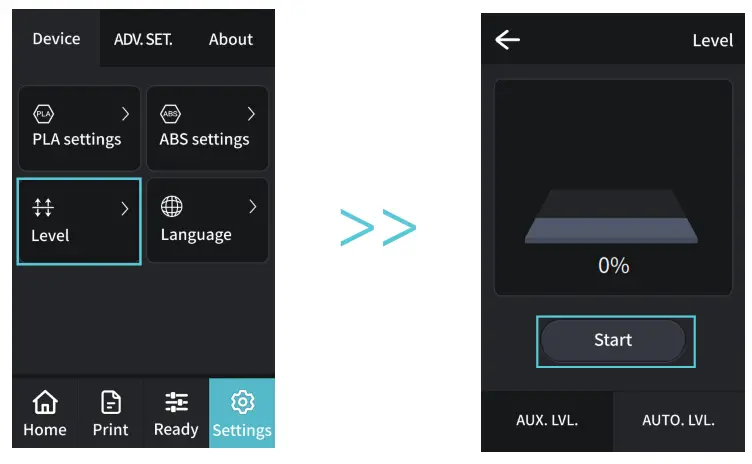
Auto Leveling
(Please use the CR Touch for automatic leveling first. If the CR Touch lights up in red and it cannot be leveled, please use the auxiliary leveling again.)
- Go to “settings” and tap “leveling” to enter the CR Touch leveling interface. Tap “start” and wait for the automatic leveling to complete.

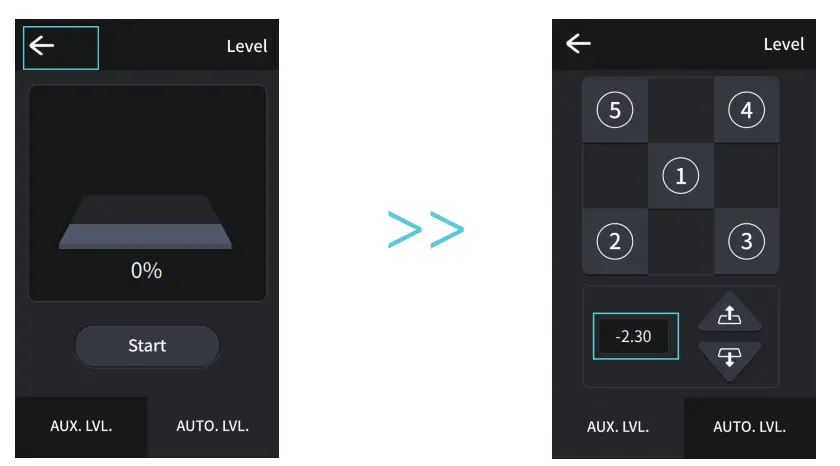
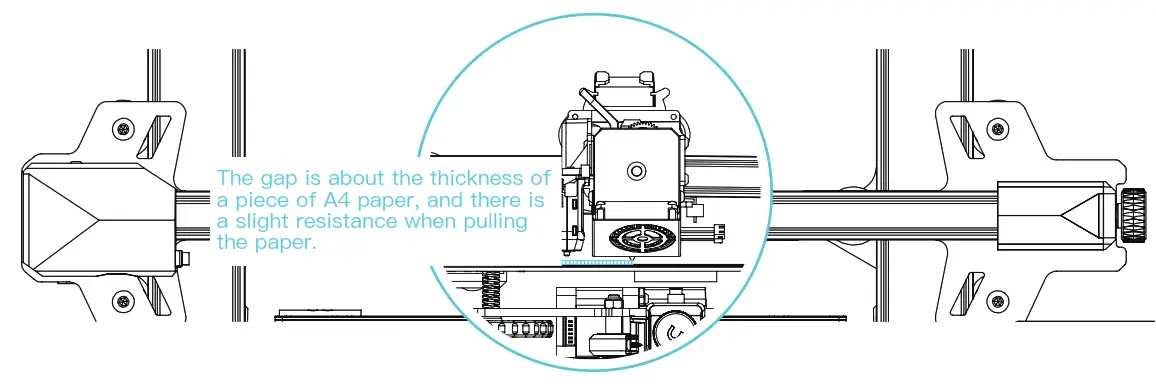
- Return to the previous menu. Enter the assisted leveling interface. Adjust the Z-axis compensation value so that the height from the nozzle to the printing platform is about the thickness of a piece of A4 paper. Return to the previous menu, and the Z-axis compensation value will be configured.


Assisted Leveling
(The CR Touch leveling will fail when the platform inclination is greater than 2 mm. In this case, please use assisted leveling instead.)
- Go to Settings → Leveling → Assisted Leveling. Tap numbers ①/②/③/④/⑤ respectively.

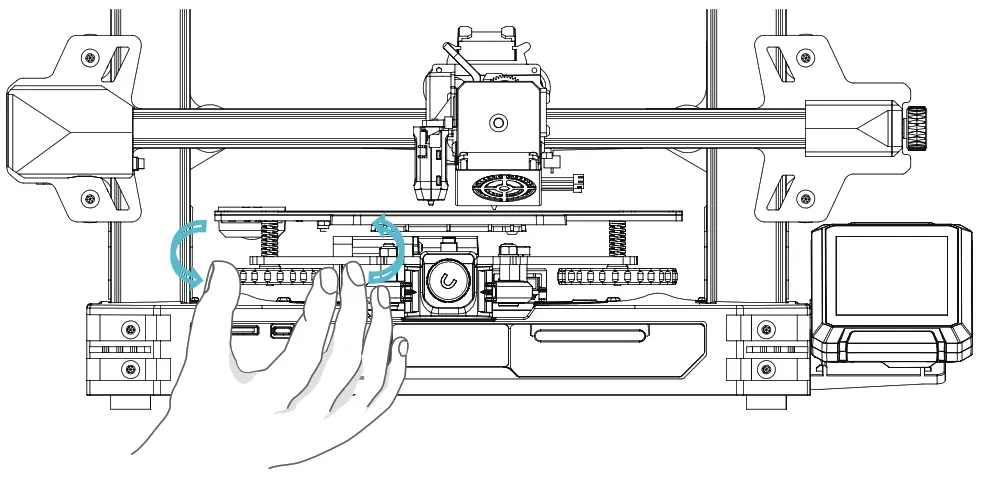
- Turn the knob at the bottom of the hotbed and move the nozzle to the four corners of the printing platform so that the gap between the nozzle and the printing platform is almost the thickness of a piece of A4 paper (0.08 to 0.1 mm). Ensure that all the four corners are leveled.


 | 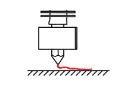 | The nozzle is too far away from the platform, and the filaments cannot stick to the platform. |
 |  | |
 | 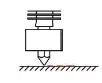 | The nozzle is too close to the platform, and the filament is not extruded enough, which may damage the platform. |
![]() Loading the Filament
Loading the Filament
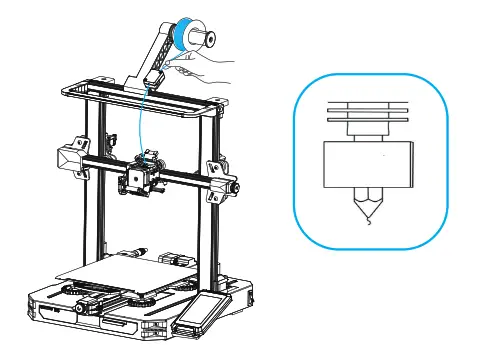
A. In order to successfully load the filament, please trim the end of the filament at an angle of 45 degrees.
B. Press the filament until it passes through the filament detection hole. Then press and hold the extruder handle to insert the filament into the extruder hole until it reaches the nozzle.
C.Warm up the nozzle. If the filament flows out of the nozzle when the temperature reaches the target value, the filament is properly loaded
First Printing
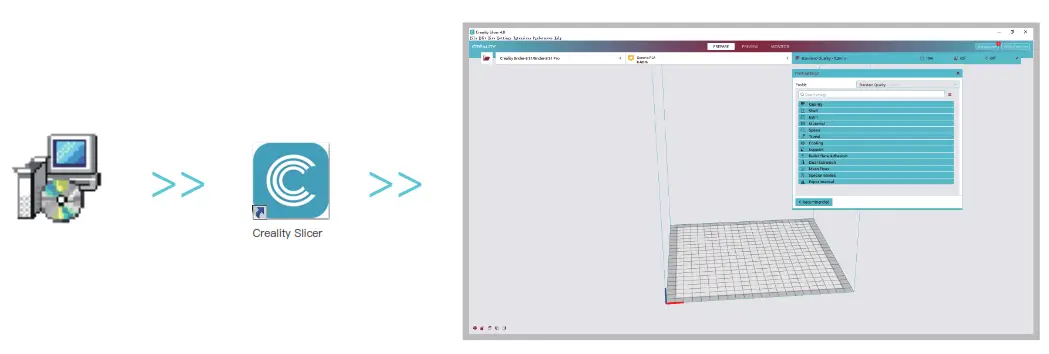 | |
| 1. Visit our official website (https://www.creality.com) to download and install the software, or install the Creality software vi a the memory card provided with the printer. | 2. Go to Preferences → Configure Creality → Select language → Next → Finish to complete the configuration. |
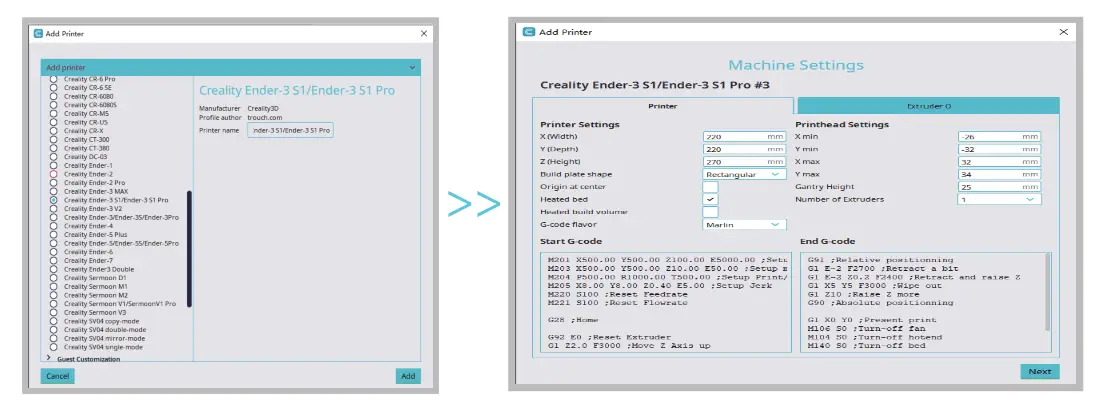 | |
| Select the model of this printer (ENDER-3 S1 Pro). | Enter parameters → Close. |
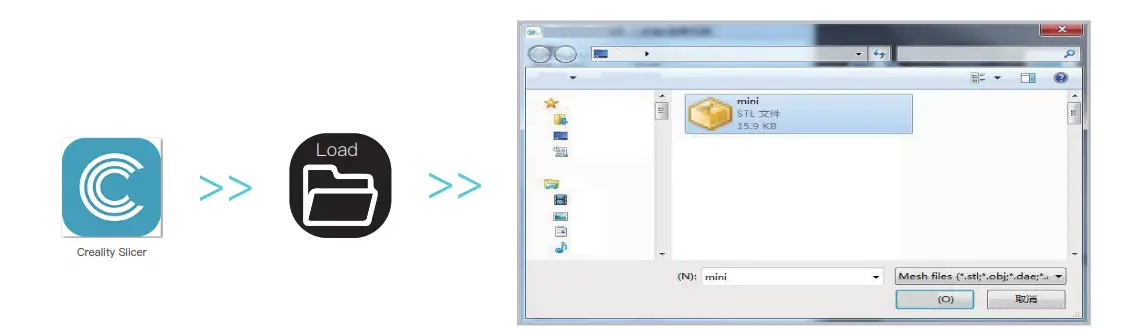 | |
| 5. Launch the Creality licing software. 6. Load the file. | Select the file |
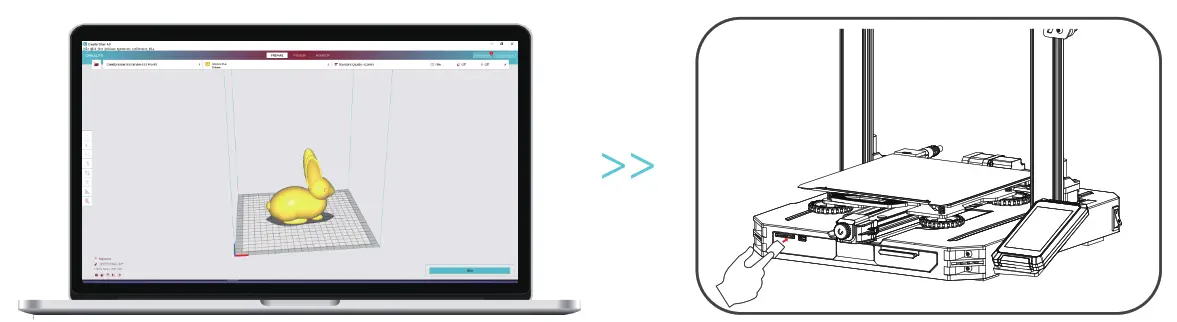 | |
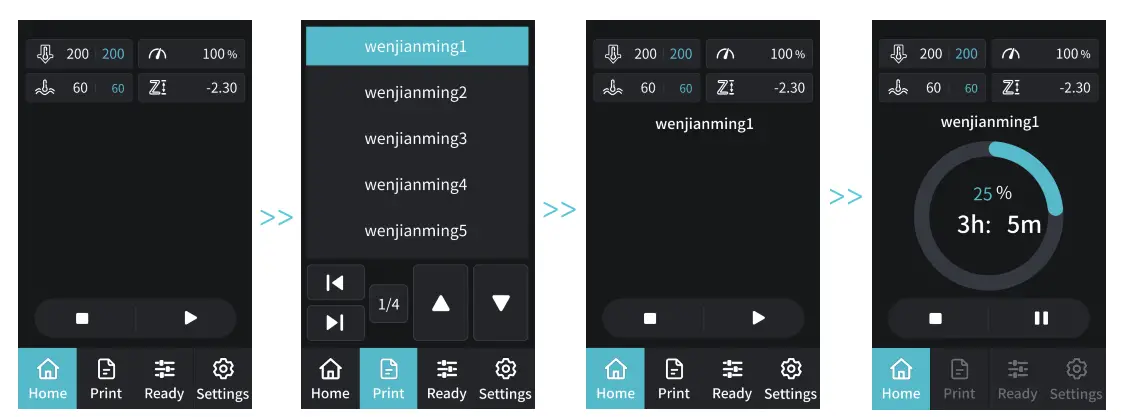
| 8. Generate the G-code file → Save it to the memory card. | 9. Insert the memory card → Print → Select from the menu → Select the file used for printing. |
![]() The file name must only contain Latin letters and digits. Chinese characters or special symbols must not be used.
The file name must only contain Latin letters and digits. Chinese characters or special symbols must not be used.![]() Note: For details on using the software, please refer to the slicing software user manual on the memory card.
Note: For details on using the software, please refer to the slicing software user manual on the memory card.
Start Printing
Before printing, please check the printer again by following these steps:
When the printer is powered off:
- The nozzle is tightly connected and moves smoothly to the left and right.
- The X axis is horizontal and stable (not wobbling up or down), and it moves run smoothly up and down.
- The Y axis is tightly connected. The platform does not shake and moves back and forth smoothly.
- The filament rack does not shake. The rollers are smooth. The filament extrusion is smooth.
When the printer is powered on:
- The screen display and touch work properly. The movements of the X, Y, and Z axes are smooth.
- The nozzle and hotbed heat up properly.
- The feed and return of the filament work properly.
- The leveling of the printer works properly
About the Printer
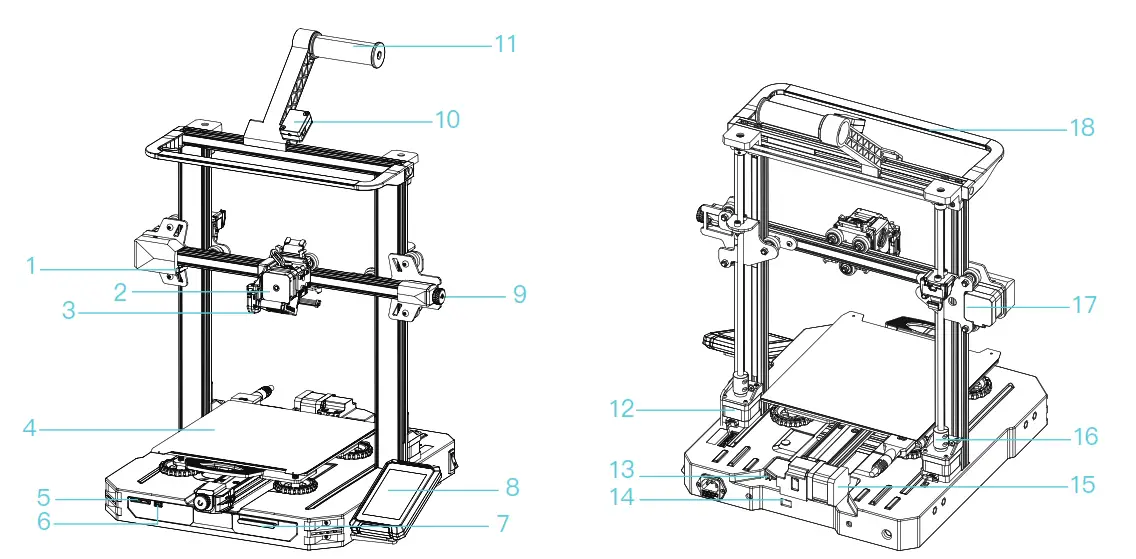
| 1 X-Axis Limit Switch 2 Nozzle Module 3 Auto Leveling Module 4 Printing Platform 5 Memory Card Slot 6 Type-C Port 7 Tool Kit 8 Display Screen 9 X-Axis Belt Adjustment Device | 10 Filament Detector 11 Rack 12 Z-Axis Motor 13 Y-Axis Limit Switch 14 Voltage Toggle Switch 15 Y-Axis Motor 16 Coupling 17 X-Axis Motor 18 LED Light |
Device Specifications
General Specifications
| Model | Ender-3 S1 Pro |
| Modeling Dimensions | 220 mm x 220 mm x 270 mm |
| Modeling Technology | FDM |
| Number of Nozzles | 1 |
| Slice Layer Height | 0.1 to 0.4 mm |
| Nozzle Diameter | 0.4 mm (standard) |
| Accuracy | ±0.2mm |
| Printing Material | PLA/TPU/PETG/ABS |
| Supported Formats | STL/OBJ/AMF |
| Printing Method | Memory card offline printing or online printing |
| Supported Slicing Software | 3D Creator Slicer, Repetier-Host, Cura, Simplify3D |
| Input voltage | 100-120V~/ 200-240V~, 50/60Hz |
| Total Power | ≤100°C |
| Hotbed Temperature | ≤300°C |
| Nozzle Temperature | Yes |
| Resume Printing Function | 350W |
| Filament Detection | Yes |
| Auto Leveling | Yes |
| PC Operating Systems | Windows XP/Vista/7/10/MAC/Linux |
| Printing Speed | Up to 150 mm/s, recommended 50 mm/s |

Due to the differences between different machine models, the physical objects and the final images can be differ. The final explanation rights shall be reserved by Shenzhen Creality 3D Technology CO., Ltd.

![]() SHENZHEN CREALITY 3D TECHNOLOGY CO., LTD.
SHENZHEN CREALITY 3D TECHNOLOGY CO., LTD.
Add:18F, JinXiuHongDu Building, Meilong Blvd., Longhua Dist.,
Shenzhen, China 518131
Official Website: www.creality.com
Tel:+86 755-8523 4565
E-mail: [email protected]
[email protected]


