![]()
IC7-LRS-4V1.0 Conch Security Camera IC Series
Installation Guide
 Quick Installation Guide
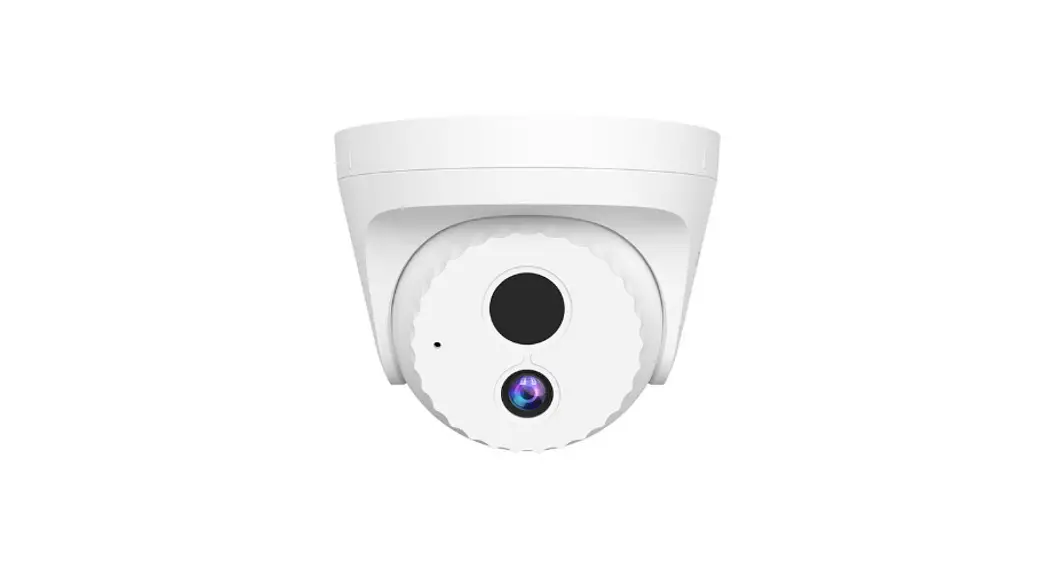
4MP Conch Security Camera
IC Series
IC7-LRS-4V1.0 Conch Security Camera IC Series
Please read this guide before you start with the quick setup for this camera upon the first use. For product or function details, please go to www.tendacn.com to download the user guide. IC7-LRS-4 is used for illustrations here unless otherwise specified. The actual product prevails.
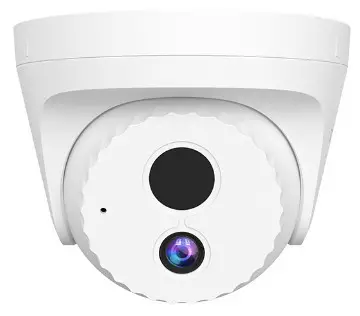
Package contents
 | 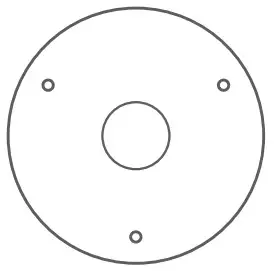 |
| Camera×1 | Installation template×1 |
 | 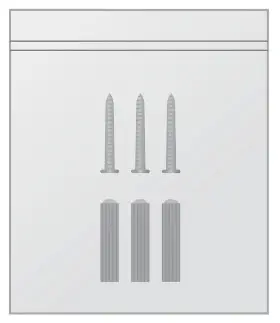 |
| Quick installation guide×1 | Installation package x 1 |
Anchor: Height 6.6 mm, inner diameter 2.4 mm, length 26.4 mm
Screw: BM3.0*5 mm (Head diameter: 6.0 mm)
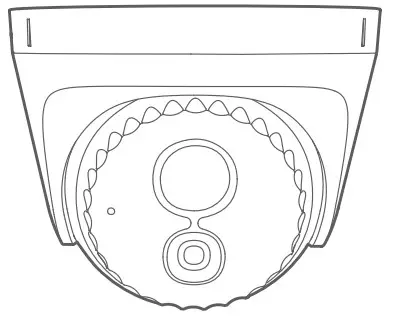
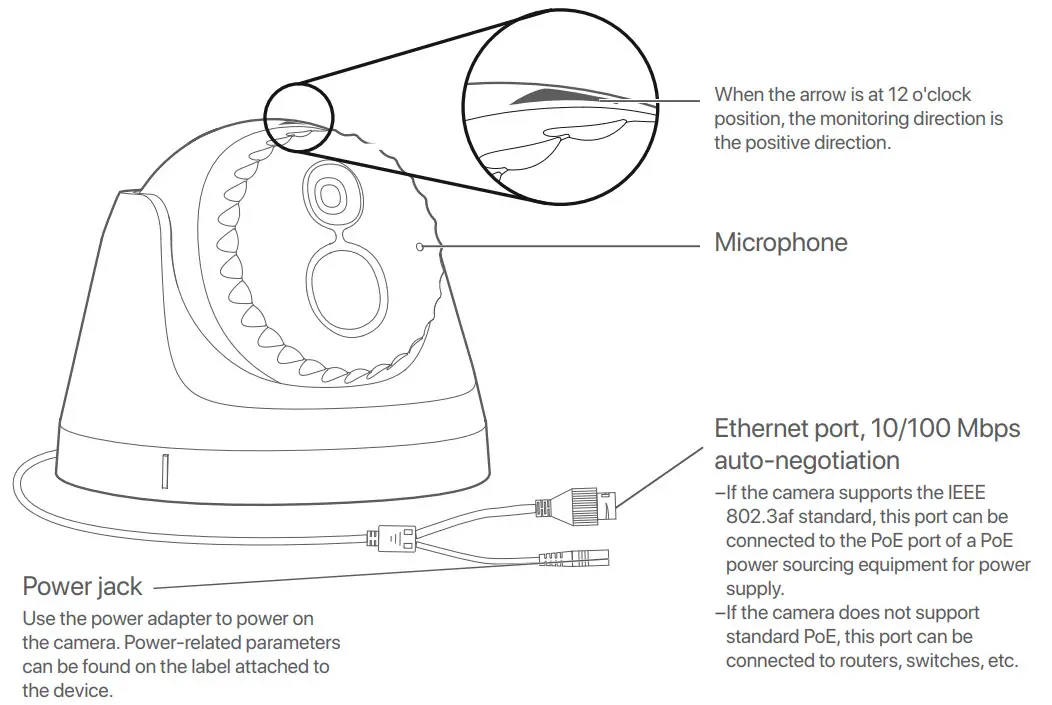
Appearance
Install the device
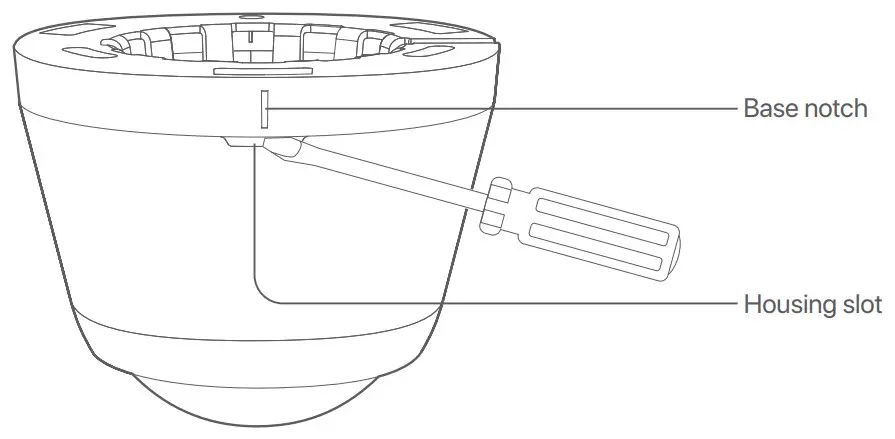
- Remove the base
Rotate the body of the camera, align the housing slot with any base notch, and then use a screwdriver to pry the housing at the slot to remove the base.
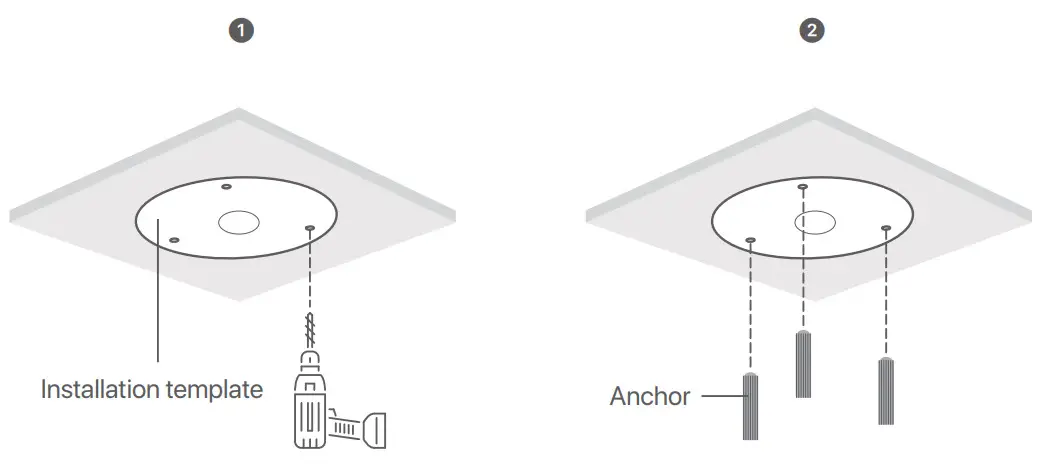
- Install the camera
The camera supports ceiling and wall installation. The ceiling installation is taken as an example here. Tips
Tips
− Please make sure the ceiling is strong enough to withstand three times the weight of the camera.
− You may need to prepare a hammer drill, a drill bit, a rubber hammer, a screwdriver, and a ladder for the installation. ➌ A. Run the cable through the side
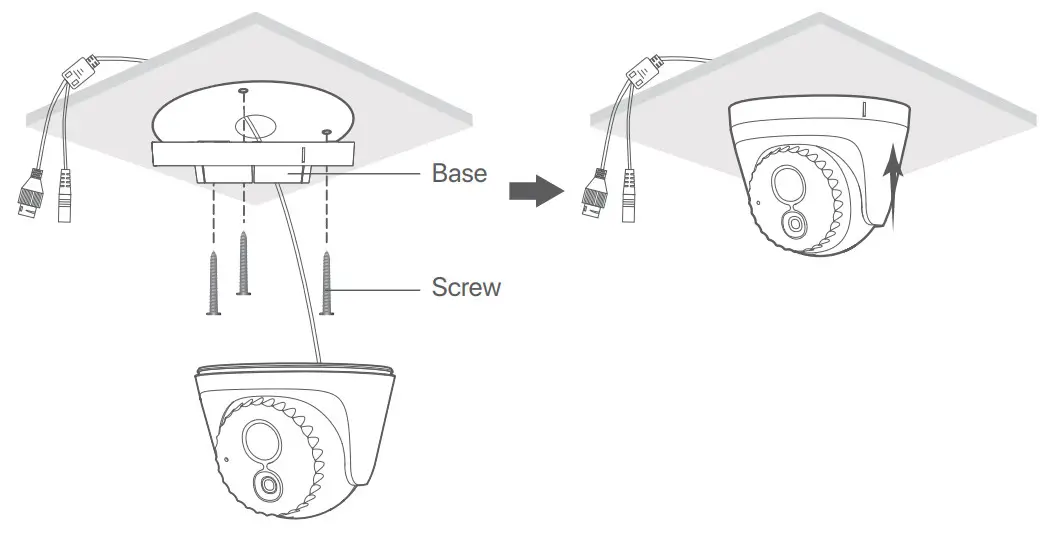
➌ B. Run the cable through the bottom ➍ Adjust the monitoring direction
 ➌ A. Run the cable through the side
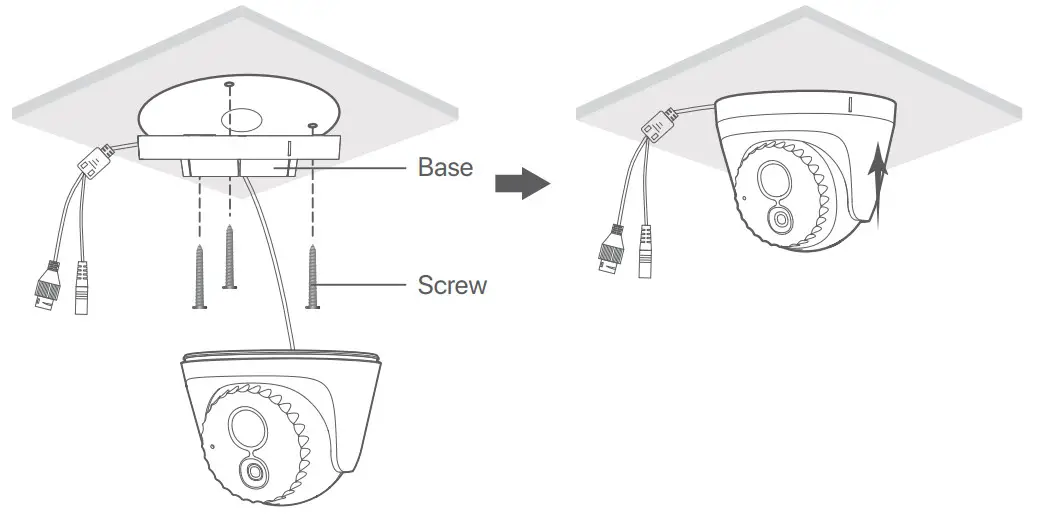
 ➍ Adjust the monitoring direction
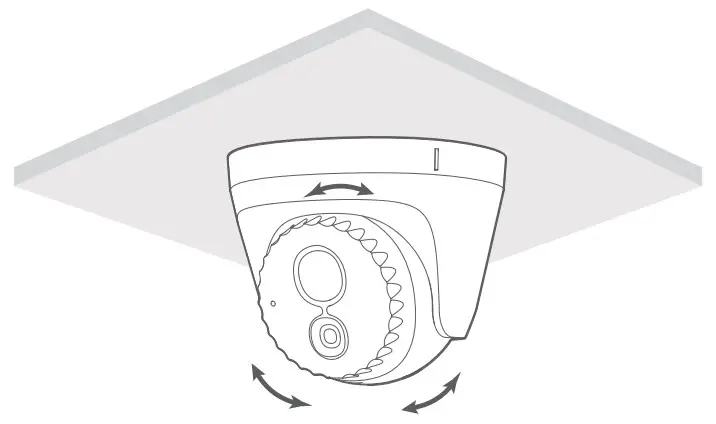
Manage the device through Network Video Recorder(NVR)
The series of cameras needs to be used with the NVR. You should add cameras on the NVR’s web UI. For details, please refer to the user manual of the corresponding NVR.
The series of cameras includes ordinary cameras and Poe cameras. Please connect the cable according to the actual conditions.
![]() Tips
Tips
− The camera supports DC power supply (Power-related parameters can be found on the label attached to the device). The power adapter is not included in the package, so you need to purchase a power adapter that meets the requirements (port specification: 5.5*2.1 mm).
− The Poe camera supports the IEEE 802.3af standard.
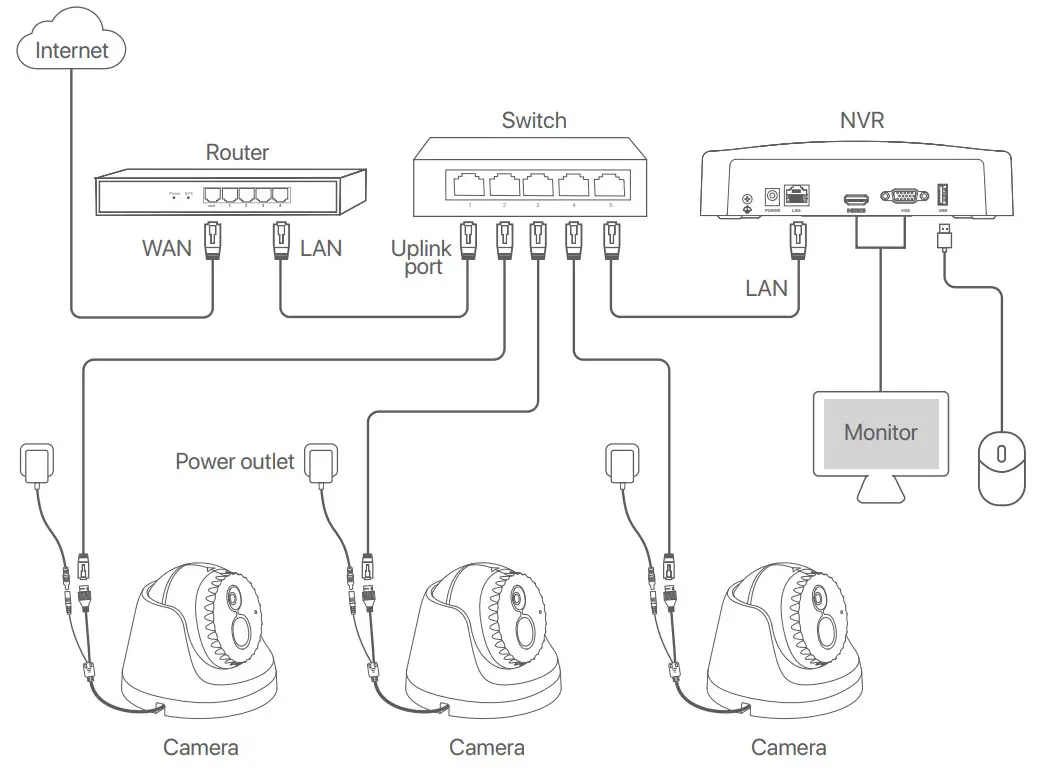
Ordinary camera topology
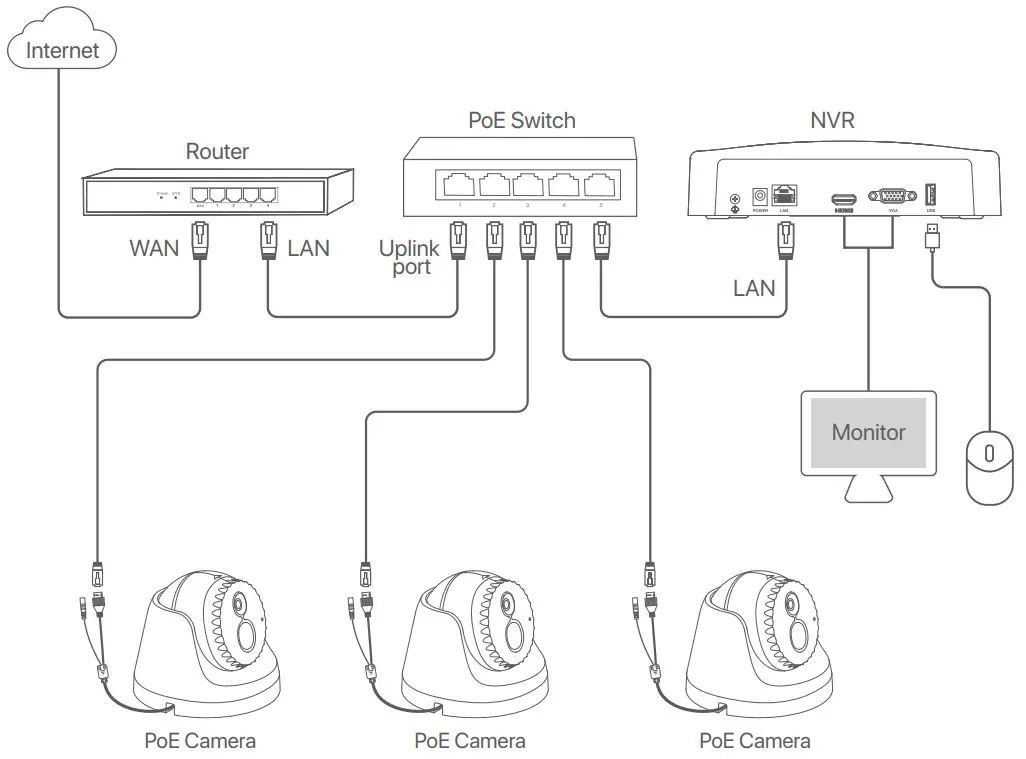
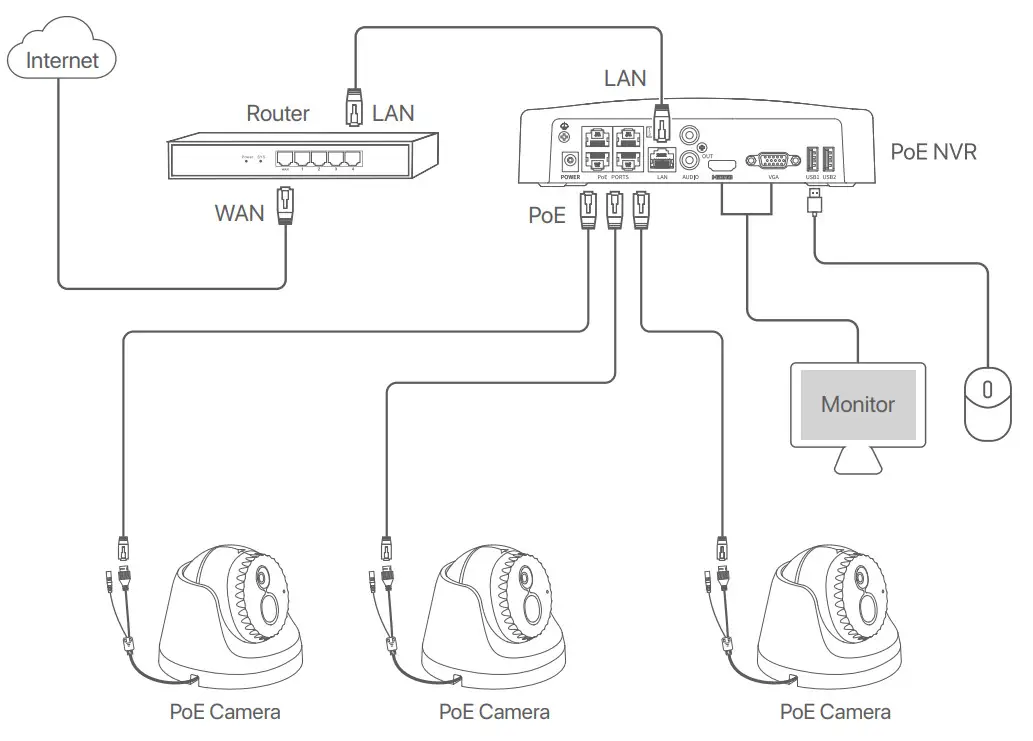
Poe camera topology
- Working with ordinary NVR

- Working with Poe NVR

Log in to web UI
You can log in to the web UI of the camera through a browser.
- Connect the computer to the switch or router that is connected to the camera.
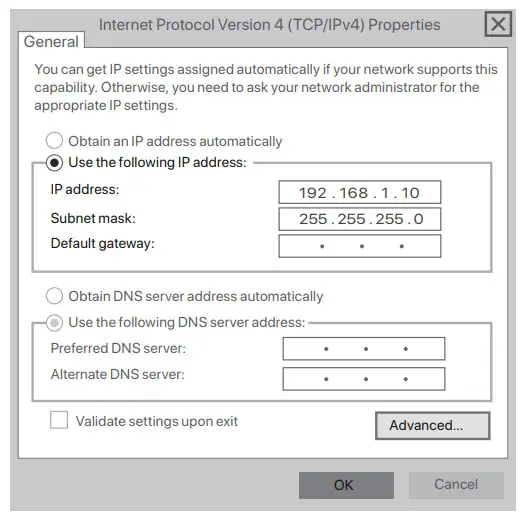
- Set the IP address of the computer to an unused one belonging to the same network segment of the IP address of the camera but different from the IP address of the camera.
The default login IP address of the camera is 192.168.1.203, and the Automatically Obtain IP address function is enabled. If there is a DHCP server in the network, the IP address of the camera may be changed. Please refer to the actual IP address assigned to the camera by the DHCP server.
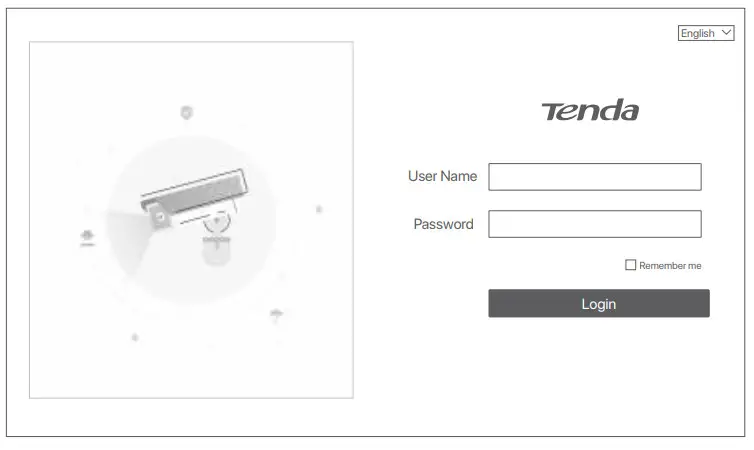
- Start a browser and enter the IP address of the camera in the address bar to access the login page. Enter the User Name (default: admin) and Password (default: admin123456), then click Login.

After successfully logging in to the web UI of the camera, you can start to configure the camera as required.![]() Tips
Tips
For network security, after logging in to the web UI, please modify your username and password in time. If your camera has been successfully managed by the NVR, modifying the login username or password may cause the camera going offline. Please operate with caution.
 CE Mark Warning
This is a Class A product. In a domestic environment, this product may cause radio interference, in which case the user may be required to take adequate measures.
The mains plug is used as disconnect device, the disconnect device shall remain readily operable.
NOTE: (1) The manufacturer is not responsible for any radio or TV interference caused by unauthorized modifications to this equipment. (2) To avoid unnecessary radiation interference, it is recommended to use a shielded RJ45 cable.
![]() FCC Statement
FCC Statement
This equipment has been tested and found to comply with the limits for a Class A digital device, pursuant to Part 15 of the FCC Rules. These limits are designed to provide reasonable protection against harmful interference when the equipment is operated in a commercial environment. This equipment generates, uses, and can radiate radio frequency energy and, if not installed and used in accordance with the instruction manual, may cause harmful interference to radio communications. Operation of this equipment in a residential area is likely to cause harmful interference in which case the user will be required to correct the interference at his own expense.
Operation is subject to the following two conditions: (1) this device may not cause harmful interference, and (2) this device must accept any interference received, including interference that may cause undesired operation.
Caution!
Any changes or modifications not expressly approved by the party responsible for compliance could void the user’s authority to operate the equipment.
NOTE: (1) The manufacturer is not responsible for any radio or TV interference caused by unauthorized modifications to this equipment. (2) To avoid unnecessary radiation interference, it is recommended to use a shielded RJ45 cable.
![]() RECYCLING
RECYCLING
This product bears the selective sorting symbol for Waste electrical and electronic equipment (WEEE). This means that this product must be handled pursuant to European directive 2012/19/EU in order to be recycled or dismantled to minimize its impact on the environment.
User has the choice to give his product to a competent recycling organization or to the retailer when he buys new electrical or electronic equipment.
Temperature: -20°C-60°C
Humidity: (10 – 95) %RH, non-condensing
Technical Support
Shenzhen Tenda Technology Co., Ltd.
6-8 Floor, Tower E3, NO.1001, Zhongshanyuan Road, Nanshan District, Shenzhen, China.
518052 USA hotline: 1-800-570-5892 Toll Free: 7 x 24 hours
Canada hotline: 1-888-998-8966
Toll Free: Mon – Fri 9 am – 6 pm
PST Hong Kong hotline: 00852-81931998
Global hotline: +86 755-2765 7180 (China Time Zone)
Website: www.tendacn.com
E-mail: [email protected]
Copyright
© 2021 Shenzhen Tenda Technology Co., Ltd. All rights reserved.
Tenda is a registered trademark legally held by Shenzhen Tenda Technology Co., Ltd. Other brand and product names mentioned herein are trademarks or registered trademarks of their respective holders. Specifications are subject to change without notice.
![]()


