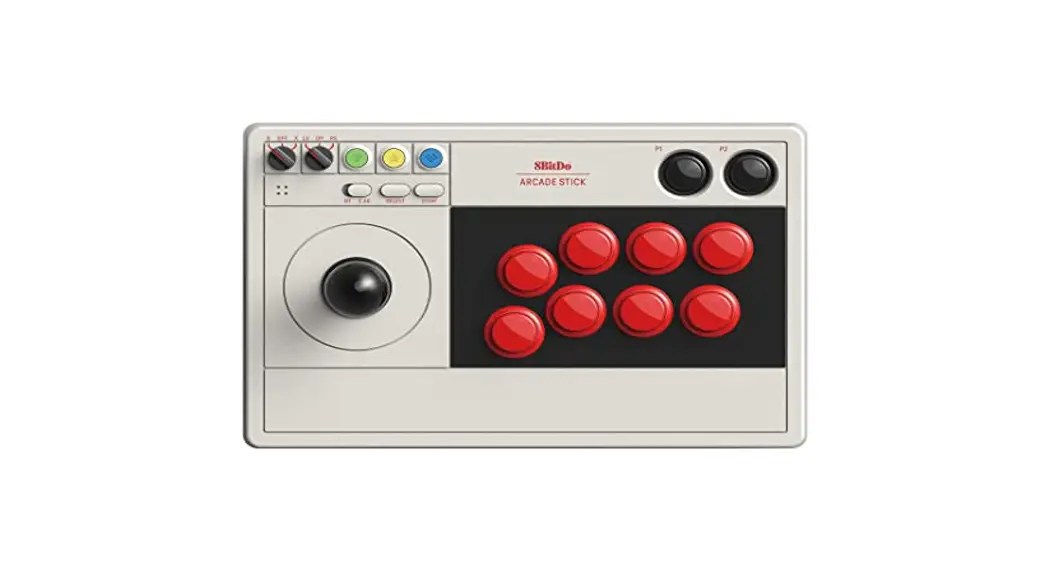
![]() Arcade Stick — instruction manual
Arcade Stick — instruction manual
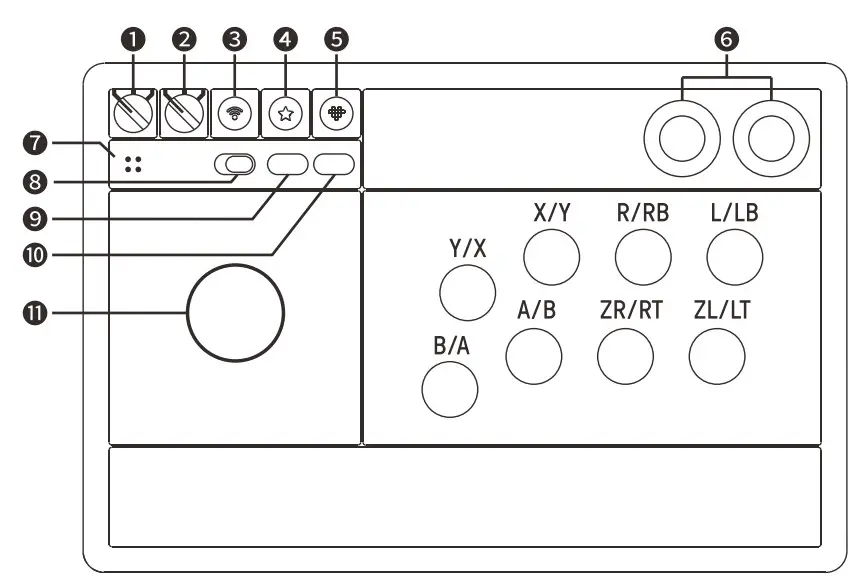
- — mode switch
Switch
off
X-input - – control stick switch
left stick
d-pad
right stick - — pair button
- — star button
- — home button
- — P1 / P2
- – led lights
- — connection switch
Bluetooth
2.4g - – select / — / view (1)
- — start / + / menu e
- – joystick
- power off: turn the mode switch to OFF
- connectivity priority: wired connection > 2.4g wireless / Bluetooth connection
 Switch
- motion controls, NFC scanning, IR camera, HD rumble, and notification LED are not supported, nor can the system be wakened up wirelessly
2.4g connection
- — put the connection switch to 2.4G
- — turn the mode switch to S mode, and LEDs start to blink
- — plug the receiver into the USB port on Switch. The Arcade stick will auto-connect to the receiver
- — LEDs on both the arcade stick and receiver will become solid when the connection is successful
• press the home button to continue to use the arcade stick when it is already on S mode
• Switch system needs to be 3.0.0 or above for 2.4g connection. Go to System Setting > Controller and Sensors > turn on Pro Controller Wired Communication
Bluetooth connection
- — put the connection switch to BT
- — turn the mode switch to S mode, and LEDs start to blink
- — press and hold the pair button for 3 seconds to enter its pairing mode, LEDs start to rotate clockwise (this is required for the very first time only)
- — go to your Switch Home Page to click on Controllers, then click on Change Grip/Order 5 — LED becomes solid when the connection is successful
• press the home button to continue to use the arcade stick when it is already on S mode
• arcade stick will auto-reconnect to your Switch on S mode once it has been paired
wired connection
- — turn the mode switch to S mode, LEDs start to blink
- — connect the arcade stick to your Switch dock via its USB-C cable
- — wait till the arcade stick is successfully recognized by your Switch to play
• Switch system needs to be 3.0.0 or above for wired connection. Go to System Setting > Controller and Sensors > turn on Pro Controller Wired Communication
• LED lights indicate the player number,1 LED indicates playerl, 2 LEDs indicate player 2, 4 is the maximum number of players the arcade stick supports
 Windows (X – input)
2.4g connection
- — put the connection switch to 2.4G
- — turn the mode switch to X mode, LEDs start to blink
- — plug the receiver into the USB port on your Windows device. Arcade stick will auto-connect to the receiver
- — LEDs on both the arcade stick and receiver will become solid when the connection is successful
• press the home button to continue to use the arcade stick when it is already on X mode
Bluetooth connection
• required system: Windows 10 (1703) or above. Bluetooth 4.0 is supported
- — put the connection switch to BT
- — turn the mode switch to X mode, and LEDs start to blink
- — press and hold the pair button for 3 seconds to enter its pairing mode, LEDs start to rotate clockwise (this is required for the very first time only)
- — go to your Windows device’s Bluetooth setting, pair it with 8BitDo Arcade Stick
- — LED becomes solid when the connection is successful
• press the home button to continue to use the arcade stick when it is already on X mode
• arcade stick will auto-reconnect to Windows on X mode once it has been paired
wired connection
- — turn the mode switch to X mode, LEDs start to blink
- — connect the arcade stick to your Windows device via its USB-C cable
- — wait till the arcade stick is successfully recognized by your Windows device to play
• LED lights indicate the player number,1 LED indicates playerl, 2 LEDs indicate player 2, 4 is the maximum number of players the arcade stick supports
 Turbo function
- — hold the button you would like to set turbo functionality to and then press the start button to activate its turbo functionality
- — LED will blink when the button with turbo functionality is pressed
- — hold the button with turbo functionality first then press the start button to deactivate its turbo functionality, LED will cease to blink
• joystick, home, select and start buttons are not included
 control stick switch
- — use the control stick switch to shift the joystick function to either the left joystick(LS), directional pad (DP), or right joystick (RS)
• LS: Left joystick, DP: D-pad, RS: Right joystick
 customize profile
- It gives you elite control over every piece of your arcade stick: customize button mapping and create macros with any button combination
- e.g. create macros and more with P1, P2
- please visit support.8bitdo.com for the application
 battery
status — LED Indicator —
low battery mode→ red LED blinks
battery charging → red LED stays solid
battery fully charged→ red LED turns off
- built-in 1000mAh Li-on battery with 40 hours of playtime on 2.4g connection and 30 hours on a Bluetooth connection
- rechargeable with 4 hour charging time
- arcade stick turns off in 1 minute with no connection and 15 minutes with 2.4g wireless / Bluetooth connection but no use
- arcade stick stays on with the wired connection
retrieve a lost connection or connect to a new receiver
• to retrieve a lost connection or re-pair to it, please follow the steps below:
- — put the connection switch to 2.4G
- — turn the mode switch to S / X mode, LEDs start to blink
- — plug the receiver into your Switch / Windows device
- — press and hold pair button for 3 seconds to enter its pairing mode. LEDs start to rotate clockwise
- — LED becomes solid when the connection is successful
• 2.4g receiver can only connect to one arcade stick at a time
 support
- please visit support.8bitdo.com for further information and additional support


