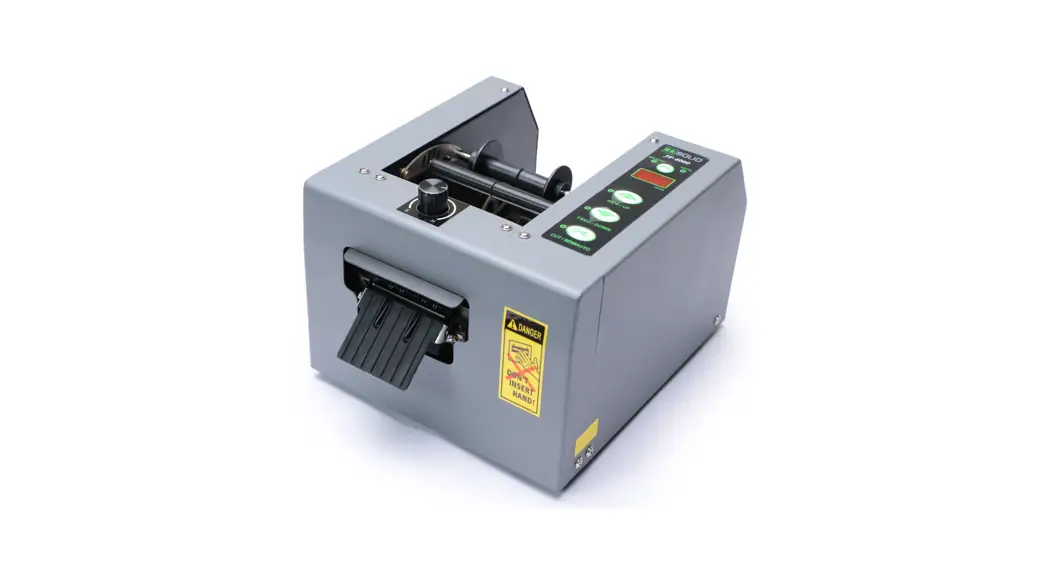
![]() AUTOMATIC TAPE DISPENSER
AUTOMATIC TAPE DISPENSER
JF-6000
User Manual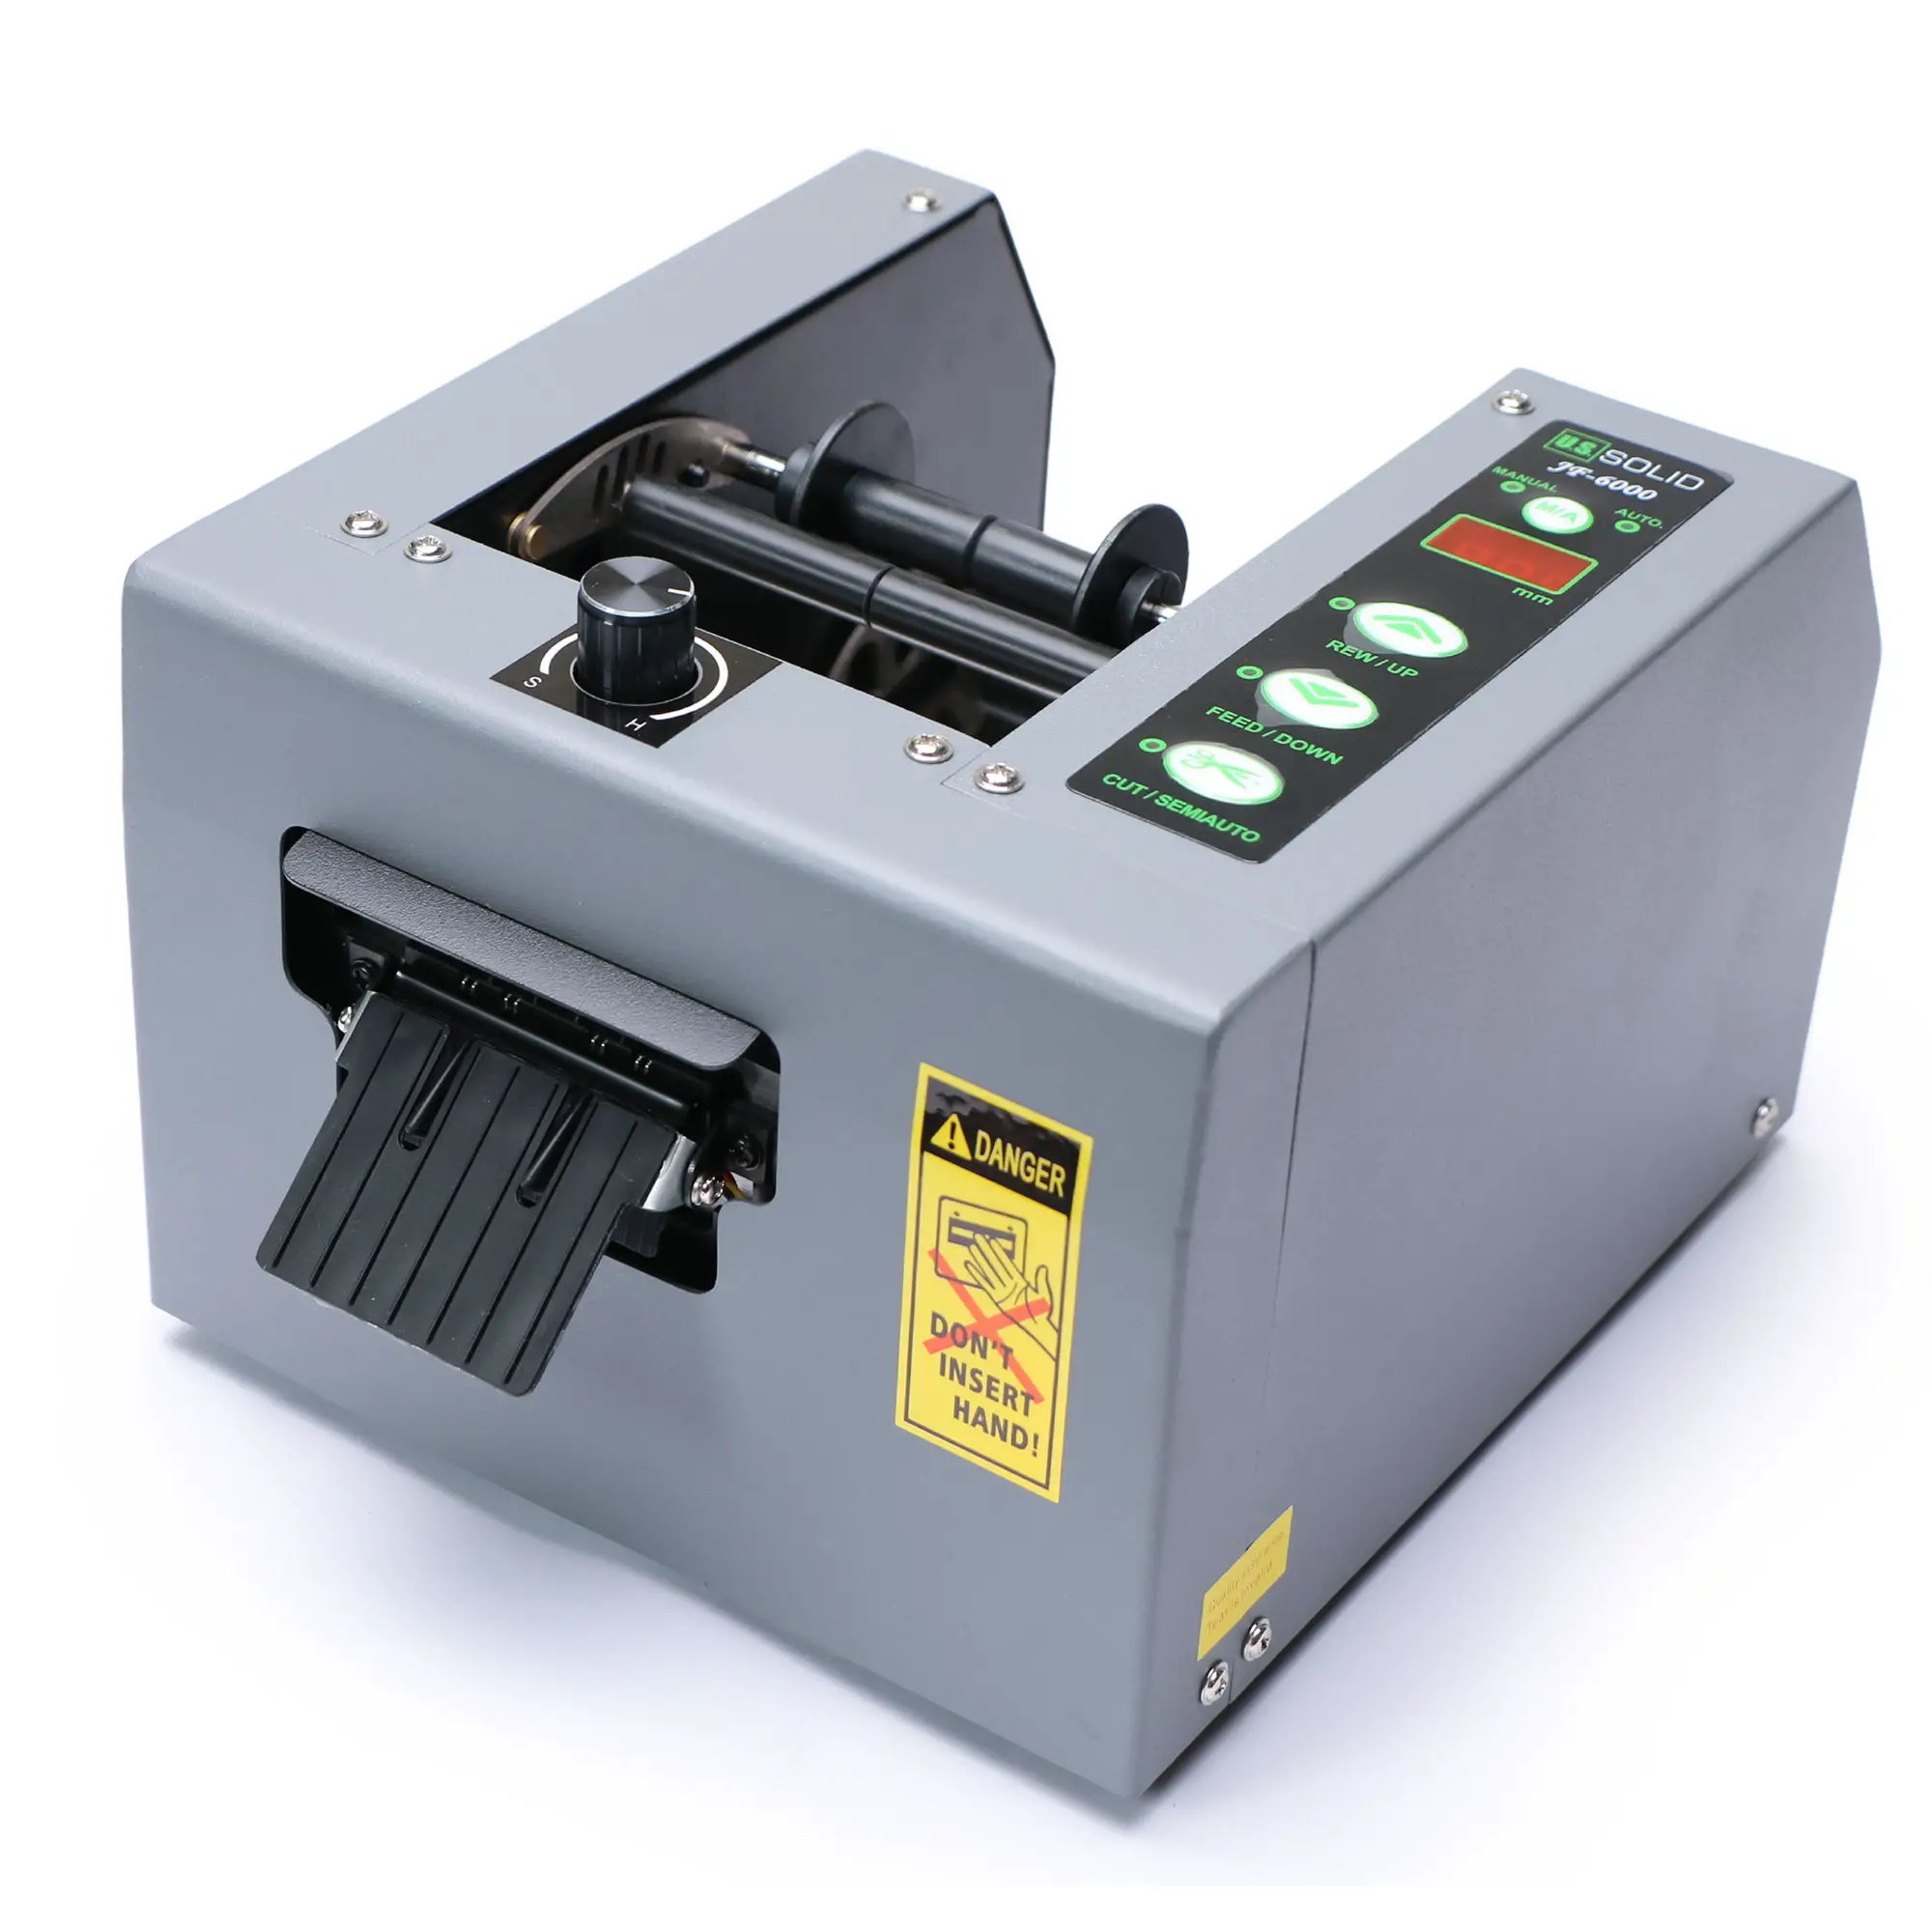
Specification
Voltage: AC110V/60HZ or AC220V/50HZ
Power: 5W
Maximum tape width: 8mm-80mm
Maximum diameter of Roll: Ø300mm Feeding
speed: 150mm/s
Weight: 5.5kg(Leader+Accessories)
Dimension: 190(w)*140(H)*230(D)mm
Applied tape: adhesive tape,non-adhesive tape
Precautions
This manual should be made available to all users of this equipment. For best results, and for maximum durability of the equipment, carefully read and follow all instructions.
- The tape dispenser includes sharp metal parts, please be careful when using the product.
- Do not damage the cables, such as processing the cable, bending the cable, pulling and strapping the cable, placing heavy objects on the cable or cutting with scissors.
- Do not use the tape dispenser if cable or plug has damages, or the socket outlet is loose. Once the cable is damaged, do not disassemble or replace it by yourself, but return the tape dispenser to factory for after-sales service.
- When stop using the tape dispenser, or repairing and inspecting the tape dispenser, please pull out the power plug from the outlet first.
- Do not touch the cable or socket with wet hands. When repairing or storing, please avoid water or moisture, and place the tape dispenser where children can not reach and well ventilated.
- When the tape is rolled into the feed rollers, please turn off the power switch(OFF) before removing the tape.
- Trouble caused by users’ split or assembly, the tape dispenser will be not guaranteed.
- The upper & lower blade set is easily sticked by adhesive tape, which will cause the cutting not so smoothly, please clean the blade set on time.
- Coat the Blade set with some oil or lubricant can improve the life effectively.
- When the tape feeding is curly, rotate the reel adjustment keys in clockwise direction or replace the reel.
- When the AUTO Feed does not work, please check whether the sensor part is clean or not.
Troubleshooting
- Problem: The tape will not be released automatically or the tape will be sluggish.
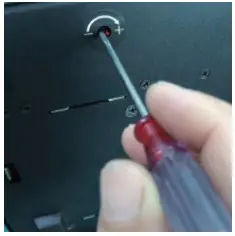
Solution: Induction is too high, use a Phillips screwdriver to adjust the bottom plate induction, and adjust it in the – direction about 1MM. - Problem: Continuously cut tape, or cut a piece and then alarm.
Solution: Induction is too low, use a Phillips screwdriver to adjust the bottom plate induction, and adjust it in the + direction about 1MM.
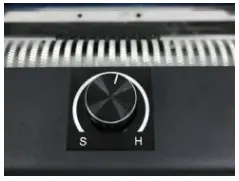
- Problem: Excessive indentation on the tape
Solution: Pressure is too large, adjust the knob on the top of the machine to the S direction by half a turn to one turn
- Problem: Tape does not come out when cutting
Solution: Pressure is too small, adjust the knob on the top of the machine to the H direction by half a turn to one turn. - Problem: The tape does not come out smoothly or the glue outlet is blocked with the tape
Solution: Replace the separating roller ring. - Problem: Tape does not cut completely
Solution: The blade is worn or the shrapnel pressure is too small, replace the blade or adjust the shrapnel pressure.
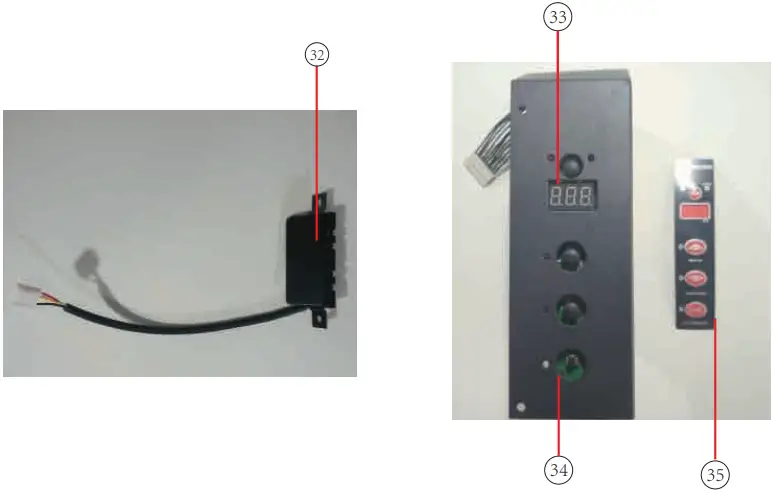
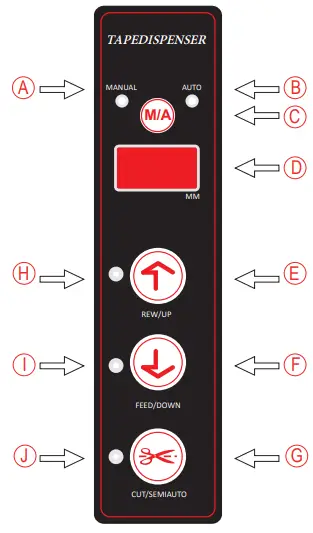 A) LED in manual mode
B) LED in automatic mode
C) Function Switch
*When power input, operating by manual mode .
*When pressing the button, operating by semi-automatic mode.
*Re-Pressing the button, operating by Automatic mode.
D) Tape length display
*5-999mm. Cutting length can precisely reach to mm .
E) Length lengthen button
*At manual mode, the button can reverse the feeder roller .
*At semi-automatic or auto mode, the button can lengthen the tape cutting length.
F) Length shorten button
*At manual mode, the button can feed the tape.
*At semi-automatic or auto mode, the button can shorten the tape cutting length .
G) Cutting button
*The button can cut the tape .
H) I) J) LED under working condition .
How to use the tape dispenser
- Insert the plug into the socket, and turned the power switch to ON.
- Lifting up the tape stand, and rotating tape, then use the tape guide to fix tape.
- After hearing an electronic sounds ,the manual mode LED display and meanwhile LED light(I) flashes .
- Paste the end of the tape to the center of roller, and press the top of tape gently, then press button(F), LED(I) will light up and the tape will be sent out to the discharge port. When the tape is going outside, LED(J) will light up.
- When LED(J) light flashes, press the cutting button(G), the machine will cut the end of tape beyond the blade.
- Press button(C) one time, then (A)(manual) and (B) (automatic mode) lights are all on, in this state (semi-automatic mode), user can set the length that needs to be cut.
- In order to set the required cutting length (20 mm to 999 mm is adjustable), you can press button(E)and button (F) .
- In the semi-automatic mode, remove the cut tape, press button (G)(cutting), according to required cutting length, tape will be send out again and in cutting standby state. Semi-automatic mode can be used in cutting weak adhesive and non-adhesive tape. At this point, you have to press button (G) (cutting) once again, then the cut tape can be sent out according to the set length.
- In the semi-automatic mode, after press the button (C), LED(A) will be off, LED (B) will be on, and the mode switches to automatic mode. In the automatic mode, the sensor will send out tape according to the set length.
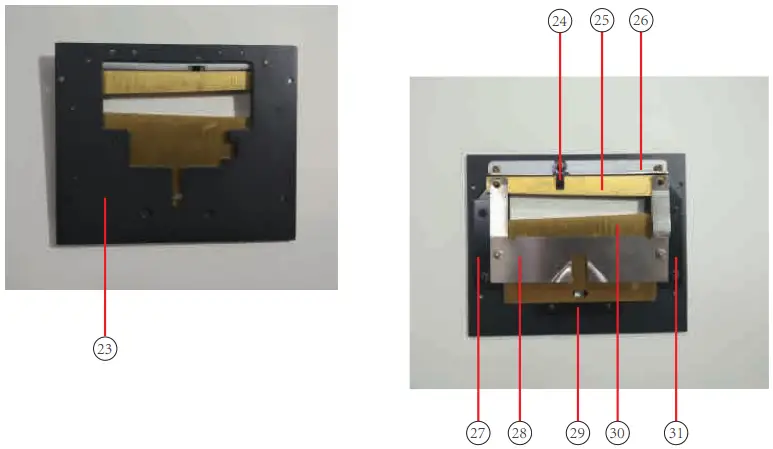
Parts Replacement
Replace the blade set 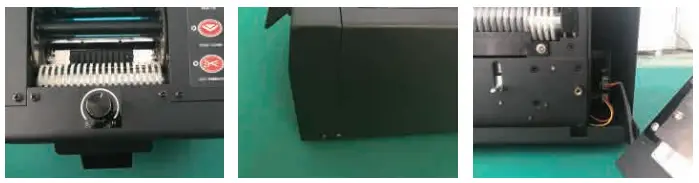
- Remove the screws on the upper part of the shell
- Remove the screws on side
- Unplug the connection terminal
Replace the upper & lower blade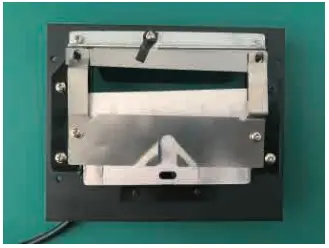 Remove the screws on the back of Auto Feed Unit
Replace the reel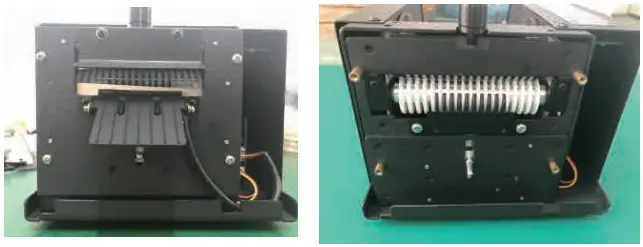
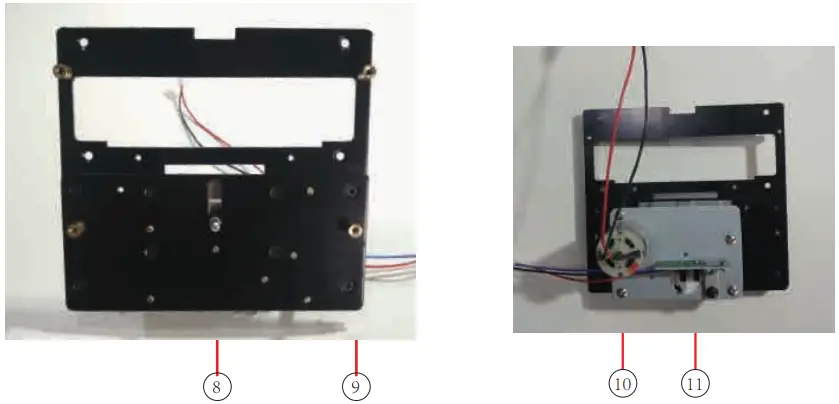
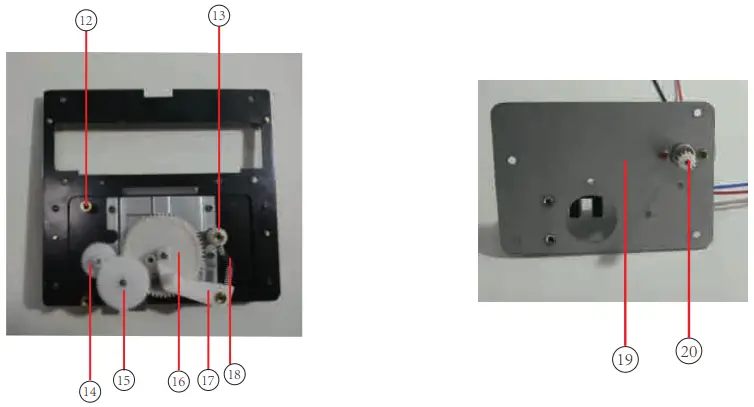
Structure of Main Part
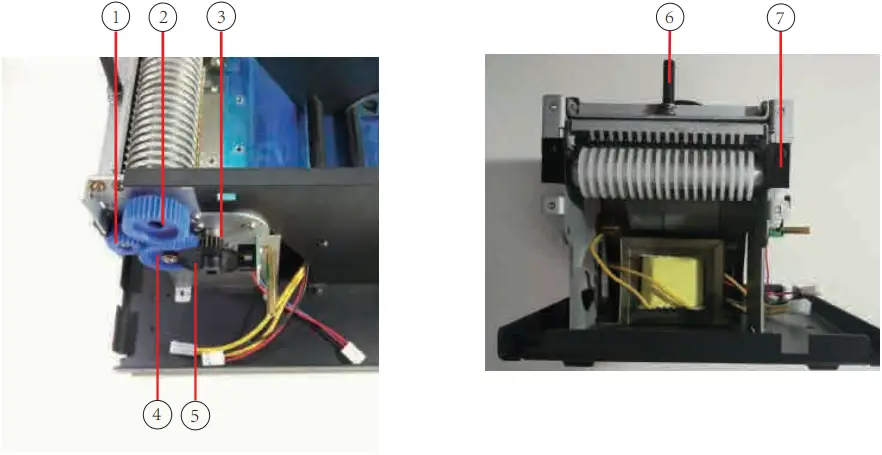
- Feeding Gear
- Driving gear 1
- Motor gear (metal gear)
- Driving gear 2
- Driving gear 3
- Pressure Knob
- Tape Feeding Holder

- Pusher Bar
- Copper Pillar
- Motor
- Cutting Sensing Board

- Cover Pillar
- Fixed Nut
- Cutting Gear 1
- Cutting Gear 2
- Cutting Gear 3
- Induction Paddle
- Spring
- Cutting Cover
- Driving Gear 4

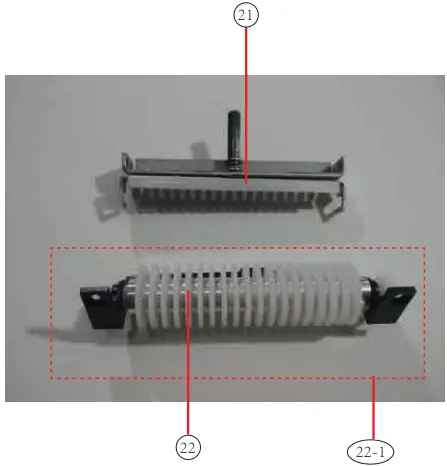
- Tape Roller Unit
- Separating Roller Ring
22-1.Feed Roller Unit
- Cutting Holder
- Pressure Sheet
- Upper blade
- Fixed Sheet
- Cutter Liner(Left)
- Spring Steel
- Limiting block
- Lower blade

- Cutter Liner(Right)
- Auto Feed Unit
- Button
- PVC Panel
For questions or concerns, e-mail [email protected], visit
www.ussolid.com, or call (800) 209-4177


