![]() LNR24-CC / LNR24-CC-V
LNR24-CC / LNR24-CC-V
LNR48-CC / LNR48-CC-V
Installation Guide
LNR24-CC Architectural Recessed
| MODEL | WATTS | DELIVERED LUMENS | CRI | KELVIN | VOLTAGE | DIMMABLE |
| LNR24-CC | 20W | 1725 Im | 90 | 2700K 3000K 3500K 4000K 5000K | 120V | TRIAC |
| LNR24-CC-V | 20W | 1725 Im | 120-277-347V | 0-10V | ||
| LNR48-CC | 40W | 37601m | 120V | TRIAC | ||
| LNR48-CC-V | 40W | 3760 Im | 120-277-347V | 0-10V |
*Works with most dimmers. Refer to DALS website for dimmer compatibility list.
ITEMS INCLUDED IN THE BOX
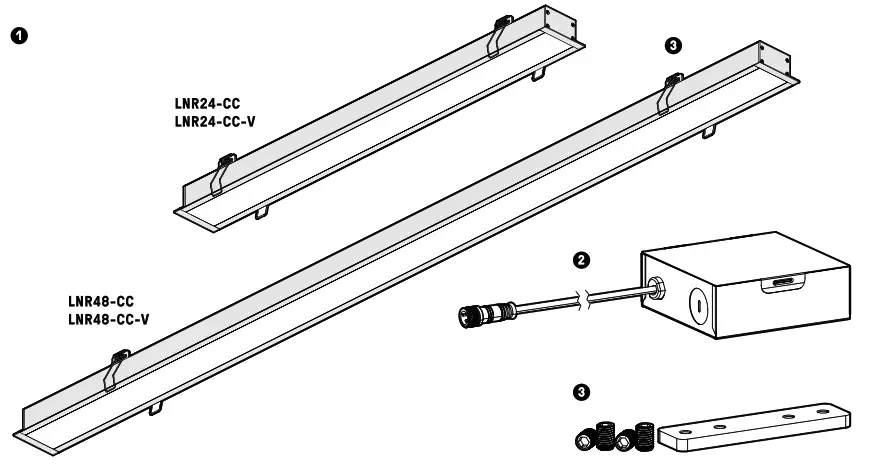
- LED recesed light
- Junction box with integrated driver
- Mounting hardware
WARRANTY
DALS offers a 5 year warranty from the date of purchase which covers repairs or replacements of defective parts of the housing, optics, and electronics. To contact DALS customer service call 1 877 430 1818 or send an e-mail to [email protected].![]() BEFORE YOU START BEFORE STARTING INSTALLATION, SHUT THE LINE FEED POWER OFF USING THE CIRCUIT BREAKER. Instructions pertaining to a risk of fire, electric shock or injury to persons. Installation must be done according to local electrical codes. Installation should be done by a certified electrician. This class B digital apparatus complies with Canadian ICES-005. This digital apparatus does not exceed the Class B limits for radio-noise emissions from digital apparatus as set out in the Radio Interference Regulations of the Canadian Department of Communications.
BEFORE YOU START BEFORE STARTING INSTALLATION, SHUT THE LINE FEED POWER OFF USING THE CIRCUIT BREAKER. Instructions pertaining to a risk of fire, electric shock or injury to persons. Installation must be done according to local electrical codes. Installation should be done by a certified electrician. This class B digital apparatus complies with Canadian ICES-005. This digital apparatus does not exceed the Class B limits for radio-noise emissions from digital apparatus as set out in the Radio Interference Regulations of the Canadian Department of Communications.
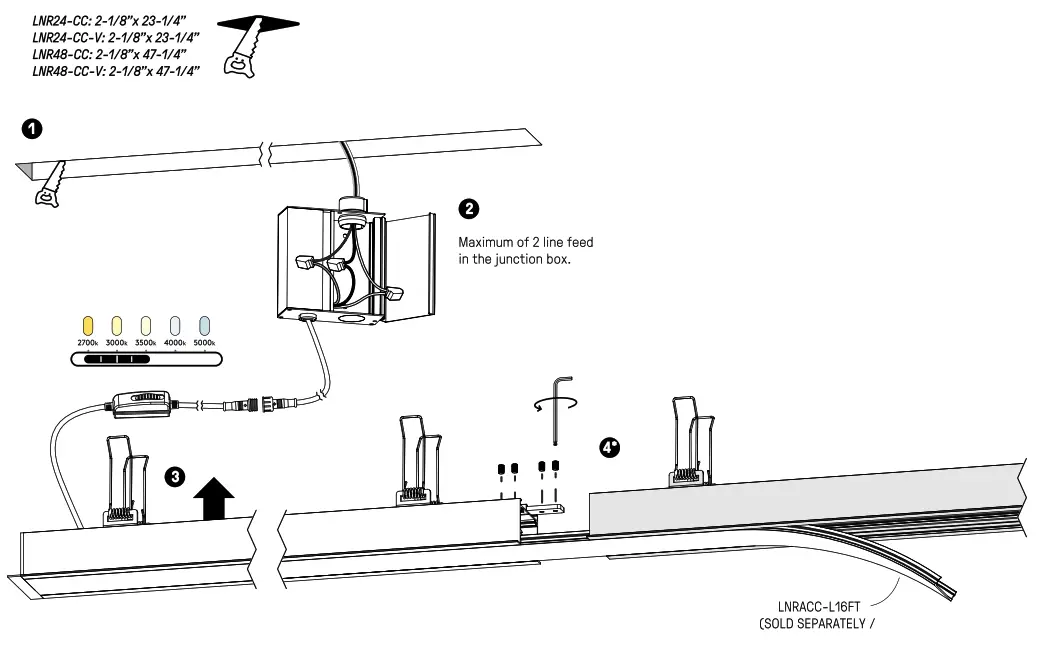
- Cut hole in ceiling and prepare supply wires. Install and unshield the line feed wire 6″ (15 cm) and strip wires 5/8″ (1.6 cm). Bring supply power to junction box through knockout.
- Open the lid of the junction box. Use the quick connectors to pair the wires from the mains with the wires from the connection box.
- Compress the springs and push the fixture into the opening. It is easier to do one spring at a time.
 Don’t forget to select the color temperature you would like.
- INSTALLATION OF 2 OR MORE FIXTURES TOGETHER:
Unscrew the end caps where both fixtures meet. Slide the mounting bracket into the middle rail of each fixture. Make sure it is properly centered on the joint before tightening the 4 set screws.
- Unscrew the butterfly nut at the back of the fixture to remove the spring clips

- A) CENTERED/OFFSET INSTALLATION: Create a 2″ opening in the panel.
B) PERIMETER INSTALLATION: Remove r from the side of the panel.
C) INSTALLATION ON RAILS: Plan adding 2 rails spaced 2-1/4″ apart. Cut the panel consequently.
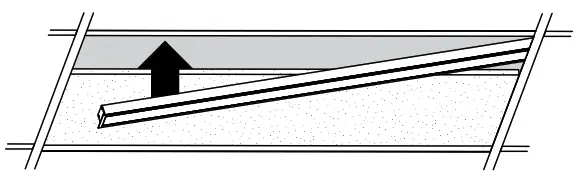
* BOTH LNR24 AND LNR48 FIXTURES CANNOT BE INSTALLED ON A SINGLE PANEL. - Insert the linear fixture inside the suspended ceiling and let it rest onto the rails. Finally, put the suspended ceiling panel back.
 A) CENTERED/OFFSET INSTALLATION:
 B) PERIMETER INSTALLATION:
 C) INSTALLATION ON RAILS:

 A) CENTERED/OFFSET INSTALLATION:
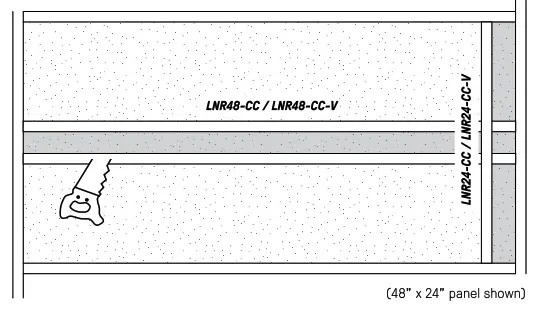 B) PERIMETER INSTALLATION:
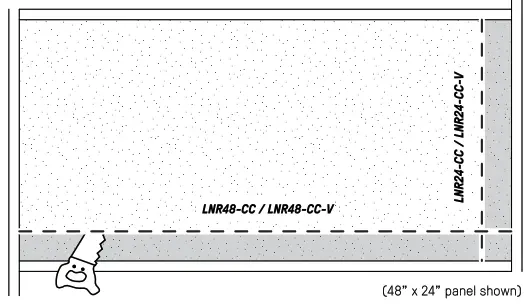 C) INSTALLATION ON RAILS:
TIPS: It is also possible to only add one rail and use the existing frame as shown in the example beside.
![]() 1 877 430 1818
1 877 430 1818
www.dals.com
INS LNRXX REV1![]()


