westomatic EVOLVE Screen Media
INSTALLING SCREEN MEDIA
LOADING FILES ON TO SD CARD
- We recommend using an SD Card to show media on the screen of the H20
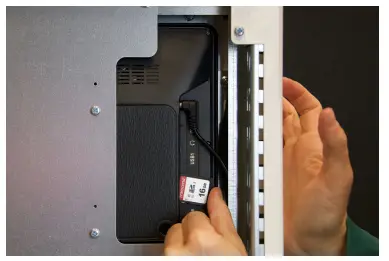
- Remove the SD Card from the media screen
- Using a computer, read the contents of the SD card
- Delete all files currently on the SD Card (if there are any)
Load your media:
For stock footage please use the following link Evolve-Screen-Media.zip and copy the files onto the SD card
Alternatively you can create your own using the following settings:
File Formats:
Image: PNG, JPG
Video: MP4
Frame Width x Height: 1280 x 720
Frame Rate: 30fps
Once created, please load onto the SD card
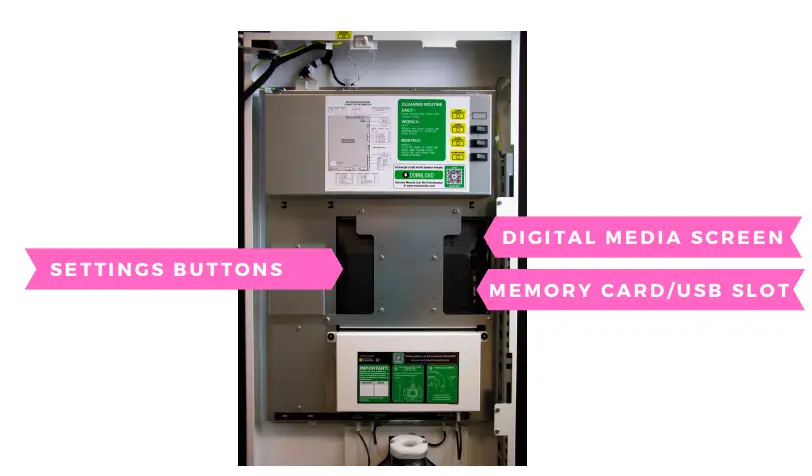
- Using the buttons on the back of the screen, highlight the ‘SETTINGS’ option and press ‘ENTER’ to select it
- Using the directional buttons again change the ‘AUTOPLAY’ options to your desired setting. i.e. ‘movie’ or ‘photo’ or ‘photo & movie’ should your screen have this option.

- Press ‘MENU’ to save the settings
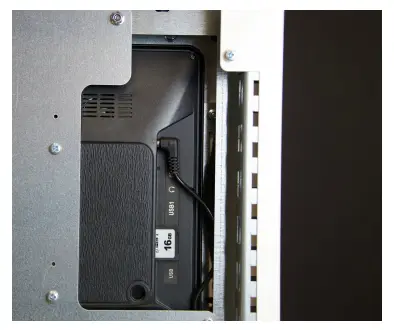
- Insert SD card back into digital media screen (as shown in the image)
- Files on the SD Card will automatically play and continually rotate the media on the card.
- The screen does have sound – to adjust it please use the remote control supplied.
CONTACT
Westomatic Vending
Services Ltd ,
Units 7-8 Forde Court,Block 4 Forde Road ,
Newton Abbot ,
TQ124BT
call
+ 4 4 ( 0 ) 1 6 2 6 3 2 3 1 0 0


