
HDMI KVM EXTENDER
User ManualHDMI KVM Extender over IP (120m)
ER2662KVMIP
Important Safety Instruction
- Do not mix up the transmitter and receiver before instruction.
- Do not unplug the device, when it is in using, keep distance from inflammable and explosive devices.
- Power Supply : DC 5V, Use only the supplied power supply unit, Do not use the power supply if it Is damaged.
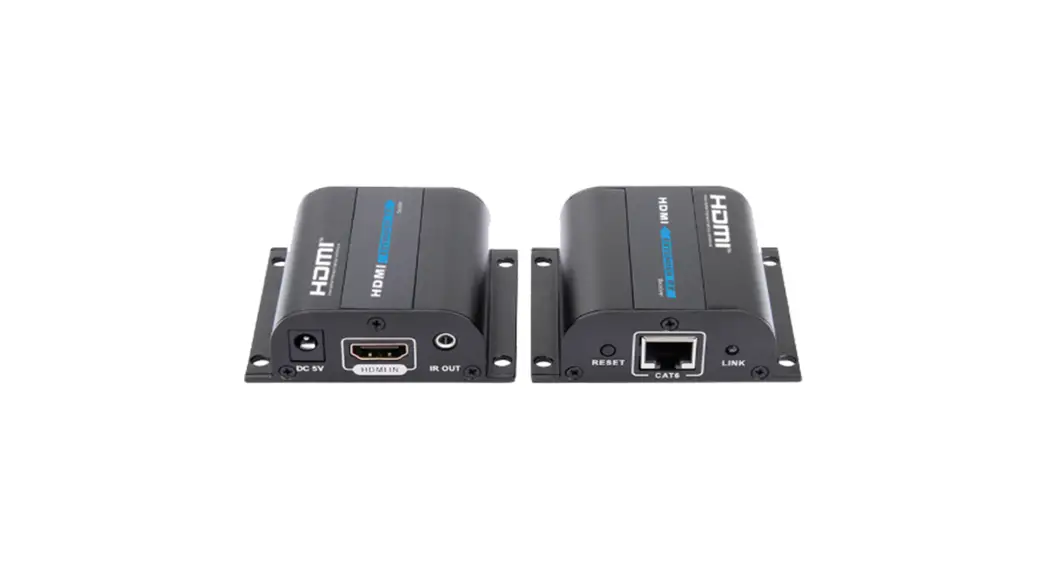
Product Introduction
This is a HDMI KVM EXTENDER, is made up of a transmitter unit(local site) and a receiver unit(remote site). The HDMI signal can be extended up to 120 meters via network cable, and the resolution supported is up to 1080p@601-1z. It allows access to a computer system from a remote console by USB connectors(US B keyboard and mouse). It is perfect for factory and construction sites, or any type of installation where the console needs to be in a conveniently accessible location. It is a Iso useful for control and security purposes. Therefore it is widely used In command center, data control center, operation rooms in military, bank, government, enterprise etc.
Features
- The HDMI signal transmission distance can reach 120m through the network cable.
- Resolution supported is up to 1080p@60H z.
- Support point to point connectionor one to manyconnection through network switch(es).
- Support KVM function.
- Aluminium alloy casing, stable and durable.
- Lightning Protection, Surge Protection, ESD Protection.
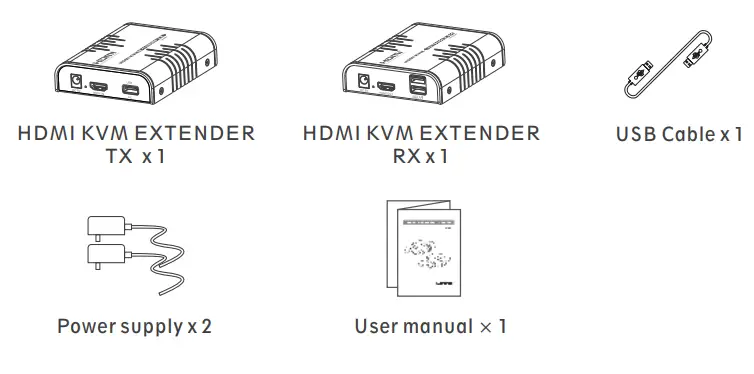
Package Content
Installation Requirements
- Source devices : PC or other devices with HDMI graphics card.
- Display devices : With HDMI input port, SDTV, HDTV, and monitor.
- Network cables : UTP/STP CAT5E/6 network cables, which following the standard of IEEE-568B. Transmission length: CATS 80m/CAT5E 100m/CAT 6120m.
Panel Introduction
1. HDMI EXTENDER TX (Transmitter)
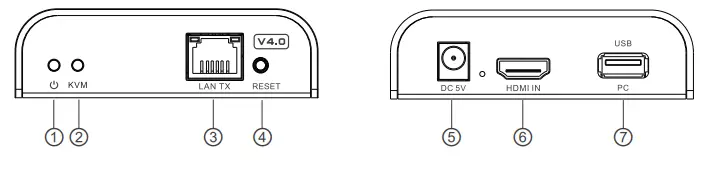
| ① | Power indicator | The indicator will turn blue when power up |
| ② | KVM indicator | The indicator will turn orange when the USB port connect to the PC successfully |
| ③ | LAN signal output | Output modulated HDMI signal |
| ④ | Reset button | Restart the device |
| ⑤ | Power input | Connect with DC5V1 A power adapter |
| ⑥ | HDMI input | Connect with the source device |
| ⑦ | USB port | Connect with PC |
2. HDMI KVM EXTENDER RX (Receiver)
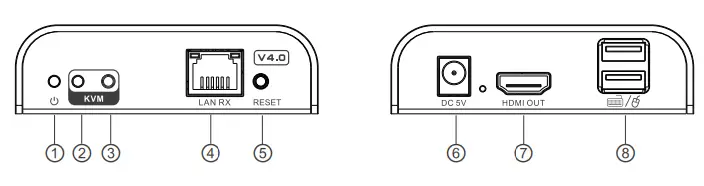
| ① | Power indicator | The indicator will turn blue when power up |
| ② | KVM indicator | When the KVM function is usable, it will turn orange. |
| ③ | KVM switch | Press the button to enable the KVM function (Especially in the one-to-many situation) |
| ④ | LAN signal input | Input modulated HDMI signal |
| ⑤ | Reset button | Restart the device |
| ⑥ | Power input | Connect with DC5V1 A power adapter |
| ⑦ | HDMI output | Connect with HDMI display device |
| ⑧ | USE. port | Connect with keyboard and mouse |
Installation Procedures
- How to make a CATSE/6 network cake
Follow the standard of IEEE-568B: 1-Orange/white
2-Orange
3-Green/white
4-Blue
5-Blue/white
6-Green
7-Brown/white
8-Brown - Install driver Software Connect the transmitter to the computer via a USB cable, and the USB driver will be installed automatically.
- Supported OS and version Windows 7, Windows 7 x64, Windows Server 2008, Windows Server 2008 x64, Windows Vista, Windows Vista x64, Windows Server 2003, Windows XP, Windows XP-x64, Windows 2000, Windows ME, Windows 98SE, Windows 8, Windows 10
- General Connection
Transmission distance can be up to 120 meters for 1080p over one CAT6
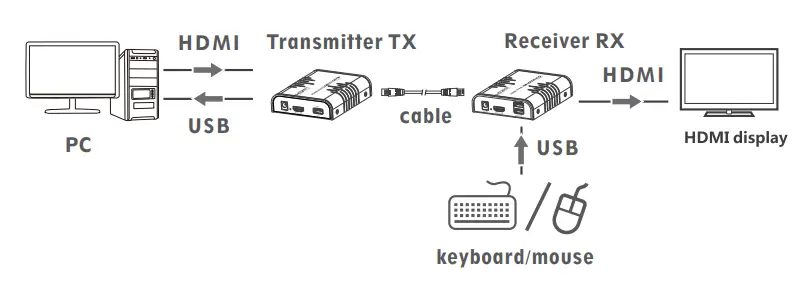
One to one connection:
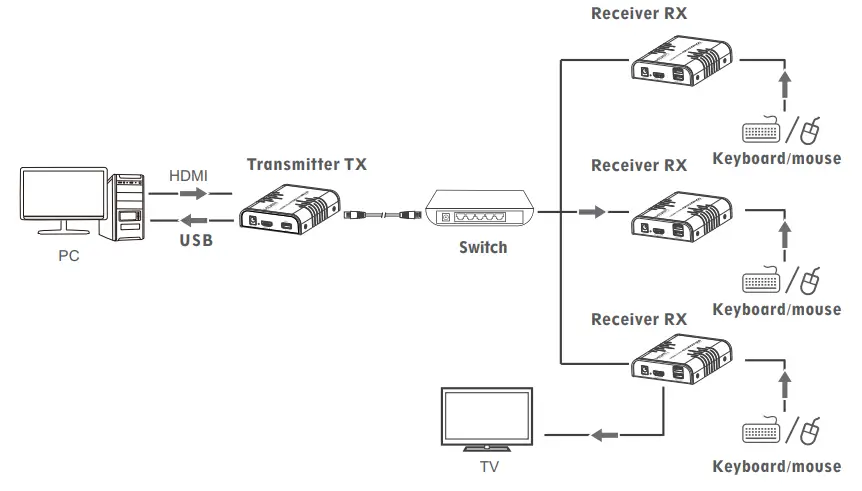
One-to-many Connection: by using network router/switch, one transmitter to several receivers, realize extender and splitter function.
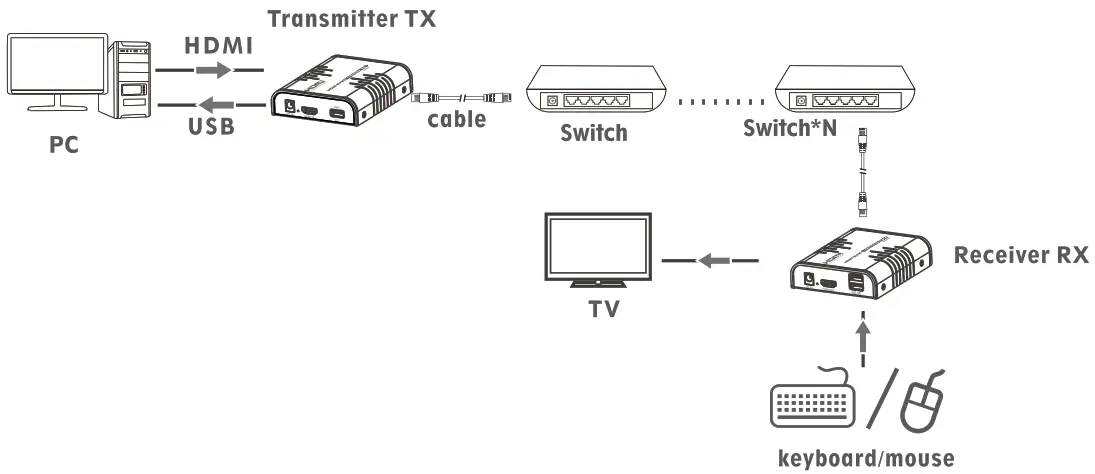
Switch Connection: by using network router/switch, realize unlimited extension.
NOTE :
- Transmission distance depends on type of network cable, CATS: Wm, CAT5E : 100m, CAT6: 120m.
- It is recommended that Gigabit Ethernet switches be used in LAN. Fast Ethernet switches (100Mbps) and Gigabit Ethernet switches (1000Mbps) can not be mixed-use in cascade.
FAQ
– A : Press the KVM switch of the receiver you want to use, and then the keyboard and the mouse which connect to that USB port of the receiver will work.
– A : 1) If source is graphics card, please set the resolution to be HDMI supported by display.
– 2) Check whether cable of Receiver is well connected.HDMI
– 3) Change the cable of Receiver.HDMI
– 4) Check whether signal correctly.HDMI source device output HDMI
– 5) Change the cable of Transmitter.HDMI
– A: 1) Check and make sure all the cables are connected well.
– 2) Try again with shorten network cable.
– A: 1) Please press reset button of HDMI extender.
– 2) Make sure the network cable is made according to the standard of IEEE-568B.
– A: 1) Please press the KVM switch of the receiver again.
– 2) Please make sure the USB cable is connected well.
– 3) restart the transmitter or receiver.
– 4) Reinstall the USB driver.
Specification
| Items | Specifications |
| HDM version | HDMI 1.3 |
| HDCP version | HDCP 1.4 |
| Video bandwidth | ≤20 Mbps |
| HDMI resolution supported | 640*480@60Hz – 800*600@60Hz – 1024*768@60Hz 1280*720@60Hz – 1360*768@60Hz – 1440*900@60Hz 14001 050@60Hz – 1680*1050©60Hz – 1920*1080@60Hz |
| Audio support | PCM (44.1 KHz, 48KHz) |
| HDMI connector | Type A,19 pin, Female |
| LAN connector | RJ-45 |
| Operation temperature | -10 ∼60 |
| Relative humidity | 10-95% (Non condensing) |
| Protection | Lightning Protection Surge Protection ESD Protection |
| Power Consumption | TX<3.5w – RX<3.5w |
| Dimensions | 109.6(L) x 89.5(w) x 26.3(H)mm *2pcs |
| Weight | TX: 240g – RX: 240g |
| Color | Black |
Disclaimer
The product name and brand name may be registered trademark of related manufactures. ™ and ® may be omitted on the user manual. The pictures in this user manual are just for reference. The terms HDMI, HDMI High-Definition Multimedia Interface, and the HDMI Logo are trademarks or registered trademarks of HDMI Licensing Administrator, Inc. We reserve the rights to make changes without further notice to a product or system described herein to improve reliability, function or design.


