![]() ELEVATE YOUR ELECTRONICS
ELEVATE YOUR ELECTRONICS
INSTALLATION
INSTRUCTIONS
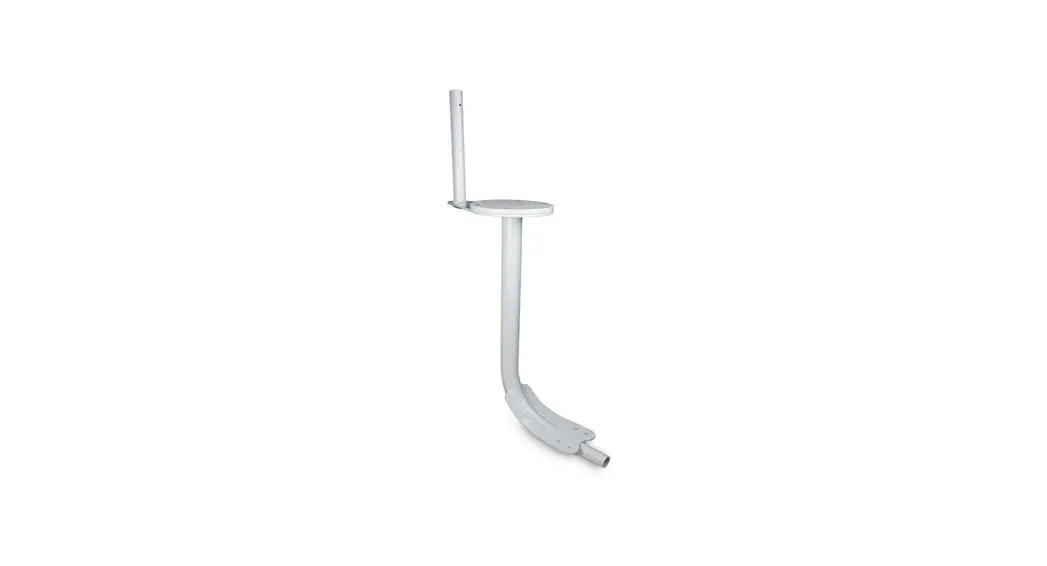
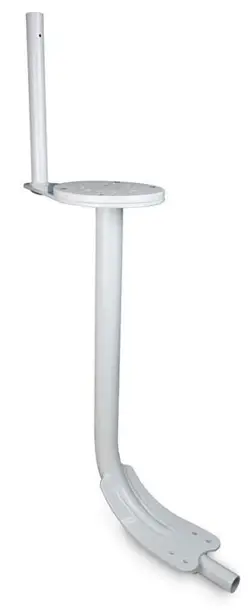
For Seaview Light Bars:
LTBSF, LTBSF2 & LTBSF4
Refer to website for the most up-to-date instructions and videos.
WWW.SEAVIEWGLOBAL.COM
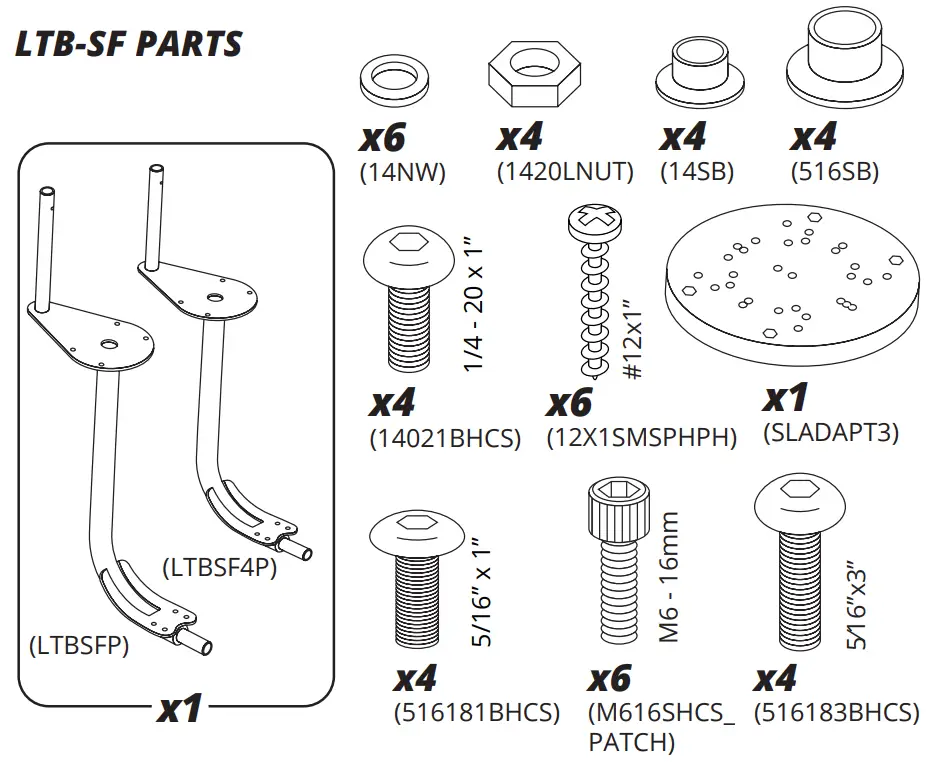
PARTS INCLUDED
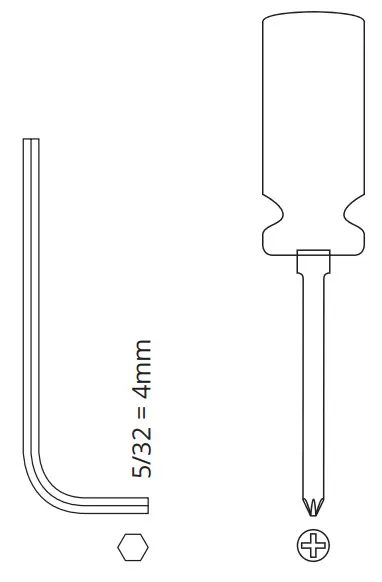
TOOLS NEEDED
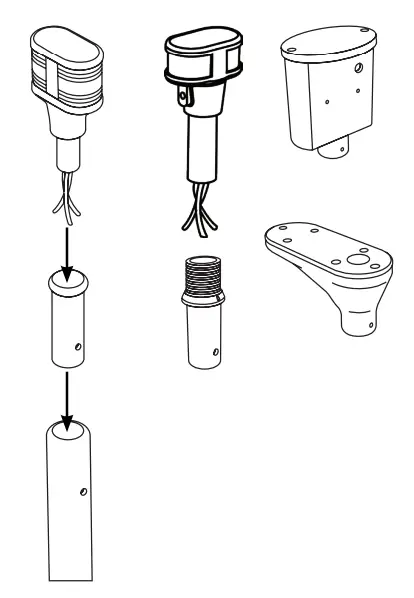
- Install your light, adapter, or box onto the light bar by following the instructions with the optional accessory.

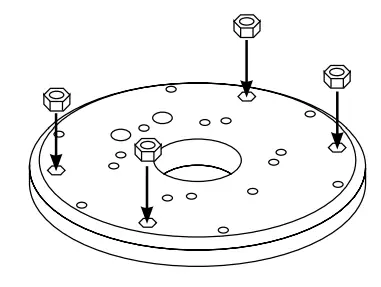
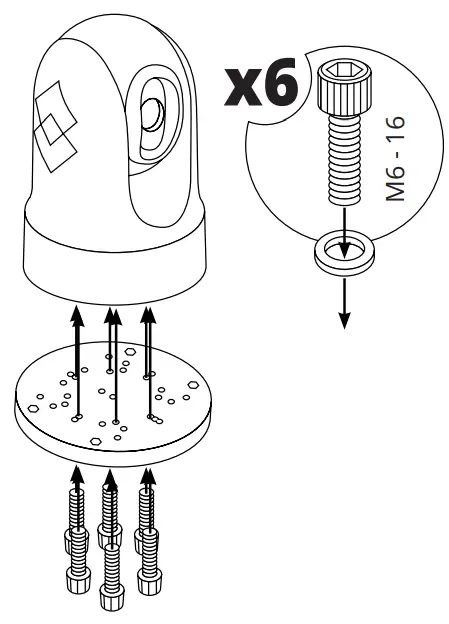
- Insert the four nuts into the adapter plate. This has most likely been done for you.

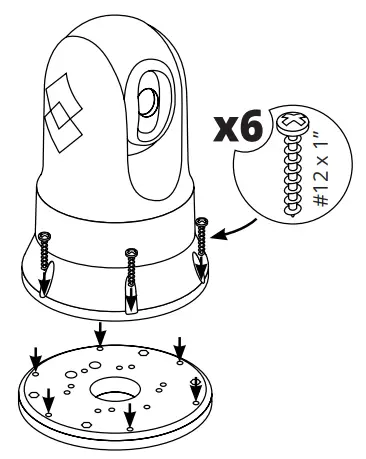
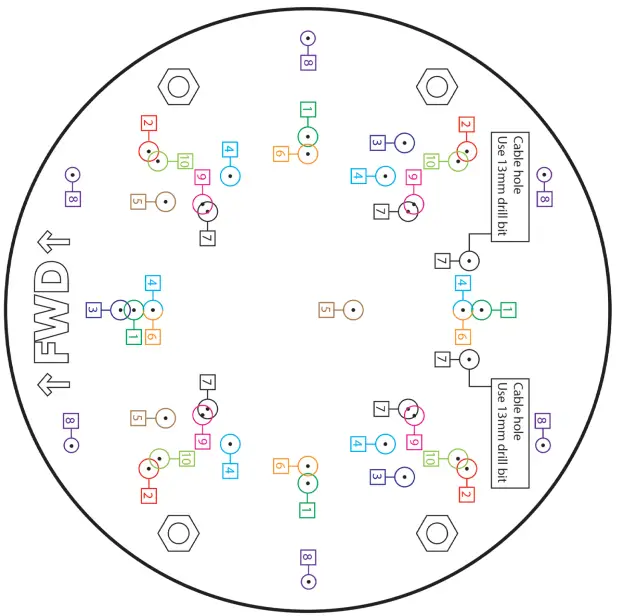
- A Drill small pilot hole for #12 screws. Refer to the drill template on the last page for drill location. Using a Philips head screwdriver screw in the six #12×1” screws to secure the camera to the adapter plate. (For #LTBSF2 & LTBSF4 only)
 3B Secure the camera or searchlight assembly to the light bar using the four 1/4-20×1” bolts and nylon shoulder washers.
- A Drill holes for M6 bolts. Refer to the drill template on the last page for drill location. Using an Allen wrench, screw in the six M6 – 16mm bolts to secure the camera to the adapter plate. (For #LTB-SF only)
 4B Secure the camera or search light assembly to the light bar using the four 1/4-20×1” bolts and nylon shoulder washers.
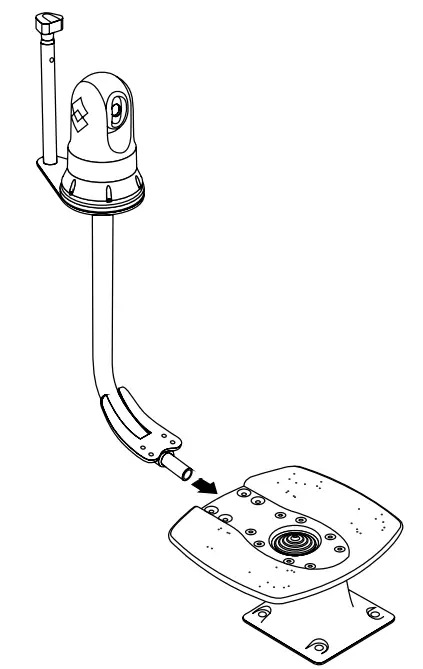
- Insert the light bar into the light bar hole on the back of the Seaview mount.

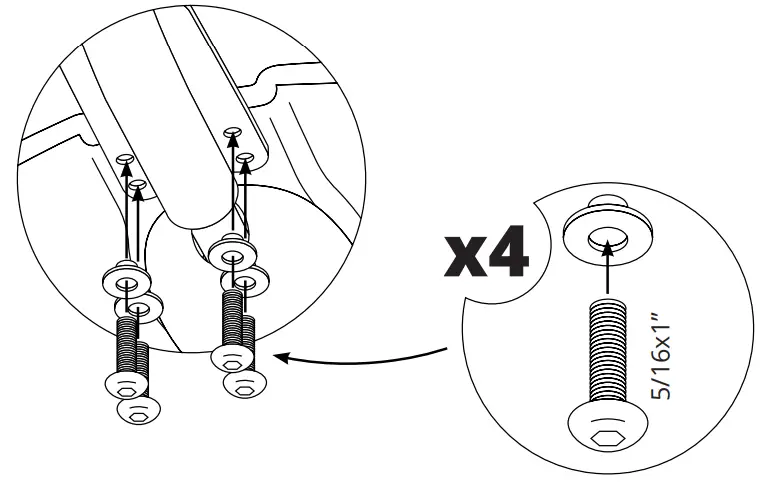
- A Using the four 5/16×1” bolts and nylon shoulder washers, secure the light bar by bolting it to the top plate.

6B When using the Seaview #SP1-MOD or #SP2-MOD Spreader Kits use the 5/16×3” bolts.
 3B Secure the camera or searchlight assembly to the light bar using the four 1/4-20×1” bolts and nylon shoulder washers.
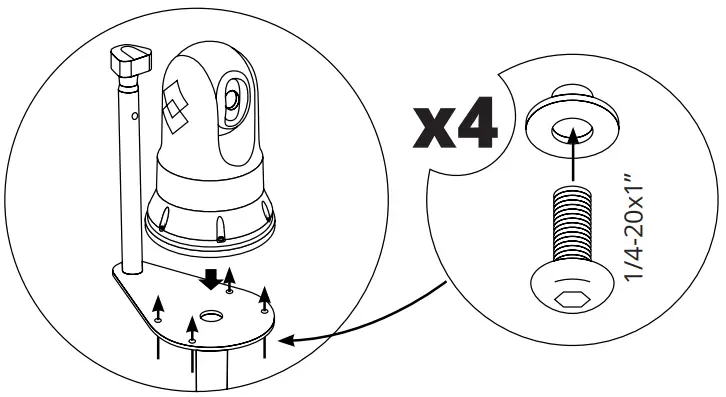
 4B Secure the camera or search light assembly to the light bar using the four 1/4-20×1” bolts and nylon shoulder washers.
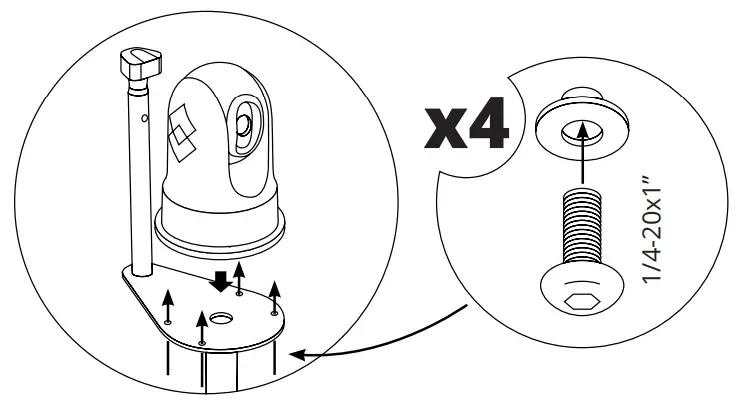
 SLADAPT-3
Drill Template
![]() ELEVATE YOUR ELECTRONICS
ELEVATE YOUR ELECTRONICS
Tel: 800-655-7922
www.seaviewglobal.com
EUROPEAN OFFICE
Tel: +33 4 94 53 27 70
www.seaviewprogress.com
5-4232021


