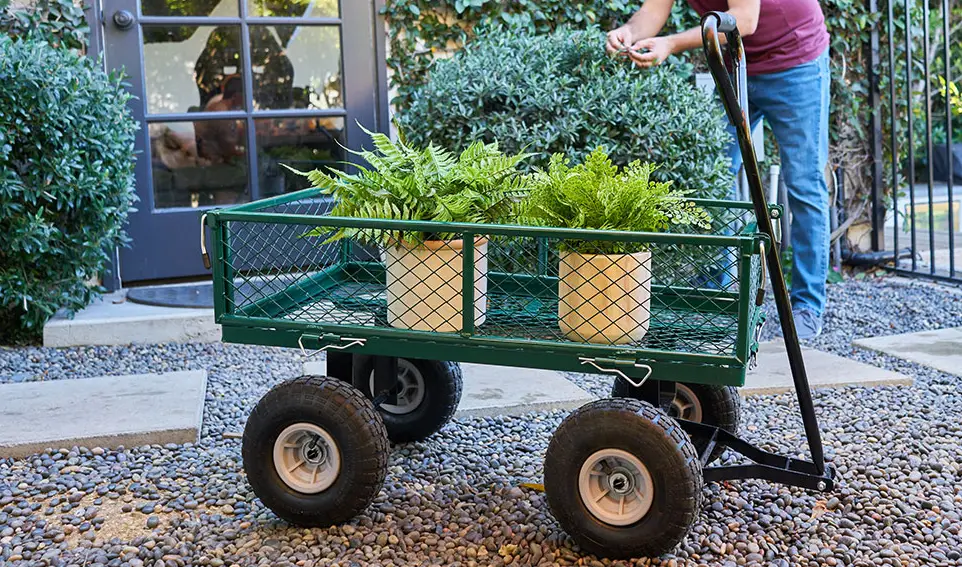
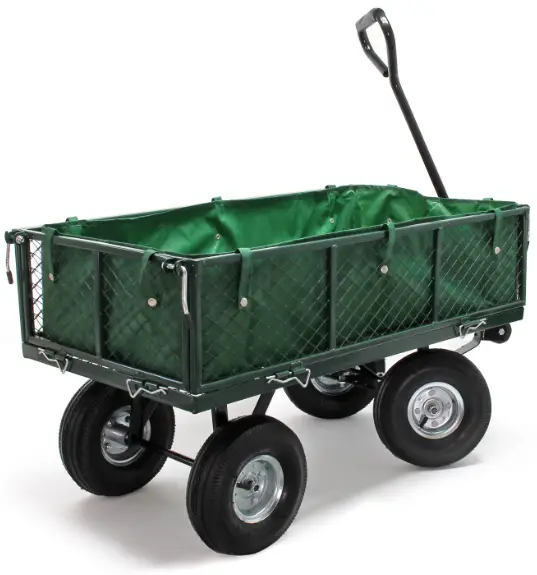
wiltec 51182 Garden Cart Transport Trolley
Please read and follow the operating instructions and safety information prior to initial operation.
Technical changes reserved!
Illustrations, functional steps, and technical data may deviate insignificantly due to continuous further developments.
The information contained in this document may alter at any time without prior notice. No part of this document may be copied or otherwise duplicated without prior written consent. All rights reserved. WilTec Wildanger Technik GmbH cannot be held liable for any possible mistakes in this operating man-ual, nor in the diagrams and illustrations shown.
Although WilTec Wildanger Technik GmbH has made every possible effort to ensure that this operating manual is complete, accurate, and up-to-date, errors cannot be ruled out entirely.
If you have found an error or wish to suggest an improvement, we look forward to hearing from you. Send us an e-mail to:
[email protected]
or use our contact form:
https://www.wiltec.de/contacts/
The most recent version of this manual in several languages can be found in our online shop:
https://www.wiltec.de/docsearch
Our postal address is:
WilTec Wildanger Technik GmbH
Königsbenden 12
52249 Eschweiler Germany
Do you wish to collect your goods? Our address for collection is:
WilTec Wildanger Technik GmbH
Königsbenden 28
52249 Eschweiler Germany
In order to shorten the waiting time and to allow for an easy on-site processing, we kindly ask you to contact us briefly beforehand or to place your order via the webshop.
E-mail: [email protected] Phone: +49 2403 55592–0 Fax: +49 2403 55592–15
To return your goods for exchange, repair, or other purposes, please use the following address. Atten-tion! To allow for a trouble-free complaint or return, it is important to contact our customer service team before returning your goods.
Retourenabteilung
WilTec Wildanger Technik GmbH
Königsbenden 28
52249 Eschweiler Germany
E-mail: [email protected]
Phone: +49 2403 55592–0
Fax: (+49 2403 55592–15)
© by WilTec Wildanger Technik GmbH http://www.WilTec.de
http://www.aoyue.eu
http://www.teichtip.de
Introduction
Thank you for choosing to purchase this quality product. To minimise the risk of injury, we ask you to always take some basic safety precautions when using this product. Please read this operating manual carefully and make sure that you understand it.
Keep these operation instructions in a safe place.
The inner parts of the device do not contain components requiring maintenance by the user. Leave all maintenance, control, and repair works to a qualified person. In case of unqualified intervention, the 2-year warranty will expire. Keep these operation instructions in a safe place.
Important safety information
- Do not exceed the maximum load of 300 kg.
- Do not permit children to use the trolley without supervision. The trolley is not a toy.
- Distribute the load evenly on the loading area.
- Do not load objects on the grate. Lower the grate before charging the trolley.
- Do not use the trolley with pieces being damaged, broken, or badly mounted. The trolley should only be used after all problems have been resolved (e.g., by installing spare parts).
- Do not use to trolley with or on objects that could damage the pneumatic tyres. The pneumatic tyres should not be filled with more than 2,06 bar (30 psi).
- Keep this manual in a safe place.
Assembly
You will need the following tools for assembly:
- slotted screwdriver,
- 8- and 12-mm open-end wrench, and/or
- two medium-sized adjustable spanners.
During assembly, refer to the exploded view and parts list.
- Step 1: First turn the rack of the trolley and place it on parts of the carboard to avoid damages to the surface.
- Step 2: Fix the back support assembly to the rack with the help of the 8 × 23 mm supporting bolt (25) and 8 mm nut (21). Fix the rear axle support to the rear part of the trolley, then fix then right and left support bar. Firmly tighten all nuts.
- Step 3: There are four shoulder screws – three short ones and a long one. Make sure to use the long shoulder screw (8 × 25 mm) in the front centre of the steering mechanism. Assembly the front support assembly completely before fixing it to the rack.
- Connect the steering plug to both axle guides by using the 8 × 23 mm supporting bolts (short ones) (25), 8 mm washers (20), and 8 mm nuts (21).
Note: Place the steering plug above both axle guides. - Now place the yoke onto the front axle support and secure the steering plug by using the 8 × 23 mm supporting bolt (short one) (25), 8 mm washer (20), and 8 mm nut (21).
- Connect the central front axle support to the assembly as showed. Therefore, use the 8 × 25 mm support bolt (long one) (27), 8 mm washer (20), and 8 mm nut (21).
- Mount the complete front support assembly to the trolley rack by using the 4 supporting bolts, nuts, and washers
- by WilTec Wildanger Technik GmbH http://www.WilTec.de
http://www.aoyue.eu
http://www.teichtip.de
- Connect the steering plug to both axle guides by using the 8 × 23 mm supporting bolts (short ones) (25), 8 mm washers (20), and 8 mm nuts (21).
- Step 4: Then mount the wheels in the following order:
- Place one wheel on the axle with the valve stem pointing outwards.
- To fix the wheel, use the 12 mm washer and then the 12 mm nut (22). Tighten them firmly.
–
- Step 5: Place the trolley on its wheels. Fix the pull handle, yoke washer, and plastic coupling by using the 8 × 60 mm pull handle bolts (26), 8 mm washers (20), and nuts (21).
- Step 6: Fix the locking handles to the grate with the help of the 8 mm washers (20) and nuts (21).
Note: Do not tighten yet the nuts completely for they need to be adapted after mounting the grate. - Step 7: Fix the front, rear, left, and right grate with the help of R pins. With the help of the locking handle, bring the grates to an upright position and tighten the nuts of the locking handle. Make sure that the nuts are not tightened too firmly to ensure smooth operation. Place the small grate case on the trolley.
Technical specifications
| Max. load (㎏) | 300 |
| Weight (㎏) | 20 |
| Size (㎜) | 965 × 510 × 550 |
| Wheels (㎜) | ⌀ 270 × 77 |
| Max. pressure (㍴) | 2.06 (30 psi) |
- by WilTec Wildanger Technik GmbH http://www.WilTec.de
http://www.aoyue.eu
http://www.teichtip.de
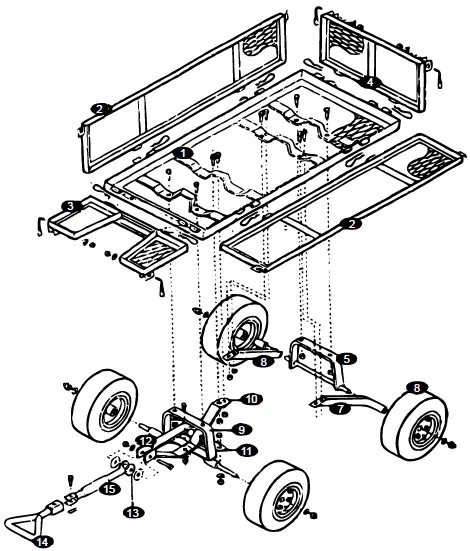
| № | Name | Qty. | № | Name | Qty. |
| Pieces of main frame | Front support assembly | ||||
| 1 | Trolley rack | 1 | 9 | Front axle support | 1 |
| 2 | Lateral parts | 2 | 10 | Central front axle bar | 1 |
| 3 | Front piece | 1 | 11 | Yoke | 1 |
| 4 | Back part | 1 | 12 | Steering plug | 1 |
| 6 | 25.4 × 8.89 cm wheels | 4 | 13 | Plastic coupling | 1 |
| Back support assembly | 14 | Handle | 1 | ||
| 5 | Rear axle support | 1 | 15 | Pull handle | 1 |
| 7 | Left rear axle bar | 1 | |||
| 8 | Right rear axle bar | 1 | |||
Tools and fixation pieces for assembly
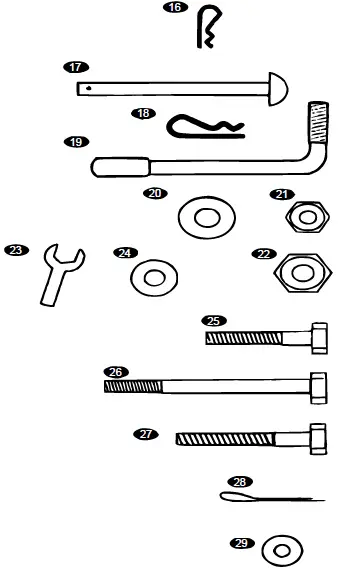
| № | Name | Qty. |
| 16 | R pin | 8 |
| 17 | Handle safety pin | 1 |
| 18 | R pin | 1 |
| 19 | 8 mm locking handles, use with 20 and 21 | 4 |
| 20 | 8 mm washer | 19 |
| 21 | 8 mm nut with locking insert | 19 |
| 22 | 12 mm wheel nut | 4 |
| 23 | Small spanner | 1 |
| 24 | 12 mm washer | 4 |
| 25 | 8×23-mm supporting bolt, use with 21 | 13 |
| 26 | 8×60-mm handle bolt, use with 21 | 1 |
| 27 | 8×25-mm supporting bolt | 1 |
| 28 | R pin | 1 |
| 29 | 12 mm washer | 1 |
Important Note:
Reproduction and any commercial use (of parts) of this operating manual, requires a written permission of WilTec Wildanger Technik GmbH.
© by WilTec Wildanger Technik GmbH
http://www.WilTec.de
http://www.aoyue.eu
http://www.teichtip.de


