Vixen 50-600 AZ 1 Space Eye Telescope User Manual

Safety Notes
Warning!
Never look at the sun through a telescope / finder scope. Permanent and irreversible eye damage may result.

Caution
Do not place a telescope or an eyepiece under direct sunlight. There is a possibility of a fire.
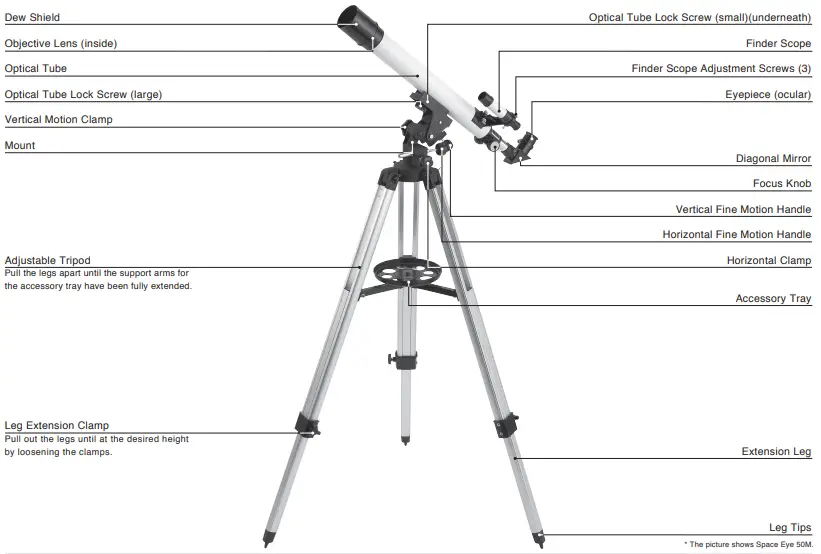
Parts Description
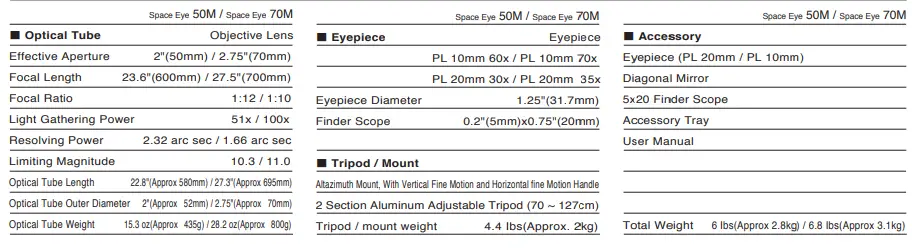
Specifications
Setting Up
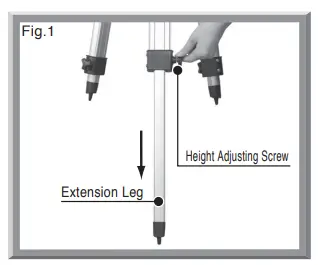
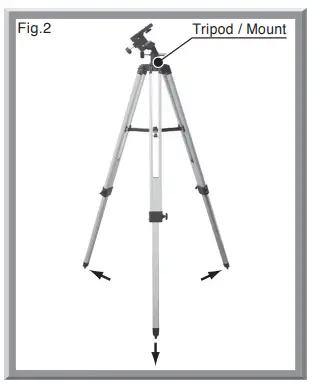
Setting Up the Tripod / Mount
- Take out the mount with tripod from the Loosen the extension clamp and extend the legs until at the desired height. (Set the height of all three of the legs to be equal and tighten the extension clamp.)

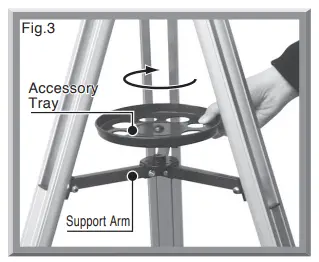
- Stand the tripod uptight and pull the tripod legs apart until the support arms for the accessory tray have been fully extended

- Push the accessory tray down at the center of the support arms

Place the optical tube over the mount head and attach it so the screws protrude in the holes in the mount head
- Tighten up the optical tube lock screw to fix the telescope in place.
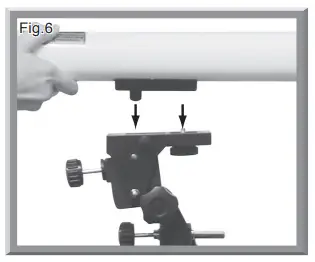
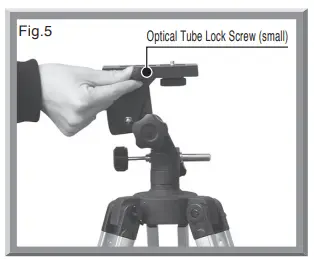
Attaching the Optical Tube
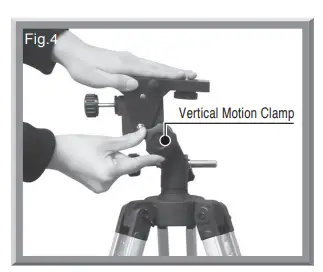
- Loosen the vertical motion clamp and set the mount head to a level position. Then, tighten the vertical motion clamp.

- Loosen the small optical tube lock screw.

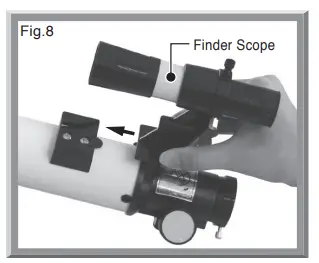
Attaching the Finder Scope
- The finder scope comes equipped with the finder scope bracket.
Slide the finder scope bracket leg into the finder bracket shoe on the optical tube as shown in the figure until it snugs.
You are not ready to use the finder scope unless you finish aligning it with the telescope. Please refer to “Aligning the
Finder Scope” described in the Using the Telescope section.
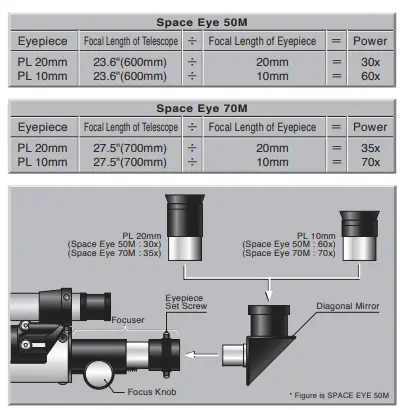
Attaching the Eyepiece
An eyepiece must be used when viewing through the Space Eye.
The Space Eye 50M/70M come standard with 2 eyepieces and a Diagonal Mirror. (See Diagram Below) Insert the eyepiece into the Diagonal Mirror. The numbers on each eyepiece indicate the focal length of that eyepiece. The magnification is obtained by dividing the focal length of the telescope by the focal length of the eyepiece.
Vertical / Horizontal Motion Clamp
You can point the telescope to the desired direction by turning the vertical / horizontal clamps.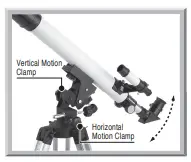
Vertical / Horizontal Slow-Motion Knob
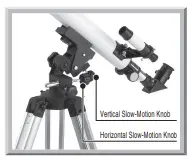
Adjust the direction of the telescope roughly with the finder scope, and tighten the vertical and horizontal motion clamps. Insert the target in the center of the field of view with the vertical / horizontal slow-motion knob.(Note)
The slow-motion knobs turn within the limited range. If you want to turn them further, loosen the vertical / horizontal motion clamp and move them to the desired point and re-tighten the clamp. Then, adjust the direction with the slow-motion knobs
Aligning the Finder Scope
It is very difficult for the telescope user to locate a target object through
WKH WHOHVFRSH·V IiHOG RI YiHZ DW KiJK PDJQiIiFDWiRQ, HVSHFiDOO\ DV WKH field of view narrows.
The finder scope allows you to find your target object easier by means of its much wider field of view.
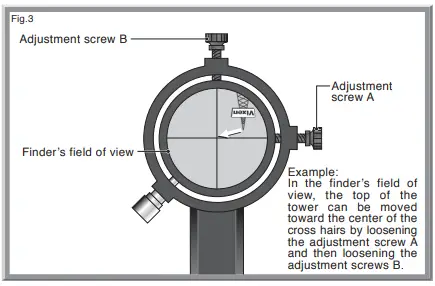
There is a cross hairs in the field of view of the finder scope. Adjust the direction of the finder scope with the setscrews so that the object VHHQ iQ WKH FHQWHU RI WKH WHOHVFRSH·V IiHOG RI YiHZ FRPHV FORVH WR WKH FURVViQJ RI WKH FURVV KDiUV iQ WKH IiQGHU·V IiHOG RI YiHZ.
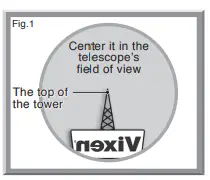
- Choose a conspicuous target in the distance (over 200m away) and place the target toward the center of a field of view of the 7KH iPDJH iQ WKH WHOHVFRSH·V IiHOG of view is mirror-reversed as used together with the supplied diagonal mirror. It is recommended to start the adjustments using an eyepiece of low magnification.

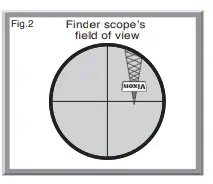
- Next, look through the finder You should probably see the same target somewhere ZiWKiQ WKH IiQGHU·V IiHOG RI YiHZ. 7KH WRZHU VKRZQ iQ WKH IiQGHU·V field of view is reversed as illustrated in the figure. The center of the cross hairs does not fall on the target at this stage.

- While looking through the finder scope, align the field of view with WKH WHOHVFRSH·V IiHOG RI YiHZ E\ loosening or tightening the setscrews on the finder bracket so that the target comes to the FHQWHU RI WKH IiQGHU·V IiHOG RI