![]() H-Series
H-Series
Remodel
H3RM, H4RM
Installation Instructions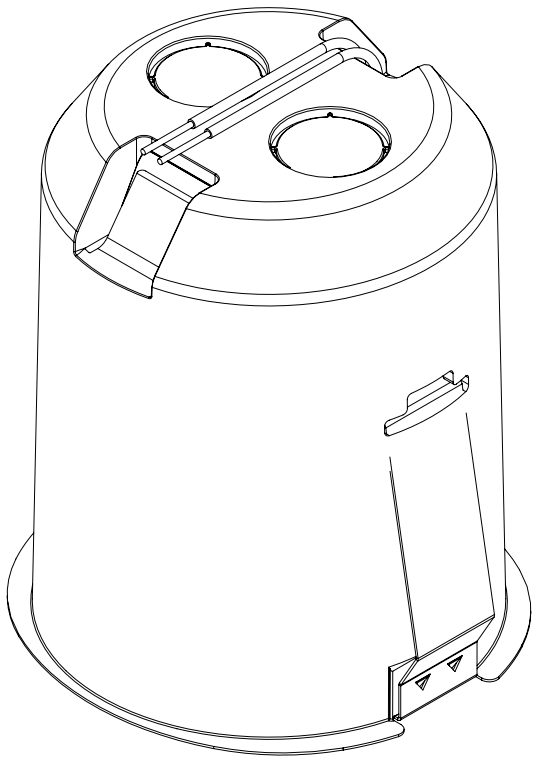
Safety Information
For your safety, read and understand these instructions completely before starting installation.
The electrical product contained herein is designed to meet the requirements of UL 1598 and the current NFP regulations as published in the NEC. Specific modifications and revisions in your area may differ from this standard. Compliance with local building and electrical codes must be confirmed before installation.
WARNING – To prevent wiring damage or abrasion, do not pinch or damage exposed wiring during installation. Keep away from edges of sheet metal or other sharp objects.
WARNING – Risk of fire or electric shock. Installation of this product requires a person familiar with the construction and operation of the luminaire’s electrical system and the hazard involved. If not qualified, do not attempt installation. Contact a qualified electrician.
WARNING – Risk of fire or electric shock. Install this kit only in the luminaires that have the construction features shown in the photographs and / or drawings. Do not make or alter any open holes in an enclosure of wiring or electrical components during kit installation.
WARNING – Risk of fire or electric shock. Do not alter, relocate or remove wiring, lampholders, power supply, or any other electrical component.
Pre-Installation
Power to luminaire must be turned off prior to installation. Failure to do so may cause electric shock, which may result in injury or death. Ensure that electrical connection is in accordance with local and NEC standards and that wiring is 120VAC.
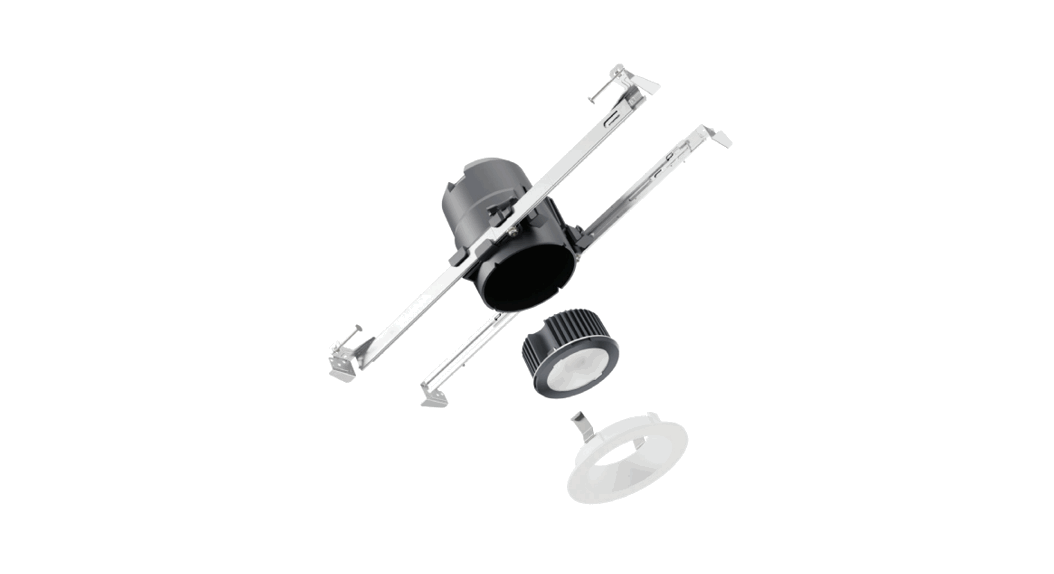
Housing Installation
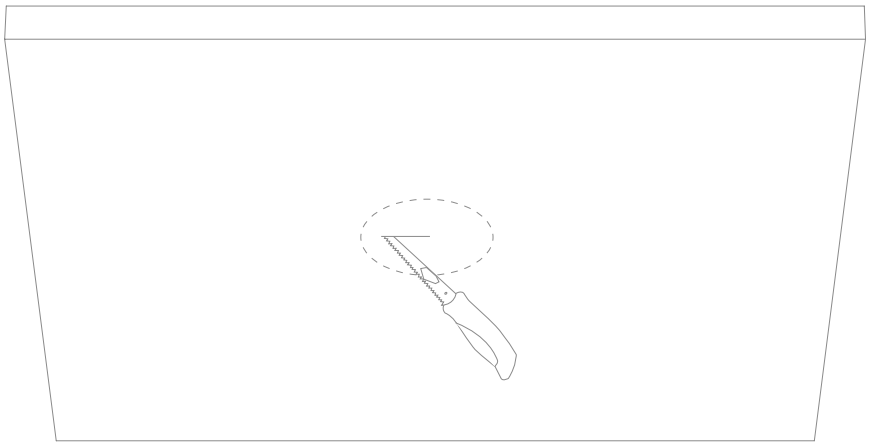
- Mark center fixture position on drywall.
- Cut opening in drywall (housing is compatible with ceiling thickness 1/2″ to 5/8″).
Cut out: H3RM: 3 5/8″ [92mm], H4RM: 4 1/2″ [114mm]
NOTE: Clean the edges of hole to remove debris
- Route electrical wires through wiring compartment using Romex tabs or knockouts.
- Push the box into the ceiling, and make sure that the plastic lip is flush with the bottom of the ceiling.

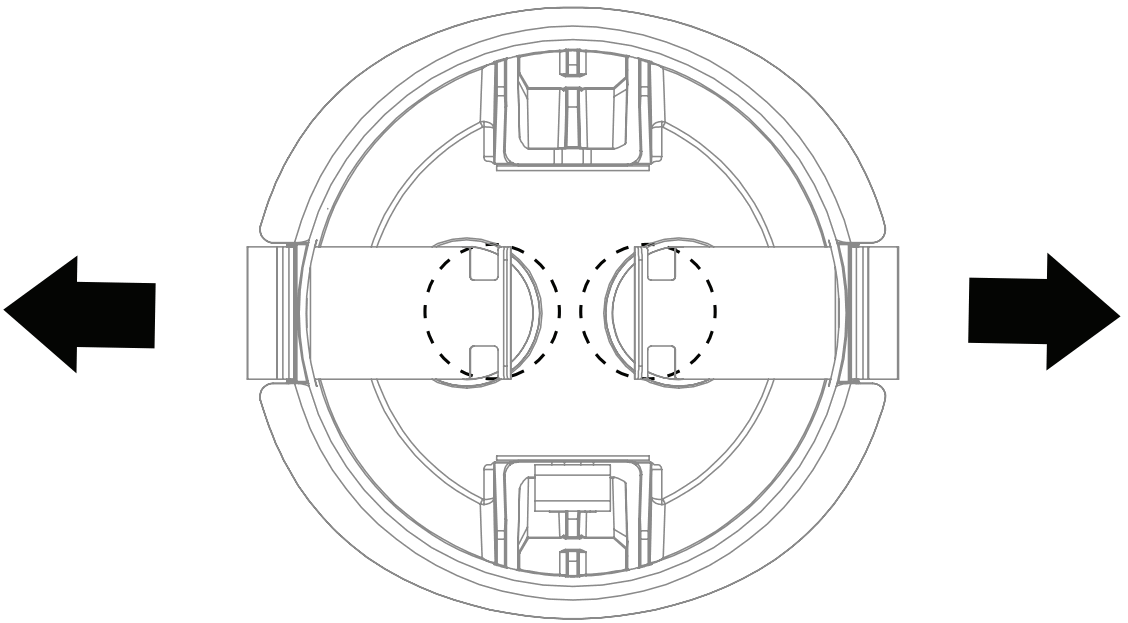
- Push the push flanges on the spring clips out, making sure that the notches on the spring clip snap into place with the T-shaped cutout in the housing.

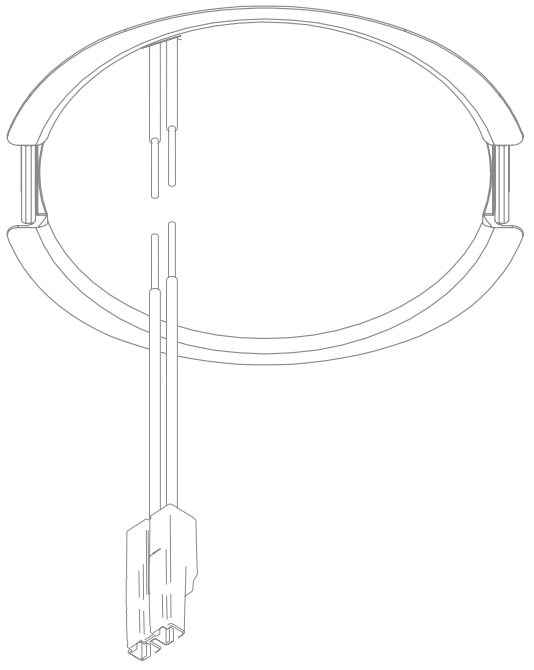
- Connect hardwire adapter (included) to housing electrical leads.
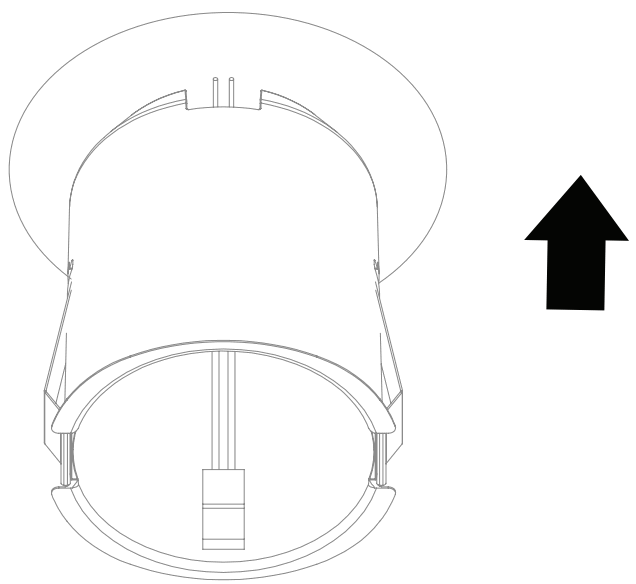
 Module Installation
 - Align trim onto module and snap on trim.

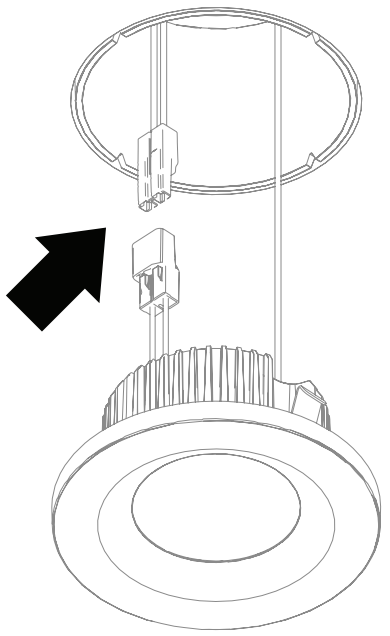
- Make ground wire connection and attach ground wire terminal (factory installed on module) to housing per national and local electrical code.

- Connect module female connector to hardwire adapter male connector.

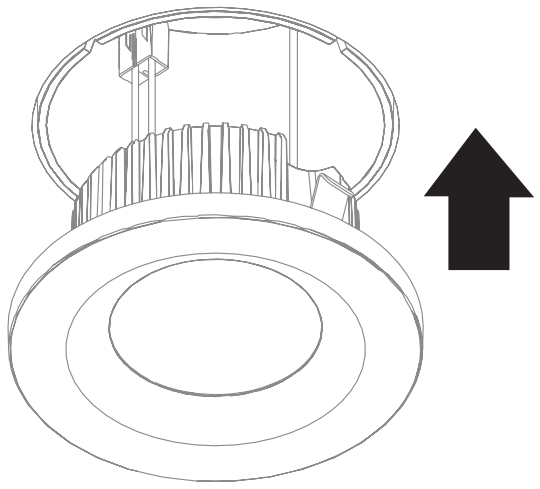
- Place module into housing. Push trim up until flush with ceiling.

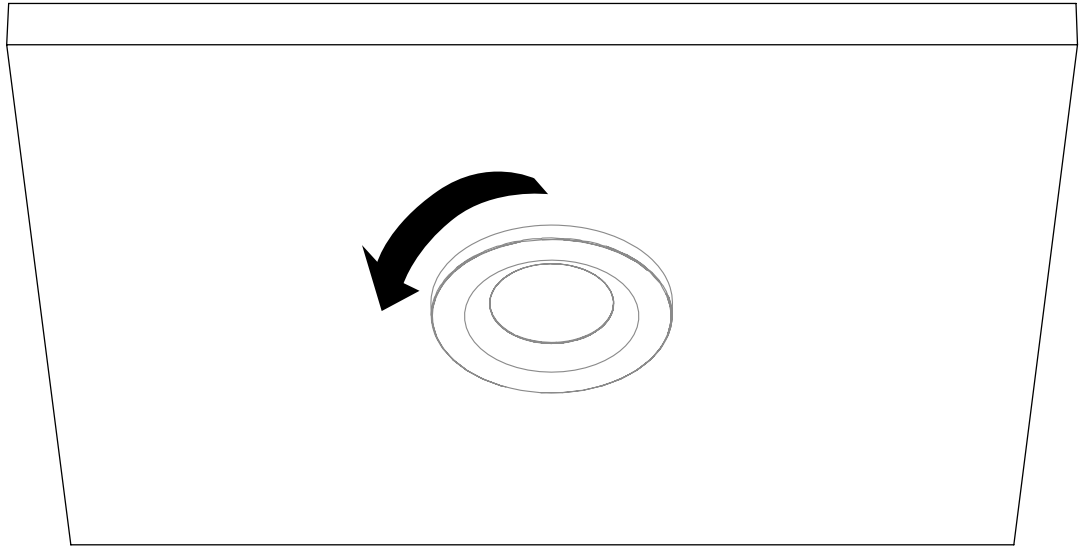
- Press trim to ceiling and rotate slightly turn to fully seat trim.

 Module Installation
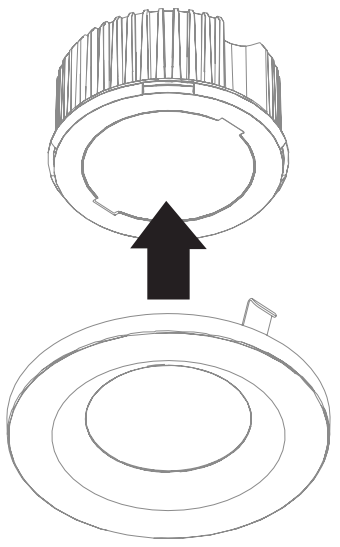

For use with H Series module & trims or a certified 4″ retrofit kit.
See dmflighting.com/compatibilityhseries for additional info.
Have a question? Contact us!
dmf Lighting®
[email protected]
dmflighting.com
323.934.7779


