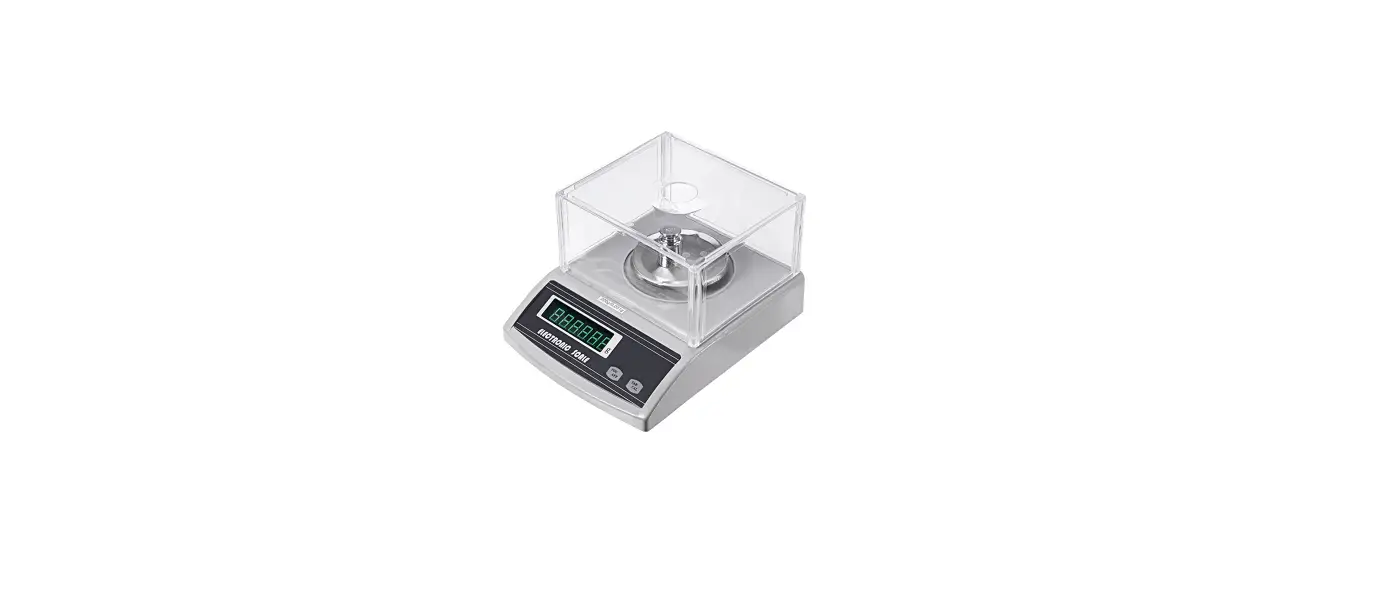
Banggood BUZZER1 Electronic Scale
Feature
- Input voltage: DC5V
- Maximum display range: 1KG
Function:
- The digital tube displays the detected weight, and the detection unit can be switched (G/KG);
- It has fine-tuning and calibration function to make the measured data more accurate;
- When the detection unit is G, the resolution is 0.01g, when the detection unit is KG, the resolution The rate is 1g;
- With peeling function;
- When the object exceeds the detection range, there will be an alarm;
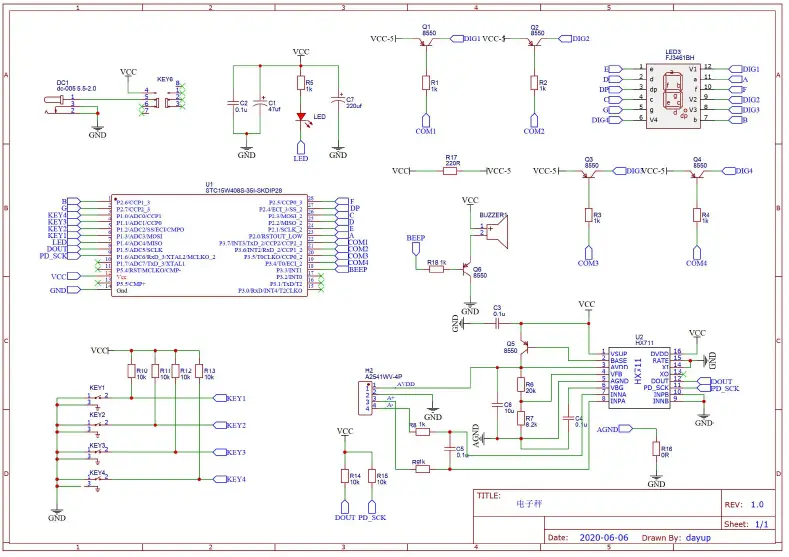
Working principle: STC15W408S single-chip microcomputer is used as the main control, weighing dedicated AD Chip HX711 sampling data, digital tube as a display device to display weight; there are four Touch the button on the side foot as a human-computer interaction channel;
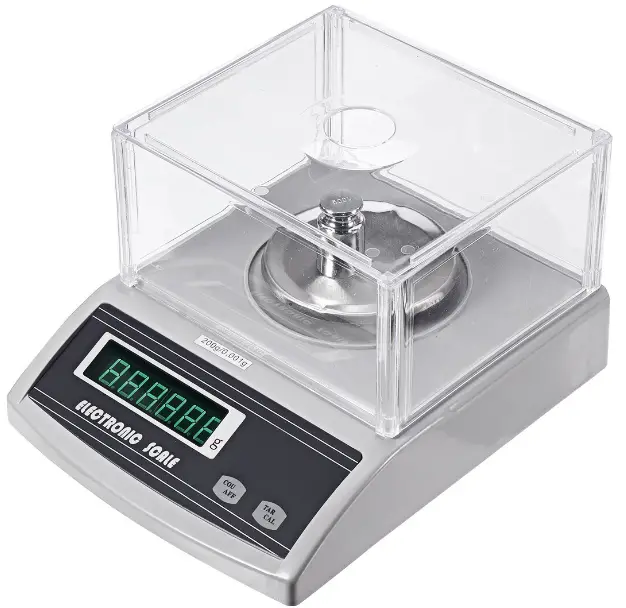
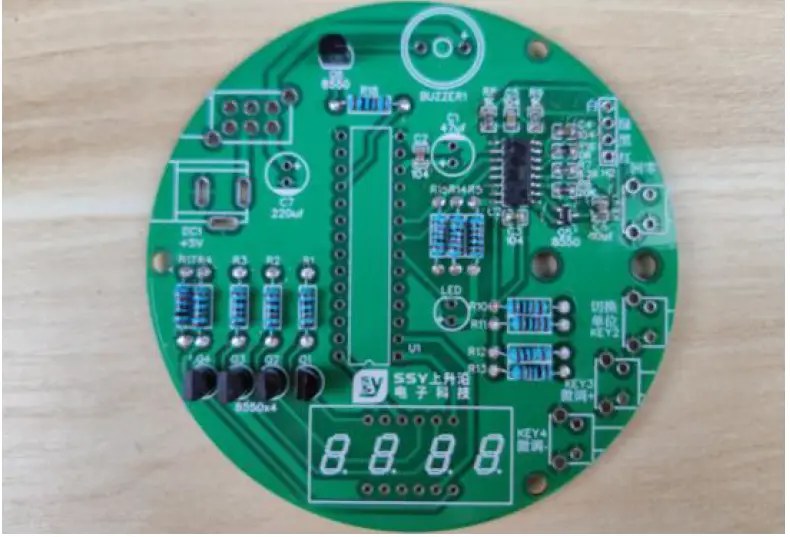
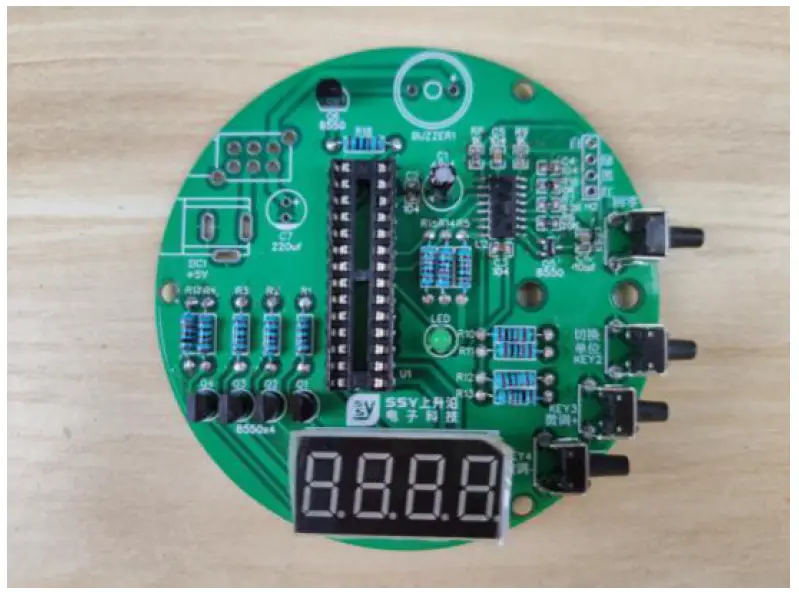
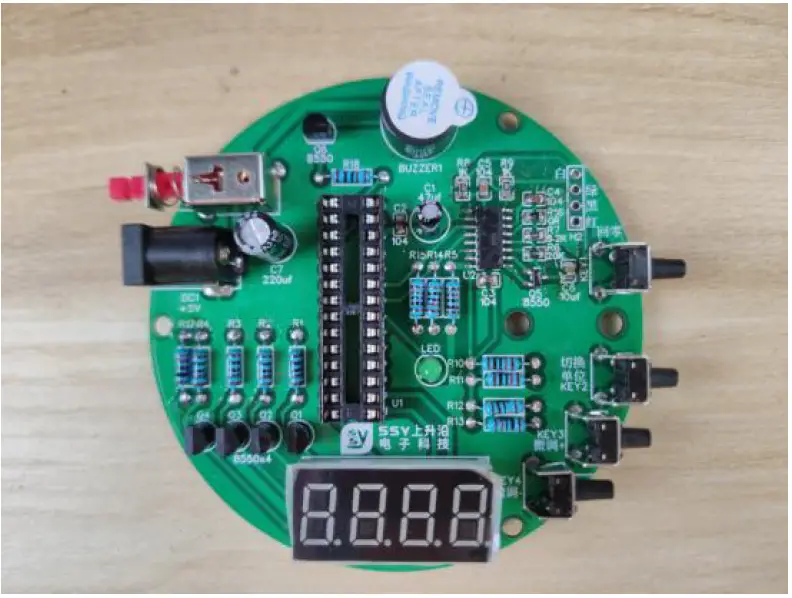
Front assembly drawing
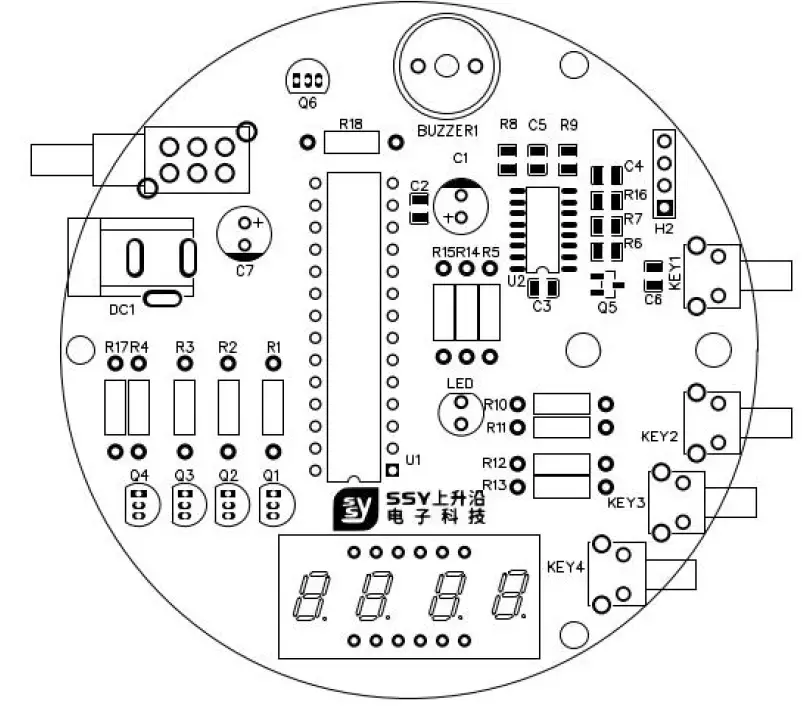
Welding list (number corresponds to PCB component silk screen)
| Num. | Component name | Marked | Parameter | Package | QTY. |
| 1 | Active buzzer | BUZZER1 | Diameter 12mm | BUZ-TH_BD12.0 | 1 |
| 2 | Electrolytic capacitor | C1 | 47uf/16V | Plug-in | 1 |
| 3 | Chip capacitors | C2,C3,C4,C5 | 104 | C0805 | 4 |
| 4 | Chip capacitors | C6 | 10u | C0805 | 1 |
| 5 | Electrolytic capacitor | C7 | 220uf/16V | CAP-D6.3×F2.5 | 1 |
| 6 | Power outlet | DC1 | DC-005 | Plug-in | 1 |
| 7 | Touch the button with your side foot | KEY1,KEY2,KEY3,KEY 4 | STP-1236B | Plug-in | 4 |
| 8 | Self-locking button | KEY6 | PN22LENA03QE | Plug-in | 1 |
| 9 | Green light emitting diode | LED | 3mm(5mm) | Plug-in | 1 |
| 10 | Digital Tube | 3641BS | Plug-in | 1 | |
| 11 | Triode | Q1,Q2,Q3,Q4,Q6 | 8550 | Plug-in | 5 |
| 12 | Triode | Q5 | 8550 | SOT-23 | 1 |
| 13 | Metal film resistor | R1,R2,R3,R4,R5,R18 | 1k | R_AXIAL-0.4 | 6 |
| 14 | Metal film resistor | R10,R11,R12, R14,R15,R13 | 10k | R_AXIAL-0.4 | 6 |
| 15 | Chip resistor | R16 | 0R | R0805 | 1 |
| 16 | Metal film resistor | R17 | 220R | R_AXIAL-0.4 | 1 |
| 17 | Chip resistor | R6 | 20k | R0805 | 1 |
| 18 | Chip resistor | R7 | 8.2k | R0805 | 1 |
| 19 | Chip resistor | R8,R9 | 1k | R0805 | 2 |
| 20 | Single chip microcomputer | U1 | STC15W408S | DIP-28 | 1 |
| 21 | Integrated chip | U2 | HX711 | SOP-16 | 1 |
| 22 | IC Block | DIP-28 | 1 | ||
| 23 | Load cell | 1kg/81*13.5*13.5 | 1 | ||
| 24 | Acrylic board | Diameter 80mm | 1 | ||
| 25 | Acrylic board | Diameter 15mm | 2 | ||
| 26 | screw | M4x10mm | 2 | ||
| 27 | screw | M4x20mm | 4 | ||
| 28 | Copper column (with nut) | M3 | 3 | ||
| 29 | Copper pillar | M4x15mm | 2 | ||
| 30 | PCB board | 1 |
Production steps
- Solder SMD components first
When soldering SMD components, first apply tin on one of the pads, solder one foot of the component first, and then add additional soldering to the remaining pads;
- Find the metal film resistor and the plug-in transistor, and weld them at the corresponding positions. The resistance should match the resistance value on the silk screen; (welding sequence: from short to high, from small to large)
 The resistance value of the metal film resistor can be calculated according to the figure below;
 Unit conversion:
- 1K=1000R
- 10K=10000R
- 100K=100000R
- 1M=1000K=1000000R
- 10M=10000K=10000000R
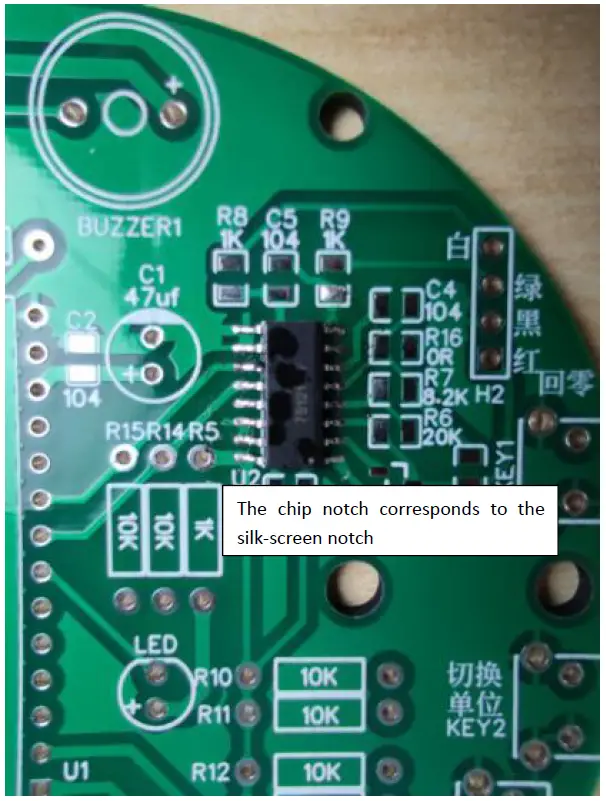
- Welding other devices, the positive and negative poles of the light-emitting diode and the electrolytic capacitor should be distinguished, the long leg is the positive pole, corresponding to “+”; the notch of the chip holder corresponds to the silk screen;

- For welding other devices, the direction of the digital tube must be correct and not reversed;

- Finally, add welding other devices, the positive and negative of the buzzer need to be distinguished clearly; insert the single-chip microcomputer chip; the notch of the chip and the notch of the chip holder need to correspond.

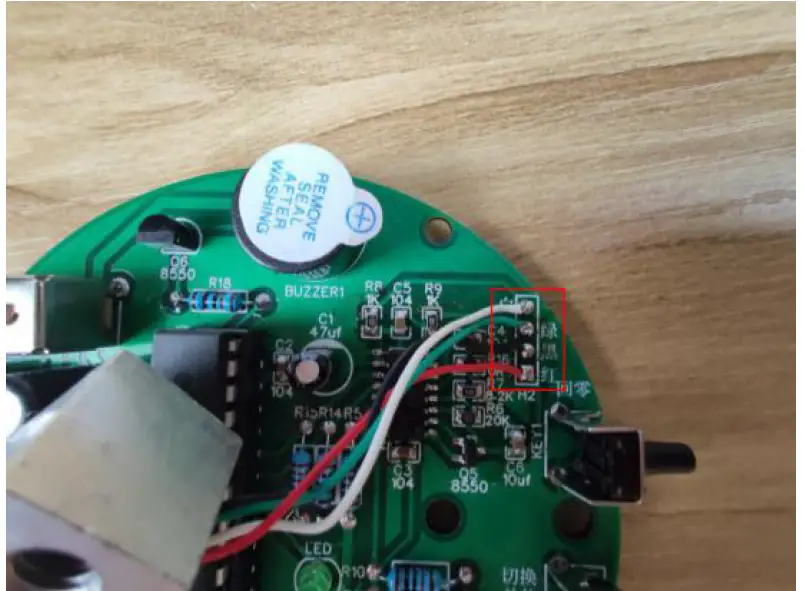
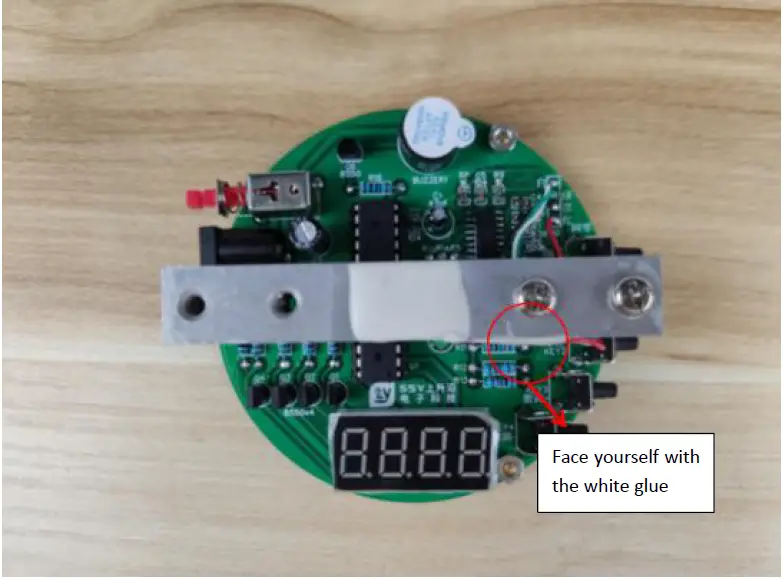
- Finally weld the gravity sensor, the white line corresponds to white, the green line corresponds to green, and so on; Do not solder the glue wire to the pad (the metal wire in the glue wire must be exposed and soldered to the pad)

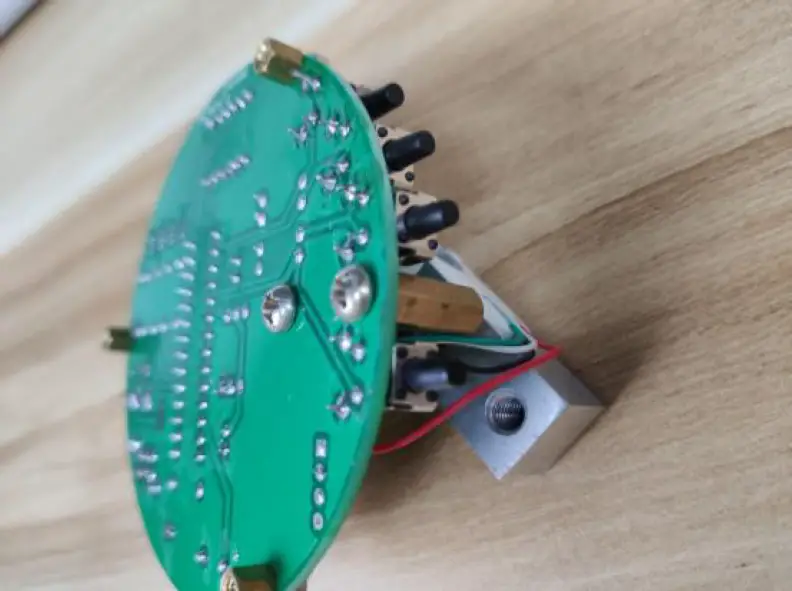
- Assemble the electronic scale First fix it on the board with two short screws and copper pillars;

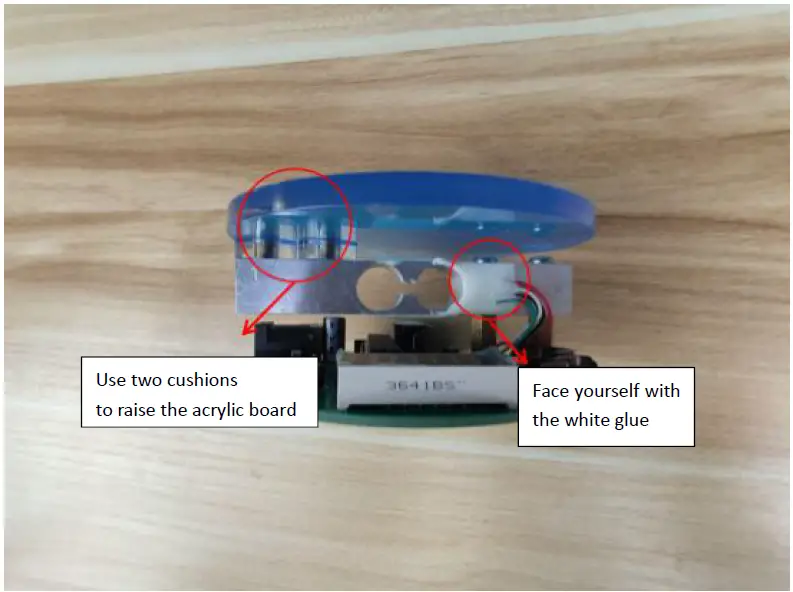
Use two long screws to fix the sensor;
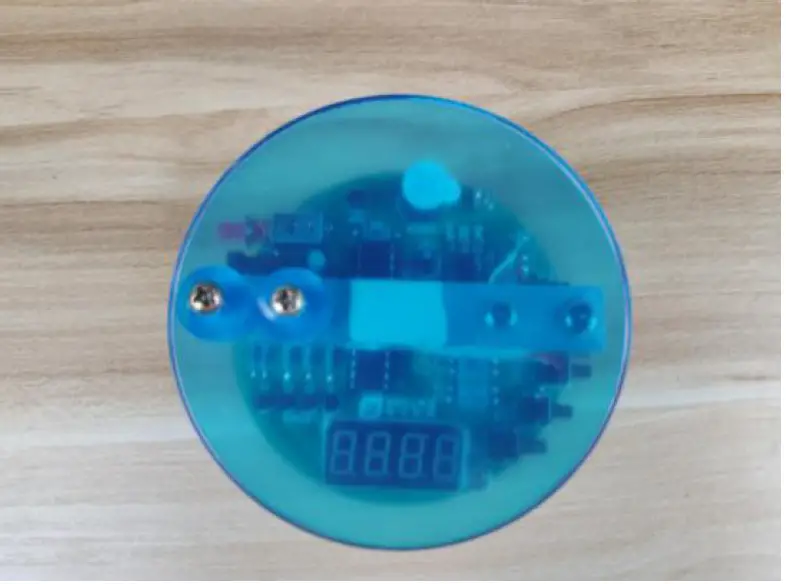
Fix the acrylic board;
Finally, the acrylic film can be removed to become transparent
 The resistance value of the metal film resistor can be calculated according to the figure below;
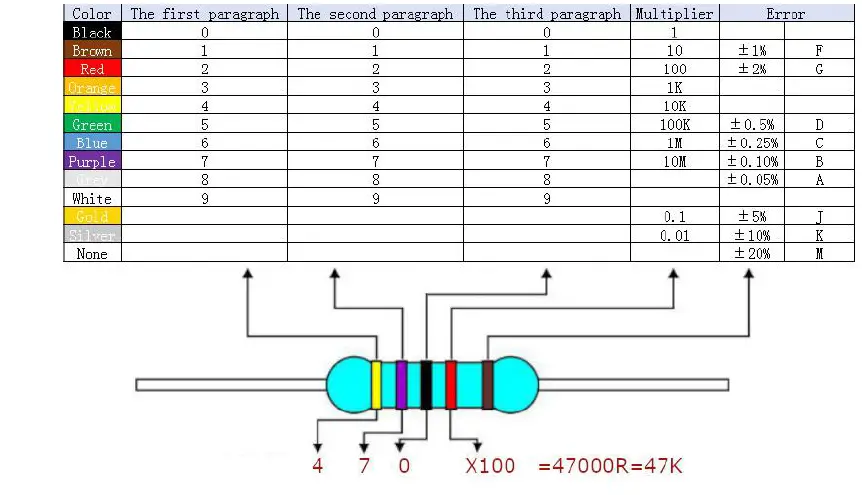 Unit conversion:
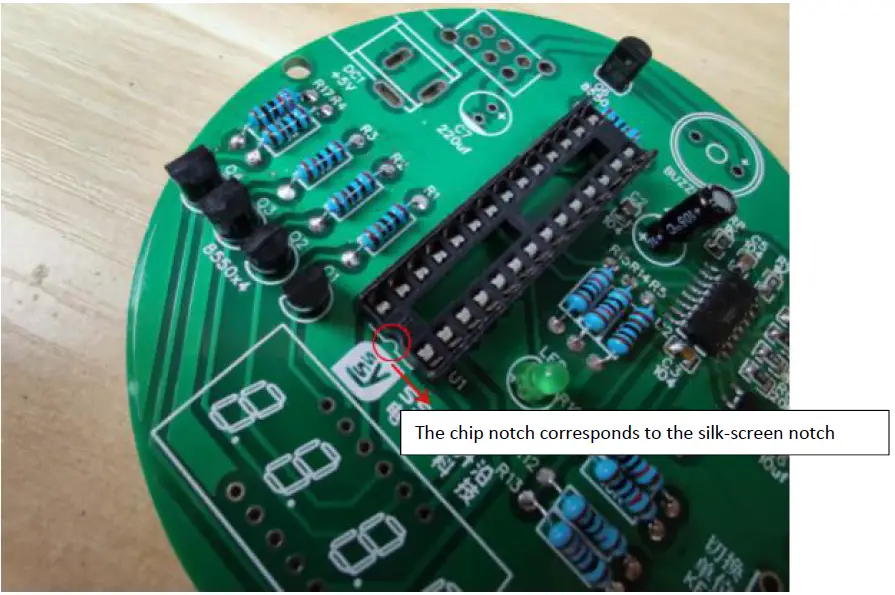
Use tutorial
- After welding the product, plug in the power supply, press the switch, the LED will light up, and the buzzer will beep for a few seconds, the digital tube will display 0.00, the unit is KG, the minimum scale is g, and the range is 1KG , More than 1KG, the buzzer will alarm;
- Put the electronic scale on a horizontal table top, and press the zero button to reset;
- Press the switch unit button, the digital tube displays 00 .00, the unit is g, the minimum scale is 0.01g, and the maximum range is 99.99g. When the weighed weight exceeds the range, the buzzer will alarm. Press the switch unit button to switch the unit to KG, and the buzzer will cancel the beep;
- With memory fine-tuning function, for example, when weighing 100g objects, the digital tube displays 98g, you can press the fine-tuning + button to adjust to 100g to improve the accuracy, otherwise press the fine-tuning -.
- The zero return button can be used as a tare


