
![]()
![]() Arteon 10003SL Built In Electric Fireplace
Arteon 10003SL Built In Electric Fireplace
Instruction Manual 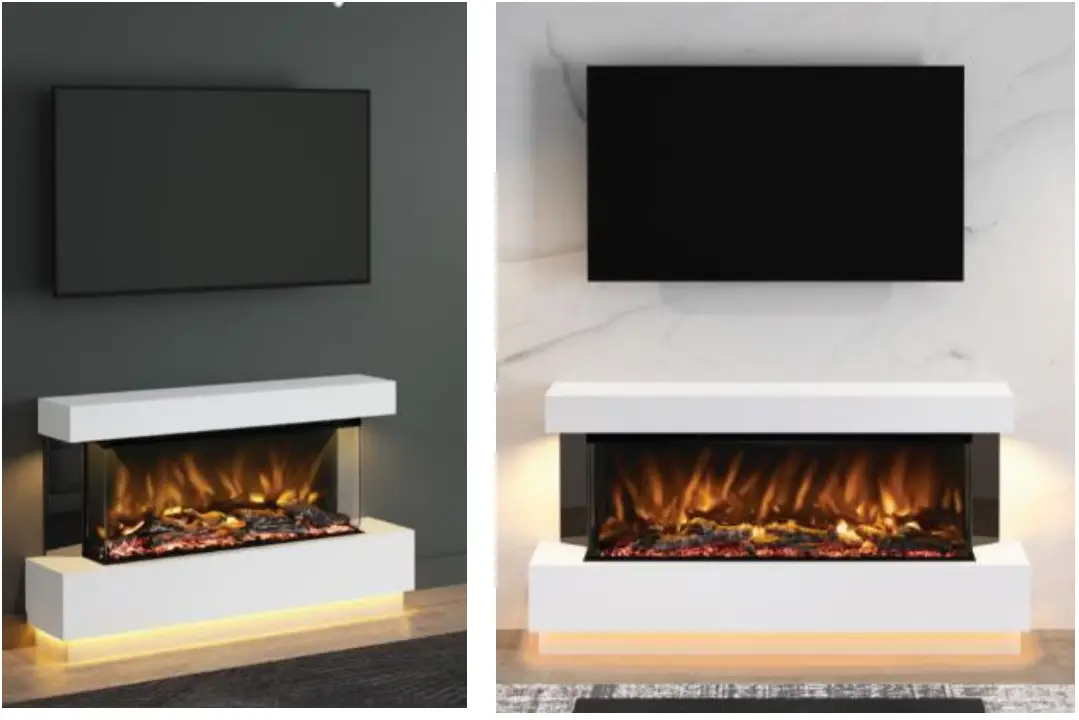 Evento Timber Suites To Suit:
Arteon 10003SL & 12503SL Fires
Technical Specification
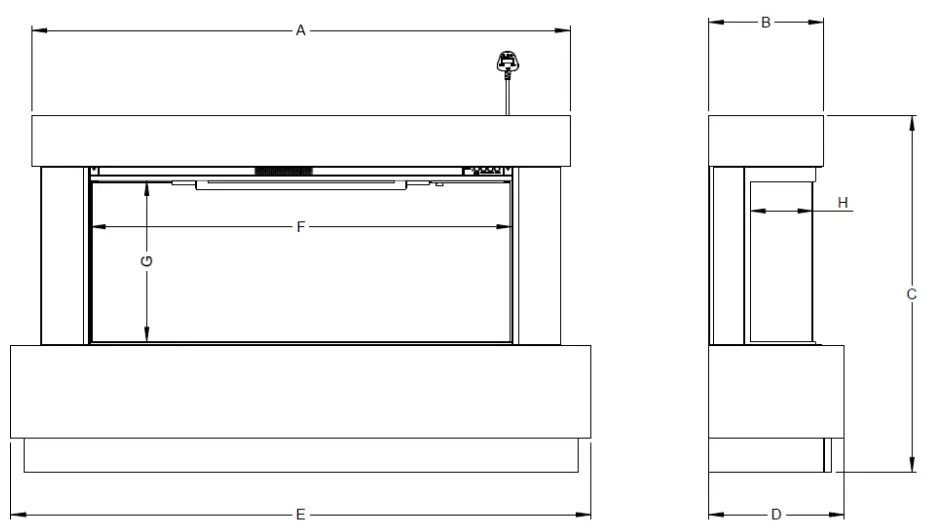
| Fire | Surround | Logs | Dimensions (mm) | ||||
| A | B | C | D | E | |||
| ARTEON PRYZM 5D 1000 3SL | 54” EVENTO TIMBER FLOOR STANDING | 6 | 1270 | 271 | 842 | 320 | 1370 |
| ARTEON PRYZM 5D 1250 3SL | 64” EVENTO TIMBER FLOOR STANDING | 8 | 1520 | 296 | 842 | 345 | 1620 |
| Fire | Visible Glass Area (mm) | ||
| F | G | H | |
| ARTEON PRYZM 5D 1000 3SL | 995 | 380 | 152 |
| ARTEON PRYZM 5D 1250 3SL | 1245 | 380 | 177 |
What is in the box (s)
Depending on the product size purchased:
Box- 050164 – (1000-3SL)
Quantity | Description | Quantity | Description |
| 1 | ARTEON PRYZM 1000-3SL- Electric Fire Engine | 1 | Rear Bracket ( Not Required For This Installation) |
| 6 | Logs (Small Box Inside Fire) | 1 | Fire Remote Control & 2 x AAA Batteries (Large Box Inside Fire) |
| 2 | Bags of Crystals (Large Box Inside Fire) | 4 | Short Side Brackets (Large Box Inside Fire) |
| 3 | Bags of Pebbles (Large Box Inside Fire) | 2 | Long Side Brackets (Large Box Inside Fire) |
| 2 | Bags of Bark (Large Box Inside Fire) | 1 | Power Cable, Plug & IEC (1.8M) (Large Box Inside Fire) |
| 2 | Bags of Grey Slate (Large Box Inside Fire) |
Box- 050172– (1250-3SL)
| Quantity | Description | Quantity | Description |
| 1 | ARTEON PRYZM 1250-3SL- Electric Fire Engine | 1 | Rear Bracket ( Not Required For This Installation) |
| 8 | Logs (Small Box Inside Fire) | 1 | Fire Remote Control & 2 x AAA Batteries (Large Box Inside Fire) |
| 3 | Bags of Crystals,(Large Box Inside Fire) | 4 | Short Side Brackets (Large Box Inside Fire) |
| 3 | Bags of Pebbles (Large Box Inside Fire) | 2 | Long Side Brackets (Large Box Inside Fire) |
| 3 | Bags of Bark (Large Box Inside Fire) | 1 | Power Cable, Plug & IEC (1.8M) (Large Box Inside Fire) |
| 3 | Bags of Grey Slate (Large Box Inside Fire) |
Box- 050237 (to suit the 1000 3SL) or Box 050253 (to suit the 12503SL
Quantity | Description |
| 1 | EVENTO- Assembled Top- with pre-installed Downlight Set & Sensor. |
| 1 | EVENTO- Assembled Base- with pre-installed LED Light Set. |
Also in Boxes 050237 & 050253, there is a smaller box ( Labelled A) containing the following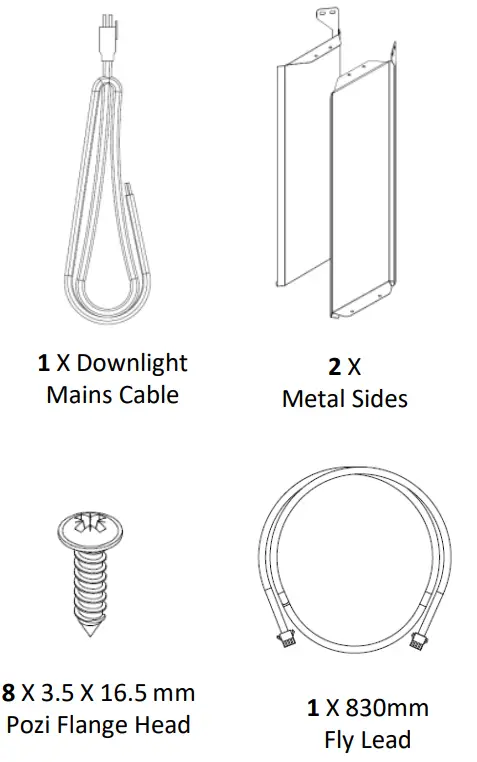
| Quantity | Description |
| 2 | Metal Sides LH/RH- 601407 |
| 8 | 3.5 x 16.5mm POZI FLANGE HEAD screws bagged. |
| 1 | Downlight Instructions. |
| 1 | 2M Downlight Mains Cable (Supplied to be used with a fused spur. i.e. A 3 Amp Switched Fused spur or 3 Amp 3 Pin Plug if using a double socket. |
| 1 | 830mm Fly Lead- Required to connect the LED Lights to the Fire. |
Please ensure all fixings are present before commencing installation. If anything is missing please call Customer Services on 01914300901 or email us at [email protected]
Installation – Timber
Note: The surround and fire are a two adult person lift. A second person will be required to lift and support the surround and fire during installation.
Before the surround can be installed, consideration will need to be given routing the power supply to the fire. This will affect the stages of the installation process. We advise a qualified electrician conduct any electrical parts of the installation.
Note: A double socket is required or a single socket and a 3 Amp switched fused spur for the operation of the Fire and the preinstalled Downlights.
Unpack your new suite- DO NOT dispose of the packaging until you have checked and made sure all the parts and fixings listed on Page 4 are present.
Tip: To help avoid damage of the assembled parts place them on the surplus packaging, whilst they are waiting to be installed.
Note: This installation guide is detailed for both 54” and 64” sized surrounds so please familiarise yourself with the model you have purchased before beginning installation.
Preparing the fire- See the separate Fire Instructions.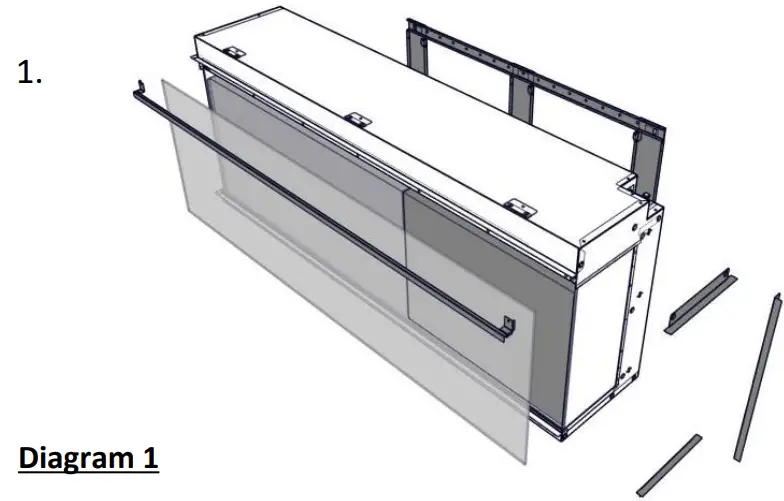 Locate the box containing the Fire- 050164 or 050172 depending on the version purchased and locate the Fire Instructions.
Please refer to the Pages 8-9, in the Fire Instructions and follow the steps to remove the Glass and Rear Bracket and the internal cardboard boxes.
Please refer to Page 10- Diagram 11 in the Fire Instructions to prepare the Fire for a 3 Sided installation.
Once the Fire has been prepared, lift the unpacked Assembled Base into position.
Remove any obstructions, i.e. mark and cut to shape or remove any skirting to allow the Assembled Base to butt up flush to the wall.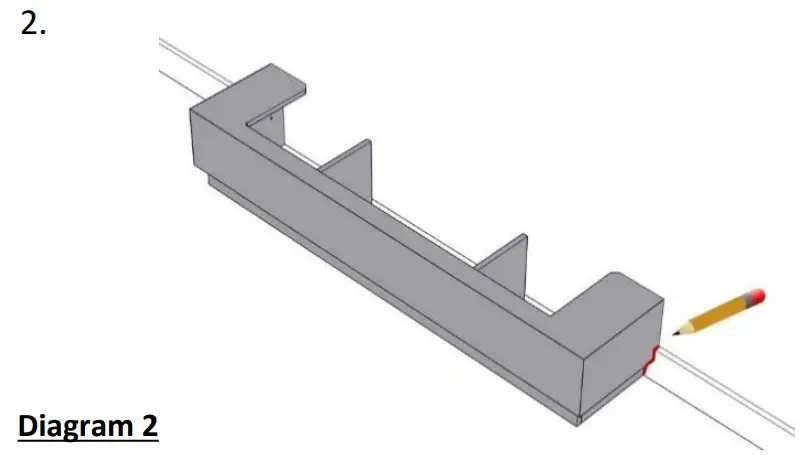 See Diagram 2.
Note: The Assembled Base is a two adult person lift.
Position the Assembled Base away from the wall, leaving enough space to the rear to allow the Fire and Metal Sides to be installed in the following steps.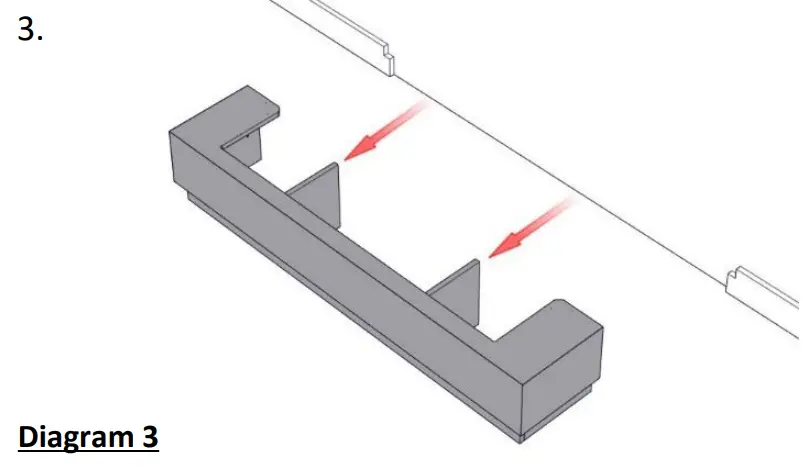 See Diagram 3.
Note: Ensure the glass and cardboard boxes inside the fire have been removed before proceeding further, this will reduce the handling weight.
Lift the Fire into the cut out in the Assembled Base, ensuring the Fire is sitting on the two central supports. See Diagram 4.
Note: The fire is a two adult person lift.
Ensure the Fire is positioned centrally in the cut out of the Assembled Base and that the Fire is pushed up tight against the front of the opening.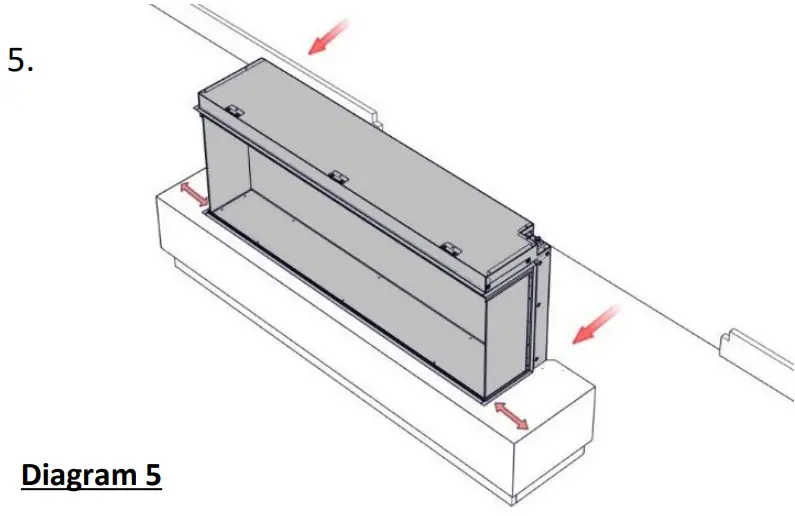 See Diagram 5.
Locate the 2 x Metal Sides , these are packaged in the small cardboard box, (Box A- found inside the surround box), along with the 8 x 3.5 X 16mm Pozi Flange Head Screws, required for fixing.
Note: Remove any protective film before installing.
Position the 2 x Metal Sides with the tab at the top.
Line up the holes in the Metal Sides with the pre-drilled holes on the Assembled Base .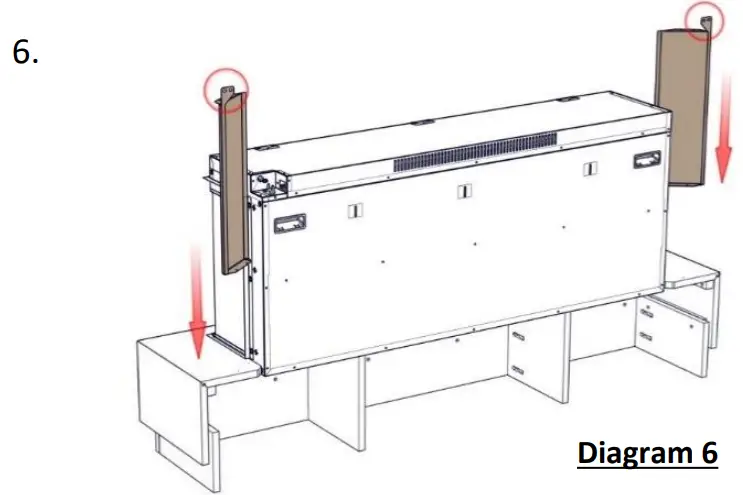 See Diagram 6.
Once aligned, fix the Metal Sides to the Assembled Base using 4 x 3.5 X 16mm Pozi Flange Head Screws provided.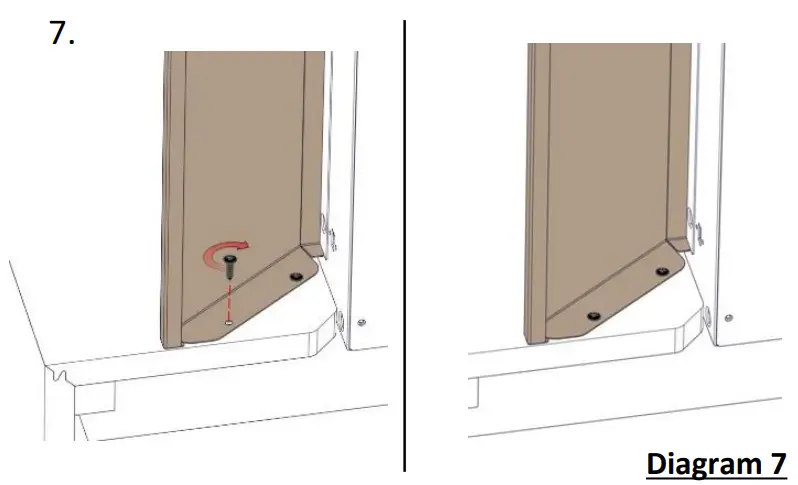 See Diagram 7.
Tip: If the holes do not align go back to step 4 and ensure the Fire has been positioned centrally in the opening of the Assembled Base.
(Please refer to Page 11 in the Fire Instructions, before proceeding further and ensure the Power Cable and LED Light Set are connected to the relevant connection ports.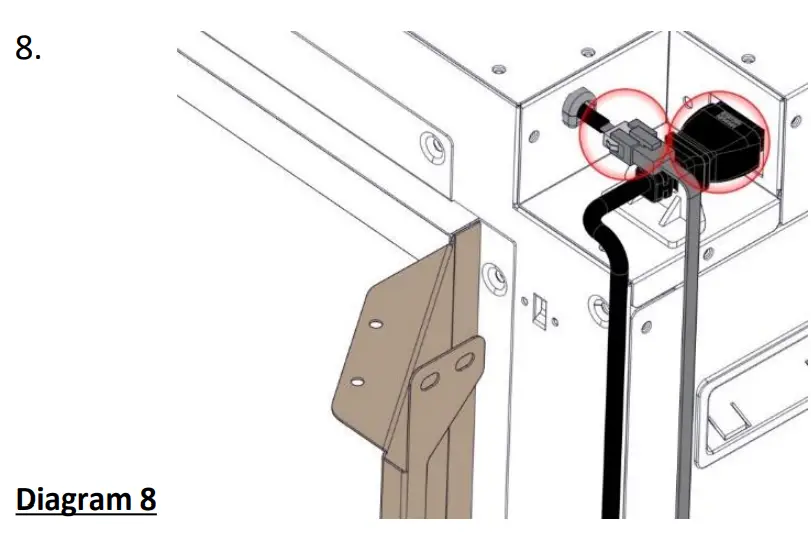 See Diagram 8.
Note: At this stage also wire in or plug in the mains cable for the Downlights. (The cable found in the smaller cardboard box that comes with the surround.)
Lift the partially assembled surround against the wall.
Ensuring the Metal Sides are plumb – mark the location of the fixing points on the wall behind.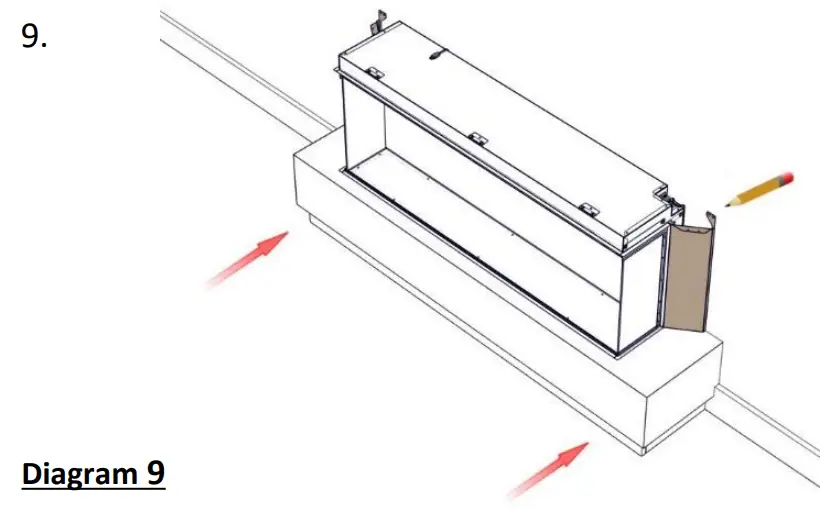 See Diagram 9.
Remove the partially assembled surround from the wall and drill and plug the fixing points.
Note: Plugs and fixings are not supplied- See Important Note on Page 9.
Note: This is a two adult person lift.
Finally return the partially assembled surround against the wall. Note: Great care must be taken to avoid crushing or damaging the cables on installation.
Note: Ensure the Downlight mains cable (white cable) is routed in a way that it can be connected to the preinstalled Downlights in the Assembled Top when it is positioned
in a later procedure. See Diagram 11.
Once routed correctly, proceed with fixing the surround to the wall.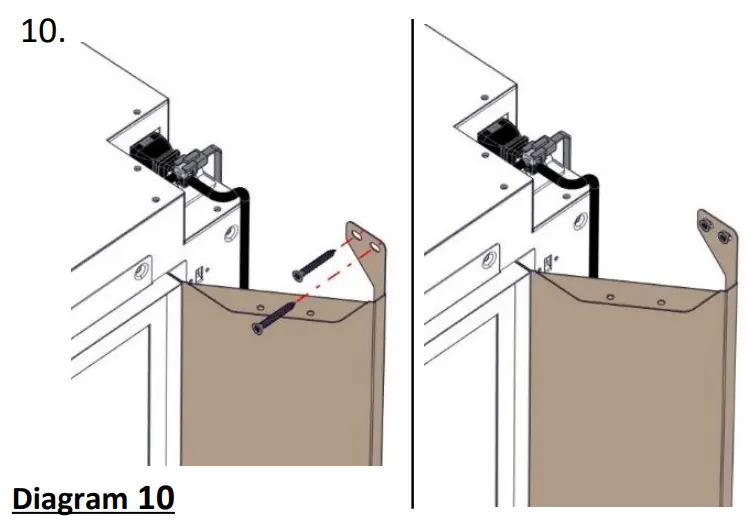 See Diagram 10.
Note: Once the partially assembled surround has been secured to the wall, connect the pre-installed Downlights to the mains cable, checking that the lights and sensor are working correctly.
If there are any problems please call Customer Services on 01914300901 or email us at [email protected]Lift the Assembled Top into position.
Note: The Assembled Top is a two adult person lift.
Note: Great care must be taken to avoid crushing or damaging the Downlight cables during installation.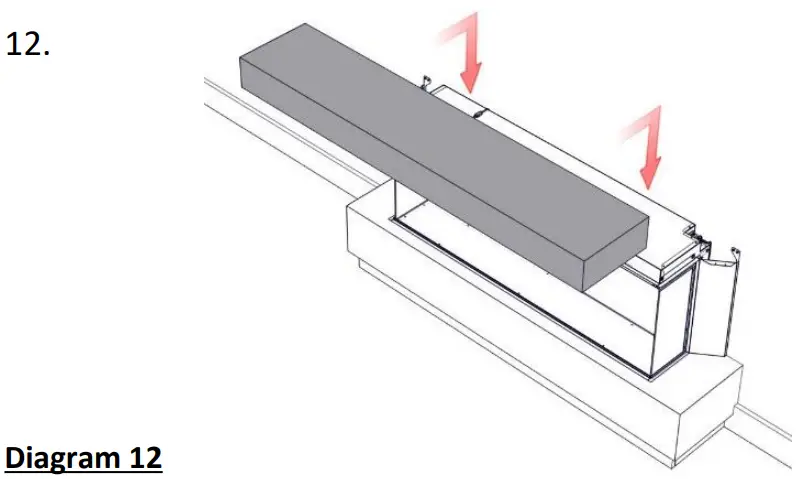 See Diagram 12.
Ensure the Assembled Top is centralized on the Metal Sides, before fixing in position.
There should be approx. 21mm overhang each side.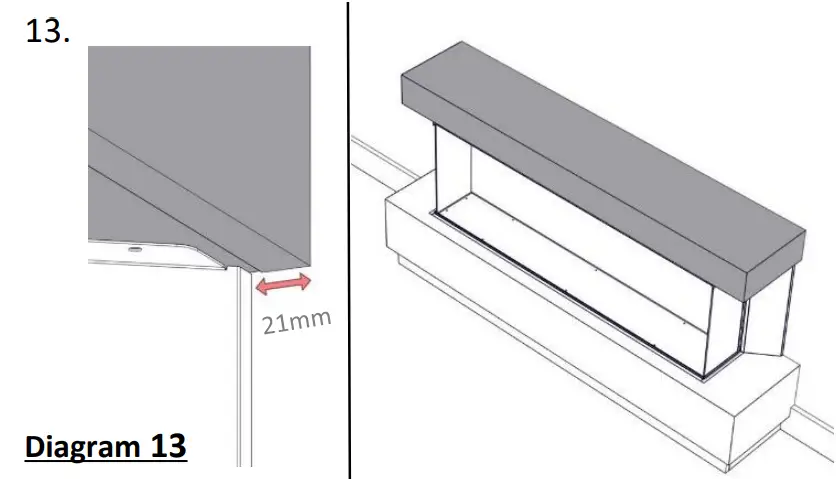 See Diagram 13
Line up the holes in the Metal Sides with the pre-drilled holes on the Assembled Top.
Once the holes are aligned, fix to the Assembled Top using 4 No. 3.5 X16mm Pozi Flange Head Screws provided.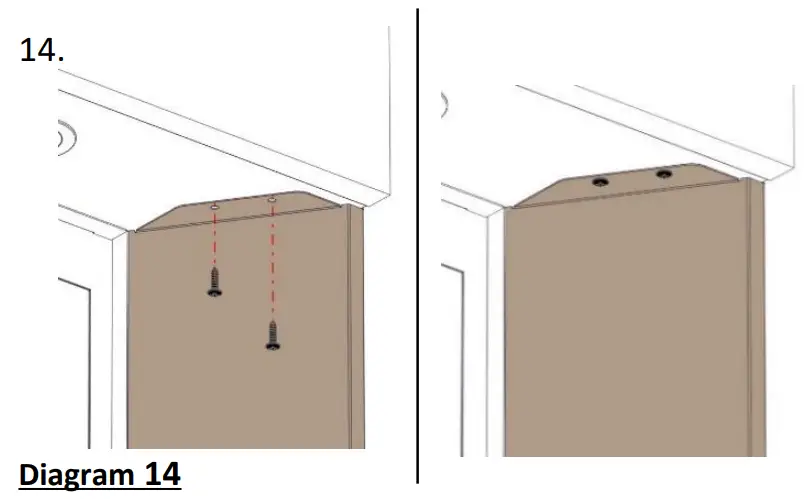 See Diagram 14.
Note: DO NOT seal around the edges of the top between the wall- access to the downlights and sensor may be required in the event of failure.
Once the installation is complete, please refer to Page 15 in the Fire Instructions (with the Fire), for advice on how to dress the Fuel Bed and position the Logs.
Once the Logs and Fuel Bed have been dressed remember to replace the Glass- securing with the previously removed Screws. Please refer to Page 16 in the Fire Instructions.
For the Fire User Instructions, please refer to Pages 1723, in the Fire Instructions.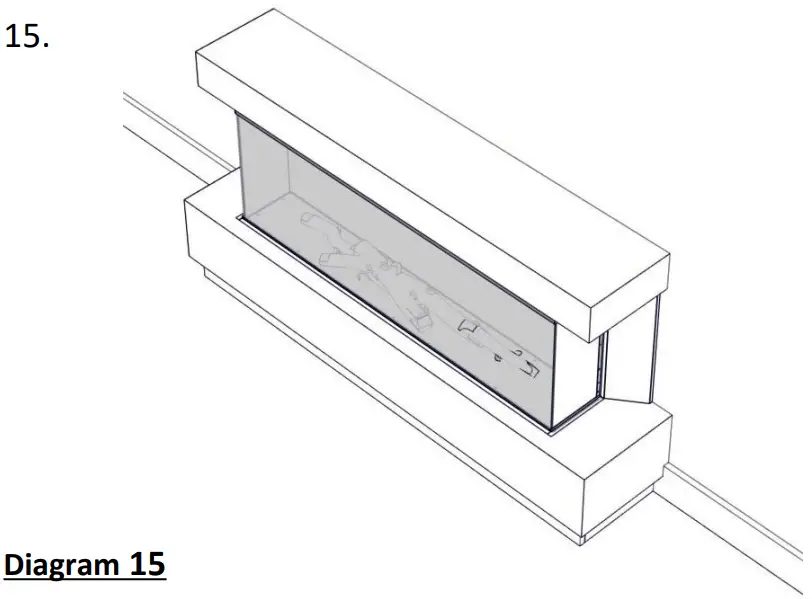
Maintenance
WARNING: Before any maintenance or whilst cleaning the exterior of the fireplace, the unit should be disconnected from the power supply until it has cooled down.
Cleaning the Furniture
To maintain the appearance of your new suite we recommend that it dusted using a lint free cloth. NEVER use any form of abrasive or DAMP cloth.
Cleaning the Fire and the Metal Sides
Cleaning or polishing products is not recommended. Fingerprints or other marks on the front glass panel and metal sides can be removed by using a piece of soft, damp, lint-free cloth with a good quality household glass cleaner. The front glass panel should always be completely dried with a clean, lint-free cloth or paper towel.
CAUTION: Abrasive cleaners should not be used on the glass panel. Liquids should not be sprayed directly onto any surface of the unit.
Troubleshooting
Should you have any queries regarding this product please contact Customer Services on 01914300901 or email us at [email protected]
Recycling
All cardboard packaging is recyclable.
IMPORTANT NOTE:
Wall fixings (i.e. screws/wall plugs etc.) are not supplied as these are crucially dependent upon the type of wall and surface the surround is going to be fixed too.
The installer is therefore responsible for ensuring that suitable fittings are used as well as individual fitting situations and environments. All mechanical fixings, for holding the surround in position, must be secured to a solid wall or structure.
![]()


![Pleasant Hearth Electric Fireplace User Manual [model: 24-900-002]](https://static-data1.manualsee.com/1/img/253/68707/2021/02/Pleasant-Hearth-electric-fireplace-User-Manual-Model-24-900-002.jpg "Pleasant Hearth Electric Fireplace User Manual [model: 24-900-002]")
![Pleasant Hearth Electric Fireplace Insert User Manual [model: 24-900-002]](https://static-data1.manualsee.com/1/img/92/71366/2021/02/Pleasant-Hearth-Electric-Fireplace-Insert-User-Manual-Model-24-900-002.jpg "Pleasant Hearth Electric Fireplace Insert User Manual [model: 24-900-002]")


