
 GooDee 1080P HD Video Projector
 GooDee 1080P HD Video Projector
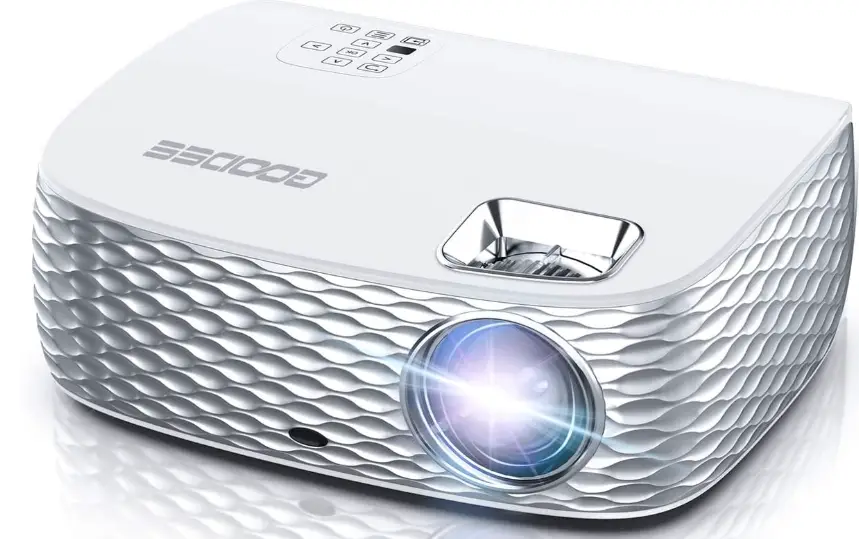
Preparation Before Use

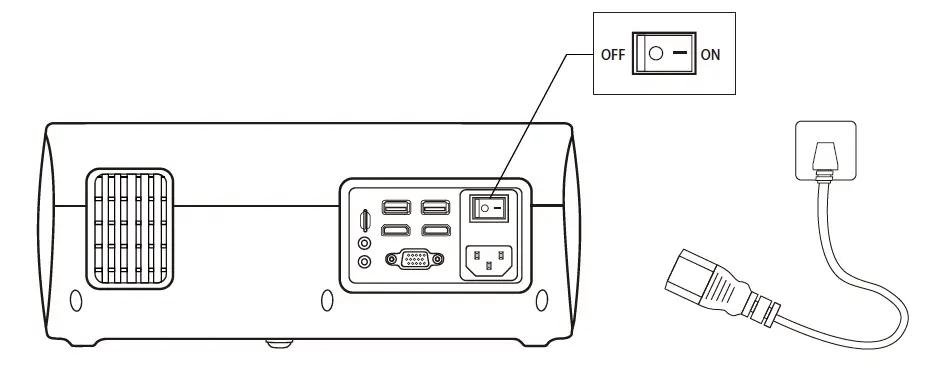
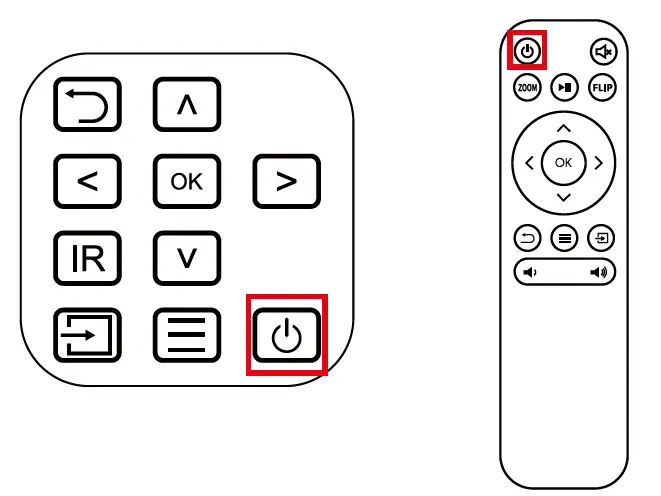
- Connect the power cable and press the power switch on the projector.

- Press the power button on either the remote control or projector control panel and wait approximately three seconds.

Basic Operations
Correcting Projection Image
If the projected image appears in the shape of a trapezoid, the trapezoidal correction knob on the projector can be toggled and rotated until the image returns to a normal rectangular shape.
Focusing Projection Image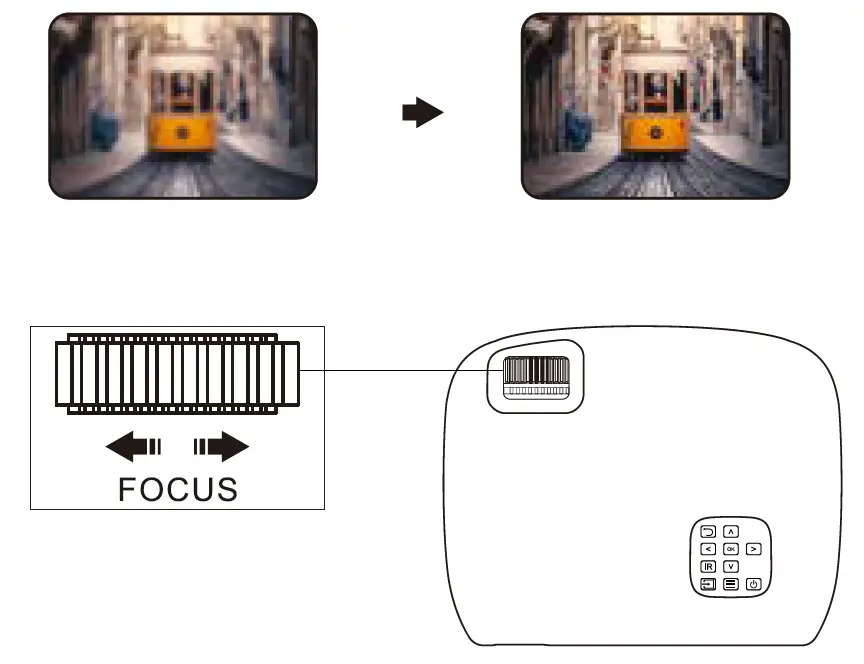
Note:
- The lens will not be able to focus if it becomes dirty or condensation forms on it. Please remove any dirt or condensation.
- The lens will not be able to focus if the projection distance is outside the normal range. Check the projection distance if you are having trouble getting the picture to focus.
Function Adjustment
Switching the projection mode
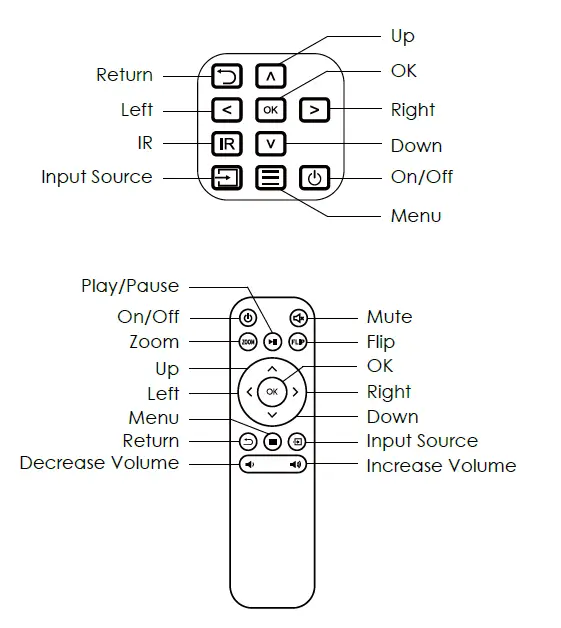
Press the [FLIP] button on the remote control or open [MENU] – [PICTURE] – [Flip] to select the [Front], [Rear], [Front/Celling], or [Rear/Celling] projection modes.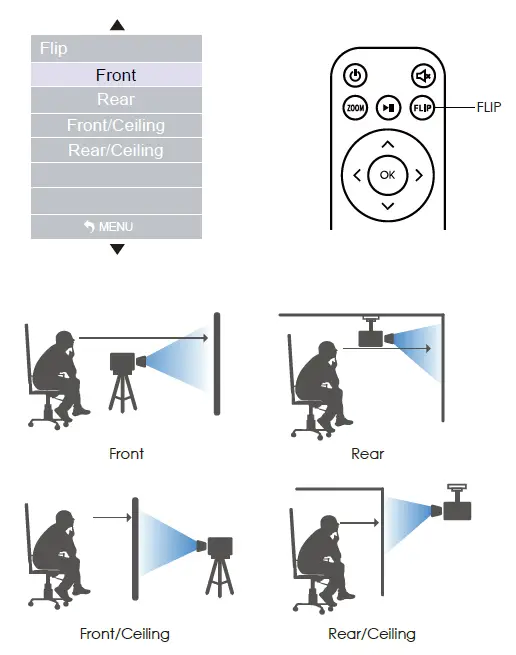
Image zoom function
Press the [ZOOM] button on the remote control or open [MENU] – [PICTURE] – [Reduce Display Size] to adjust the image size and zoom from 0-25%.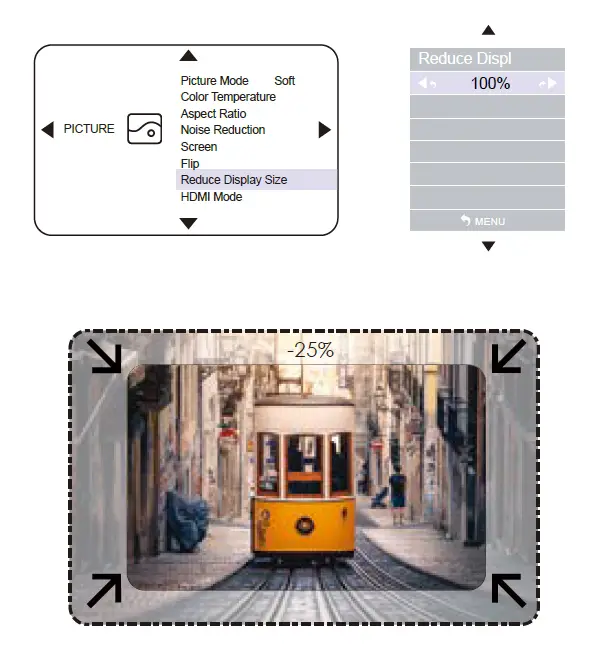
Adjusting brightness, color, and contrast
Open [MENU] – [PICTURE] – [Picture Mode] to adjust the brightness, color, contrast, etc. as needed.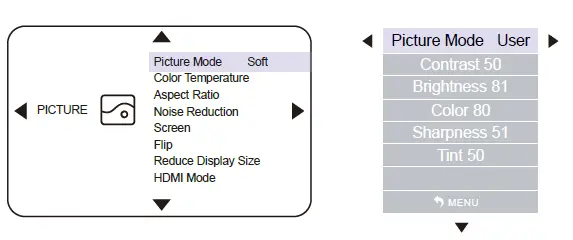
Restoring Factory Settings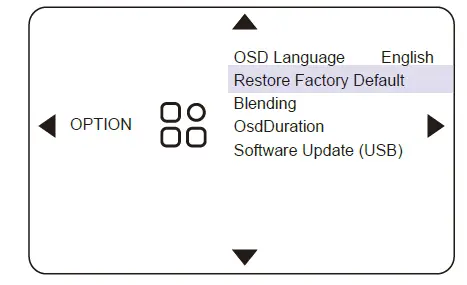
This function is used to restore all parameters to their original manufactured state:
Open [MENU] – [SETTINGS] – [Restore Factory Default] and press the [OK] button to enter the “Restore Factory Default” menu.
Connection Settings
Computer Connection Settings
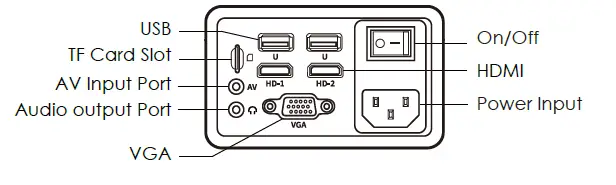
Connect the computer to the projector with the HDMI cable, click the [SOURCE] button, and select the corresponding [HDMI1] / [HDMI2] input. After confirming a normal connection between the computer and projector, perform the following operations:
(Notice: A Mini DisplayPort to HDMI adapter is needed to connect an Apple computer to the projector.)
- Connect to your computer and set the display resolution and frequency to 1920×1080 and 60 Hz, respectively.
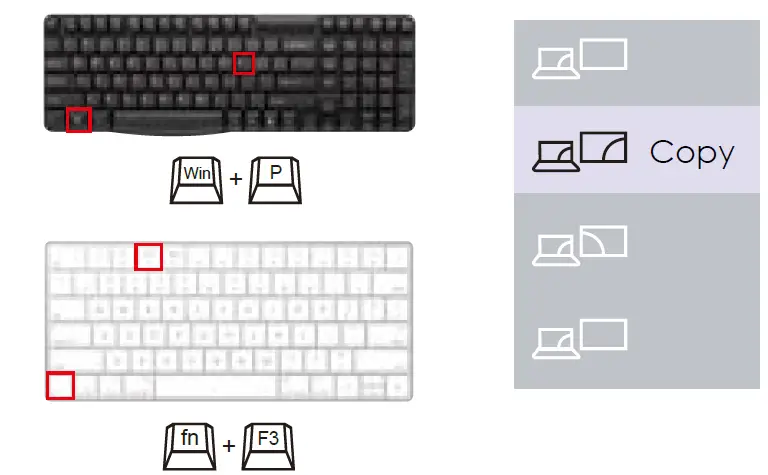
- The computer’s image output mode should be checked when the projector’s input channel is set to HDMI/VGA. Press [F1 – F12] while holding down the FN key to choose the duplicate image mode.
Common key commands are as follows:
(FN+F5) for Toshiba, Sharp, and Acer; (FN+ F7) for IBM, Hitachi, and BenQ; (FN+ F4) for HP and NEC; (FN+ F3) for Lenovo, Founder, Samsung, and Panasonic; (FN+ F8) for Apple and Dell; (FN+ F9) for Asus.
DVD Connection Settings
If using a three-in-one AV cable, the corresponding L/R audio and video channels must be properly inserted to connect DVD/VCD players, cameras, and other HD devices to the projector. The [AV] input should be selected using the [SOURCE] button.
USB/SD Connection Settings
Please insert the USB flash drive or SD card into the correct position on the function interface, click the [SOURCE] button, and select the corresponding [USB] / [SD] input. Press the play button to begin playing the selected file.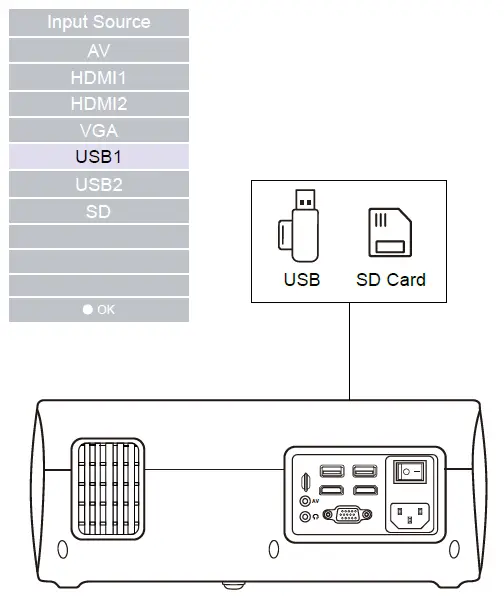
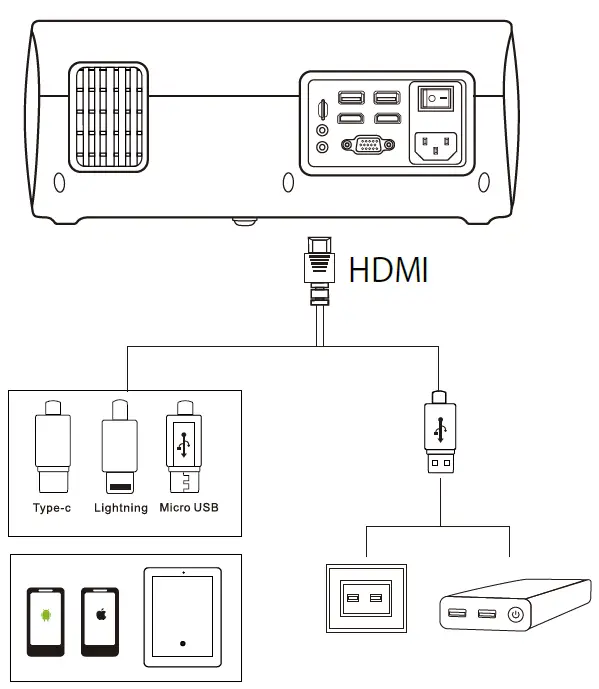
Phone Connection Settings
Phones cannot be connected directly to the projector with a USB cable. An HDMI screen mirror device must be used instead.
- Connecting an iPhone/iPad:A Lightning to HDMI adapter is needed. Once connected, the iPhone/iPad will display a prompt asking whether the device is to be trusted. Once the trust button has been tapped, the screen mirror image can be opened and projection can begin.
- Connecting an Android phone: A Micro USB/Type C to HDMI adapter is needed. Once connected, a QR code for downloading EZCast software will be displayed on the screen. Projection from the phone can begin once the software has been installed.

FAQS
11.5″ Wide, 9.5″ Deep, 4.5″ High
If you are being told it is 7000 lumens, this is misleading. +3000 lumens is a mid to higher-end projector. Don’t be fooled.
For Android Device: Please prepare a Micro USB/Type C to HDMI adapter.(Not included in the package)
For Mac Book Air: Please prepare an extra Mini Display Port to HDMI adapter (not included in package).
For Mac Book Pro: Please prepare an additional USB – C cable (not included in package).
Yes, this 1080p projector could be mounted on a normal tripod.
GooDee video projector has interfaces: HDMI x 2, USB x 2, AV, TF, VGA and headphone, you could connect to external speakers.
Yes works well with sports games
This movie projector support 100V-240V.
You will get 55” or 70”, just for reference.
BL98 outdoor projector develops multiple installation methods, standing the projector also mount it with M4 screw for your choice.
This firmware is upgrade and there no need to upgrade it.
It support 100V-240V.
If your projector is really close to the screen. At 10ft, the color will be washed out. Best to use in a dark room.
Connect the projector to fire stick and then slick USB signal source.
This 1080P projector have the good view both dark and day time.
We recommend to use in dark environment for the best performance.


