
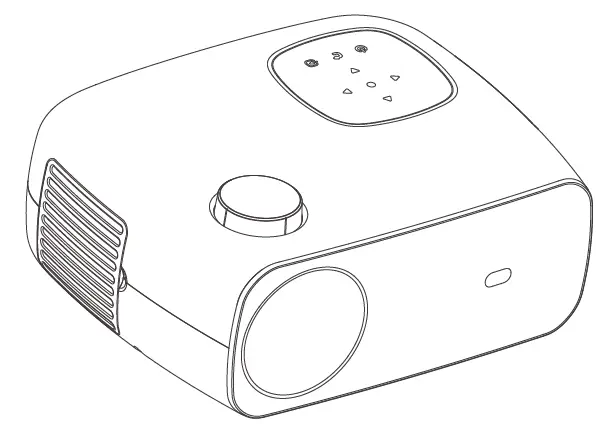
FunFlix RD-882 Mini Projector HD Portable Projector
IMPORTANT INSTRUCTION
- Please read the manual carefully before operating projector. To ensure stable power supply, please use standard power cord.
- Please use the power supply and cable indicated on the rating label. The projector should be kept away from cloths, sofas and anything that may block the ventilation scoop. Please keep the unit away from flammable and explosive materials.
- Please do not disassemble the unit by yourself as this will invalidate the warranty service. To protect your eyes, do not stare directly at the lens when the projector is on. The projector must be kept away from water and any other liquids.
- To prevent electric shock, please keep the projector out of the rain and away from moisture. It is recommended to switch off the projector after it has run for 6 hours non-stop. Please use the original foam and other cushioning materials when transporting the projector.
- If the projector does not work, please contact the authorized service agent.
Package List
- 1 x Mini projector
- 1 x Power Cable
- 1 x AV Cable
- 1 x HDMI Cable
- 1 x Remote Control
- 1 x User Manual
OVERVIEW
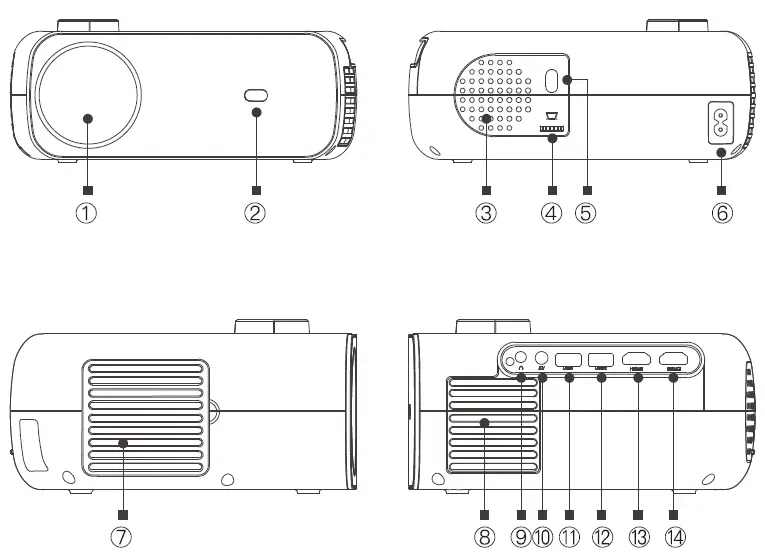
- Lens
- IR for Remote Control
- Speaker
- Keystone Correction
- IR for Remote Control
- Power Outlet
- Dust-Proof Net
- Air Outlet
- Headphone Jack
- AV Port
- USB1 Port(Wired Mirroring Interface)
- USB2 Port
- HDMI1 Port
- HDMI2 Port

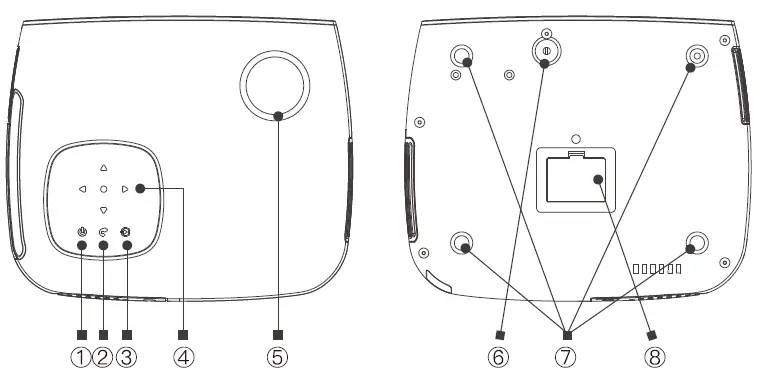
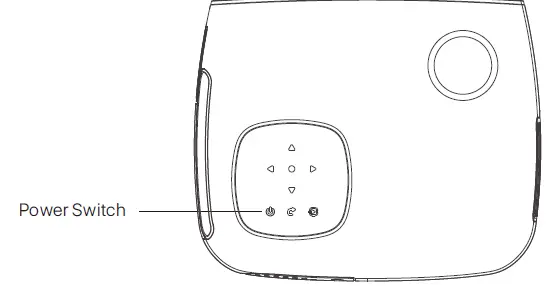
- Power Switch
- Back Button
- Source Switch
- Direction Button/ OK Button
- Focus Adjustment
- Height Adjustment Screw
- 4 Screw Holes for Ceiling Mount (Remove 4 non-slip pads before Ceiling Mount)
- Bottom Label
- (First tear off the label, then remove the dust cover, you can clean the dust
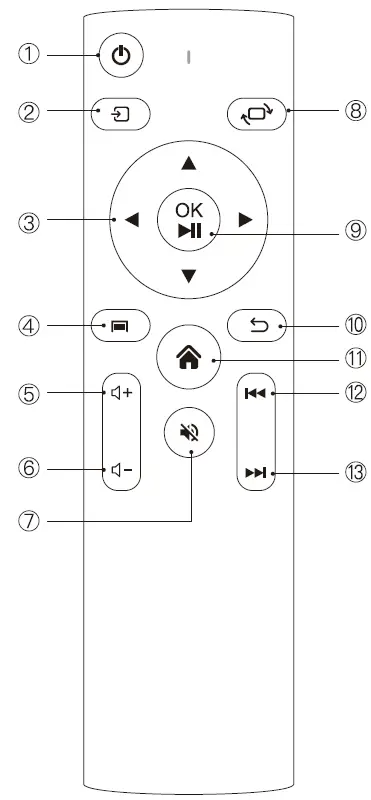
REMOTE CONTROL
- Power Switch
- Source Switch
- Direction Button
- Menu Button
- Volume +
- Volume –
- Mute
- Screen Flip
- Confirm Button/(Pause/Play Button)
- Back Button
- Home Button
- Previous
- Next

SWITCHING MACHINE OPERATION
Power On:
- Step1: Press the power button on the body or the power button on the remote control, the indicator light will turn blue and steady.
- Step2: After 2 seconds, the projector starts to start, the image appears on the screen, and the unit enters the normal working state.
- Step3: If the projector is newly installed, the image may be blurred or trapezoidal distortion when it is turned on for the first time. Please refer to the “Focus/Keystone Correction” section for calibration.
- Step4: After the image is adjusted clearly, it can be viewed normally.
Power Off:
- Step1: In the working state, press the power button of the body or the power button on the remote control to switch the projector to the standby state.
- Step2: After the projector enters into the standby state, the machine is in the process of automatic heat dissipation, and the indicator light will change from blue to red.

FOCUS KEYSTONE CORRECTION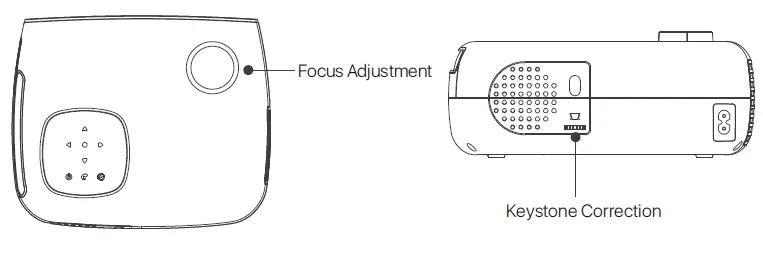
Image Focusing
Place the projector lens perpendicularly to the projection screen or curtain wall, and adjust the focus dial until the image is clear, that means the image focusing is finished. During the focusing process, you can play the programs or pick up the product menu images to match the focusing adjustment.
Keystone Correction
Please turn the trapezoidal adjustment dial until the image is displayed normally.
Note: The projector has only mechanical trapezoidal correction in the vertical direction and there is no horizontal correction. Make sure the projector is level with the projected image.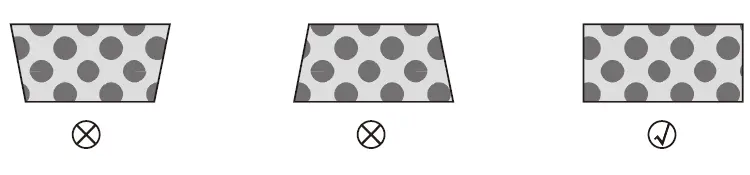
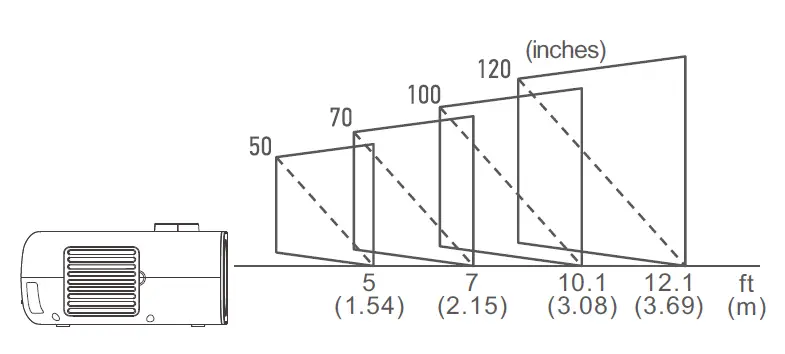
STANDARD SETTING
Refer to the data in the table below to place the projector away from the projection screen according to the preset graphic size. When installing, place the projector on a solid, stable countertop. The airframe should be well ventilated. Do not cover or block the vents. There should be no obstructions within of the vents.
| Picture Size | Projection Distance |
| 50 inches | 5 ft(1.54m) |
| 70 inches | 7 f(2.15m) |
| 100 inches | 10.1 ft(3.08m) |
| 120 inches | 12.1 ft(3.69m) |
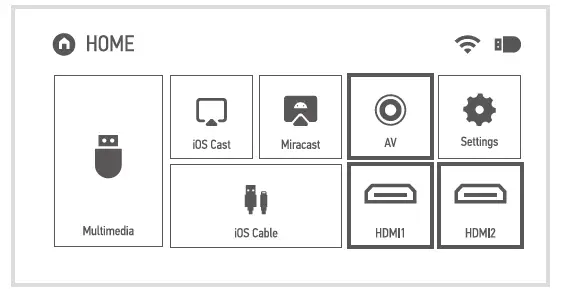
USE OF THE PROJECTOR
- Source Settings

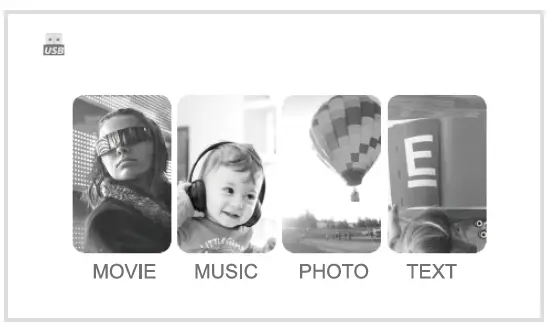
- Multimedia

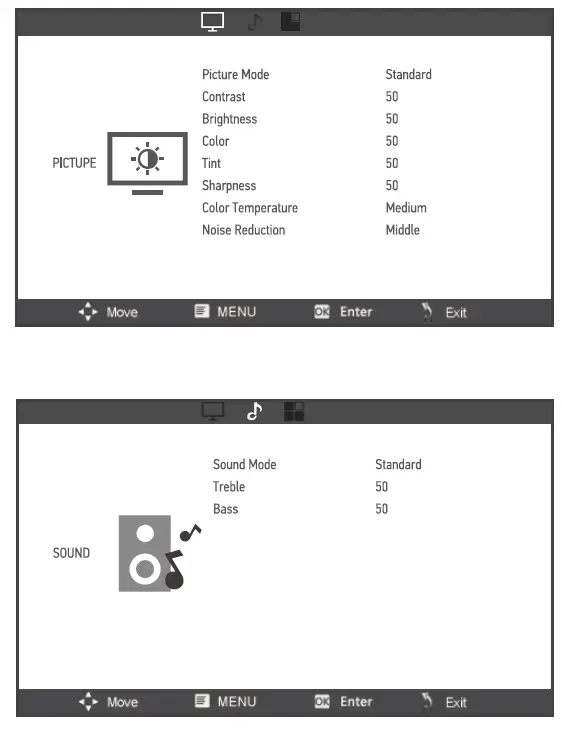
- Menu Settings

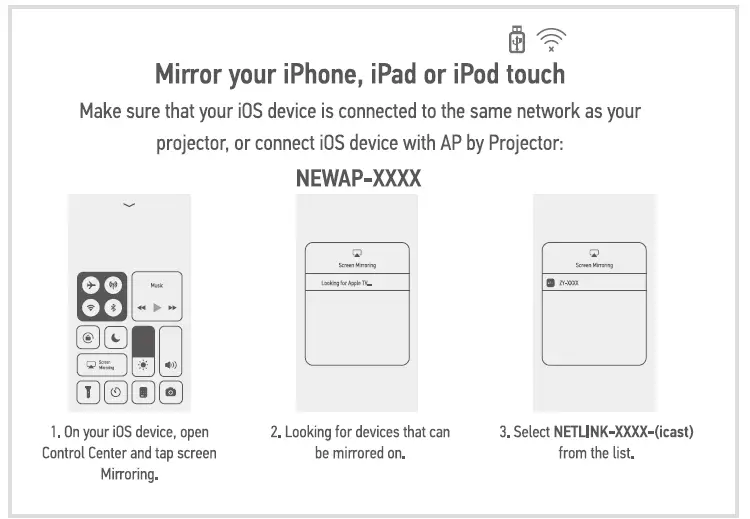
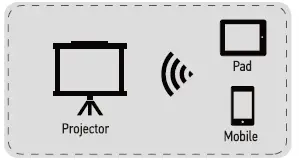
- iOS Cast
- Step1: Select iOS Cast on the main interface.
- Step 2: The iOS device and the projector must be connected to the same network, or the iOS device must be connected to the wireless access point(AP) from the projector.
- Step3: Select Screen Mirroring on the control center of the iOS device.
- Step4: Select the corresponding projector device name.
- Note: The last 4 digits of the device name are randomly generated.

- Miracast
- Stap1: Select Miracast on the main interface.
- Stap2: Turn on the Wireless Display function of the Android device.
- Note: Different Android devices have different names and opening methods for the Wireless Display function. For details, please refer to the manual of the Android device you are using.
- Step3: Select the corresponding projector device name.
- Note: The last 4 digits of the device name are randomly generated.

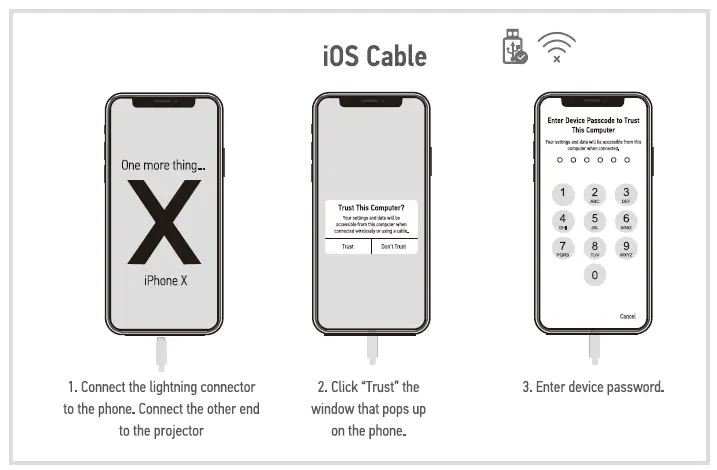
- iOS Cable
- Step1: Select iOS Cable in the main interface.
- Step2: Use the data cable to connect the iOS device and the projector (through the USB port of the projector).
- Step3: Click Trust in the pop-up window of the iOS device.
- Step4: Enter the iOS device password.
- Note: If still cannot connect with projector afar clicking Trust, can try to use the original data cable to reconnect.

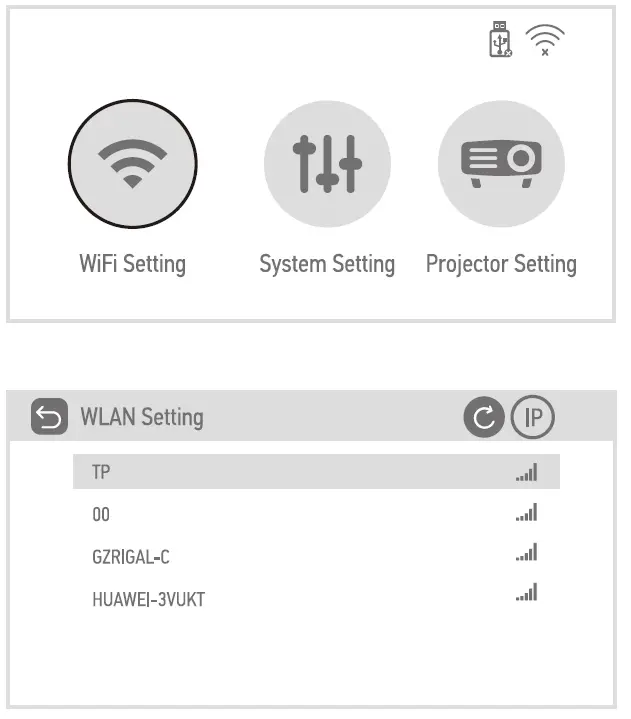
- WiFi Setting
- Step1: Select Setting in the main interface and press OK
- Step2: Select WiFi Setting. to enter setting interface.
- Step3: Turn on the WiFi, find the WiFi you need to connect to, enter the password through the virtual keyboard, and confirm the connection.

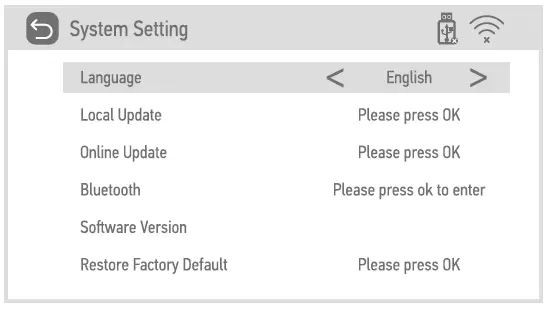
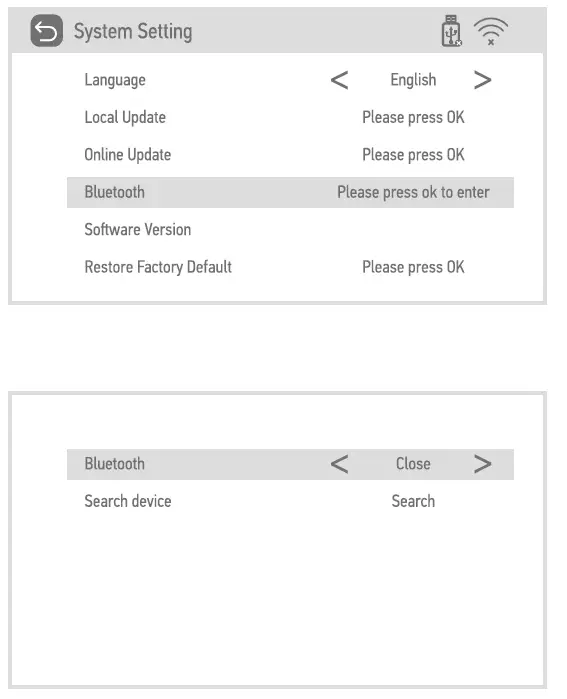
- System Setting
- Select the system setting, you can check the language and software version;
- Version upgrade: local update and online update;
- Local update: Insert the U Disk and follow the prompts to find the flle upgrade version.
- Online update: Connect to WiFi, upgrade the version according to the prompts (recommended to update from time to time)
- Restore factory default: Choose carefully.
- Bluetooth: Select the Bluetooth connection that needs to be paired.

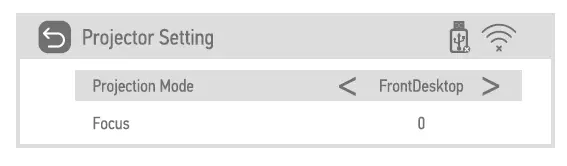
- Projector Setting
- Select the projection setting and select the corresponding settings according to the installation method of the projector

- Select the projection setting and select the corresponding settings according to the installation method of the projector
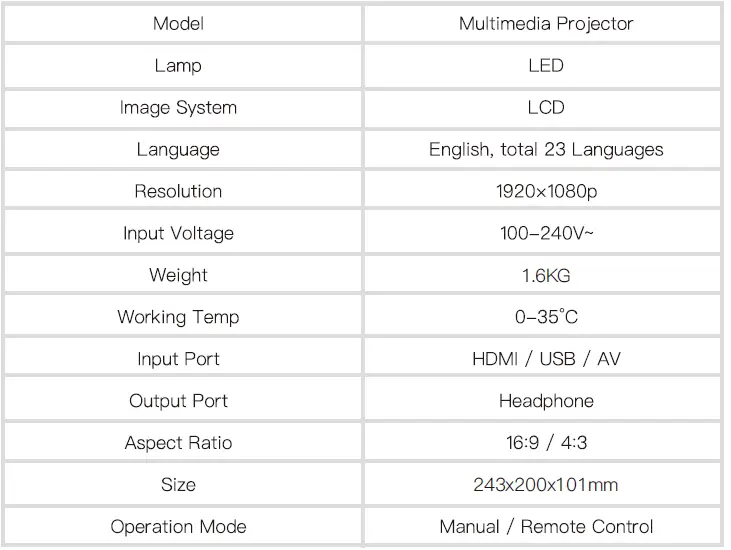
- Bluetooth Settings
- Select the system setting, select Bluetooth, turn on Bluetooth, search for Bluetooth, and select the Bluetooth connection that needs to be paired.

- Select the system setting, select Bluetooth, turn on Bluetooth, search for Bluetooth, and select the Bluetooth connection that needs to be paired.
SPECIFICATION
MULTIMEDIA SUPPORTED FORMATS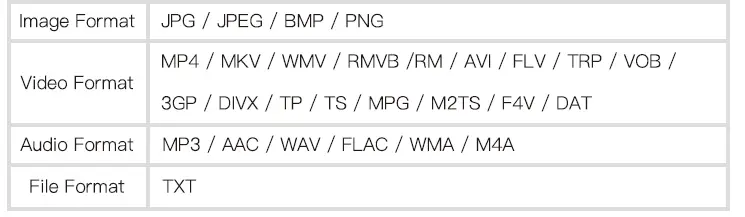
FAQS
Will a PS3 work on it?
Our projector supports high-definition input, because PS3 games are 1080p high-definition pictures, so they support ps3 connection, and the connection method is to connect through HDMI cable
How to set the language on this projector?
Setting the language is easy, you can do it with the remote control. In the “HOME” interface, select “Setting”, enter “System setting”, you can select the corresponding language.
Ansi lumens rating? is it 270?
Yes, Ansi lumens is 270.
Does it have a remote control?
Yes, it comes with a remote control, but you can use it without a remote control. If you do not have a remote control, the projector itself has some buttons to use.
Can I use it during the day or the night on lights ? Or how dark does it need to be to achieve what brightness?
Of course, this projector works well in bright places, but if it is in a dark room, its images will be clearer and more vivid.
Can this connect to Alexa dot for sound
Yes, Ansi lumens is 270.
How do you lower the volume? no button.
The remote has volume controls and menus and more. You can use the “+” “-” keys. to control your volume
How to wireless screen mirror my ios and android phone to this projector?
Select iOS Cast on the main interface the iOS device and the projector must be connected to the same network or the iOS device must be connected to the wireless access point AP) from the projector select Screen Mirroring on the control center of the iOS device
Does it come with any type of warranty?
We offer a 2-year warranty so you can buy your Funflix projector with peace of mind.
Do mini projectors actually work?
Good projectors will sometimes offer a better picture than a TV would. Plus, it has the benefit of going away when you’re not watching it. You can roll up a screen, or even just cast your projection onto a white wall and not have to worry about a screen.
What is the difference between a projector and a mini projector?
The primary difference between projectors and mini projectors is that full-size projectors aim to provide the highest quality image at the largest possible size, in comparison to mini-projectors which are geared more toward convenience and portability.
Does Netflix work on mini projector?
If you don’t want to connect a streaming stick or HDMI kit, you can still get Netflix on your projector through a number of means, including through your laptop, your Android device, and your Apple TV
Can mini projector replace TV?
If you don’t watch daytime programs like morning shows and soap operas and instead usually watch streaming videos and movies, then the projector can substitute as your TV in the most cost-effective way possible. Just remember to invest in light-blocking blackout curtains.
Is a projector better than a smart TV?
With TVs getting bigger every year, this gap is closing, but a projector gives you large screen sizes for less money. So, if you’re watching 4K content, you’ll probably want to go with a projector. Winner: Projectors make it easier to enjoy 4K resolution on a big screen.
How long do mini projectors last?
It’s correct to say that projectors last around 1500 to 2000 hours (also known as the lamp life.


