![]()
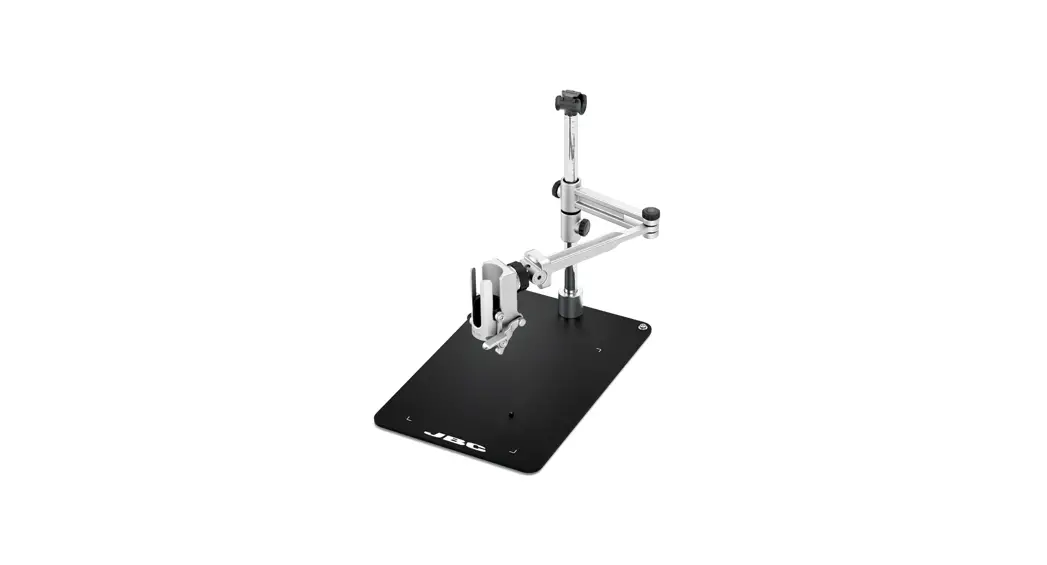
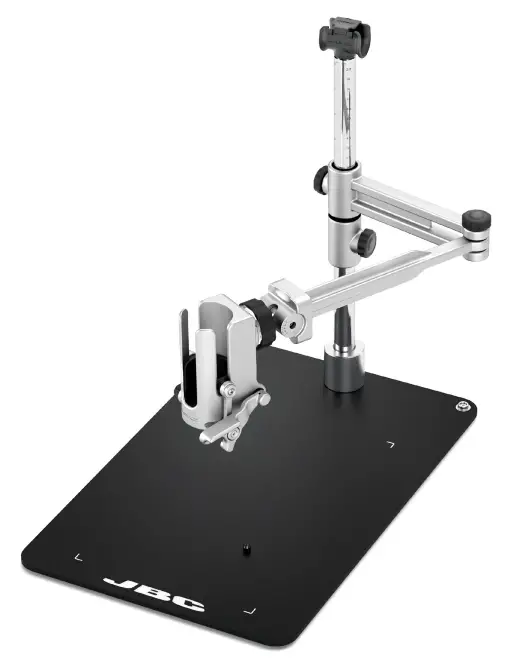
Adjustable Arm for PHS
Instruction Manual
This manual corresponds to the following reference:
RWS-D
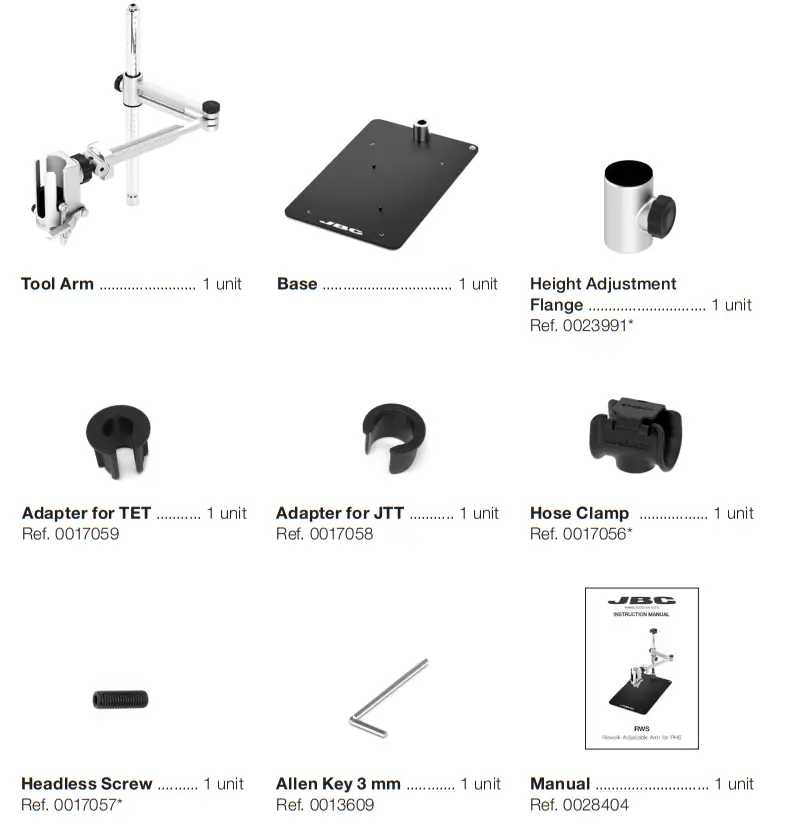
Packing List
The following items are included:
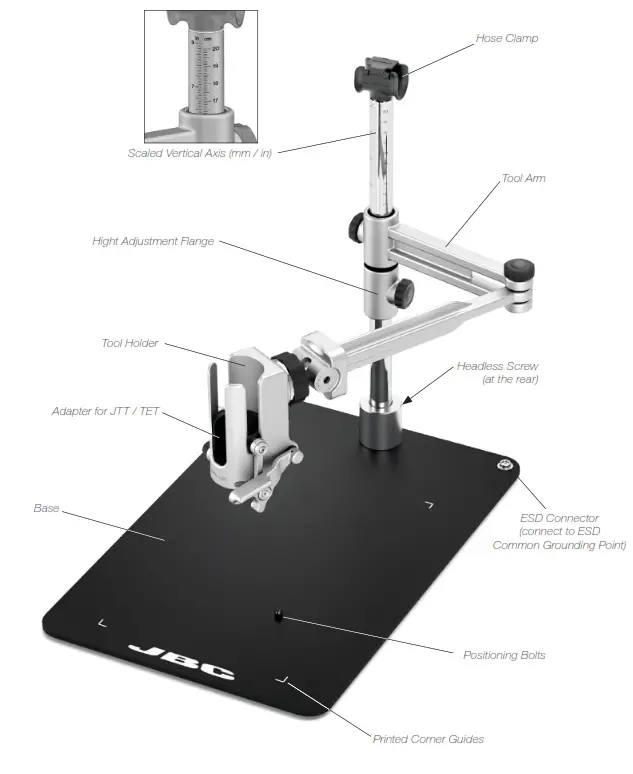
Features
Tool Arm Assembly
Setting up the Tool Arm
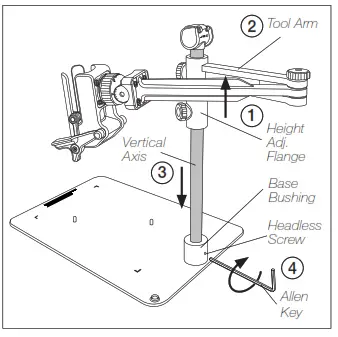
Fit the tool arm (1) and the height adjustment flange (2) onto the vertical axis. Then the vertical axis into the base bushing (3). Tighten the headless screw by using the Allen key (4).
Heater Hose Assembly
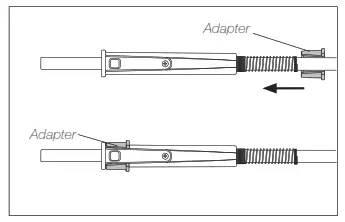
Inserting the Adapter (JT/TE) Slide the adapter along the hose to the end of the handle.
Fit Heater into Tool Holder

Insert the tool as far as possible into the tool holder with its adapter previously assembled.
Lower the Tool
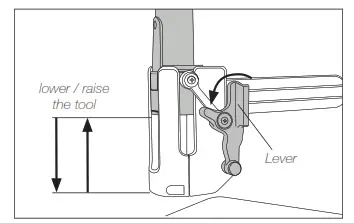
Turn the lever to lower the tool. After having finished the working process raise the tool to free up the workspace.
Fit Heater Hose to Hose Clamp
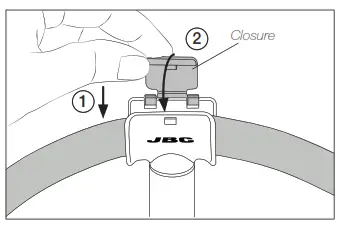
Fit the heater hose into the hose clamp (1) and move the closure down (2). 100 mm
Tool Arm Height Adjustment
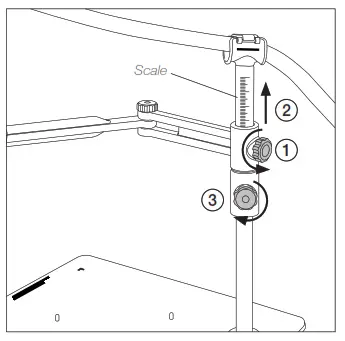
Make sure the tool arm knob is loosened (1)before adjusting the tool holder height.
Slide the tool arm to the appropriate height (2) and secure its position by tightening the height adjustment flange knob (3).
The scale on the vertical axis allows adjusting the desired height easily.
Work Position Adjustment
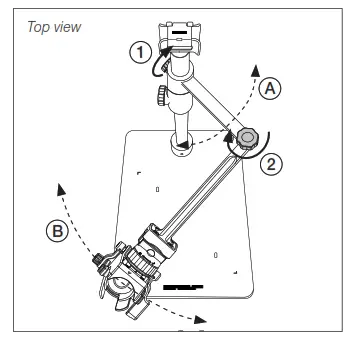
According to the work needs the tool arm allows adjustments for different positions. The articulated arm covers the entire working area. Position the arm as needed and open or
tighten the knobs (1) and (2) to allow or block the movement (A) and (B).
Tool Holder Adjustment
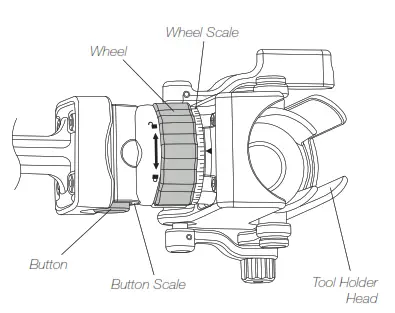
The tool holder’s head position enables an individual tool position adjustment.
By pressing the button and/or loosening the wheel the tool holder’s head position can be adjusted.
Both axes have a scale to carry out the task with higher precision.
Tilting movement
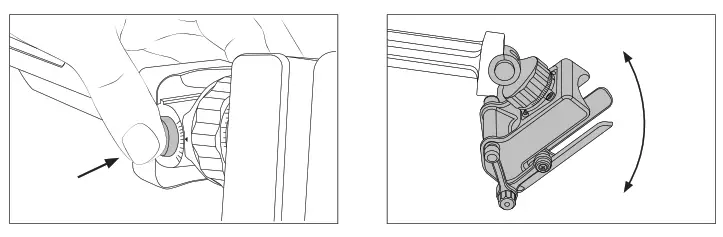 | |
| By pressing the button you can rotate the Tool Holder up or down. | The movement allows a rotation between -40º and +40º. |
Rotating movement
 | |
| You can lock or unlock the lateral rotation the mechanism by turning the fixing wheel a quarter. | The movement allows a rotation between -90º and +90º. |
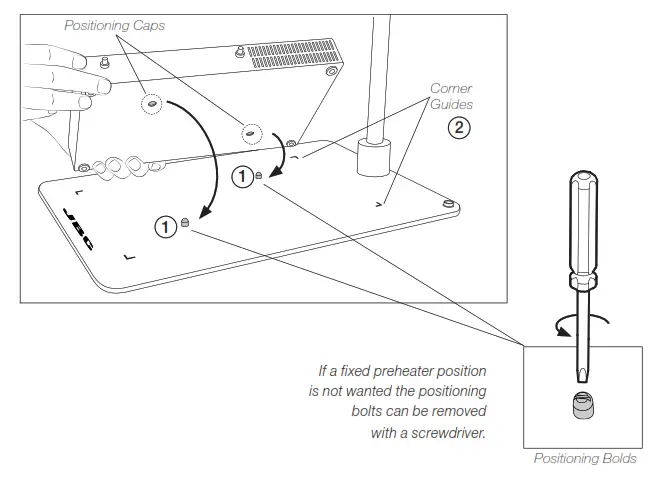
Preheater Positioning
The position of PHS can be fixed on RWS by means of positioning bolts.
Fit the positioning caps onto the positioning bolts (1). The four corner guides (2) helps to place the heater units in its position.
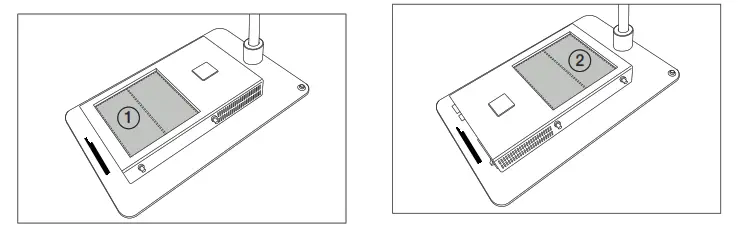
The preheater can be placed in two different positions. Heating area at the front (1) or at the rear (2).
Compatible JBC Articles
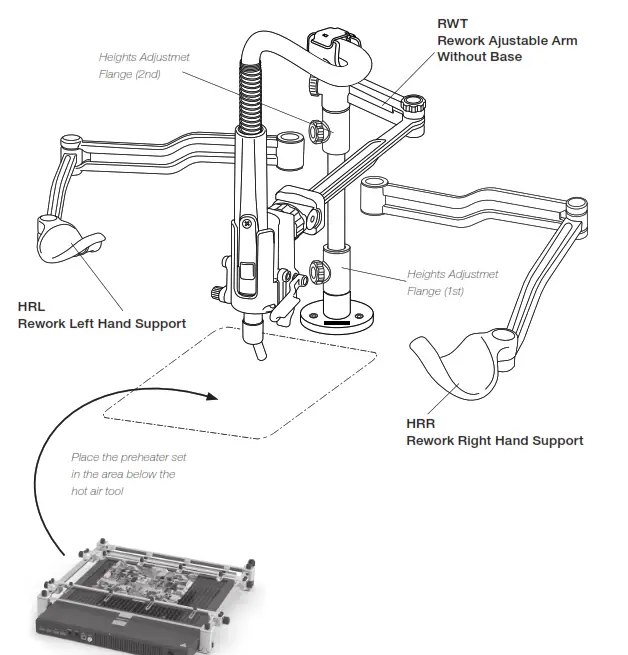
HRR and HRL can be combined with RWT, RWS or RWB.
Assemble first the height adjustment flange (1), then the HRR (2) and afterwards the HRL (3). Assemble the second height adjustment flange (4) and finally the RWT (5).
4 different sizes for PCB Supports are available:
– PHNK Nano Preheater Set
– PHSK Small Preheater Set
– PHBK Large Preheater Set
– PHXK XL Preheater Set
Accessories
PHSK Small Preheater Set
JBC offers PHSK Small Preheater Set for rework on small/medium PCBAs. It features heating of 130 x 135 mm / 5.12 x 5.31 in and four thermocouple connections. Includes Preheater with its console and PCB support.
PSS Small PCB Support

Also available JBCs Small PCB Support PSS – it comes without preheater.
PSS Small PCB Support adapts to different PCB geometries by means of its adjustable components and its 3 adjustable height positions 28, 50 or 70 mm / 1.1, 2 or 2.8 in.
Maintenance
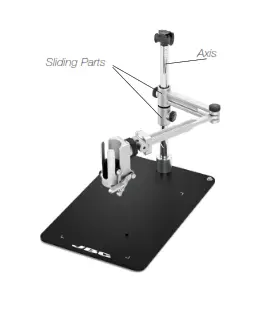
– Check periodically that the RWS is clean, especially the sliding parts and the axis.
– Use a damp cloth when cleaning. Alcohol can only be used to clean the metal parts.
– Replace any defective or damaged parts. Use original JBC spare parts only.
– Repairs should only be performed by a JBC-authorized technical service.
Safety
 It is imperative to follow safety guidelines to prevent electric shock, injury, fire, or explosions.
– Do not use the equipment for any purpose other than PCB rework. Incorrect use may cause a fire.
– The temperature of accessible surfaces may remain high after the unit is turned off. Handle with care.
– Be careful with the fumes produced when soldering.
– Keep your workplace clean and tidy. Wear appropriate protection glasses and gloves when working to avoid personal harm.
– Utmost care must be taken with liquid tin waste which can cause burns.
– This appliance can be used by children over the age of eight as well as persons with reduced physical, sensory or mental capabilities or lacking experience provided that they have been given adequate supervision or instruction concerning the use of the appliance and understand the hazards involved. Children must not play with the appliance.
– Maintenance must not be carried out by children unless supervised.
Specifications
RWS
Rework Adjustable Arm for PHS
Ref. RWS-D
| – Base Dimensions (L x W): | 270 x 410 mm / 10.63 x 16.14 in |
| – Height: | 386.5 mm / 15.22 in |
| – Arm Lenght: | 444.5 mm / 17.50 in |
| – ESD Safe Connector | |
| – Total Net Weight: | 5.10 kg / 11.24 lb |
| – Package Dimension/Weight: | : 474 x 368 x 195 mm / 5.70 kg |
| (L x W x H) | 18.66 x 14.49 x 7.68 in / 12.57 lb |
Complies with CE standards ESD Safe
![]()
Warranty
JBC’s 2 year warranty covers this equipment against all manufacturing defects, including the replacement of defective parts and labor.
The warranty does not cover product wear or misuse. In order for the warranty to be valid, equipment must be returned, postage paid, to the dealer where it was purchased.![]() This product should not be thrown in the garbage.
This product should not be thrown in the garbage.
In accordance with the European directive 2012/19/EU, electronic equipment at the end of its life must be collected and returned to an authorized recycling facility.