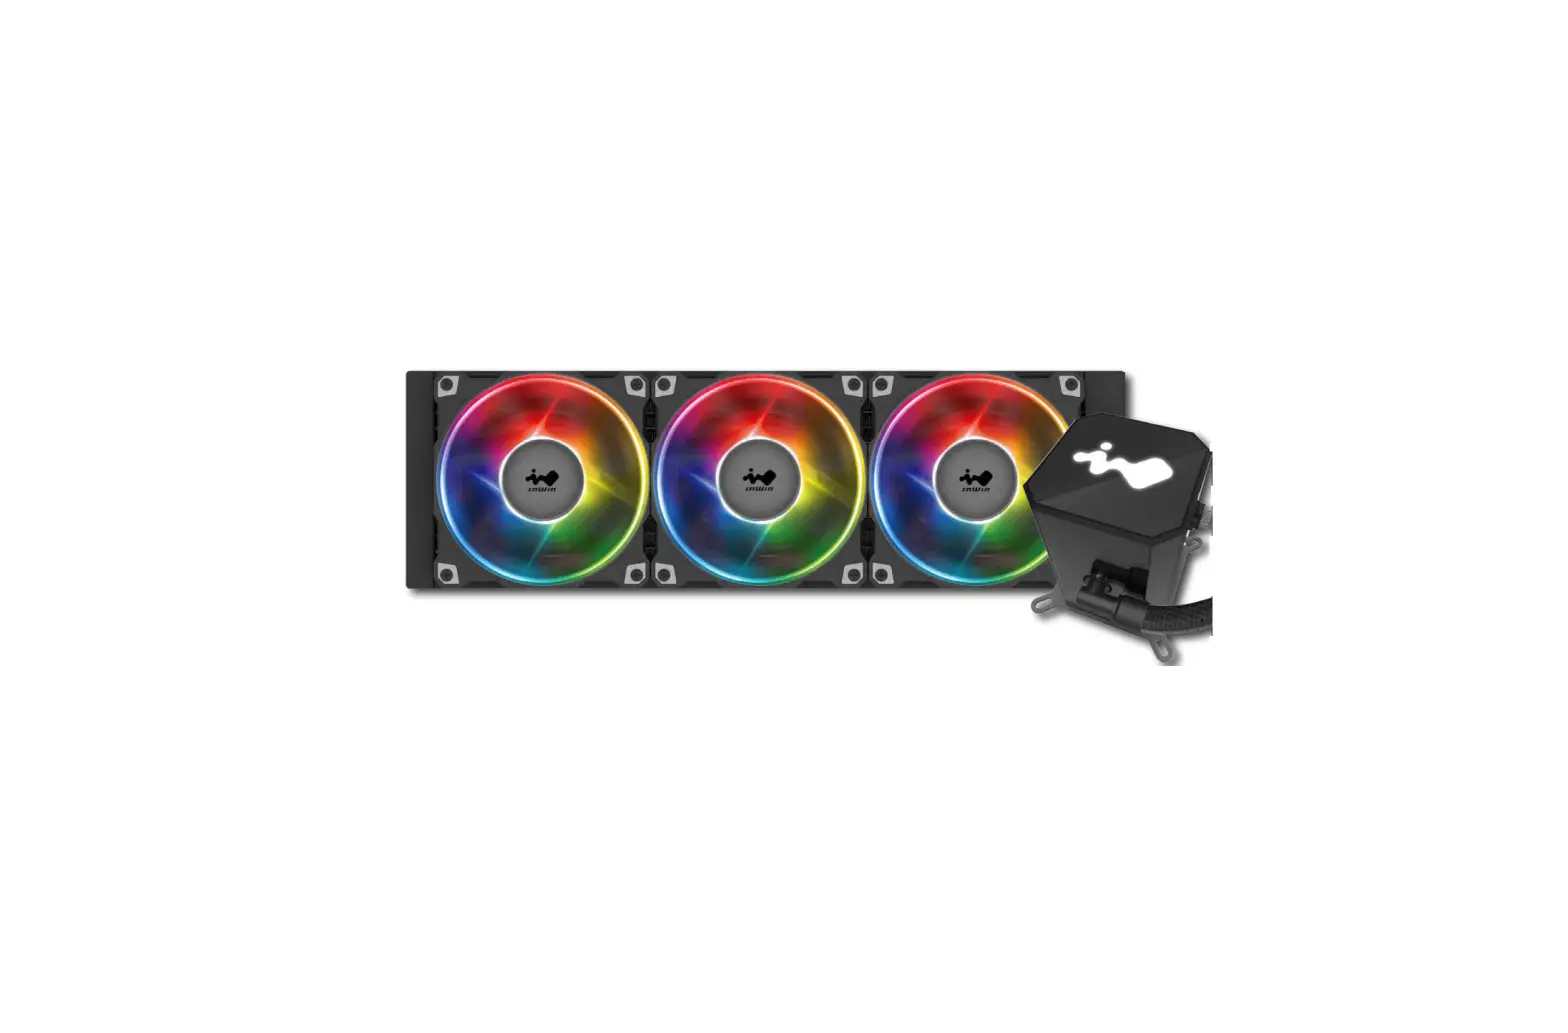
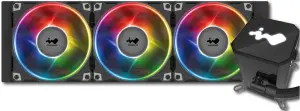
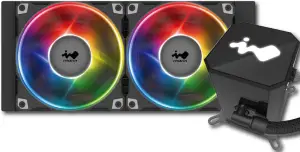
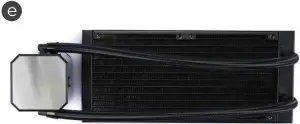
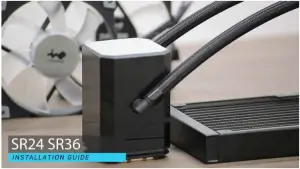
InWin IW-LC-SR24 All in One Twin Turbines Liquid CPU Cooler
Product Story
The SR series possesses a high waterflow pump, and the patented twin-turbine function runs parallel with one another and functions simultaneously to push both currents toward the copper cold plate to significantly reduce the temperature and keep hardware cool. The pump illuminates a white LED logo under normal circumstances. If it detects an unusual current or excessive heat, the LEDs will flash red and blue lights to prevent damaging components. The SR series come with AJF120 fans to provide the best operational performance, while reducing noise pollution. The AJF120 case fans can also sync with addressable motherboards. The tubing is sleeved with braided nylon for protection and the rubber used is designed to withstand constant motion of water drawn from the twin-turbine pump.
Specifications
| Model | SR24 | SR36 | |
| Model Number | IW-LC-SR24 | IW-LC-SR36 | |
| CPU Socket Support | Intel® LGA 2066/2011-V3/2011/1366/1156/1155/1151/1150/1200 AMD® AM4/AM3+/AM3/AM2+/AM2/FM2+/FM2/FM1/TR4 | ||
| Radiator | Dimensions | 277 x 120 x 27 mm (10.9 x 4.7 x 1.1″) | 397 x 120 x 27 mm (15.6 x 4.7 x 1.1″) |
| Material | Aluminum | ||
| Tube Length | 400 mm | ||
| Tube Material | Rubber with Nylon Braided Sleeve | ||
| Water Block & Pump | Dimensions | 68 x 68 x 100 mm | |
| Materials | Copper, Plastic | ||
| Pump Speed | 2400±10%RPM | ||
| Fan | Model | Jupiter Series AJF120 | |
| Quantity Included | 2 PCS | 3 PCS | |
| Dimensions | 120 x 120 x 26 mm | ||
| Speed Mode (PWM) | PWM 500-2500 RPM +/- 10% | ||
| Noise Level | 23 dBA (normal) | ||
| Airflow | 101.5 CFM (max) | ||
| Static Pressure | 4.22 mm-H2O | ||
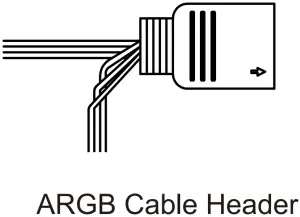
| Connectors | 4-pin (12V, PWM) , 3-pin (5V, ARGB) | ||
| Bearing Type | Double Ball Bearing | ||
| Package Dimensions ( H x W x D) | 136 x 265 x 331 mm (5.4″ x 10.4″ x 13″) | 142 x 244 x 459 mm (5.6″ x 9.6″ x 18″) | |
| Net Weight | 1.5kg/ 3.3lbs | 1.8kg/ 3.9lbs | |
| Gross Weight | 2.1kg/ 4.6lbs | 2.5kg/ 5.5lbs | |
| Warranty | 5 Years | ||
* Our products comply with RoHS regulations
* Specifications may vary based on different regions
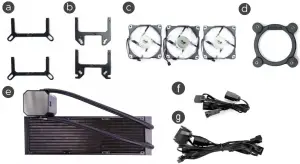
SR24 Package Contents

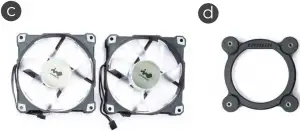


a. Intel mounting bracket x2
b. AMD mounting bracket x2
c. Jupiter AJF Fan x2
d. Intel CPU backplate x1
e. 240 Radiator x1
f. Addressable Cable to M/B (5V, 3-pin) 1 to 3 x1
g. SATA Cable (Pump+PWMx1
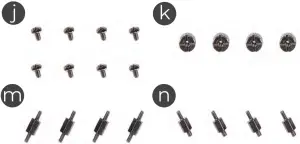
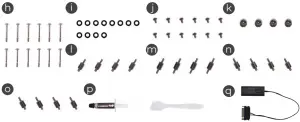
h. Fan Screws x8
i. Washer x8
j. Radiator Screws x8
k. Thumbscrew Cap x4
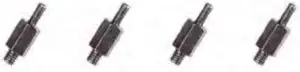
l. Standoff Screws x4 (LGA 20XX)
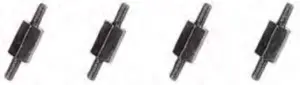
m.Standoff Screws x4 (LGA 115X/1366)
n. Standoff Screws x4 (TR4)
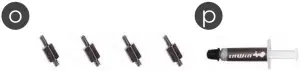
o. Standoff Screws x4 (AMD)
p. Thermal Compound x1
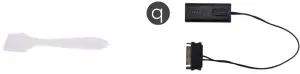
q. ARGB One-Click Controller x1
SR36 Package Contents
a. Intel mounting bracket x2
b. AMD mounting bracket x2
c. Jupiter AJF Fan x3
d. Intel CPU backplate x1
e. 360 Radiator x1
f. Addressable Cable to M/B (5V, 3-pin) 1 to 3 x1
g. SATA Cable (Pump+PWMx1
h. Fan Screws x12 i. Washer x12
j. Radiator Screws x12
k. Thumbscrew Cap x4
l. Standoff Screws x4 (LGA 20XX)
m.Standoff Screws x4 (LGA 115X/1366)
n. Standoff Screws x4 (TR4)
o. Standoff Screws x4 (AMD)
p. Thermal Compound x1
q. ARGB One-Click Controller x1
Installation
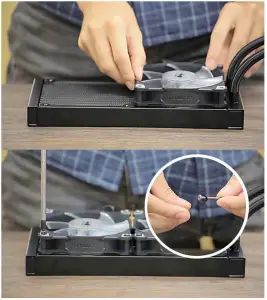
- Install AJF120 Fans to Radiator.
Parts Required: 240mm/360mm radiator, Jupiter AJ120 Fans, Washers, Fan Screws
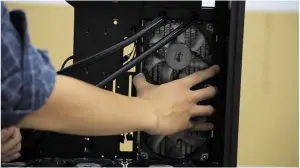
- Install Fans and Radiator combo to your PC chassis.
Parts Required: Radiator Screws
- Installation for motherboards
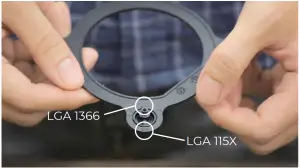
A. For Intel Motherboards (LGA115X / 1366 or LGA 20XX):
(1) Switch the Intel backplate pins according to the CPU socket of your motherboard.
(2) Attach the Intel backplate to the bottom of the motherboard.
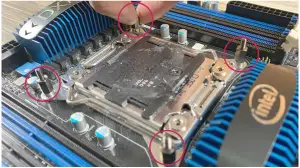
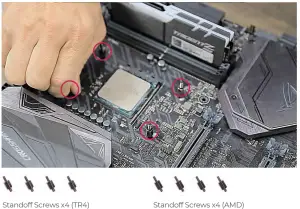
Note: Intel LGA 20XX does not require backplate installation.(3)Install the standoff screws onto your motherboard. Ensure to use the correct standoff screws for your CPU socket.
Note: Intel LGA 20XX does not require backplate installation.
Parts Required: Standoff Screws (LGA115X / 1366 or LGA 20XX)
Standoff Screws x4 (LGA 20XX)
Standoff Screws x4 (LGA 115X/1366)B. For AMD Motherboards (AMD or TR4)
Directly install the AMD standoff screws onto your motherboard. Parts Required: Standoff Screws (AMD or TR4)
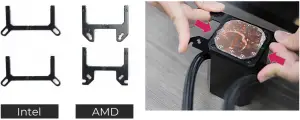
- Install the Pump Unit
Parts Required: Mounting Bracket, Thumbscrew Cap, Thermal Compound
A. Choose your Mounting Bracket according to your CPU.
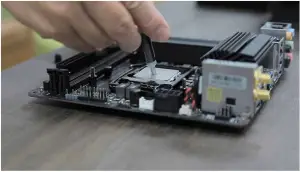
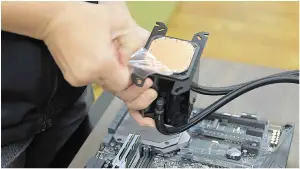
B. Apply the Thermal Compound evenly on the CPU surface.
C. Remove the protect film from the cold-plate.
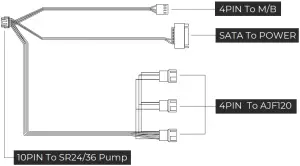
D. Install the pump unit and then tighten it with the thumbscrew. - Connect Power to the Fans and Pump
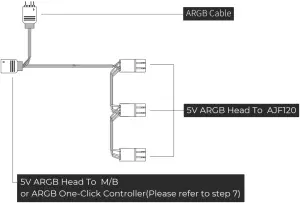
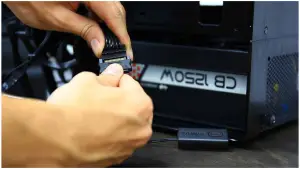
Parts Required: SATA Cable (Pump + PWM), Addressable Cable (5V, 3-pin)

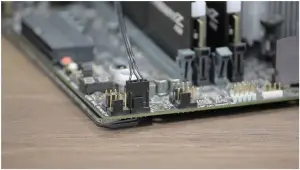
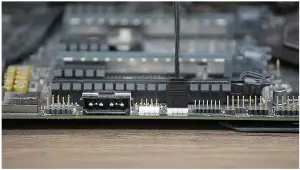
- Sync Fans to Addressable Motherboard
A. Fan M/B Header
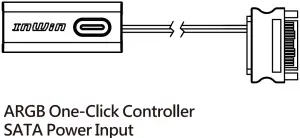
B. ARGB M/B Header - ARGB One-Click Controller Installation
Note: Please follow this step if your motherboard does not support ARGB effect.
Please use the included ARGB One-Click Controller to connect to your PSU’s SATA cable and the Addressable Cable in order to use the 11 different of lighting effects.

Hold the button to turn on or off the lights. Tap the button to change the lighting modes.1
Rainbow 2 LED-Red Breathing
3
LED-Green 4 LED-Blue
5
LED-Purple 6 LED-White
7
Light at the end of the Tunnel 8 Two-Tone Ring
9
Diagonal Transition 10 Rotating LED Trio
11
Full Circle 12 Flow-Red
13
Flow-Green 14 Flow-Blue
*InWin reserves the right to change the lighting modes.
*For more installation instructions, please scan the QR Code below or watch the video in the website link: https://youtu.be/KL7KFRSFdxo

Troubleshooting
If your AIO pump or fan does not operate properly, please follow the instructions below:
- Please check your system’s power.
- Please make sure all the connectors are connected properly.
- For more technical support, please visit the InWin Forum website at https://forum.in-win.com/
Important Note
- Please follow the user manual for installation guidelines.
- When storing the product, please keep this product away from high temperatures. Keep it away from machines such as heaters that might cause high temperatures.
- Please do not put anything in the impeller.
- Please do not modify the wires or the connectors provided by InWin.
- Please do not touch the fan blades when the fan is in operation.
- Please only use this product in a computer case.
- Please keep this product away from any liquids.
- Warranty
* For more detailed warranty information, please visit the InWin retail website at www.in-win.com.
* The actual product is subject to change without prior notice. InWin Development Inc. reserves the right to

Copyright© 2020 in With Development Inc. All Rights Reserved.


