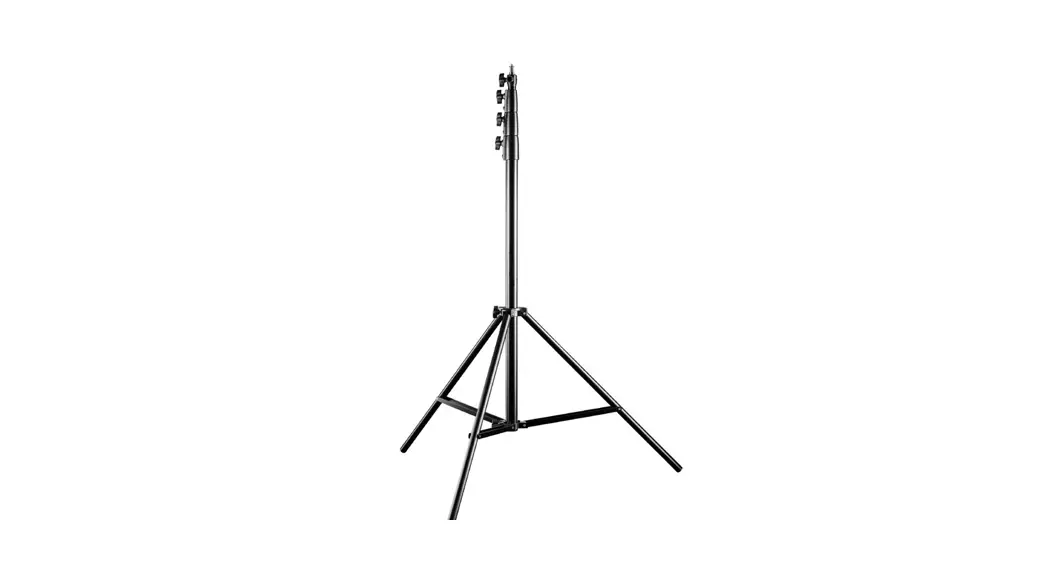
![]() Walimex pro AIR 380 Deluxe Lamp Stand
Walimex pro AIR 380 Deluxe Lamp Stand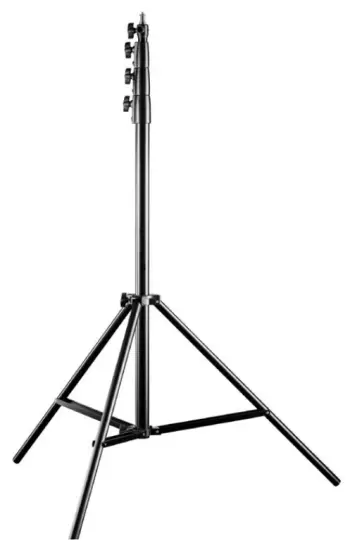

A) Components light stand
| 1 Mounting adapter, exchangeable 2 Locking screw for adapter holder 3Center column 4 Locking clamps 5 Locking fastener wing screws 6 Locking screws for light stand leg angle adjustment | 7 Stand star 8 Stand base 9 Leg struts 10 Stand legs 11 Stand leg feet with rubber stoppers 12 Centre column base with rubber stopper |
By purchasing this product you have acquired a high-quality, versatile, and practice-oriented lamp stand/studio stand with long-term quality. The Walimex pro AIR 380 Deluxe offers a high level of comfort and additional safety thanks to its air-damped elements, which enable slow and gentle lowering even under load. The lampstand has good stability in its stand class and offers enough reserves for your equipment with its high load capacity and its great working height.
We hope you enjoy using our product.
Your team from WALSER
Adjusting the light stand
Loosen the locking screw of the leg angle adjustment (6). Pull the stand legs (10) outwards and press the standing star (7) downwards. This spreads the legs. Set the desired angle of the legs. Fix the legs by tightening the locking screws of the light stand angle adjustment (6) again. Note that the base of the telescopic center column (12) should not touch the ground as this will affect the stability of the stand. Proceed in reverse order when folding the stand.![]() WARNING!
WARNING!
Risk of squeezing fingers with the struts of the stand legs (9).
Height adjustment
The light stand is equipped with a telescopic center column that can be extended.
The locking clamps of the center column (4) are fixed by the locking fastener screws (5). To adjust the height of the light stand, loosen the locking fastener screws (5). Set the desired height and tighten the locking fastener screws (5) again. Press the center column elements down to check that all locks are fixed correctly. The stand is now ready to use.
Installation of equipment on the light stand
Using the adapter on the top, you can attach devices such as studio flashes, LED lights, softboxes, poles, etc. to this stand. Either attach the adapter to your equipment first and then mount it on the tripod or attach the adapter to the tripod first and then mount your equipment on it. In both cases, make sure that the adapter, as well as the equipment, are positioned correctly and that the screws are tightened. The locking screw (2) must be tightened so that it holds the thinner part of the inserted adapter pin, see fig. A. This prevents accidental release of the mounted equipment. On the upper end of the mounting adapter (1), a 1/4 or 3/8 inch thread can be used. You can also attach suitable equipment here. The adapter can be mounted horizontally as well as vertically on the top of the tripod.
Recommended accessories for increased stability
When using heavy equipment with large extension height, we recommend additional accessories for stabilization. For this, we recommend the use of special sandbags or weights. The use of safety lines or ropes is also recommended for extreme working heights. These measures guarantee the optimum stability of your tripod even under adverse conditions.
You will find suitable accessory articles in our webshop www.foto-walser.de:
Art.-No. / Name
- 15537 Walimex pro sandbag
- 15876 Walimex stand weight 3 kg
- 13739 Walimex weight for rods and boom stands 4,4 kg
- 12720 Walimex pro-Tripod Wheels Pro, set of 3
- 21636 Walimex pro-Tiltable Umbrella Mount with Spigot Socket
Usage notes and maintenance of the light stand
- Note that light stands generally must be placed on a sufficiently strong, level surface to ensure maximum stability and to allow the maximum load capacity.
- Note the maximum load capacity of your light stand model (see technical data).
- Note the max. load values specified for centrally placed equipment on the stand.
- Regular removal of sand, dust, and other contaminants is recommended.
If you notice a scratching or crunching sound when moving the center column segments, remove the impurities with a soft, damp cloth. - Hold the center column segment tightly with one hand during the release of the locks before you loosen its adjustment clamp.
- Do not move a stand with mounted equipment and an extended center column. There is a strong leverage effect with a combination of heavy equipment and a large center column extension.
Technical specifications
| Walimex pro AIR 380 Deluxe | |
| Item No. | 19670 |
| Type | Light Stand |
| Max. working height | 380 cm |
| Min. working height | 123cm |
| Min. packing size | 120 cm |
| Max. load capacity | 15 kg |
| Weight | 2,7 kg |
| No. Segments center column | 4 |
| No. Segments center column extendable | 3 |
| Type stand locks | Wing Screw |
| ØCenter column tube segments (mm) | 40, 35, 30, 25 |
| ØMax. footprint | 105 cm |
| Connection adapter | 5/8 Zoll Spigot, 3/8 inch thread, 1/4 Zoll thread |
| Materials | |
| Stand tubes | Aluminum |
| Stand locking clamps | Aluminum |
Scope of delivery
- 1 x Walimex pro-AIR 380 Deluxe lamp stand
- 1 x Mounting adapter
- 1 x Manual D / EN
We are here for you!
If you need help or free, individual consultation from our trained specialist
personnel, please contact our service team.
We are happy to help!
Your WALSER Team
Email / Homepage
[email protected]
www.walser.de
Our postal address:
WALSER GmbH & Co. KG
Senefelderstrasse 23
86368 Gersthofen
Germany
 Our warranty promise
WALSER is known for its high-quality workmanship, optimal functionality, and customer-oriented service.
To highlight our exceptional service level, we offer a 2-year warranty for this Walimex pro product.
This warranty is only valid in combination with your purchase receipt.
If you would like to utilize our warranty, contact us by email at [email protected].
Our comprehensive guarantee as well as its scope can be found at www.foto-walser.de/en/warranty.![]() Niclas Walser
Niclas Walser
Founder and Owner
Notizen:
![]() WALSER GmbH & Co. KG
WALSER GmbH & Co. KG
Senefelderstrasse 23
86368 Gersthofen
Germany
[email protected]
www.walser.de
Made in China
12/2020


