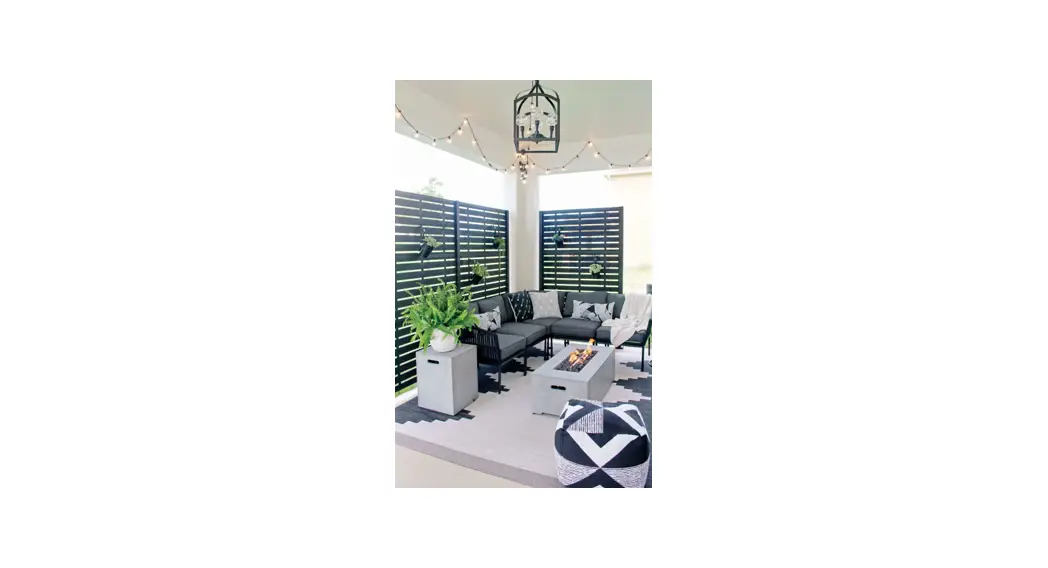
![]() LIVING 2X4 Decorative Screen Panel Frame Kit
LIVING 2X4 Decorative Screen Panel Frame Kit
Installation Guide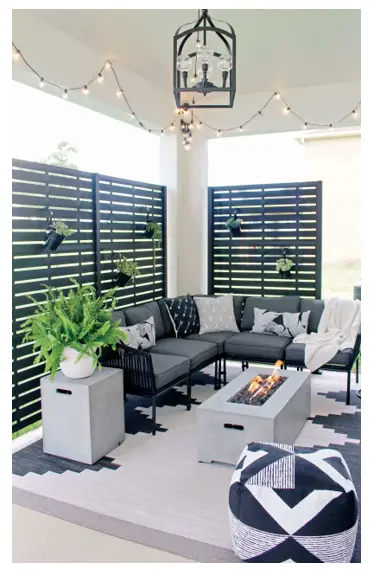
WEB REV 11.21
2X4
DECORATIVE SCREEN PANEL
FRAME KIT
2X4 Decorative Screen Panel Frame Kit
![]() Read all instructions prior to installing product.
Read all instructions prior to installing product.
Refer to manufacturers safety instructions when operating any tools.
To register your product, please visit: barretteoutdoorliving.com
![]() WARNING:
WARNING:
- Improper installation of this product can result in personal injury. Always wear safety goggles when cutting, drilling and assembling the product.
- Incorrect installation may cause harm to the product or individual.
- Check local building codes to determine pool-safe product options.
NOTICE:
- DO NOT attempt to assemble the kit if parts are missing or damaged.
- DO NOT return the product to the store. For assistance or replacement parts call: 1-877-265-2220.
BEFORE YOU BEGIN:
Check your local zoning laws.
- Local zoning laws and Home Owners Associations may regulate the location, style and height of your product or even require a permit signoff beforehand.
- Check local codes for frost line depth and regulations.
- NOTE: Installation is best accomplished with two sets of hands.
TOOLS/MATERIALS NEEDED:
| Drill | |
| Pencil | |
| Tape Measure | |
| Rubber Mallet | |
| Level |
SOLD SEPARATELY:
| (3) 2×4 Decorative Screen Panels | |
| 3/8″ Bolts/Screws (For surface mounting) |
2×4 Frame Kit Component list:
| QTY. | Description |
| 2 | 2″ Aluminum Posts |
| 2 | Top/Bottom U-Channels (Rails) |
| 2 | Mid H-Channels (Rails) |
| 1 | Surface Mount Kit |
| 2 | Post Caps |
| 1 | Hardware (Screw Kit) |
| 1 | #3″ Phillips drill bit |
| 6 | DSP Post Channels |
| 2 | Post Channels for bottom space |
2×4 Line Extension Frame Kit Component list:
| QTY. | Description |
| 1 | 2″ Aluminum H-Post |
| 2 | Top/Bottom U-Channels (Rails) |
| 2 | Mid H-Channels (Rails) |
| 1 | Surface Mount Kit |
| 1 | Post Cap |
| 1 | Hardware (Screw Kit) |
| 1 | #3″ Phillips drill bit |
| 3 | DSP Post Channels |
| 1 | Post Channel for bottom space |
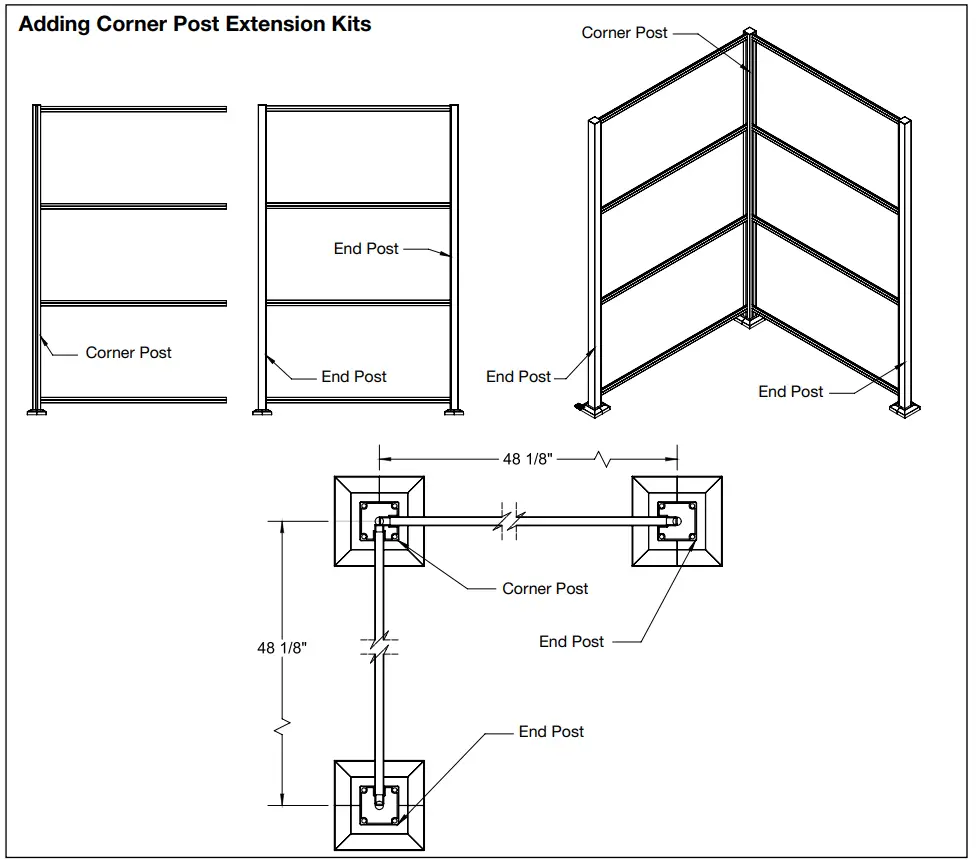
2×4 Corner Extension Frame Kit Component list:
| QTY. | Description |
| 1 | 2″ Aluminum Corner Post |
| 2 | Top/Bottom U-Channels (Rails) |
| 2 | Mid H-Channels (Rails) |
| 1 | Surface Mount Kit |
| 1 | Post Cap |
| 1 | Hardware (Screw Kit) |
| 1 | #3″ Phillips drill bit |
| 3 | DSP Post Channels |
| 1 | Post Channel for bottom space |
- Determine where you would like to install the frame kit. Make sure the posts will be held in place by a solid structure and if necessary, reinforce the surface it is attaching to.

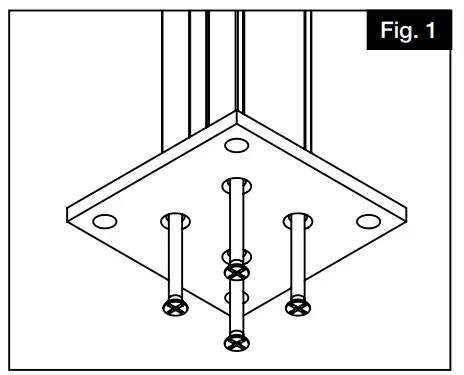
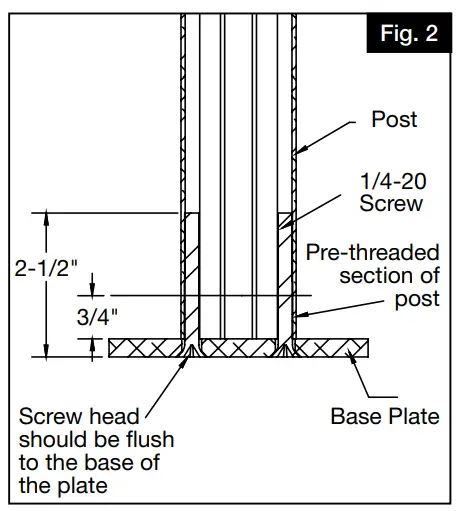
- Install base plates to bottom of posts. Locate bottom post with pre-tapped holes and attach the bottom plate to that end. Using a #3 Phillips drive bit, screw base plate to bottom of post through the (4) screw bosses (Fig. 1). Posts are partially threaded on one end of the post (3/4″). While installing screws, you will feel resistance at the 3/4″ mark for a tighter, more secure fit. Install screws until they’re flush with the plate (Fig. 2).
TIP: Drill should be set to low speed when securing plates to post.
- Set first post in desired location. Use the post assembly to mark the holes for the surface mounting plate. Mark and drill holes for appropriate 3/8″ fasteners (fasteners will vary depending on mounting surface). Attach post/base assembly to surface using appropriate 3/8″ fasteners.
NOTE:
Keep in mind ceiling clearance if installing inside. Attaching post/base assembly to surface may need to wait until end of installation if full assembly must be tilted for all 3 panels to be installed properly.
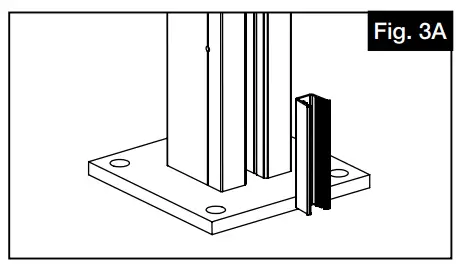
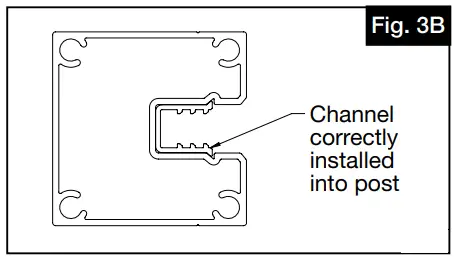
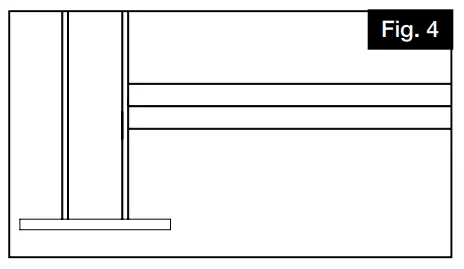
- Insert 3″ post channel spacer at bottom of post. Channel should sit on top of the post mounting plate. (Fig. 3A & 3B) Take bottom rail and insert into first post, resting on the spacer (Fig. 4).

NOTE:
This step is to set distance in between posts. - Repeat step 4 with second post by inserting the bottom spacer. Take second post and insert opposite side of bottom rail into the channel of this post. Be sure rail is fully inserted into the post. Lock second post into position -by repeating Step 3.
 NOTE:
NOTE:
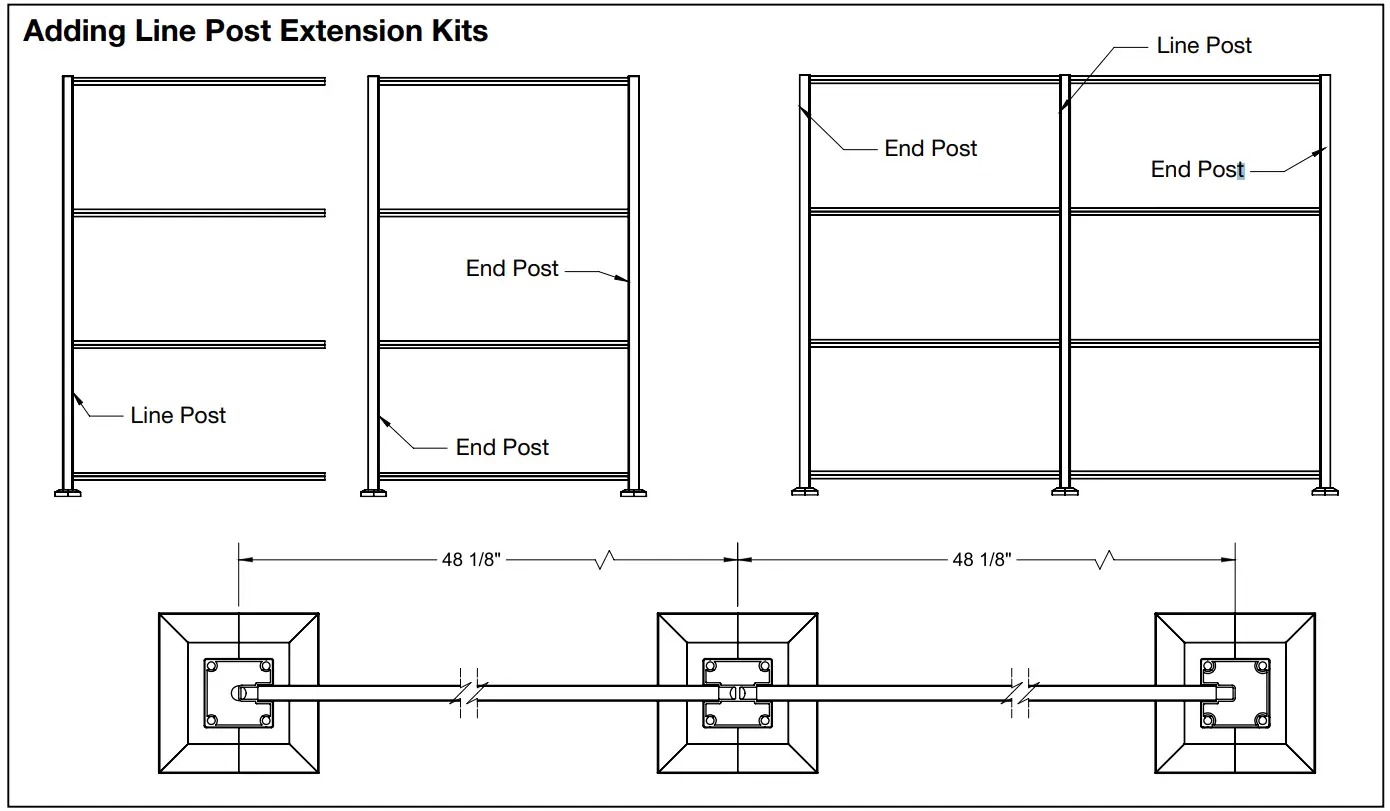
If connecting more than one frame kit together, line or corner posts are available (sold separately). - Posts are pre-drilled in screw location. Using the #2 square drive bit provided in the kit, install screw through this location and lock post and rail together. Repeat on second post. (Fig. 5A & 5B)
 NOTE:
NOTE:
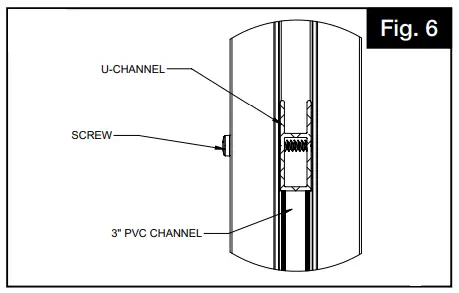
See side view of installation (Fig. 6).

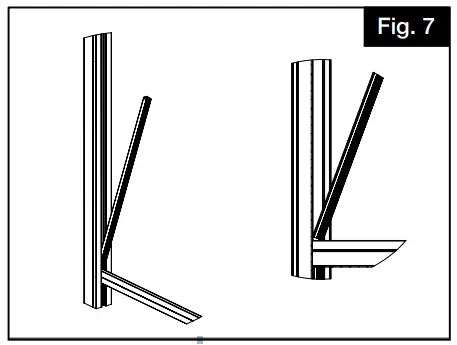
- Insert first plastic post channel into post as shown. Working from the bottom of the channel, push into the post until it clicks into place. (Fig. 7)
 NOTE:
NOTE:
A flat head screw driver can be used to fully seat into post.
Repeat on second post (Fig. 8)
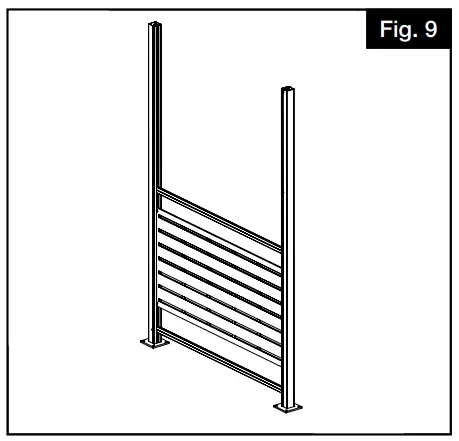
- Insert first decorative screen panel into assembly (into post channel). (Fig. 9)

- Slide H-Channel in the groove from the top, resting it on the top of the first Decorative Screen Panel. Push down on the rail to confirm post channel is seated correctly.
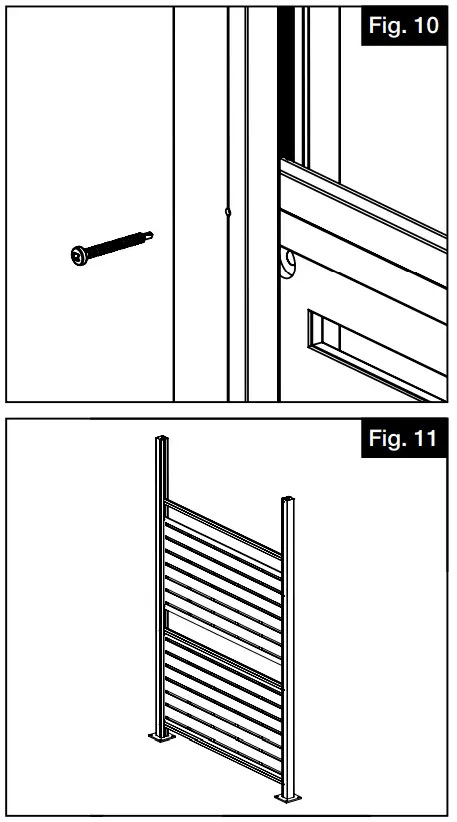
Posts are pre-drilled. Using #2 square drive bit provided, install screw into place, locking post & rail together. (Fig. 10)
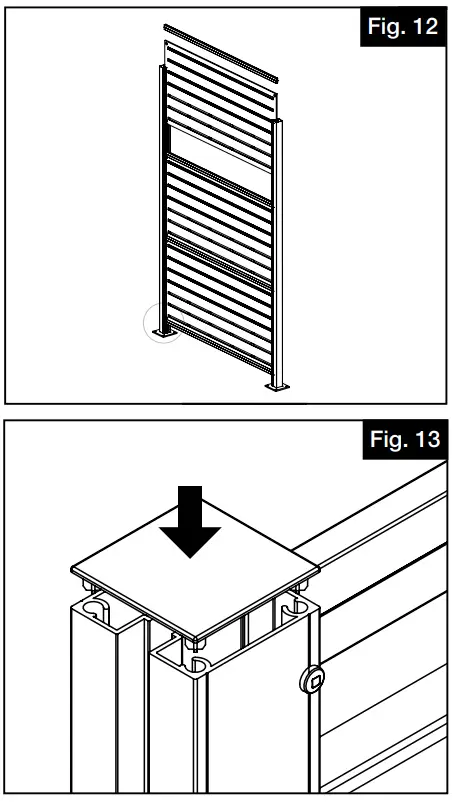
- Repeat steps 7-9 for the middle and top panel (Fig. 11 & 12).
NOTE:
Always use a tape measure to verify rails are equal space from each other and that they are level.
- Place post caps on top of posts (lining up the tabs underneath to the holes in the post). Using a rubber mallet, fully seat the cap onto the post (Fig. 13).
NOTE:
If installing additional frame kits (line or corner), install these prior to placing post caps on posts. - To connect additional frame kits, line and corner extension kits are available.
- Assemble trim ring over plate. Take one side of trim ring and push plugs through holes underneath. Take second half of the trim ring and push together (Fig. 14).

 NOTE:
NOTE: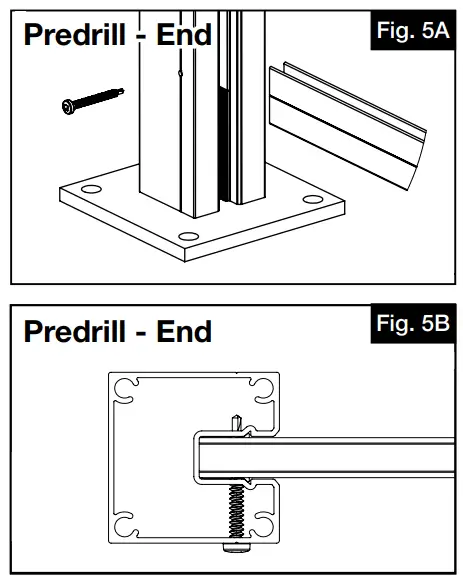 NOTE:
NOTE: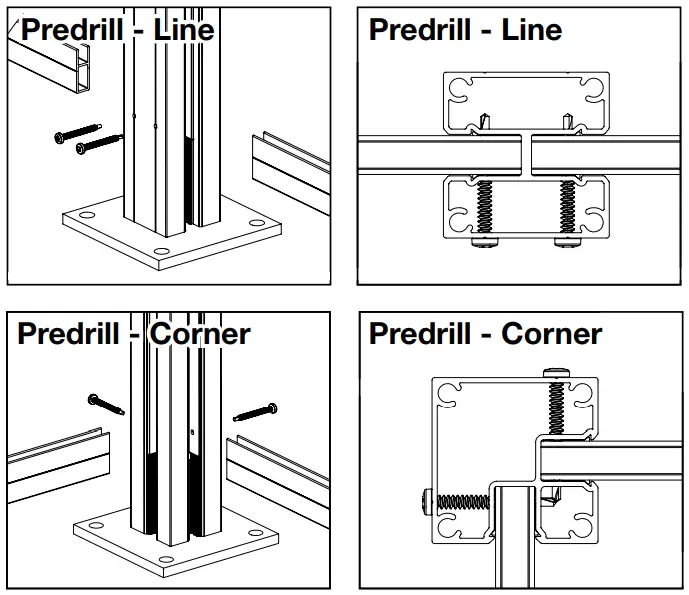
 NOTE:
NOTE: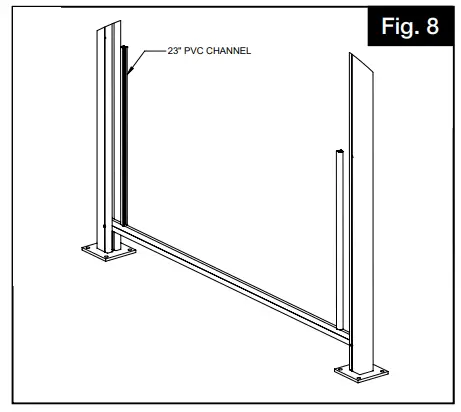

![]() To obtain and review a copy of the warranty please visit barretteoutdoorliving.com.
To obtain and review a copy of the warranty please visit barretteoutdoorliving.com.
You may also contact us at 1-877-265-2220 or email [email protected].


