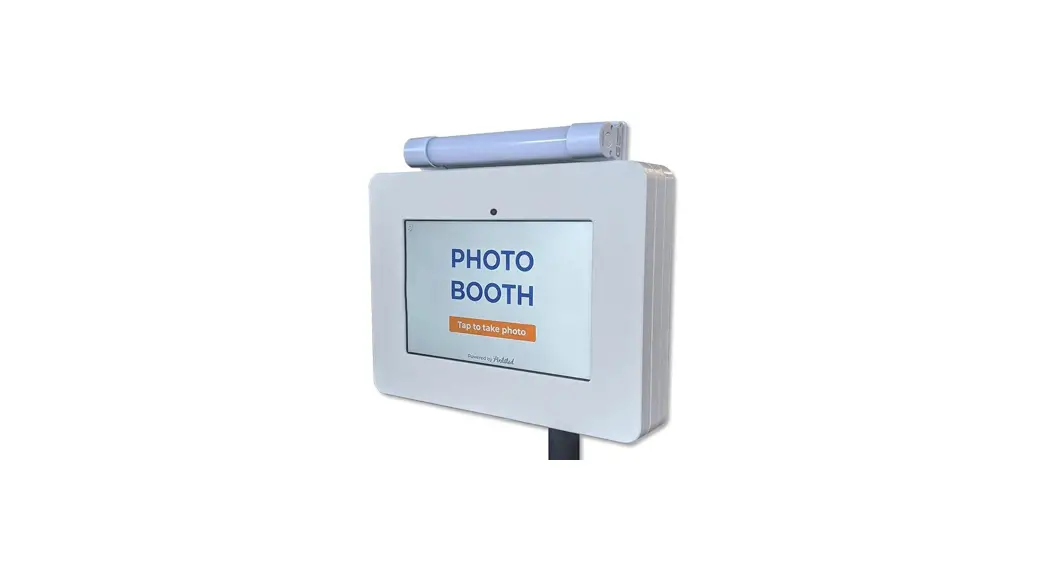
![]() Photo Booth Setup Guide
Photo Booth Setup Guide
UNPACK
Remove all of the items from the box.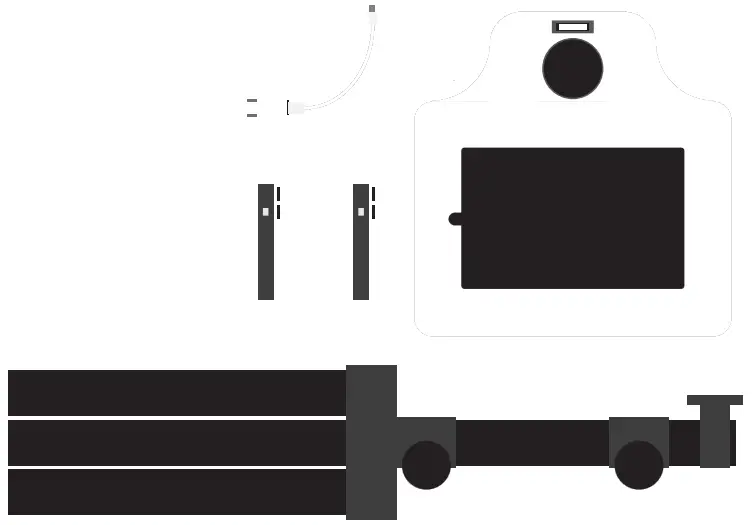
SET UP THE TRIPOD
Set up the tripod with the legs 2’ apart and raise the neck to your desired height. Then tighten both knobs.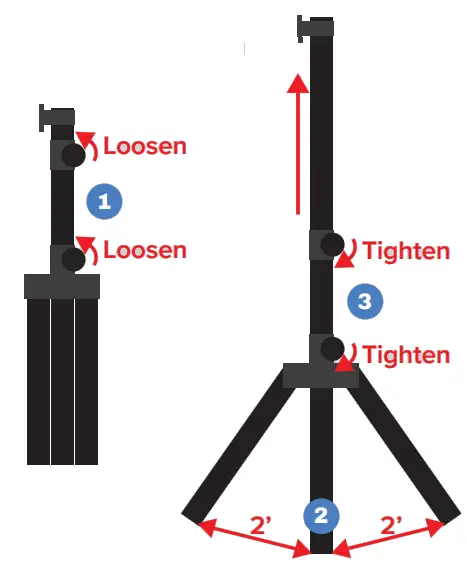
MOUNT THE KIOSK
Slide the kiosk onto the bracket attached to the top of the tripod. Insert the thumb screw and fully tighten it. 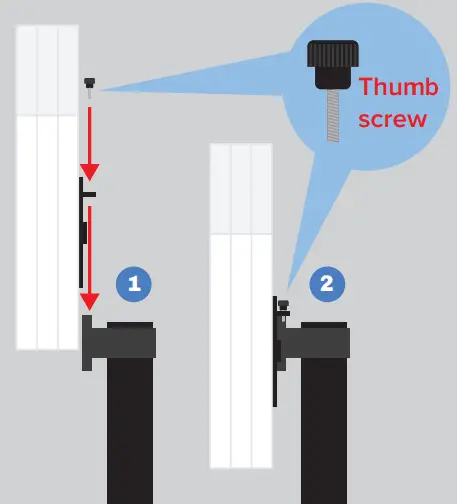
PLUG IN
Attach the power pack with the velcro strips. Plug the white USB into the top port & the black USB into the bottom port.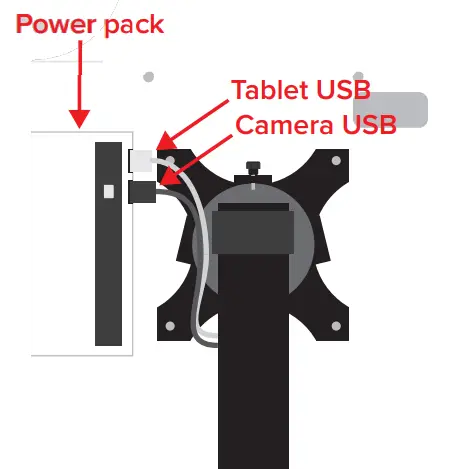
POWER UP x2
Remove the back cover by sliding it to the side. Press & hold the power buttons on both the tablet and camera.
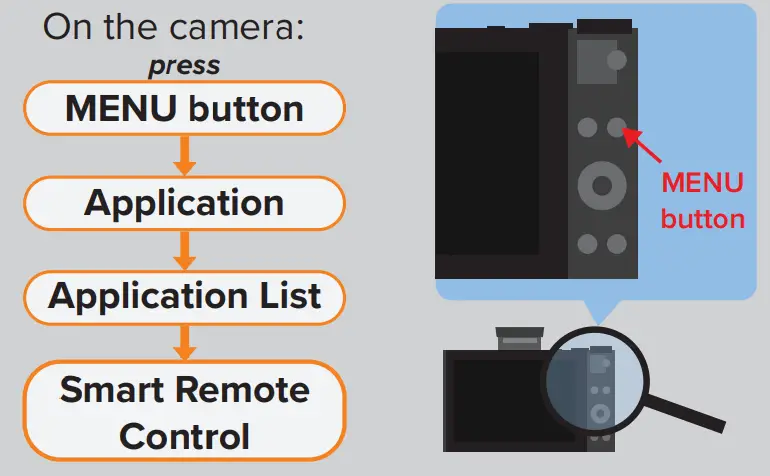
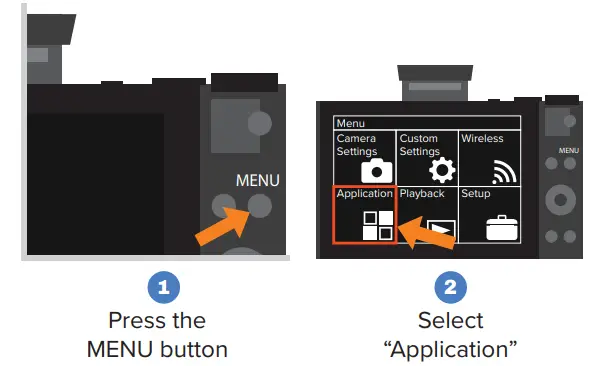
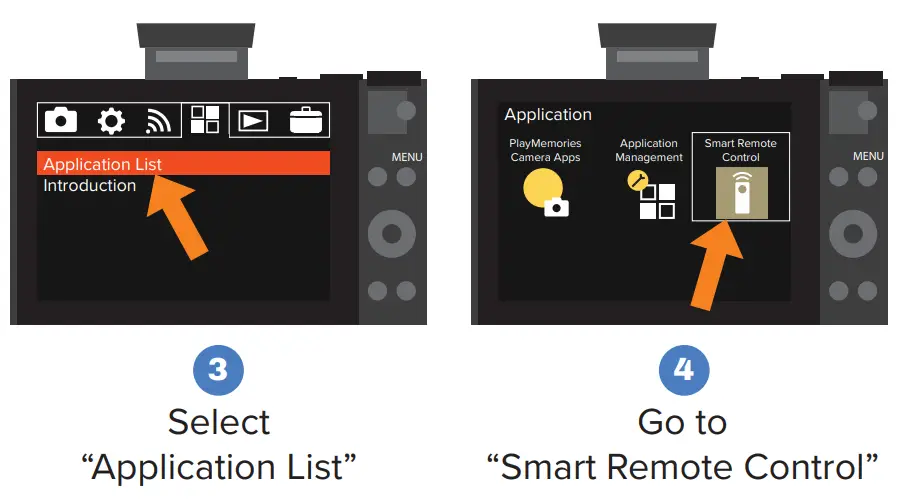
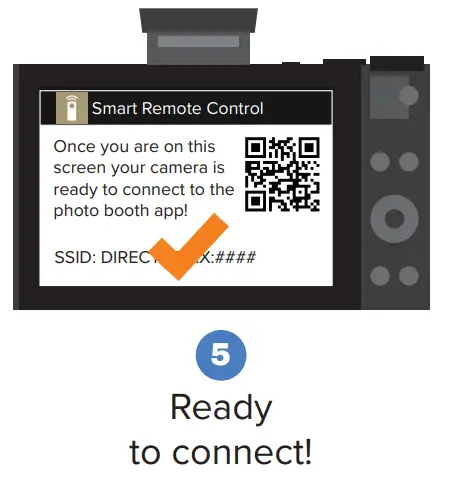
PREP CAMERA TO CONNECT
CONNECT TABLET TO WIFI
Unlock tablet with PIN: #-#-#-# Swipe down from top of screen, tap & hold wifi icon. Choose wifi network and connect.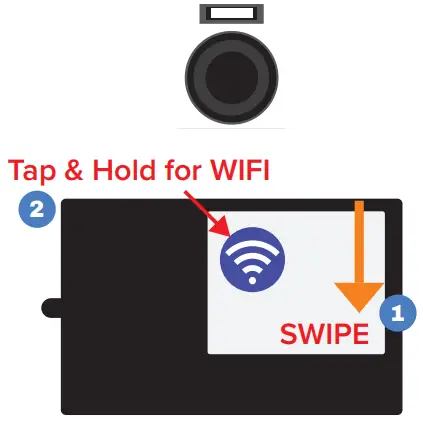
OPEN PIXI APP & TEST!
Once connected to wifi, tap on the PixiCloud icon to start the photo booth app. Once it loads, tap the screen to take a test photo!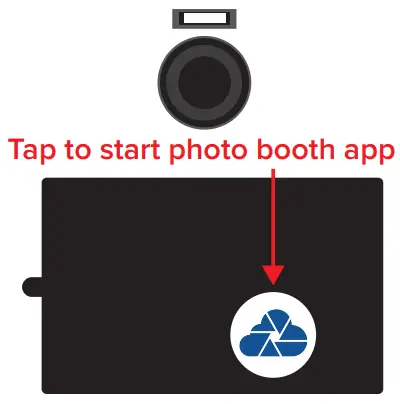
POSITIONING
Now that you’re up and running, check your framing and distance. Make sure the kiosk is level and 4’- 6’ from your backdrop.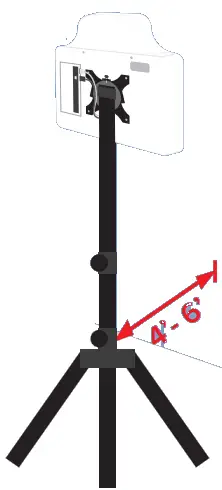
Troubleshooting
Preparing your camera to connect (or reconnect) to your tablet
PIN to unlock tablet
#-#-#-#
Text (SMS) Support
Need help?
Text us for the quickest response! (###) ### – ####
IMPORTANT NOTES
- [SUPER IMPORTANT] After taking a photo, if you click on the “X” the photo will not be saved!
The photos are only saved to the gallery when the user approves and sends to email or text message. - Your (2) power packs come fully charged. Each will give you 3-4 hours of run time. When you see the indicator lights running low, change over to your backup power pack and plug the original into a power outlet to recharge it. Charging the pack that is not in use will give you unlimited run time.
- Take test photos! Make sure everything looks good and functions properly before the start of your event.
- If you do not have wifi, the photos will be stored in an online queue. The moment the device connects to wifi, the queue of photos will be sent.
Included in the kit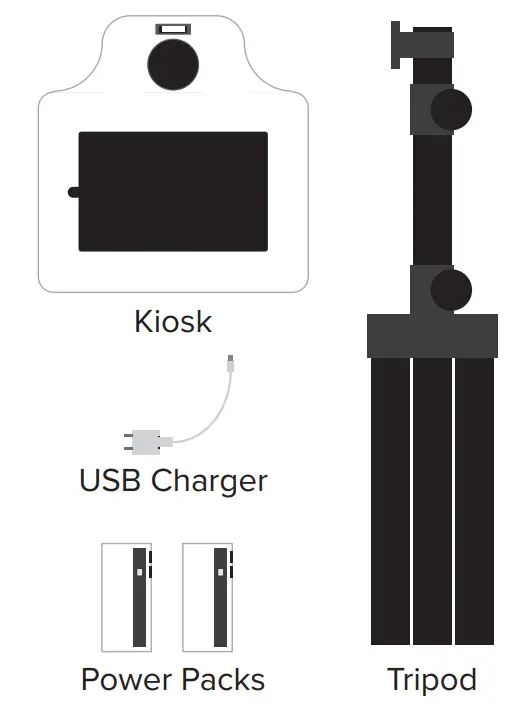
![]()


 Camera Module User Guide")


