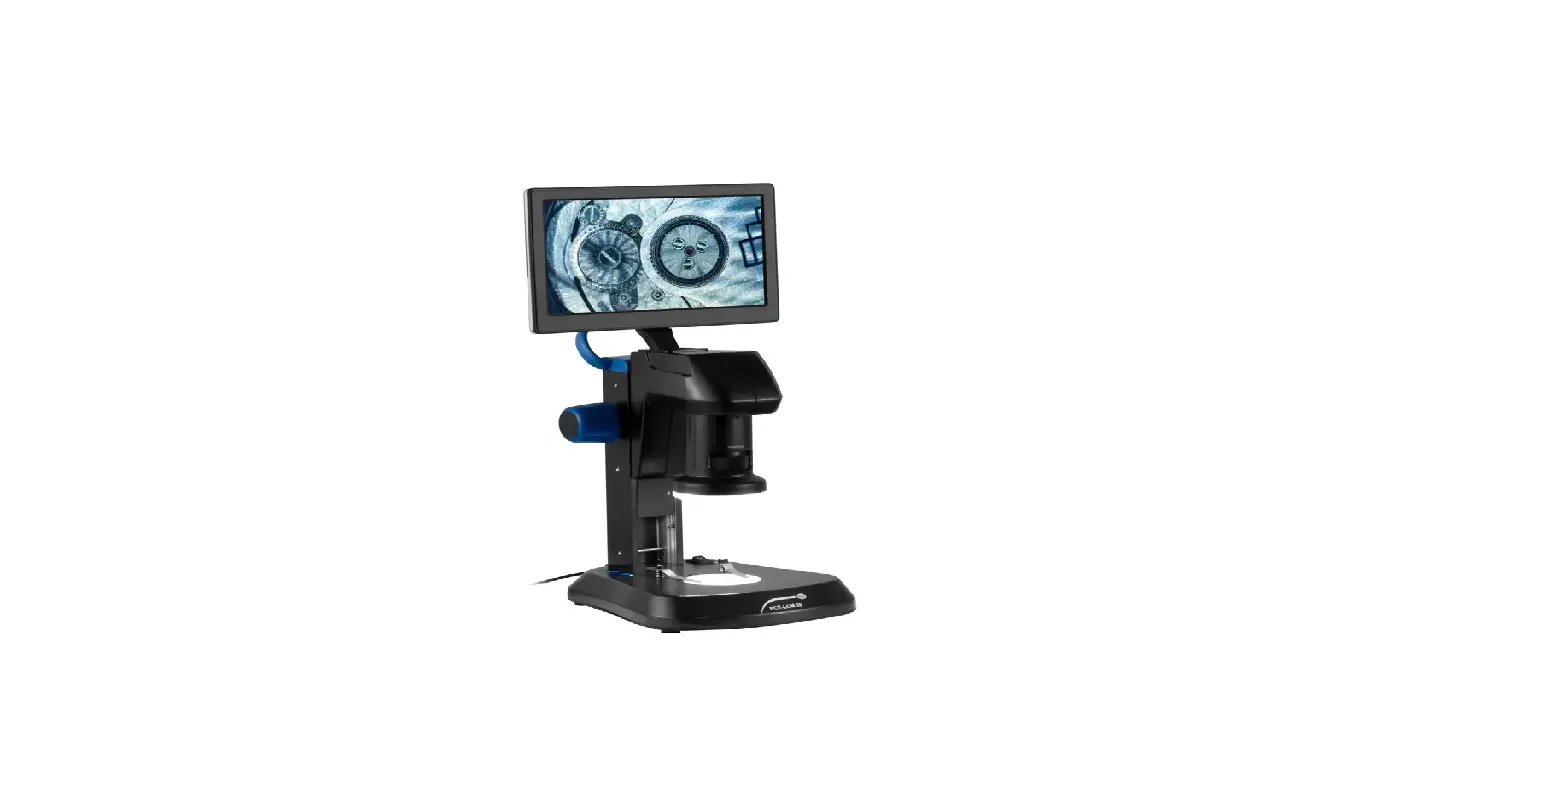
PCE Instruments PCE-LCM 50 Digital Microscope
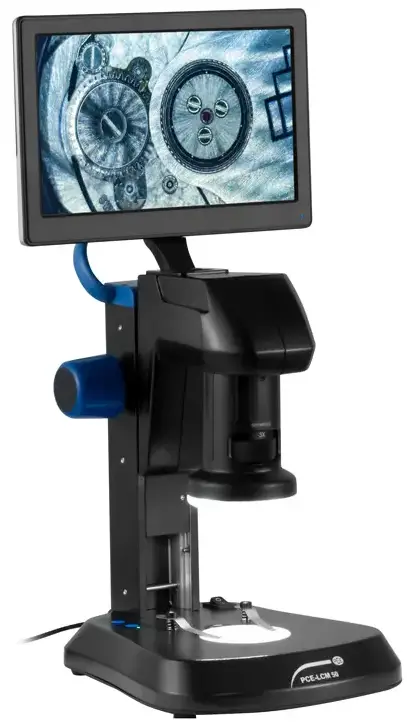
The PCE-LCM 50 Digital Microscope is a high-performance microscope that can be used for various applications. It comes with a range of features that make it easy to use and highly effective. Below are some of the key specifications of the microscope:
Product Specifications
- Optical lens
- Barlow lens
- Optical zoom
- Digital zoom
- Fixed working distance
- Image sensor
- White balance
- Display resolution
- Frame rate
- Pixel size
- Signal-to-noise ratio
- Interface
- Power supply mains adapter
- Illumination incident light
- Illumination transmitted light
- Environmental conditions
- Dimensions
- Weight
Product Delivery Scope
- Digital microscope PCE-LCM 50
- USB mouse
- Micro-SD card
- Protective cover
- Contrast disc black/white
- Translucent lens
- Mains adapter
- Protective film
- User manual
Product Usage Instructions
Please read the user manual carefully and completely before you use the device for the first time. The device may only be used by qualified personnel and repaired by PCE Instruments personnel. Damage or injuries caused by non-observance of the manual are excluded from our liability and not covered by our warranty. The microscope has several user interfaces. These can be opened by moving the mouse to the left or bottom edge of the screen. Below are the instructions for the key features:
Lighting
The microscope has an incident and a transmitted light function.The illumination can be adjusted separately in 5 brightness levels. To adjust the illumination, press the INC key for incident light and TRA for transmitted light. The keys are located on the microscope table.
- Click to take a picture. The screen displays a message with the file name. Hint: Dimension lines and drawing elements are not included in the image.
- Click to start and stop a video recording. After the recording has started, a time indication starts in the upper right corner of the display indicating the recording time.
- File overview Shows the existing image and video files in a side view. The navigation through the file overview is explained in chapter 6.1.1.
- Drawing menu In the drawing menu, you will find shapes and operations for measuring the image, explained in chapter 6.1.2, and the calibration menu, explained in chapter 6.1.3.
- Please refer to the user manual for detailed instructions on using each of these functions.
Safety notes
Please read this manual carefully and completely before you use the device for the first time. The device may only be used by qualified personnel and repaired by PCE Instruments personnel. Damage or injuries caused by non-observance of the manual are excluded from our liability and not covered by our warranty.
- The device must only be used as described in this instruction manual. If used otherwise, this can cause dangerous situations for the user and damage to the meter.
- The instrument may only be used if the environmental conditions (temperature, relative humidity, …) are within the ranges stated in the technical specifications. Do not expose the device to extreme temperatures, direct sunlight, extreme humidity or moisture.
- Do not expose the device to shocks or strong vibrations.
- The case should only be opened by qualified PCE Instruments personnel.
- Never use the instrument when your hands are wet.
- You must not make any technical changes to the device.
- The appliance should only be cleaned with a damp cloth. Use only pH-neutral cleaner, no abrasives or solvents.
- The device must only be used with accessories from PCE Instruments or equivalent.
- Before each use, inspect the case for visible damage. If any damage is visible, do not use the device.
- Do not use the instrument in explosive atmospheres.
- The measurement range as stated in the specifications must not be exceeded under any circumstances.
- Non-observance of the safety notes can cause damage to the device and injuries to the user.
- Do not touch the lenses.
- When the microscope is not in use, use the dust cover.
- We do not assume liability for printing errors or any other mistakes in this manual. We expressly point to our general guarantee terms which can be found in our general terms of business.
Delivery scope
- 1 x digital microscope PCE-LCM 50
- 1 x USB mouse
- 1 x micro-SD card
- 1 x protective cover
- 1 x contrast disc black / white
- 1 x translucent lens
- 1 x mains adaptor
- 1 x protective film
- 1 x user manual
Specifications
| Optical lens | 1 … 4 x |
| Barlow lens | 0.3 x |
| Optical zoom | 8.1………… x |
| Digital zoom | 1 … 10 x |
| Fixed working distance | 90.5 mm |
| Image sensor | 1/3″, 3MP |
| White balance | automatically or by pressing a key |
| Display resolution | 1024 x 600 pixels |
| Frame rate | 30 fps |
| Pixel size | 2.75 x 2.75 µm |
| Signal-to-noise ratio | >65 db |
| Interface | USB 2.0 |
| Power supply mains adaptor | primary: 100 … 240 V secondary: 12 V, 1 A |
| Illumination incident light | ring with 21 x 20 mA LEDs, adjustable in 5 steps |
| Illumination transmitted light | 7 x 20 mA LEDs, adjustable in 5 steps |
| Environmental conditions | -5 … 40 °C / 23 … 104 °F, 45 … 85 % RH |
| Dimensions | 300 x 225 x 270 mm / 11.8 x 8.9 x 10.6 in |
| Weight | approx. 2.3 kg / 5.1 lbs |
Device description
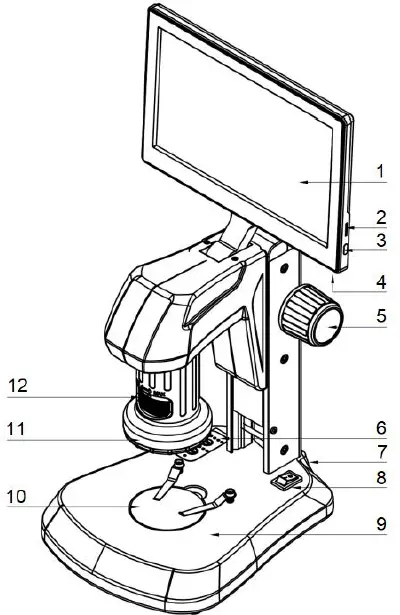
| 1. | 9″ display |
| 2. | Micro-SD card slot |
| 3. | On/off switch for the display (standby) |
| 4. | USB 3.0 interface |
| 5. | Focusing wheel |
| 6. | Setting the lighting |
| 7. | Connection for power supply (on the back) |
| 8. | Display on/off switch |
| 9. | Illumination for transmitted light microscopy |
| 10. | Stage |
| 11. | LED ring |
| 12. | Mechanically adjustable zoom |
Lighting
The microscope has an incident and a transmitted light function. The illumination can be adjusted separately in 5 brightness levels. To adjust the illumination, press the “INC” key for incident light and “TRA” for transmitted light. The keys are located on the microscope table.
Description of user interfaces
The microscope has several user interfaces. These can be opened by moving the mouse to the left or bottom edge of the screen.
Menu screen left
 Click to take a picture. The screen displays a message with the file name.
 Click to take a picture. The screen displays a message with the file name.
Hint
- Dimension lines and drawing elements are not included in the image.
 Click to start and stop a video recording. After the recording has started, a time indication starts in the upper right corner of the display indicating the recording time.
 Click to start and stop a video recording. After the recording has started, a time indication starts in the upper right corner of the display indicating the recording time.
 File overview
- Shows the existing image and video files in a side view.
- The navigation through the file overview is explained in chapter 6.1.1.
 Drawing menu
- In the drawing menu, you will find shapes and operations for measuring the image, explained in chapter 6.1.2, and the calibration menu, explained in chapter 6.1.3.
 Settings menu
- Options for the image settings and other system settings such as date and time settings.
File overview
- The file overview shows images and videos recorded on the SD card.
- You can switch to the large view of the images with a double click.
Navigation bar

 Back button
- Exit the file overview or the large view.
 Forward / back button
- Navigate through the file overview and the large view.
 Delete button
- Delete the displayed item.
- In the file overview, an entry must be selected by a mouse click.
Note: Some characters are placed to indicate distances or areas and are generated based on the stored calibration. The calibration of the PCE-LCM 50 is explained in chapter 6.1.3.
 Point
Point
- Click to place a point at the current cursor position.
 Circle from radius
- Select the centre point by a click, then move the cursor to the desired distance for the radius.
 Circle from 2 points
- Create 2 reference points that lie on the edge of the created circle.
![]() Circle from 3 points
Circle from 3 points
- Create 3 reference points. The circle is created so that all 3 reference points are on the circumference.
 Distance between two circles
- The function measures a distance between two circles which can be created by various sub-functions.
 Concentric circles
- Create a circle using the circle-from-radius function. Here you can create one or more circles with the same centre point.
 Distance between line and circle
- Create a circle using the circle-from-radius function. Then select 2 points to create a straight line. The measured distance “LD-X” describes the distance between the straight line and the centre of the circle.
![]() Polygon
Polygon
- Create a polygon with any number of reference points. To finish the polygon, press the right mouse button.
![]() Crosshairs
Crosshairs
- With one click, you create a reference point with coordinates.
![]() Rectangle
Rectangle
- Creates a rectangle from 2 reference points.
![]() Line from several points
Line from several points
- Creates a line from several reference points.
 Arc from 3 points
- Creates an arc from 3 reference points.
 Freehand line
- Creates a line from cursor movements.
 Line
Line
- Creates a line from 2 reference points.
 Perpendicular lines
- First, a line is created.
- Subsequently, another reference point is used to create a line that is perpendicular to the first line.
 Parallel lines
- First, a line is created. Then, with another click, you create the first reference point for the parralel line.
- The start of this is oriented towards the cursor position.
- With another click, you can finish the line.
 Angle measurement
- First, a line is created.
- Then create another line from the end point. The smallest angle between the new line and the original line is measured.
 Text
Text
- A text field is created. After this, a virtual keyboard is displayed to enter a text. Finish the entry by clicking on the “Confirm” button.
 Sheet export
- With this function, you can export the automatically determined dimensions of the drawing elements as a CSV file. This file is saved to the SD card with the corresponding time.
 Mouse
Mouse
- Switch to the mouse to make further settings.
 Select and delete
- Use the option to select a drawing element on the display to delete it.
 Delete all
- Deletes all drawing elements on the screen.
 Screenshot
- This function saves the image with the created points and graphics to the SD card. These images are not listed in the file overview.
Calibration
- “Add “: Creates a new calibration
- “Delete”: Deletes the selected calibration
- “Edit “: Edit the calibration
- Adjusting the name, length and length unit
Place a dimensioned object under the microscope, for example a ruler. Open the drawing menu, click on “Add” in the lower area. Select 2 points to set a distance on the display. To open the menu again, move the mouse to the left edge of the screen. Click on “Length” and enter the actual length between the two points. To complete the calibration, click on “Done”.

- Note that a calibration is only valid for a certain focus.
- If the focus changes, a new calibration is required.
Light settings
 Automatic exposure
- Adjusts the exposure if the resulting image is overexposed or underexposed.
 Reset
Reset- Resets the light settings.
 Target brightness
- Setting for automatic exposure.
 Exposure
- Controls the light that comes from the LED ring.
 White balance
 Red
Red Green
Green Blue
Blue- Describes the red/green / blue portion of the image.
- Adjustable to perform color correction.
 Colour temperature
- Adjusts the red, green and blue portions to create a “cold” or “warm” colour impression.
 Antiflicker
- Counteracts flickering effects of electric light sources.
 Contrast
- Sets the difference in the brightness of the light and dark parts of the image.
 Saturation
- Allows you to create a colourful/achromatic presentation.
 Brightness
- Adjustment of the light produced by the LED ring.
 Sharpness
- Controls the difference of details and how much they differ from each other.
 Noise suppression
- Setting to avoid interfering signals in the video transmission.
 Language
- Available languages: English / German / French / Chinese / Korean
- Date setting

- Time setting

- Storage option

- Selects the storage location for new files and offers the option to format the data media (the included micro-SD card or a USB pen drive).
- Version
 Red
Red Green
Green Blue
Blue Colour temperature
 Contrast
 Saturation
 Brightness
 Sharpness
 Noise suppression
 Language
Menu at the bottom
 Zoom in
- Enlarges the image by a factor of 0.1, up to a maximum of 10.
 Zoom out
- Reduces the image by a factor of 0.1. The image size cannot become smaller than 1.
 Mirror vertical
- Mirrors the image on the vertical axis.
 Mirror horizontal
- Mirrors the image on the horizontal axis.
 Quick saturation
- Corrects the saturation of the settings menu.
 HDR
HDR- Function to compensate for shadows or overexposure.
 Freeze
- Freezes the image.
 Grid options
- Settings to show or hide scale bars / a grid.
 Line options
- Compare to saved image
- Opens the file overview, shows the selected image on the right side of the screen.
 Quarter camera image
- Quarter the current view.
 Zoom in
 Zoom out
 Mirror vertical
 Mirror horizontal
 Quick saturation
 HDR
HDR Freeze
 Grid options
 Line options
Attention: The calibration is not scaled. You must adjust your calibration if you work with dimensions.
Troubleshooting
| Error | Reason | Solution |
| The field of vision is dirty | Your sample is contaminated | Clean your sample. |
| The lenses are contaminated. | Clean the lenses. | |
| No clear picture | The lenses are contaminated. | Clean the lenses. |
| Illumination does not work when the supply voltage is connected | No power supply | Check the mains adaptor. |
| Lighting defective | Get in touch with PCE Instruments. | |
| Dark image | Brightness setting is too low | Increase the brightness setting. |
| White balance is inefficient | Adjust the white balance manually. | |
| The angle between the display and the microscope is large | Adjust the angle. | |
| No image on the screen | No power supply | Check the mains adaptor and the connection method. |
| Screen switch is off | Switch on the display using the display switch. |
Contact
If you have any questions, suggestions or technical problems, please do not hesitate to contact us. You will find the relevant contact information at the end of this user manual.
Disposal
For the disposal of batteries in the EU, the 2006/66/EC directive of the European Parliament applies. Due to the contained pollutants, batteries must not be disposed of as household waste. They must be given to collection points designed for that purpose. In order to comply with the EU directive 2012/19/EU we take our devices back. We either re-use them or give them to a recycling company which disposes of the devices in line with law. For countries outside the EU, batteries and devices should be disposed of in accordance with your local waste regulations. If you have any questions, please contact PCE Instruments.

![]()
PCE Instruments contact information
Germany
- PCE Deutschland GmbH
- Im Langel 26 D-59872 Meschede Deutschland
- Tel.: +49 (0) 2903 976 99 0
- Fax: +49 (0) 2903 976 99 29
- [email protected]
- www.pce-instruments.com/deutsch
United Kingdom
- PCE Instruments UK Ltd
- Unit 11 Southpoint Business Park Ensign Way, Southampton Hampshire United Kingdom, SO31 4RF
- Tel: +44 (0) 2380 98703 0
- Fax: +44 (0) 2380 98703 9
- [email protected]
- www.pce-instruments.com/english
The Netherlands
- PCE Brookhuis B.V.
- Institutenweg 15 7521 PH EnschedeNederland
- Telefoon: +31 (0)53 737 01 92
- [email protected]
- www.pce-instruments.com/dutch
Italy
- PCE Italia s.r.l.
- Via Pesciatina 878 / B-Interno 6 55010 Loc. Gragnano Capannori (Lucca) Italia
- Telefono: +39 0583 975 114
- Fax: +39 0583 974 824
- [email protected]
- www.pce-instruments.com/italiano
United States of America
- PCE Americas Inc.
- 1201 Jupiter Park Drive, Suite 8 Jupiter / Palm Beach 33458 FL USA
- Tel: +1 (561) 320-9162
- Fax: +1 (561) 320-9176
- [email protected]
- www.pce-instruments.com/us
Spain
- PCE lbérica S.L.
- Calle Mayor, 53 02500 Tobarra (Albacete) España
- Tel: +34 967 543 548
- Fax: +34 967 543 542
- [email protected]
- www.pce-instruments.com/espanol
Denmark
- PCE Instruments Denmark ApS
- Birk Centerpark 40 7400 Herning Denmark

© PCE Instruments
References
 France.fr : Actualités, destinations et infos du tourisme en France
-
iberica.es
 Make an offer on the domain instruments.co.uk - Domains.co.uk
-
Computer Instruments | Home
 Discover Italy: Official Tourism Website - Italia.it
-
Industrial Measurement Products and Solutions | PCE Instruments
-
PCE Deutschland GmbH Prüfgeräte vom Hersteller | PCE Instruments
-
PCE Brookhuis B.V. | PCE Instruments
-
PCE Americas Inc. : Test Instruments | PCE Instruments
-
PCE Iberica S.L. Instrumentación | PCE Instruments
-
PCE Instruments France | PCE Instruments
-
PCE Italia s.r.l. / Strumenti di Misura | PCE Instruments
-
PCE Teknik Cihazlar Paz. Tic. Ltd.Şti. | PCE Instruments
-
PCE Americas Inc. : Test Instruments | PCE Instruments


