![]() S1X Presentation Enhancer
S1X Presentation Enhancer
User Manual
 S1X Presentation Enhancer User Manual
Disclaimer
Please read through the manual carefully before using the product and operate it according to the manual. It is advised that you should keep this manual for future reference.
Do not disassemble the device or remove the sealing label from the device. Otherwise, Shanghai Hyco Genyong Technology Co., Ltd. does not assume responsibility for the warranty or replacement.
All pictures in this manual are for reference only and actual product may differ. Regarding the product modification and update, Shanghai Hyco Genyong Technology Co., Ltd. reserves the right to make changes to any software or product to improve reliability, function, or design at any time without notice. Besides, the information contained herein is subject to change without prior notice.
The products depicted in this manual may include software copyrighted by Shanghai Hyco Genyong Technology Co., Ltd. or a third party. The user, corporation, or individual, shall not duplicate, in whole or in part, distribute, modify, decompile, disassemble, decode, reverse engineer, rent, transfer or sublicense such software without prior written consent from the copyright holders.
This manual is copyrighted. No part of this publication may be reproduced or used in any form without written permission from Hyco.
Shanghai Hyco Genyong Technology Co., Ltd. reserves the right to make final interpretation of the statement above. If there is any update without prior notice, please visit HYCO official website www.hycoiot.com or refer to the latest product manual for the latest product information.
Design
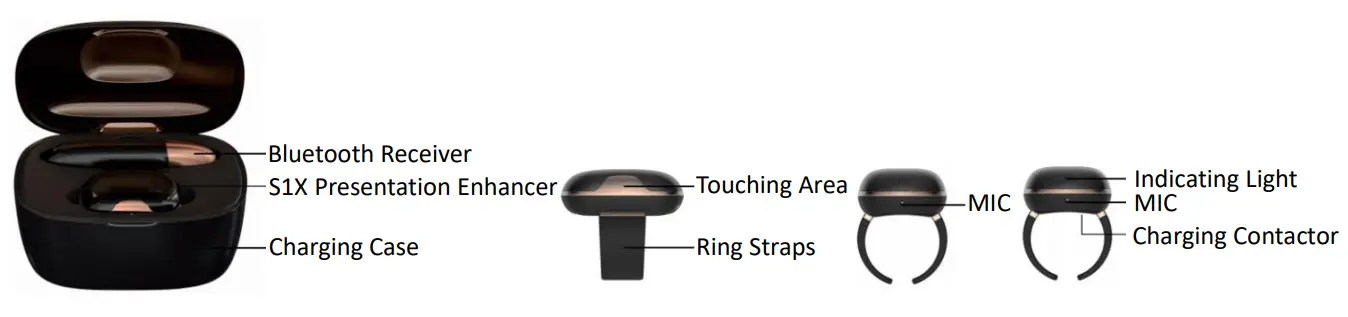
Components
| Components | Quantity | Usage |
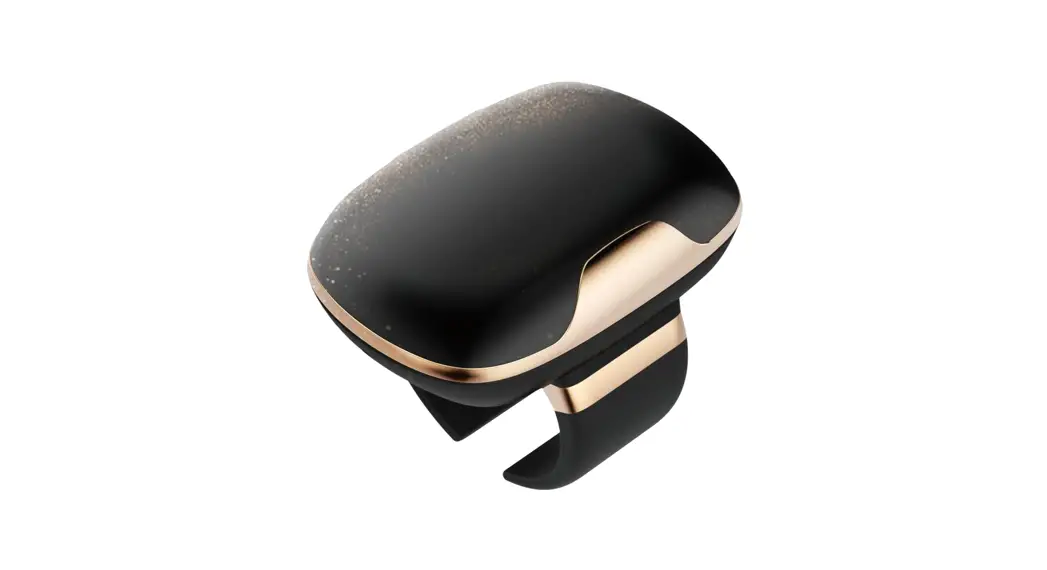
| Presentation Enhancer | 1 | Combination of mic, laser pointer and remote |
| Charging Case | 1 | Charger and device container |
| Bluetooth Receiver | 1 | Information transferring to PC |
| USB Cable | 1 | Charging the case |
| Certificate | 1 | Factory certification |
| User Manual | 1 | Device description and usage instruction |
Specifications
| Weight | 11g |
| Ring Straps | Size-adjustable |
| Laser Pointer | Red Laser 650nm |
| MIC | MEMS mic |
| Volume Control | Automatic |
| Bluetooth | BT 5.0 |
| Bluetooth Transmission Distance | 20m |
| Live Broadcast Receiver (Optional) | 20m |
| LED Indicator Lights | RGB |
| Battery | [email protected] |
| Charging Time | 2.5 hours |
| Working Hours | 4 hours |
| Control Keys | Capacitive touching keys |
| Working Temperature | -10℃ ~ +50℃ |
| Humidity | 5% ~ 95% relative humidity, non-condensing |
Instruction
- How to wear S1X?
Pick up S1X with left hand and turn one side containing two metal dots toward yourself. Insert the right index finger into the S1X ring strap and put it on the third part of the index finger. That blue indicator light flash turns to green means successful wearing. - S1X LED Indicator Lights
(1) Lights off: Bluetooth disconnection
(2) Purple light flashes with S1X on finger: Bluetooth disconnection
(3) Blue light flashes: Bluetooth connection
(4) Green light flashes: device worn on finger and presentation function on - S1X Case LED Indicator Lights
(1) Green light flashes: battery full
(2) Yellow light flashes: battery half
(3) Red light flashes: battery low
(4) Red light on: charging
(5) Green light on: fully-charged device
Charging
Insert S1X into charging case. Red indicator light means that the device is charging. When fully charged the light turns to green.
Put S1X inside the charging slot of the case, the charging contacts of S1X should touch the ones of the case. The indicator light will flash red to indicate that it is being charged. When fully charged, the indicator light will flash green.
Bluetooth Connection
Insert Bluetooth receiver into PC and Bluetooth connection automatically starts. Connection succeeds with blue light flashes on both S1X and Bluetooth receiver.
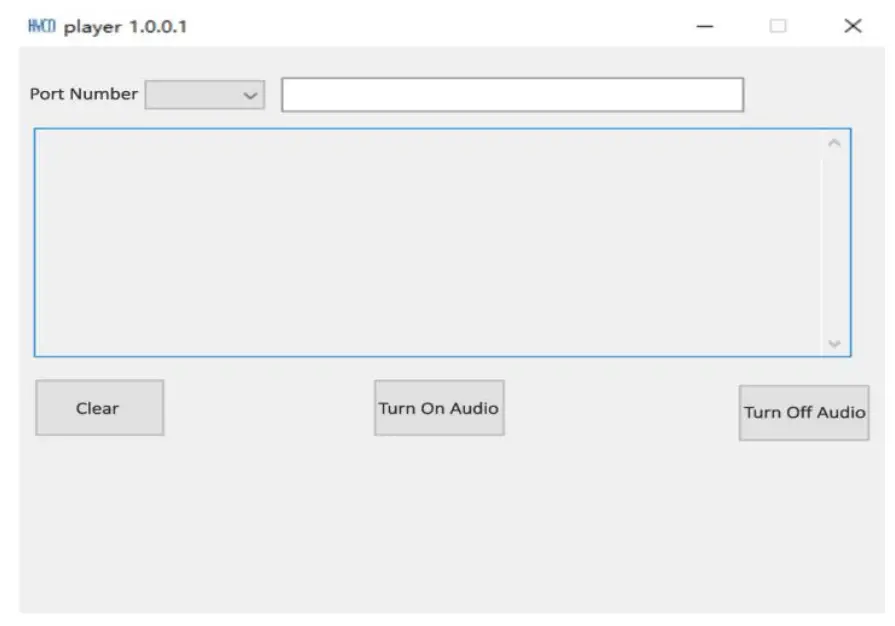
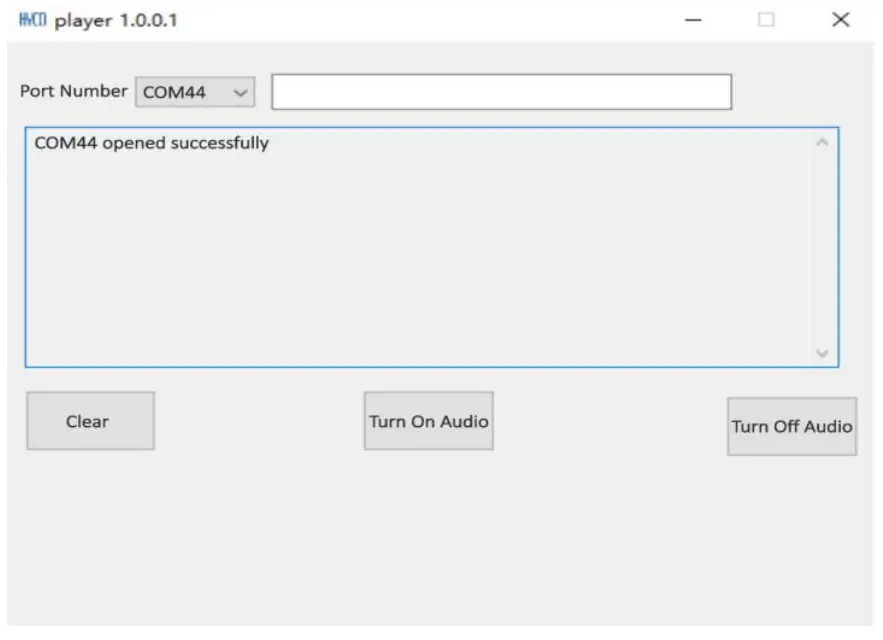
6. How to Use S1X?
(1) Insert Bluetooth receiver into a laptop.
(2) Open S1X Configuration Tool.exe.
(3) Click the drop-down button on the top left corner to select the port number (see picture below).
(4) Select ‘Turn On Audio’. It shows words like ‘COM44 opened successfully’ (see picture below).
(5) Pick up S1X with left hand and turn one side containing two metal dots toward yourself. Insert right index finger into the S1X ring strap and put it on the third part of the index finger. That blue indicator light flashes turns to green means successful wearing.
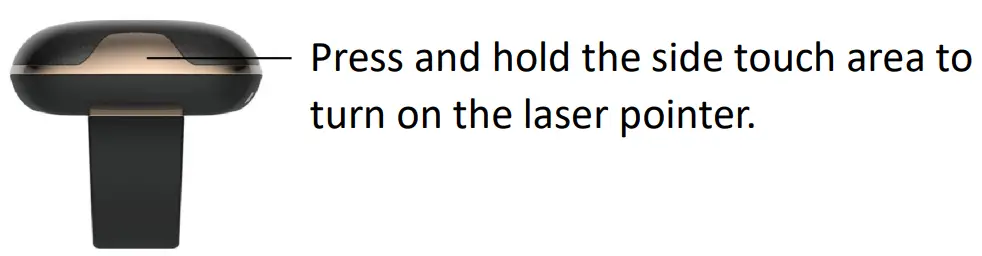
7. How to Use Laser Pointer?
Press and hold the side touch area to turn on the laser pointer, and release to turn off.
Service
- Warranty: one year for S1X, and 6 months for battery, charging case, and other parts (free maintenance within one year, except for human factors).
- Maintenance Service Contact:
[email protected]
+86-15201965826
HYCO Technology
Address: 302 Building A 999 Huaxu Rd., Qingpu Dist., Shanghai, China
Website: www.hycoiot.com
Email: [email protected]
Mobile: +86-15201965826


