Hoggar 1.200L ARYA Sheds Cabinets User Manual
Dearest customer:
Thank you for choosing one of our products
BEFORE YOU START YOU SHOULD KNOW…
![]() Two people are required to assemble this shed
Two people are required to assemble this shed
 Assembly can take 2-3 hours
 Contact the authorities to determine if the installation is authorized
We advise you to carefully follow this instruction manual step by step for a correct assembly of the product.
Make sure you have all the necessary parts for assembly and remove the protective plastic before starting to assemble.
Do not assemble the shed near children or pets.
Plan to install the product on a dry, windless day. Avoid assembly on adverse weather days to avoid product damage or personal injury. The shed is not designed to be built directly on the lawn.
Mounting on a level, firm base of wood, a flat cement floor, or cemented brick or block is recommended. It is very important to fix the shed to the ground. It does not include screws or other necessary parts for its anchorage.
If a cement base is made, it is important to lean towards the edges to prevent water ingress
The product should be located in a place sheltered from the wind and with good drainage.
Avoid placing it very close to areas with trees, since it will be necessary to regularly clean branches and leaves that may fall.
We recommend removing snow from the metal shed after each snowfall.
You should never focus your body weight on the ceiling.
It is recommended for its correct conservation to keep the house clean with a soft cloth and to keep the door track clean for its correct sliding.
The sheds are only intended to store objects, residence or other effects are prohibited.
TOOLS NEEDED FOR ASSEMBLY

CLEANING AND MAINTENANCE
It is recommended for its correct conservation to keep the product clean, its cleaning can be done with a soft damp cloth.
Never use abrasive solutions or detergents on the product.
It is important to always keep the shed drains clean so that dirt does not accumulate on the roo
WARRANTY
This shed is made with the highest quality materials and under strict quality controls and standards.
In the event of any inconvenience in the purchased product, please contact customer service by phone and email, which are described on the back cover of this instruction manual.
The guarantee is valid from the date of purchase that appears on the ticket or invoice, which must be presented to use the guarantee.
The warranty period for this product is 10 years against any inconvenience or failure resulting from a structural defect or discoloration.
THE WARRANTY IS EXCLUDED
- Non conformity with transportation. It must be communicated to the transport agency within the period indicated on the delivery note once the product is received.
- Breakage, damage caused by inclement weather such as strong winds, hail, floods etc …
- The bad assembly, incorrect use and consequences derived from it.
- Non-maintenance and wear parts such as shock absorbers, cylinder, handle and hinges
- The plastic pieces.
- Cleaning or maintenance with abrasive products.
- Damage due to corrosion in parts or sheets in intermittent areas, indirectly damaged areas or due to being exposed to marine areas with salinity causing corrosion. Damage due to corrosion on parts edges or corners is excluded from the guarantee.
- Discoloration caused by the passage of time.
- Scratches in the paint.
- Knocks or dents in the sheet metal.
- Failure to present the invoice or sales ticket and failure to notify in due time and form.
- The costs generated by the treatment of defective or damaged parts, as well as the responsibility for indirect damages that may occur.
- Commercial use or for a purpose other than personal or domestic.
- Modifications, paintings or assembly not carried out in accordance with the law of guarantees and explanations of the instruction manual, as well as the damages caused by exceeding the storage capacity of the product.
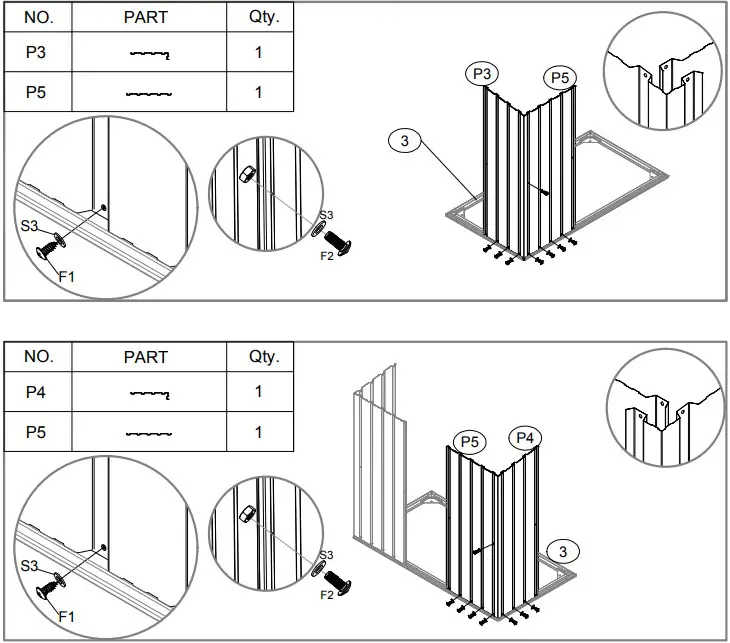
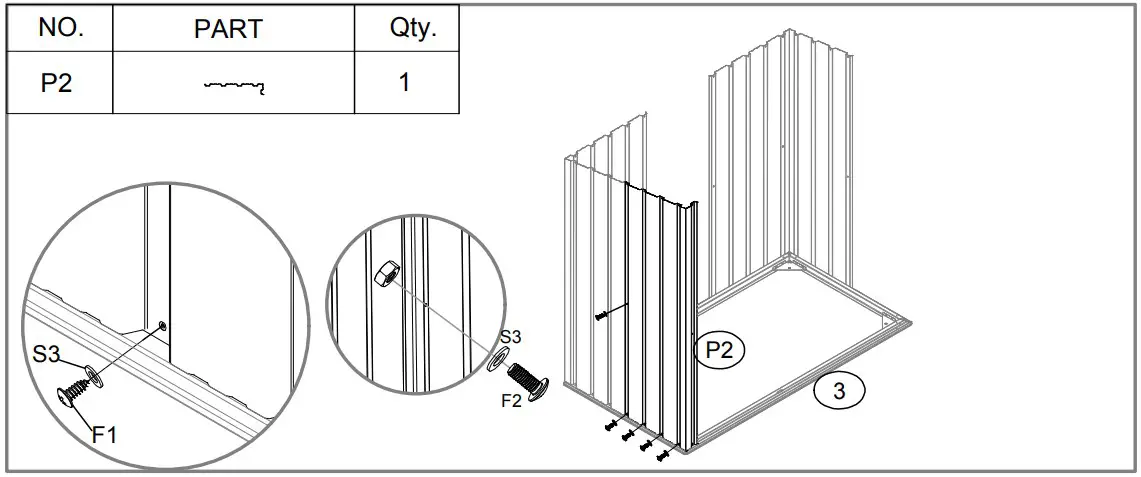
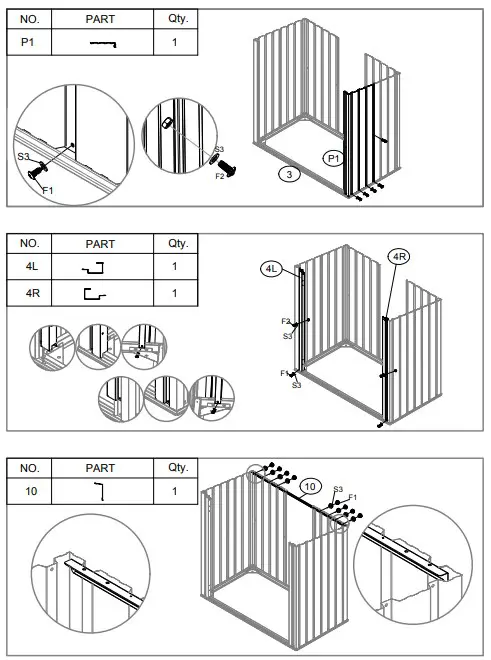
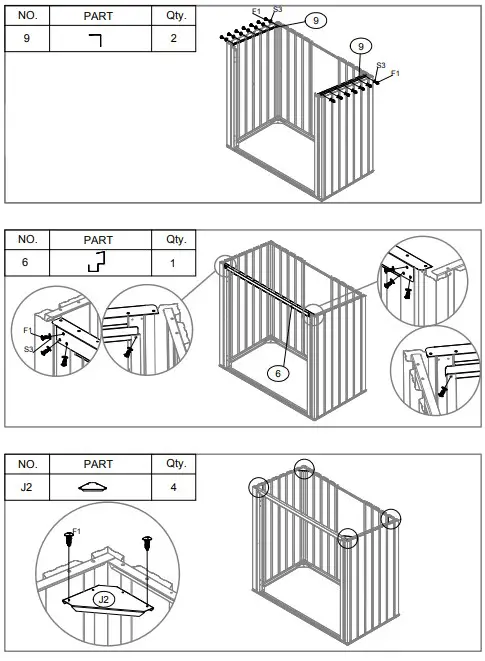
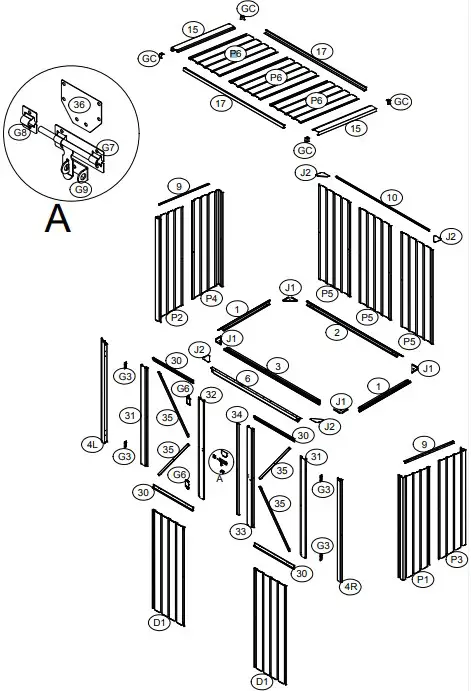
Assembly Instructions
| NO | PART | Qty. |
| 1 | 2 | |
| 2 | 1 | |
| 3 | 1 | |
| 9 | 2 | |
| 10 | 1 | |
| 35 | 4 | |
| 30 | 4 | |
| 31 | 2 | |
| 32 | 1 | |
| 33 | 1 | |
| 34 | 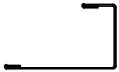 1164mm 1164mm | 1 |
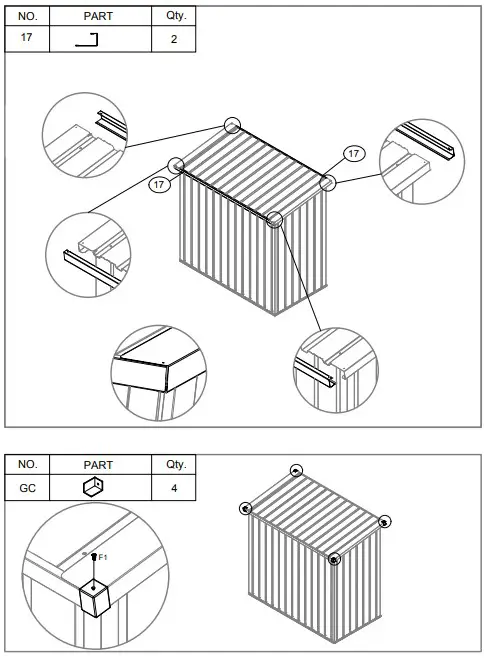
| 17 | 2 | |
| 15 | 2 | |
| 4L | 1 | |
| 4R | 1 | |
| 6 | 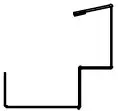 1301mm 1301mm | 1 |
| 36 |  | 1 |
| J2 | 4 |
| P1 | PART | Qty |
| P |  | 1 |
| P3 | | 1 |
| P4 |  | 1 |
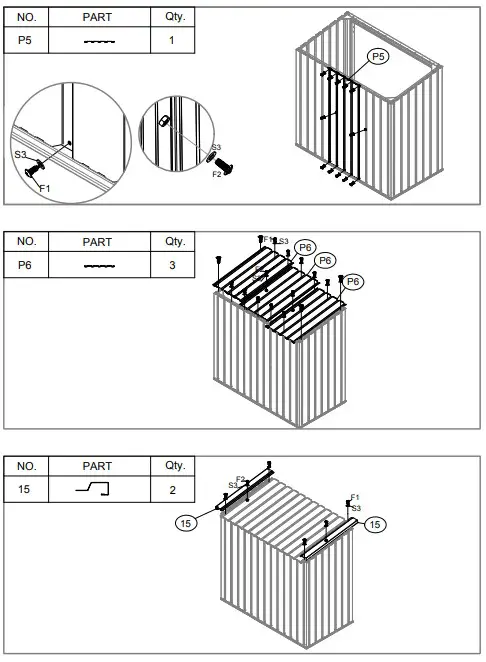
| P5 | | 3 |
| P6 | 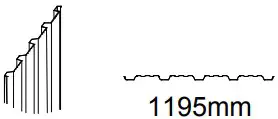 | 3 |
| D1 |  | 2 |
| G6 | 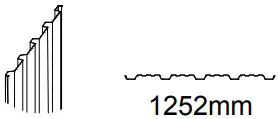 | 2 |
| G8 |  | 1 |
| G7 |  | 1 |
| G9 |  | 1 |
| G3 |  | 4 |
| J1 |  | 4 |
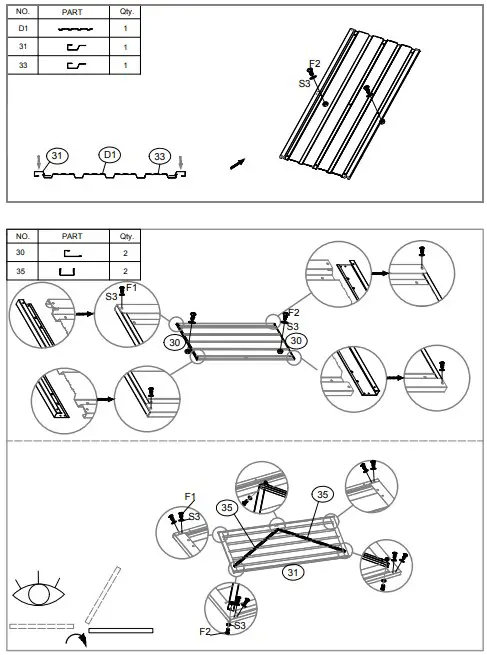
| GC |  | 4 |
| F1 |  | 160 |
| F2 |  | 42 |
| F3 |  | 16 |
| S2 |  | 40 |
| S3 |  | 144 |
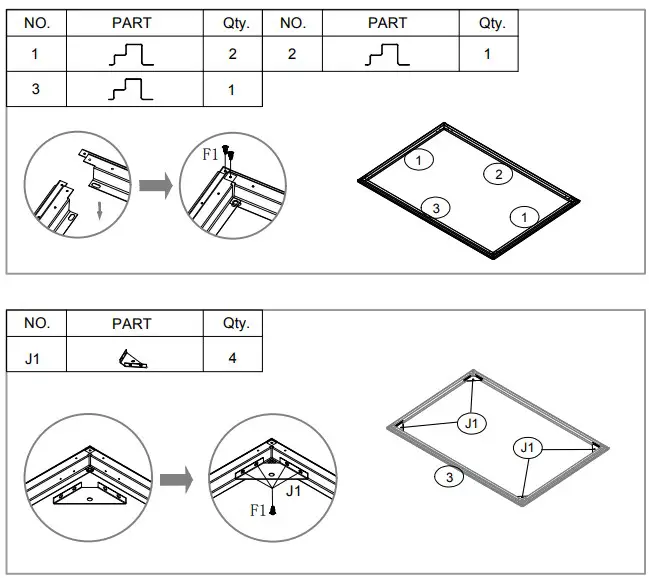
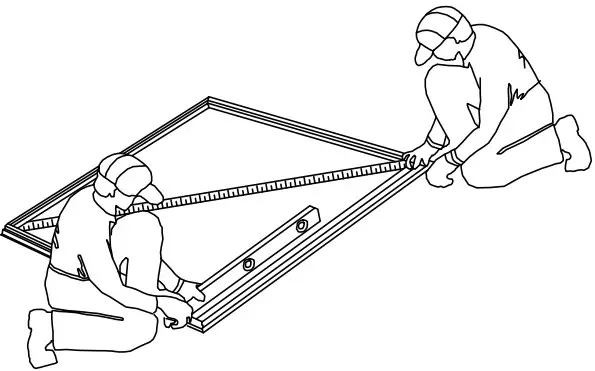
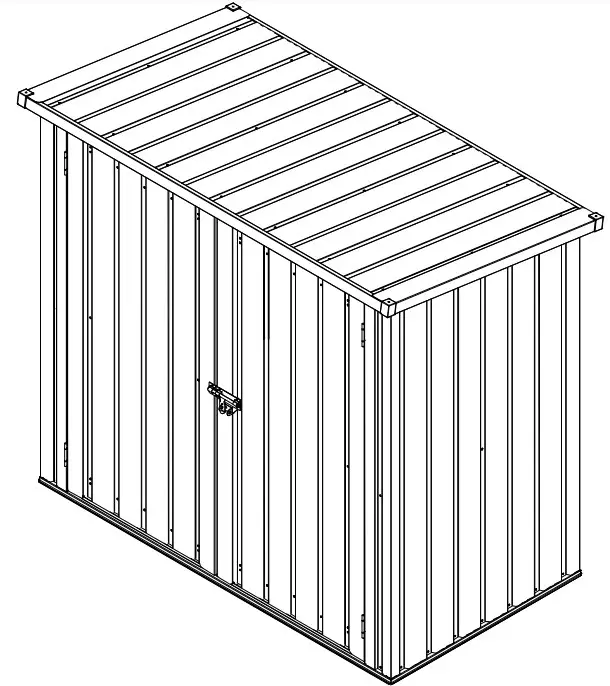
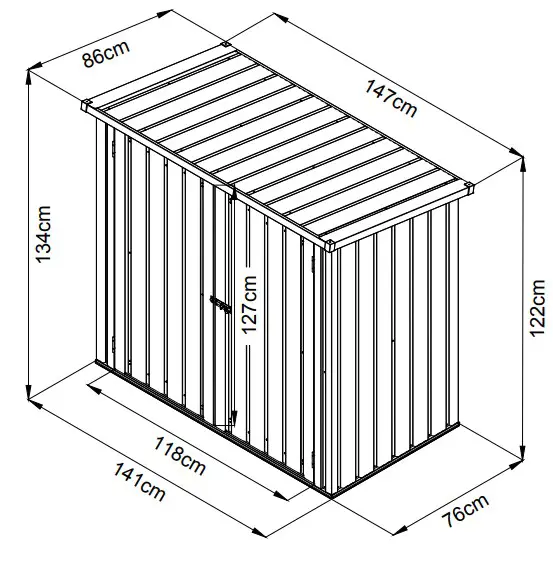
When diagonal measurements are equal, the frame is square. The floor frame must be both square and level or the holes will not line up propoerly.