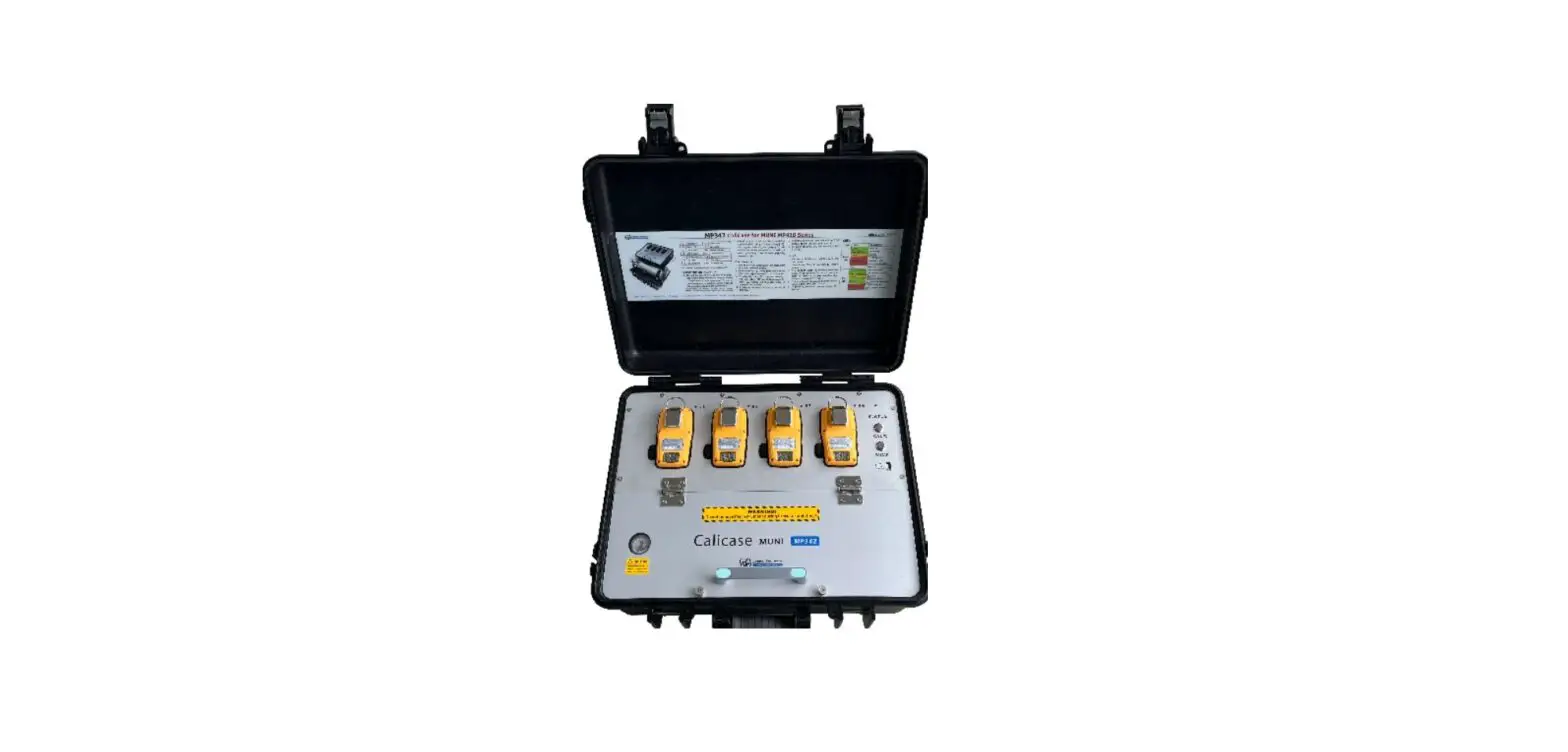
mPower Electronics MP342 4-Bay CaliCase Automatic Calibration Station User Guide
Product Overview

| 1 | Unit LED x 4 | 8 | Exhaust Port |
| 2 | Status LED | 9 | Gas Inlet2 |
| 3 | CAL Button | 10 | Pressure Gauge |
| 4 | BUMP Button | 11 | Thumb Screw x 2 |
| 5 | USB Data Line Port | 12 | Demand-flow Regulator |
| 6 | Air Inlet | 13 | Gas Inlet1 |
| 7 | Charging Port | 14 | UDisk Port |
Caution: Use in non-hazardous-gas locations only!
SETUP AND INSTALLATION
- Connect the case to a PC by USB cable [5]. Use mPower Suite software to configure the gas concentrations & other parameters on the CaliCase. Be sure to set the gas types to match the sensor types and the expiration date past the current date.
- Insert the UDisk thumb drive into a PC USB port and configure the gas concentrations & expiration dates on the UDisk using mPower Suite. Be sure to Write both the CaliCase Info and the MUNI Info to the UDisk.
- With the Calicase powered off, insert the UDisk into port [14] and then turn the power on. IMPORTANT! The CaliCase will not operate properly without the UDisk!
- Thread the gas cylinder into the demand-flow regulator (DFR) [12] C10 inlet fitting [13]. Once tightly connected, the gauge [10] will indicate the cylinder gas pressure. If needed, a second gas can be connected to port [9] using a separate DFR.
CALIBRATION OR BUMP
- Turn on 1-4 MUNI instrument(s) and place them facedown into their cradle(s).
- If the power is off, press and hold the CAL button [3] until the Status LED [2] turns green.
- CALIBRATION: Press the CAL button [3] to initiate. The Unit LED(s) [1] should blink green for about 60-100 seconds and then stay GREEN if passed or RED if failed.
- BUMP: Press the BUMP button [4] to initiate. The buzzer will be tested and the Unit LED will blink green for about 30 seconds and then stay GREEN if passed or RED if failed.
- A Calibration or Bump Report will be saved on the UDisk.
- To abort a Calibration or Bump, press and hold the BUMP button [4] until the Unit LED(s) turn off.
- To power off, press CAL until the Status LED turns off.
LEDS
| LED | Color | Description |
| Status LED | Green | Power on |
| Green blinking | Low battery | |
| Orange | Charging | |
| Red blinking | 1) USB Disk error2) Datetime error3) No pump detected | |
| None | Power off | |
| Unit LEDs | Green blinking fast | Cal/Bump testing |
| Green blinking slow | Unit firmware upgrading | |
| Orange | Match fail | |
| Green | 1) Cal/Bump test pass2) Unit firmware upgrade | |
| Red | 1) Cal/Bump test fail2) Unit firmware upgrade fail |