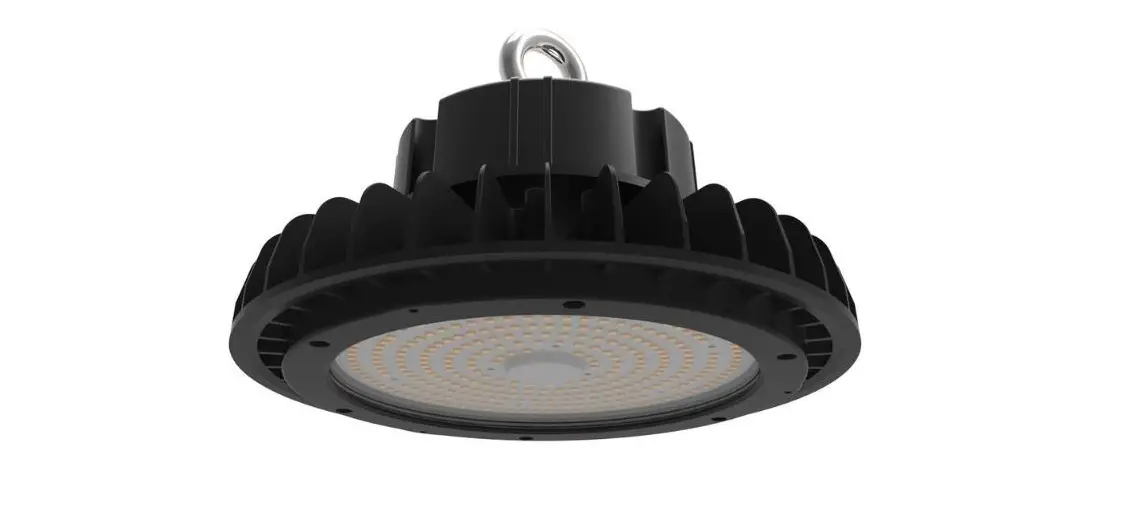
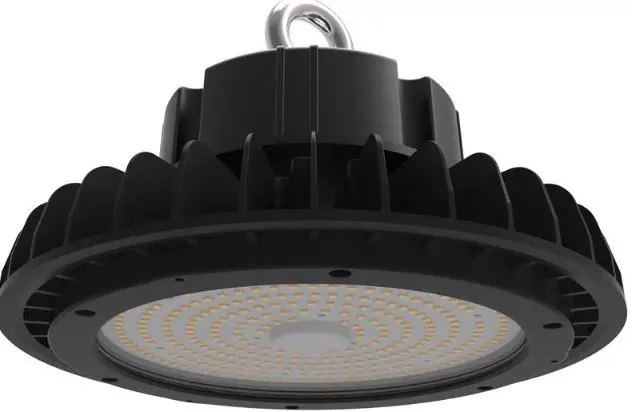
VENTURE LIGHTING AP0001 LED Modern Highbays
Before You Begin

Read These Instructions Completely and Carefully
Upgrade Instructions
- STEP 1: Disconnect power from the luminaire and follow proper lockout/tagout procedures before beginning installation or maintenance.
- STEP 2: Remove the existing luminaire. Dispose of the lamp(s) and ballast(s) per local requirements.
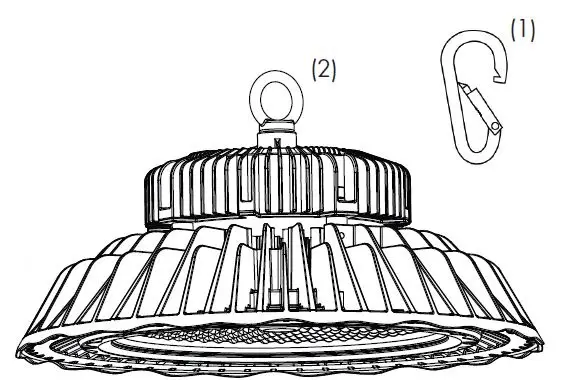
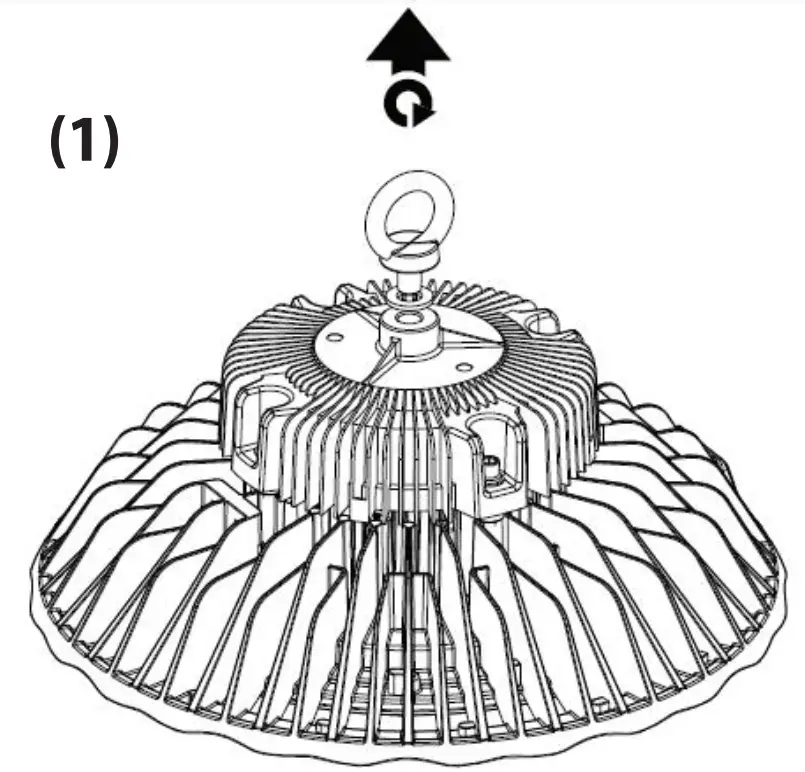
- STEP 3: Each fixture is supplied with a carabiner (1). Place the carabiner through the eyelet of the eyebolt (2) on top of the fixture.
- STEP 4: Attach the carabiner to a secure structure. (1).
- STEP 5: Connect the fixture input leads to the supply wire leads.
- STEP 6: Each fixture is supplied with 1-10V DC dimming leads.

- If dimming is not needed, nothing needs to be done.
NOTE: Do NOT connect the dimming leads together. This will cause the fixture to not operate as desired. - If dimming is desired:
- Connect the “+” supply lead to the “+” connection lead on the fixture.
- Connect the “-” supply lead to the “-” connection lead on the fixture.
NOTE: The polarity of the dimming leads is important.
Improper connection will cause the fixture to not operate as desired.
Wiring Diagram

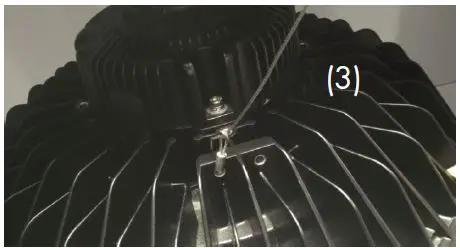
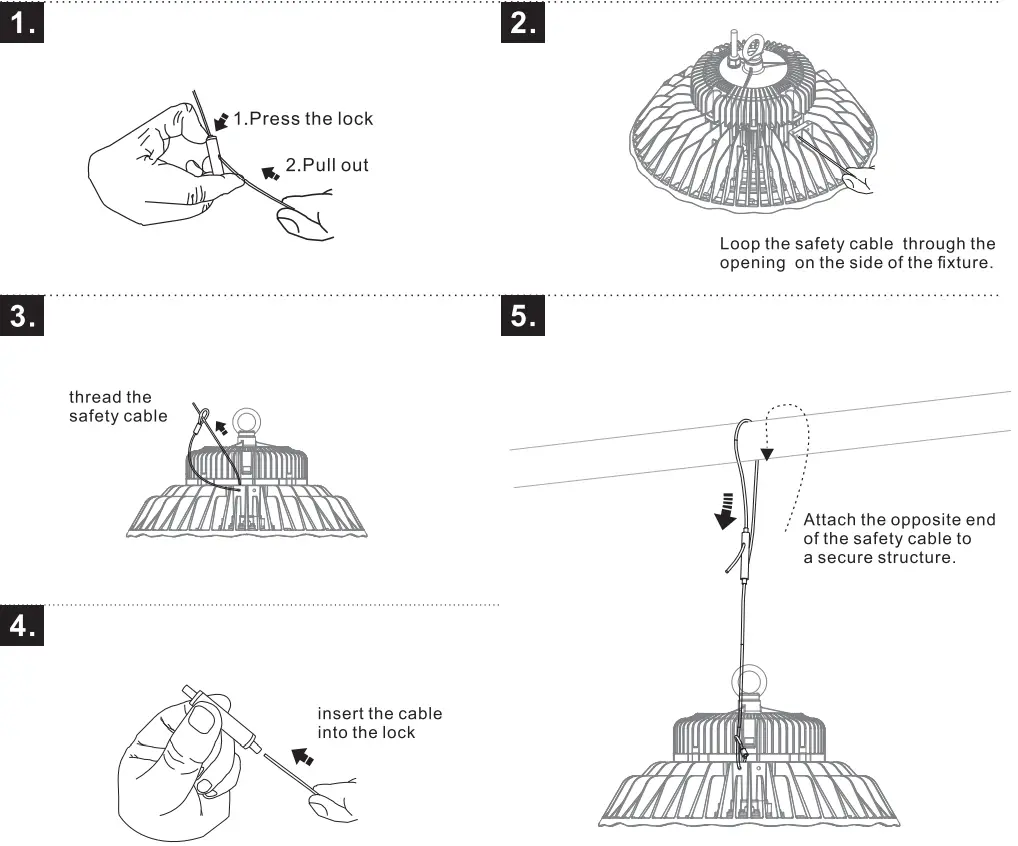
- STEP 7: Loop the safety cable through the opening on the side of the fixture as shown. Attach the opposite end of the safety cable to a secure structure. (3)
- STEP 8: Power can now be restored to the fixture.
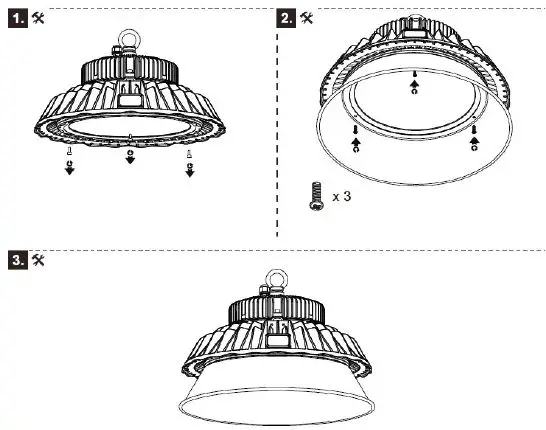
Reflector Installation
- Remove 3 of the screws which hold down the lens (remove every other screw).
- Place the reflector onto the fixture and secure to the fixture with the 3 longer screws supplied with the reflector.
 Lens Installation
 Lens Installation
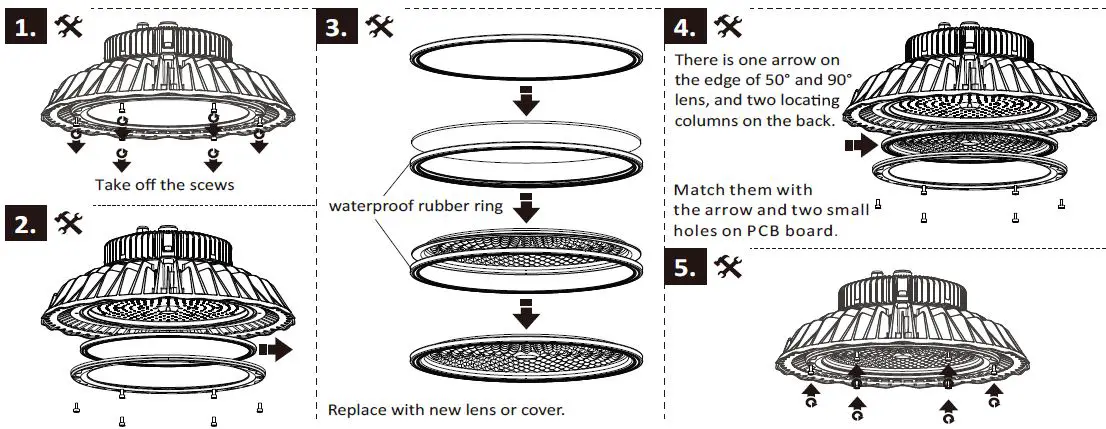
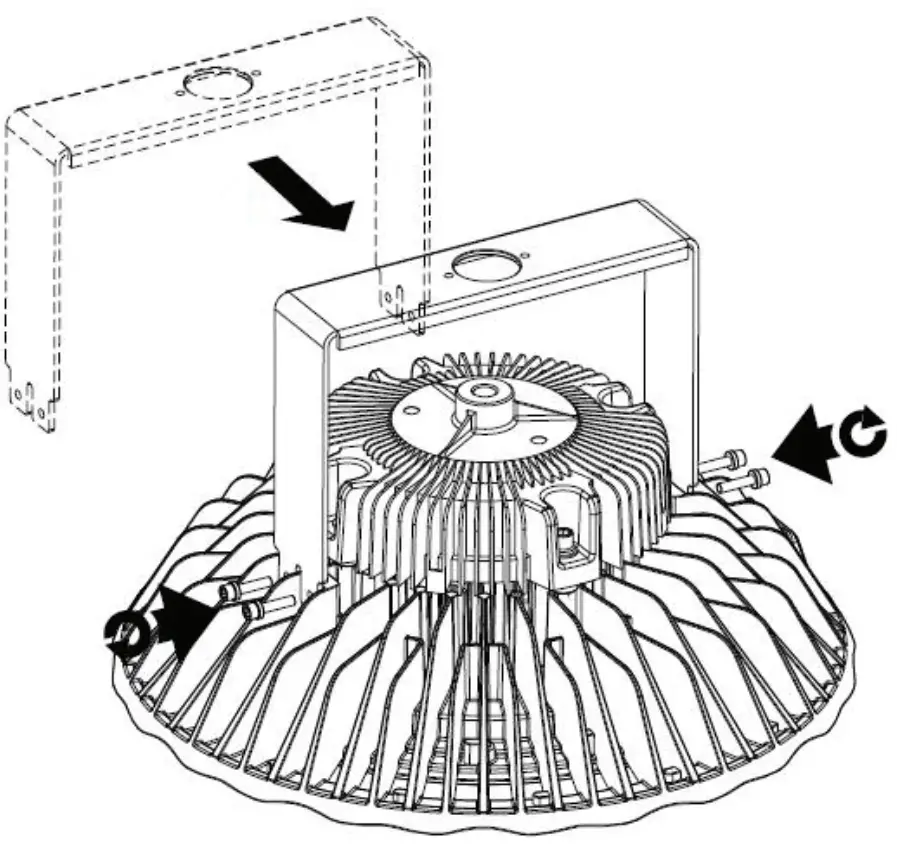
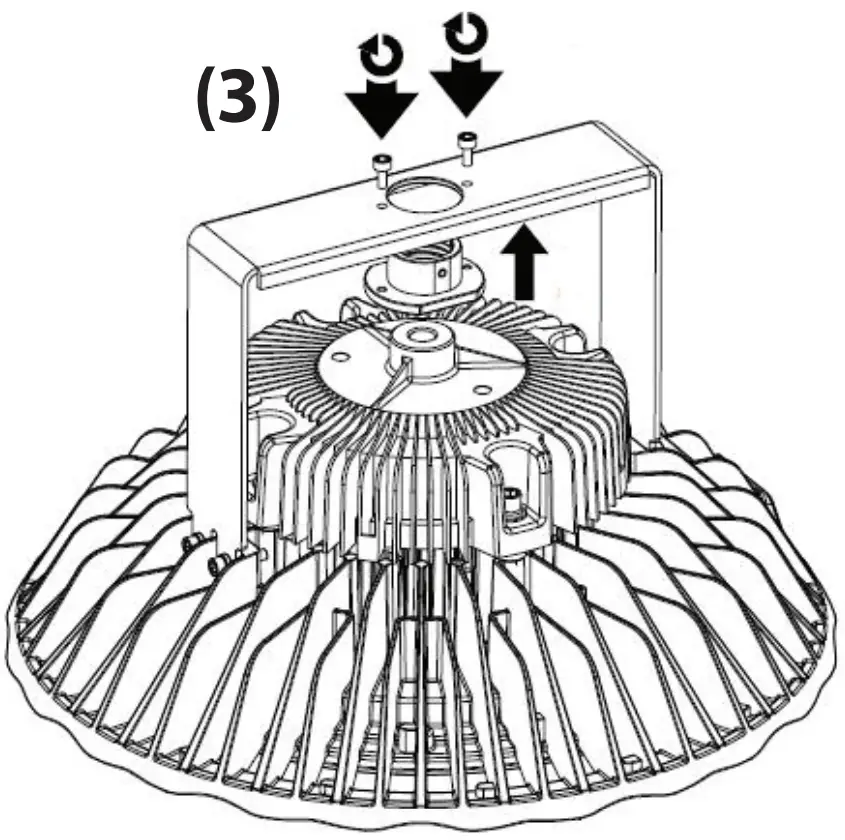
Pendant Mount Installation
- Remove the eyebolt from the fixture.

- Secure the pendant bracket to the fixture using the hardware provided.

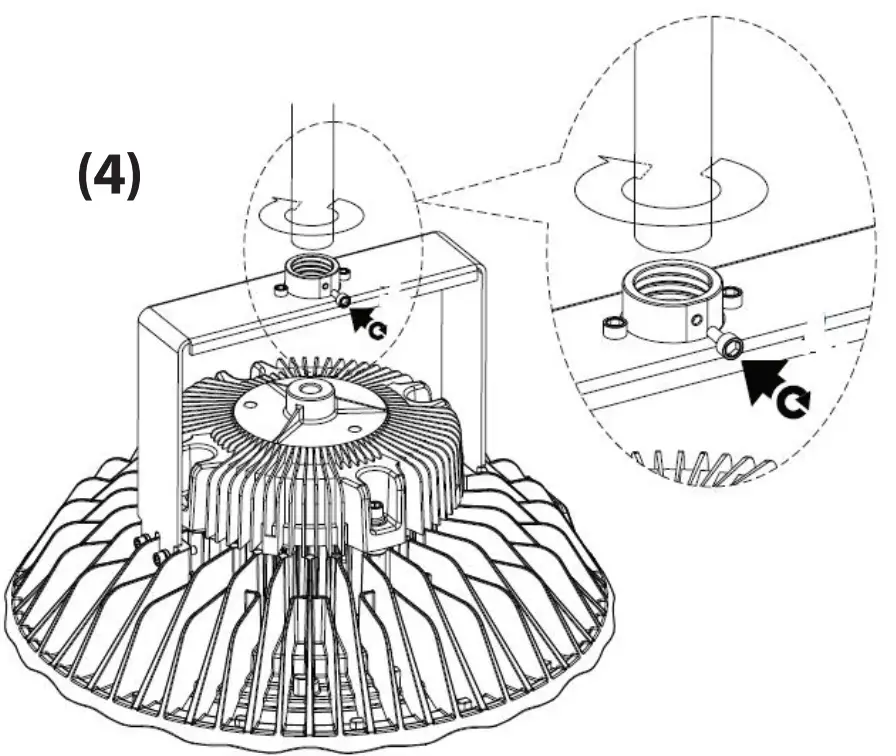
- Insert the pendant connector into the pendant bracket and secure the pendant connector to the bracket with the hardware provided.

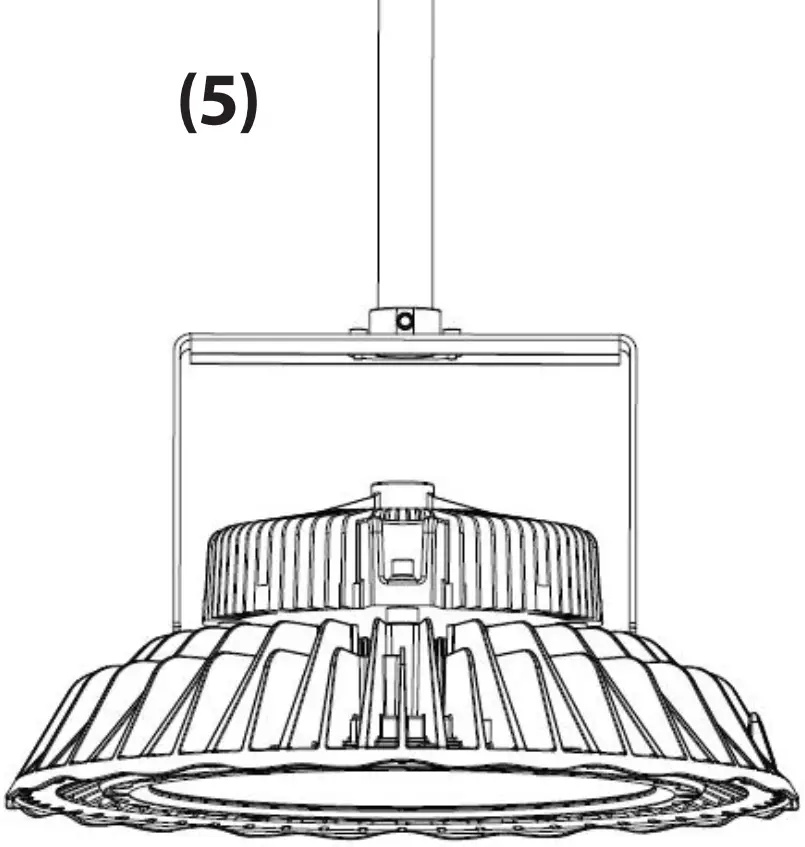
- Screw in the appropriate threaded conduit fitting/pipe and secure with the locking screw.

- Complete the installation of the assembled pendant fixture by following the installation instructions above.

Safety Cable Assembly
WARNING
Risk of fire and electric shock.
- Disconnect power from the luminaire and follow proper lockout/tagout procedures before beginning installation or maintenance. Contact a qualified electrician for installation.
- Venture Lighting’s High Bay Fixture installation requires knowledge of luminaire electrical systems. If not qualified, do not attempt installation. Contact a qualified electrician.
- To prevent wiring damage or abrasion, do not expose wiring to edges of sheet metal or other sharp objects.
- Do not make or alter any open holes in a wiring enclosure or electrical component during installation.
- Do not dismantle the fixture without Venture Lighting approval.
- If the external flexible cable of the luminaire is damaged, it should only be replaced by the supplier, a service agent or a Venture Lighting approved qualified person.
CAUTION
- Suitable for use in wet locations only.
- Venture Lighting’s High Bay Fixture must be operated within an ambient fixture temperature range of -30° to 50°C.
(800) 451-2606
6675 Parkland Blvd., Suite 100
Solon, Ohio 44139 USA
E-mail: [email protected]

- 2022 Venture Lighting International
- Venture Lighting is a registered trademarks of Venture Lighting International.